♦nodejs♦Node入门♦NodejsSQLNode.js TutorialOnline Node Terminal♦Node命令行程序♦nodejsListnodejs in 3 minutesNode.js Tutorial For Absolute Beginners♦Getting Started with Node.jsSublime Text Nodejs♦nodejs_mongodb
Usage
node [options] [V8 options] [script.js | -e "script" | - ] [arguments]
node [options] [V8 options] [script.js | -e "script" | -] [--] [arguments]
node inspect [script.js | -e "script" | <host>:<port>] …
node --v8-options
Next, create a new source file in the projects folder and call it hello-world.js.
Open hello-world.js and paste in the following content:
const http = require('http');
const hostname = '127.0.0.1';
const port = 3000;
const server = http.createServer((req, res) => {
res.statusCode = 200;
res.setHeader('Content-Type', 'text/plain');
res.end('Hello, World!\n');
});
server.listen(port, hostname, () => {
console.log(`Server running at http://${hostname}:${port}/`);
});
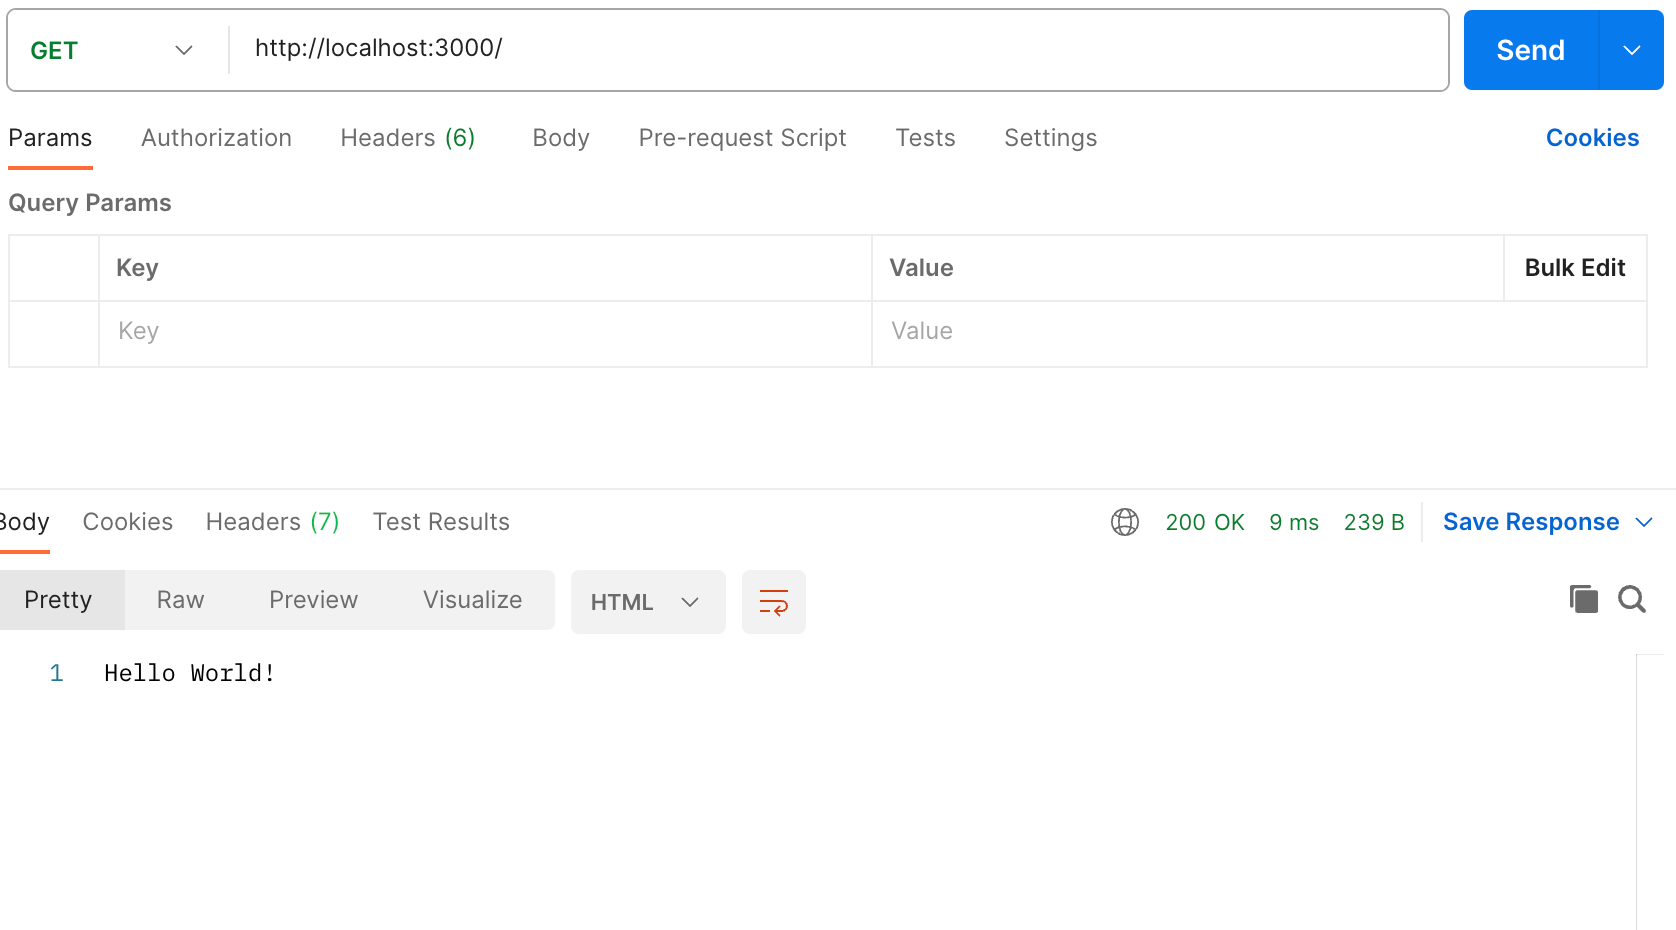
Save the file, go back to the terminal window, and enter the following command:
$ node hello-world.js
Now, open any preferred web browser and visit http://127.0.0.1:3000.
function loadXMLDoc() {
var xhttp = new XMLHttpRequest();
xhttp.onreadystatechange = function() {
if (this.readyState == 4 && this.status == 200) {
document.getElementById("demo").innerHTML =
this.responseText;
}
};
xhttp.open("GET", "xmlhttp_info.txt", true);
xhttp.send();
}
XMLHttpRequest is a built-in browser object that allows to make HTTP requests in JavaScript.
Despite of having the word “XML” in its name, it can operate on any data, not only in XML format.
We can upload/download files, track progress and much more.
Right now, there’s another, more modern method fetch, that somewhat deprecates XMLHttpRequest.
A Fetch API Example
let file = "fetch_info.txt"
fetch (file)
.then(x => x.text())
.then(y => document.getElementById("demo").innerHTML = y);
Since Fetch is based on async and await, the example above might be easier to understand like this:
getText("fetch_info.txt");
async function getText(file) {
let x = await fetch(file);
let y = await x.text();
document.getElementById("demo").innerHTML = y;
}
In modern web-development XMLHttpRequest is used for three reasons:
Historical reasons: we need to support existing scripts with XMLHttpRequest.
We need to support old browsers, and don’t want polyfills (e.g. to keep scripts tiny).
We need something that fetch can’t do yet, e.g. to track upload progress.
Does that sound familiar? If yes, then all right, go on with XMLHttpRequest.
Otherwise, please head on to Fetch.
The basics
XMLHttpRequest has two modes of operation: synchronous and asynchronous.
Let’s see the asynchronous first, as it’s used in the majority of cases.
To do the request, we need 3 steps:
Create XMLHttpRequest:
let xhr = new XMLHttpRequest();
The constructor has no arguments.
Initialize it, usually right after new XMLHttpRequest:
xhr.open(method, URL, [async, user, password])
This method specifies the main parameters of the request:
method – HTTP-method.
Usually "GET" or "POST".
URL – the URL to request, a string, can be URL object.
async – if explicitly set to false, then the request is synchronous, we’ll cover that a bit later.
user, password – login and password for basic HTTP auth (if required).
Please note that open call, contrary to its name, does not open the connection.
It only configures the request, but the network activity only starts with the call of send.
Send it out.
xhr.send([body])
This method opens the connection and sends the request to server.
The optional body parameter contains the request body.
Some request methods like GET do not have a body.
And some of them like POST use body to send the data to the server.
We’ll see examples of that later.
Listen to xhr events for response.
These three events are the most widely used:
load – when the request is complete (even if HTTP status is like 400 or 500), and the response is fully downloaded.
error – when the request couldn’t be made, e.g. network down or invalid URL.
progress – triggers periodically while the response is being downloaded, reports how much has been downloaded.
xhr.onload = function() {
alert(`Loaded: ${xhr.status} ${xhr.response}`);
};
xhr.onerror = function() {
// only triggers if the request couldn't be made at all
alert(`Network Error`);
};
xhr.onprogress = function(event) {
// triggers periodically
// event.loaded - how many bytes downloaded
// event.lengthComputable = true if the server sent Content-Length header
// event.total - total number of bytes (if lengthComputable)
alert(`Received ${event.loaded} of ${event.total}`);
};
Here’s a full example.
The code below loads the URL at /article/xmlhttprequest/example/load from the server and prints the progress:
// 1. Create a new XMLHttpRequest object
let xhr = new XMLHttpRequest();
// 2. Configure it: GET-request for the URL /article/.../load
xhr.open('GET', '/article/xmlhttprequest/example/load');
// 3. Send the request over the network
xhr.send();
// 4. This will be called after the response is received
xhr.onload = function() {
if (xhr.status != 200) {
// analyze HTTP status of the response
alert(`Error ${xhr.status}: ${xhr.statusText}`); // e.g. 404: Not Found
} else { // show the result
alert(`Done, got ${xhr.response.length} bytes`); // response is the server response
}
};
xhr.onprogress = function(event) {
if (event.lengthComputable) {
alert(`Received ${event.loaded} of ${event.total} bytes`);
} else {
alert(`Received ${event.loaded} bytes`); // no Content-Length
}
};
xhr.onerror = function() {
alert("Request failed");
};
Once the server has responded, we can receive the result in the following xhr properties:
status
HTTP status code (a number): 200, 404, 403 and so on, can be 0 in case of a non-HTTP failure.
statusText
HTTP status message (a string): usually OK for 200, Not Found for 404, Forbidden for 403 and so on.
response (old scripts may use responseText)
The server response body.
We can also specify a timeout using the corresponding property:
xhr.timeout = 10000; // timeout in ms, 10 seconds
If the request does not succeed within the given time, it gets canceled and timeout event triggers.
URL search parameters
To add parameters to URL, like ?name=value, and ensure the proper encoding, we can use URL object:
let url = new URL('https://google.com/search');
url.searchParams.set('q', 'test me!');
// the parameter 'q' is encoded
xhr.open('GET', url); // https://google.com/search?q=test+me%21
Response Type
We can use xhr.responseType property to set the response format:
" (default) – get as string,
"text" – get as string,
"arraybuffer" – get as ArrayBuffer (for binary data, see chapter ArrayBuffer, binary arrays),
"blob" – get as Blob (for binary data, see chapter Blob),
"document" – get as XML document (can use XPath and other XML methods) or HTML document (based on the MIME type of the received data),
"json" – get as JSON (parsed automatically).
For example, let’s get the response as JSON:
let xhr = new XMLHttpRequest();
xhr.open('GET', '/article/xmlhttprequest/example/json');
xhr.responseType = 'json';
xhr.send();
// the response is {"message": "Hello, world!"}
xhr.onload = function() {
let responseObj = xhr.response;
alert(responseObj.message); // Hello, world!
};
Please note:
In the old scripts you may also find xhr.responseText and even xhr.responseXML properties.
They exist for historical reasons, to get either a string or XML document.
Nowadays, we should set the format in xhr.responseType and get xhr.response as demonstrated above.
Ready states
XMLHttpRequest changes between states as it progresses.
The current state is accessible as xhr.readyState.
All states, as in the specification:
UNSENT = 0; // initial state
OPENED = 1; // open called
HEADERS_RECEIVED = 2; // response headers received
LOADING = 3; // response is loading (a data packet is received)
DONE = 4; // request complete
An XMLHttpRequest object travels them in the order 0 → 1 → 2 → 3 → … → 3 → 4.
State 3 repeats every time a data packet is received over the network.
We can track them using readystatechange event:
xhr.onreadystatechange = function() {
if (xhr.readyState == 3) {
// loading
}
if (xhr.readyState == 4) {
// request finished
}
};
You can find readystatechange listeners in really old code, it’s there for historical reasons, as there was a time when there were no load and other events.
Nowadays, load/error/progress handlers deprecate it.
Aborting request
We can terminate the request at any time.
The call to xhr.abort() does that:
xhr.abort(); // terminate the request
That triggers abort event, and xhr.status becomes 0.
Synchronous requests
If in the open method the third parameter async is set to false, the request is made synchronously.
In other words, JavaScript execution pauses at send() and resumes when the response is received.
Somewhat like alert or prompt commands.
Here’s the rewritten example, the 3rd parameter of open is false:
let xhr = new XMLHttpRequest();
xhr.open('GET', '/article/xmlhttprequest/hello.txt', false);
try {
xhr.send();
if (xhr.status != 200) {
alert(`Error ${xhr.status}: ${xhr.statusText}`);
} else {
alert(xhr.response);
}
} catch(err) { // instead of onerror
alert("Request failed");
}
It might look good, but synchronous calls are used rarely, because they block in-page JavaScript till the loading is complete.
In some browsers it becomes impossible to scroll.
If a synchronous call takes too much time, the browser may suggest to close the “hanging” webpage.
Many advanced capabilities of XMLHttpRequest, like requesting from another domain or specifying a timeout, are unavailable for synchronous requests.
Also, as you can see, no progress indication.
Because of all that, synchronous requests are used very sparingly, almost never.
We won’t talk about them any more.
HTTP-headers
XMLHttpRequest allows both to send custom headers and read headers from the response.
There are 3 methods for HTTP-headers:
setRequestHeader(name, value)
Sets the request header with the given name and value.
For instance:
xhr.setRequestHeader('Content-Type', 'application/json');
Headers limitations
Several headers are managed exclusively by the browser, e.g. Referer and Host.
The full list is in the specification.
XMLHttpRequest is not allowed to change them, for the sake of user safety and correctness of the request.
Can’t remove a header
Another peculiarity of XMLHttpRequest is that one can’t undo setRequestHeader.
Once the header is set, it’s set.
Additional calls add information to the header, don’t overwrite it.
For instance:
xhr.setRequestHeader('X-Auth', '123');
xhr.setRequestHeader('X-Auth', '456');
// the header will be:
// X-Auth: 123, 456
getResponseHeader(name)
Gets the response header with the given name (except Set-Cookie and Set-Cookie2).
For instance:
xhr.getResponseHeader('Content-Type')
getAllResponseHeaders()
Returns all response headers, except Set-Cookie and Set-Cookie2.
Headers are returned as a single line, e.g.:
Cache-Control: max-age=31536000
Content-Length: 4260
Content-Type: image/png
Date: Sat, 08 Sep 2012 16:53:16 GMT
The line break between headers is always "\r\n" (doesn’t depend on OS), so we can easily split it into individual headers.
The separator between the name and the value is always a colon followed by a space ": ".
That’s fixed in the specification.
So, if we want to get an object with name/value pairs, we need to throw in a bit JS.
Like this (assuming that if two headers have the same name, then the latter one overwrites the former one):
let headers = xhr
.getAllResponseHeaders()
.split('\r\n')
.reduce((result, current) => {
let [name, value] = current.split(': ');
result[name] = value;
return result;
}, {});
// headers['Content-Type'] = 'image/png'
POST, FormData
To make a POST request, we can use the built-in FormData object.
The syntax:
let formData = new FormData([form]); // creates an object, optionally fill from <form>
formData.append(name, value); // appends a field
We create it, optionally fill from a form, append more fields if needed, and then:
xhr.open('POST', ...) – use POST method.
xhr.send(formData) to submit the form to the server.
For instance:
<form name="person">
<input name="name" value="John">
<input name="surname" value="Smith">
</form>
<script>
// pre-fill FormData from the form
let formData = new FormData(document.forms.person);
// add one more field
formData.append("middle", "Lee");
// send it out
let xhr = new XMLHttpRequest();
xhr.open("POST", "/article/xmlhttprequest/post/user");
xhr.send(formData);
xhr.onload = () => alert(xhr.response);
</script>
The form is sent with multipart/form-data encoding.
Or, if we like JSON more, then JSON.stringify and send as a string.
Just don’t forget to set the header Content-Type: application/json, many server-side frameworks automatically decode JSON with it:
let xhr = new XMLHttpRequest();
let json = JSON.stringify({
name: "John",
surname: "Smith"
});
xhr.open("POST", '/submit')
xhr.setRequestHeader('Content-type', 'application/json; charset=utf-8');
xhr.send(json);
The .send(body) method is pretty omnivore.
It can send almost any body, including Blob and BufferSource objects.
Upload progress
The progress event triggers only on the downloading stage.
That is: if we POST something, XMLHttpRequest first uploads our data (the request body), then downloads the response.
If we’re uploading something big, then we’re surely more interested in tracking the upload progress.
But xhr.onprogress doesn’t help here.
There’s another object, without methods, exclusively to track upload events: xhr.upload.
It generates events, similar to xhr, but xhr.upload triggers them solely on uploading:
loadstart – upload started.
progress – triggers periodically during the upload.
abort – upload aborted.
error – non-HTTP error.
load – upload finished successfully.
timeout – upload timed out (if timeout property is set).
loadend – upload finished with either success or error.
Example of handlers:
xhr.upload.onprogress = function(event) {
alert(`Uploaded ${event.loaded} of ${event.total} bytes`);
};
xhr.upload.onload = function() {
alert(`Upload finished successfully.`);
};
xhr.upload.onerror = function() {
alert(`Error during the upload: ${xhr.status}`);
};
Here’s a real-life example: file upload with progress indication:
<input type="file" onchange="upload(this.files[0])">
<script>
function upload(file) {
let xhr = new XMLHttpRequest();
// track upload progress
xhr.upload.onprogress = function(event) {
console.log(`Uploaded ${event.loaded} of ${event.total}`);
};
// track completion: both successful or not
xhr.onloadend = function() {
if (xhr.status == 200) {
console.log("success");
} else {
console.log("error " + this.status);
}
};
xhr.open("POST", "/article/xmlhttprequest/post/upload");
xhr.send(file);
}
</script>
Cross-origin requests
node.js package CORSXMLHttpRequest can make cross-origin requests, using the same CORS policy as fetch.
Just like fetch, it doesn’t send cookies and HTTP-authorization to another origin by default.
To enable them, set xhr.withCredentials to true:
let xhr = new XMLHttpRequest();
xhr.withCredentials = true;
xhr.open('POST', 'http://anywhere.com/request');
...
See the chapter Fetch: Cross-Origin Requests for details about cross-origin headers.
Summary
Typical code of the GET-request with XMLHttpRequest:
let xhr = new XMLHttpRequest();
xhr.open('GET', '/my/url');
xhr.send();
xhr.onload = function() {
if (xhr.status != 200) { // HTTP error?
// handle error
alert( 'Error: ' + xhr.status);
return;
}
// get the response from xhr.response
};
xhr.onprogress = function(event) {
// report progress
alert(`Loaded ${event.loaded} of ${event.total}`);
};
xhr.onerror = function() {
// handle non-HTTP error (e.g. network down)
};
There are actually more events, the modern specification lists them (in the lifecycle order):
loadstart – the request has started.
progress – a data packet of the response has arrived, the whole response body at the moment is in response.
abort – the request was canceled by the call xhr.abort().
error – connection error has occurred, e.g. wrong domain name.
Doesn’t happen for HTTP-errors like 404.
load – the request has finished successfully.
timeout – the request was canceled due to timeout (only happens if it was set).
loadend – triggers after load, error, timeout or abort.
The error, abort, timeout, and load events are mutually exclusive.
Only one of them may happen.
The most used events are load completion (load), load failure (error), or we can use a single loadend handler and check the properties of the request object xhr to see what happened.
We’ve already seen another event: readystatechange.
Historically, it appeared long ago, before the specification settled.
Nowadays, there’s no need to use it, we can replace it with newer events, but it can often be found in older scripts.
If we need to track uploading specifically, then we should listen to same events on xhr.upload object.
ws is a simple to use, blazing fast, and thoroughly tested WebSocket client and server implementation.
Passes the quite extensive Autobahn test suite: server, client.
Note: This module does not work in the browser.
The client in the docs is a reference to a backend with the role of a client in the WebSocket communication.
Browser clients must use the native WebSocket object.
To make the same code work seamlessly on Node.js and the browser, you can use one of the many wrappers available on npm, like isomorphic-ws.
Installing
npm install ws
Opt-in for performance
bufferutil is an optional module that can be installed alongside the ws module:
npm install --save-optional bufferutil
This is a binary addon that improves the performance of certain operations such as masking and unmasking the data payload of the WebSocket frames. Prebuilt binaries are available for the most popular platforms, so you don't necessarily need to have a C++ compiler installed on your machine.
To force ws to not use bufferutil, use the WS_NO_BUFFER_UTIL environment variable. This can be useful to enhance security in systems where a user can put a package in the package search path of an application of another user, due to how the Node.js resolver algorithm works.
Legacy opt-in for performance
If you are running on an old version of Node.js (prior to v18.14.0), ws also supports the utf-8-validate module:
npm install --save-optional utf-8-validate
This contains a binary polyfill for buffer.isUtf8().
To force ws not to use utf-8-validate, use the
WS_NO_UTF_8_VALIDATE environment variable.
API docs
See /doc/ws.md for Node.js-like documentation of ws classes and utility functions.
WebSocket compression
ws supports the permessage-deflate extension which enables the client and server to negotiate a compression algorithm and its parameters, and then selectively apply it to the data payloads of each WebSocket message.
The extension is disabled by default on the server and enabled by default on the client.
It adds a significant overhead in terms of performance and memory consumption so we suggest to enable it only if it is really needed.
Note that Node.js has a variety of issues with high-performance compression, where increased concurrency, especially on Linux, can lead to catastrophic memory fragmentation and slow performance.
If you intend to use permessage-deflate in production, it is worthwhile to set up a test representative of your workload and ensure Node.js/zlib will handle it with acceptable performance and memory usage.
Tuning of permessage-deflate can be done via the options defined below.
You can also use zlibDeflateOptions and zlibInflateOptions, which is passed directly into the creation of raw deflate/inflate streams.
See the docs for more options.
import WebSocket, { WebSocketServer } from 'ws';
const wss = new WebSocketServer({
port: 8080,
perMessageDeflate: {
zlibDeflateOptions: {
// See zlib defaults.
chunkSize: 1024,
memLevel: 7,
level: 3
},
zlibInflateOptions: {
chunkSize: 10 * 1024
},
// Other options settable:
clientNoContextTakeover: true, // Defaults to negotiated value.
serverNoContextTakeover: true, // Defaults to negotiated value.
serverMaxWindowBits: 10, // Defaults to negotiated value.
// Below options specified as default values.
concurrencyLimit: 10, // Limits zlib concurrency for perf.
threshold: 1024 // Size (in bytes) below which messages
// should not be compressed if context takeover is disabled.
}
});
The client will only use the extension if it is supported and enabled on the server. To always disable the extension on the client, set the perMessageDeflate option to false.
import WebSocket from 'ws';
const ws = new WebSocket('ws://www.host.com/path', {
perMessageDeflate: false
});
Usage examples
Sending and receiving text data
import WebSocket from 'ws';
const ws = new WebSocket('ws://www.host.com/path');
ws.on('error', console.error);
ws.on('open', function open() {
ws.send('something');
});
ws.on('message', function message(data) {
console.log('received: %s', data);
});
Sending binary data
import WebSocket from 'ws';
const ws = new WebSocket('ws://www.host.com/path');
ws.on('error', console.error);
ws.on('open', function open() {
const array = new Float32Array(5);
for (var i = 0; i < array.length; ++i) {
array[i] = i / 2;
}
ws.send(array);
});
Simple server
import { WebSocketServer } from 'ws';
const wss = new WebSocketServer({ port: 8080 });
wss.on('connection', function connection(ws) {
ws.on('error', console.error);
ws.on('message', function message(data) {
console.log('received: %s', data);
});
ws.send('something');
});
External HTTP/S server
import { createServer } from 'https';
import { readFileSync } from 'fs';
import { WebSocketServer } from 'ws';
const server = createServer({
cert: readFileSync('/path/to/cert.pem'),
key: readFileSync('/path/to/key.pem')
});
const wss = new WebSocketServer({ server });
wss.on('connection', function connection(ws) {
ws.on('error', console.error);
ws.on('message', function message(data) {
console.log('received: %s', data);
});
ws.send('something');
});
server.listen(8080);
Multiple servers sharing a single HTTP/S server
import { createServer } from 'http';
import { WebSocketServer } from 'ws';
const server = createServer();
const wss1 = new WebSocketServer({ noServer: true });
const wss2 = new WebSocketServer({ noServer: true });
wss1.on('connection', function connection(ws) {
ws.on('error', console.error);
// ...
});
wss2.on('connection', function connection(ws) {
ws.on('error', console.error);
// ...
});
server.on('upgrade', function upgrade(request, socket, head) {
const { pathname } = new URL(request.url, 'wss://base.url');
if (pathname === '/foo') {
wss1.handleUpgrade(request, socket, head, function done(ws) {
wss1.emit('connection', ws, request);
});
} else if (pathname === '/bar') {
wss2.handleUpgrade(request, socket, head, function done(ws) {
wss2.emit('connection', ws, request);
});
} else {
socket.destroy();
}
});
server.listen(8080);
Client authentication
import { createServer } from 'http';
import { WebSocketServer } from 'ws';
function onSocketError(err) {
console.error(err);
}
const server = createServer();
const wss = new WebSocketServer({ noServer: true });
wss.on('connection', function connection(ws, request, client) {
ws.on('error', console.error);
ws.on('message', function message(data) {
console.log(`Received message ${data} from user ${client}`);
});
});
server.on('upgrade', function upgrade(request, socket, head) {
socket.on('error', onSocketError);
// This function is not defined on purpose. Implement it with your own logic.
authenticate(request, function next(err, client) {
if (err || !client) {
socket.write('HTTP/1.1 401 Unauthorized\r\n\r\n');
socket.destroy();
return;
}
socket.removeListener('error', onSocketError);
wss.handleUpgrade(request, socket, head, function done(ws) {
wss.emit('connection', ws, request, client);
});
});
});
server.listen(8080);
Also see the provided example using express-session.
Server broadcast
A client WebSocket broadcasting to all connected WebSocket clients, including itself.
import WebSocket, { WebSocketServer } from 'ws';
const wss = new WebSocketServer({ port: 8080 });
wss.on('connection', function connection(ws) {
ws.on('error', console.error);
ws.on('message', function message(data, isBinary) {
wss.clients.forEach(function each(client) {
if (client.readyState === WebSocket.OPEN) {
client.send(data, { binary: isBinary });
}
});
});
});
A client WebSocket broadcasting to every other connected WebSocket clients, excluding itself.
import WebSocket, { WebSocketServer } from 'ws';
const wss = new WebSocketServer({ port: 8080 });
wss.on('connection', function connection(ws) {
ws.on('error', console.error);
ws.on('message', function message(data, isBinary) {
wss.clients.forEach(function each(client) {
if (client !== ws && client.readyState === WebSocket.OPEN) {
client.send(data, { binary: isBinary });
}
});
});
});
Round-trip time
import WebSocket from 'ws';
const ws = new WebSocket('wss://websocket-echo.com/');
ws.on('error', console.error);
ws.on('open', function open() {
console.log('connected');
ws.send(Date.now());
});
ws.on('close', function close() {
console.log('disconnected');
});
ws.on('message', function message(data) {
console.log(`Round-trip time: ${Date.now() - data} ms`);
setTimeout(function timeout() {
ws.send(Date.now());
}, 500);
});
For a full example with a browser client communicating with a ws server, see the examples folder.
Otherwise, see the test cases.
FAQ
How to get the IP address of the client?
The remote IP address can be obtained from the raw socket.
import { WebSocketServer } from 'ws';
const wss = new WebSocketServer({ port: 8080 });
wss.on('connection', function connection(ws, req) {
const ip = req.socket.remoteAddress;
ws.on('error', console.error);
});
When the server runs behind a proxy like NGINX, the de-facto standard is to use the X-Forwarded-For header.
wss.on('connection', function connection(ws, req) {
const ip = req.headers['x-forwarded-for'].split(',')[0].trim();
ws.on('error', console.error);
});
How to detect and close broken connections?
Sometimes, the link between the server and the client can be interrupted in a way that keeps both the server and the client unaware of the broken state of the connection (e.g. when pulling the cord).
In these cases, ping messages can be used as a means to verify that the remote endpoint is still responsive.
import { WebSocketServer } from 'ws';
function heartbeat() {
this.isAlive = true;
}
const wss = new WebSocketServer({ port: 8080 });
wss.on('connection', function connection(ws) {
ws.isAlive = true;
ws.on('error', console.error);
ws.on('pong', heartbeat);
});
const interval = setInterval(function ping() {
wss.clients.forEach(function each(ws) {
if (ws.isAlive === false) return ws.terminate();
ws.isAlive = false;
ws.ping();
});
}, 30000);
wss.on('close', function close() {
clearInterval(interval);
});
Pong messages are automatically sent in response to ping messages as required by the spec.
Just like the server example above, your clients might as well lose connection without knowing it.
You might want to add a ping listener on your clients to prevent that.
A simple implementation would be:
import WebSocket from 'ws';
function heartbeat() {
clearTimeout(this.pingTimeout);
// Use `WebSocket#terminate()`, which immediately destroys the connection,
// instead of `WebSocket#close()`, which waits for the close timer.
// Delay should be equal to the interval at which your server
// sends out pings plus a conservative assumption of the latency.
this.pingTimeout = setTimeout(() => {
this.terminate();
}, 30000 + 1000);
}
const client = new WebSocket('wss://websocket-echo.com/');
client.on('error', console.error);
client.on('open', heartbeat);
client.on('ping', heartbeat);
client.on('close', function clear() {
clearTimeout(this.pingTimeout);
});
First, make a new file and name it server.js.
Then add the following server-side code:
const express = require('express')
const webserver = express()
.use((req, res) =>
res.sendFile('/ws-client.html', { root: __dirname })
)
.listen(3000, () => console.log(`Listening on ${3000}`))
const { WebSocketServer } = require('ws')
const sockserver = new WebSocketServer({ port: 2048 })
sockserver.on('connection', ws => {
console.log('New client connected!')
ws.send('connection established')
ws.on('close', () => console.log('Client has disconnected!'))
ws.on('message', data => {
sockserver.clients.forEach(client => {
console.log(`distributing message: ${data}`)
client.send(`${data}`)
})
})
ws.onerror = function () {
console.log('websocket error')
}
}
)
Create a WebSocket Client
Construct a page in HTML called ws-client.html.
<!DOCTYPE html>
<html lang="en">
<head>
<meta charset="UTF-8" />
<meta http-equiv="X-UA-Compatible" content="IE=edge" />
<meta name="viewport" content="width=device-width, initial-scale=1.0" />
<title>WebSocket Chat App</title>
<link href="https://cdn.jsdelivr.net/npm/bootstrap@5.3.0-alpha1/dist/css/bootstrap.min.css" rel="stylesheet" integrity="sha384-GLhlTQ8iRABdZLl6O3oVMWSktQOp6b7In1Zl3/Jr59b6EGGoI1aFkw7cmDA6j6gD" crossorigin="anonymous">
<style>
body{
padding:4rem;
text-align: center;
}
</style>
</head>
<body>
<h2>WebSocket Chat App</h2><br /><br /><br />
<form>
<input type="text" placeholder="Enter message here" name="message"><br /><br />
<input type="submit" value="Send"><br /><br />
</form>
<div></div>
</body>
</html>
Add the following code to the script element of the HTML file to build a WebSocket client:
const webSocket = new WebSocket('ws://localhost:2048/');
webSocket.onmessage = (event) => {
console.log(event)
document.getElementById('messages').innerHTML +=
'Message from server: ' + event.data + "<br />";
};
webSocket.addEventListener("open", () => {
console.log("Client is now connected");
});
function sendMessage(event) {
var inputMessage = document.getElementById('message')
webSocket.send(inputMessage.value)
inputMessage.value = ""
event.preventDefault();
}
document.getElementById('input-form').addEventListener('submit', sendMessage);
The final HTML file should look like this:
<!DOCTYPE html>
<html lang="en">
<head>
<meta charset="UTF-8" />
<meta http-equiv="X-UA-Compatible" content="IE=edge" />
<meta name="viewport" content="width=device-width, initial-scale=1.0" />
<title>WebSocket Chat App</title>
<link href="https://cdn.jsdelivr.net/npm/bootstrap@5.3.0-alpha1/dist/css/bootstrap.min.css" rel="stylesheet" integrity="sha384-GLhlTQ8iRABdZLl6O3oVMWSktQOp6b7In1Zl3/Jr59b6EGGoI1aFkw7cmDA6j6gD" crossorigin="anonymous">
<style>
body{
padding:4rem;
text-align: center;
}
</style>
</head>
<body>
<h2>WebSocket Chat App</h2><br /><br /><br />
<form>
<input type="text" placeholder="Enter message here" name="message"><br /><br />
<input type="submit" value="Send"><br /><br />
</form>
<div></div>
<script>
const webSocket = new WebSocket('ws://localhost:2048/');
webSocket.onmessage = (event) => {
console.log(event)
document.getElementById('messages').innerHTML +=
'Message from server: ' + event.data + "<br />";
};
webSocket.addEventListener("open", () => {
console.log("Client is now connected");
});
function sendMessage(event) {
var inputMessage = document.getElementById('message')
webSocket.send(inputMessage.value)
inputMessage.value = ""
event.preventDefault();
}
document.getElementById('input-form').addEventListener('submit', sendMessage);
</script>
</body>
</html>
Your HTML page would look like this.
Start the Server and Run the Client
Finally, start the server by running the following command in your terminal:
node server.js
Now, go to your browser and open http://localhost:3000
Alternatives to the ws Library
Socket.io
Working with WebSocket connections in Node.js is made simple and intuitive by the well-known WebSocket module Socket.io.
Compared to the ws library, Socket.io has a larger codebase and more dependencies, which could make it slower and use more resources.
Additionally, the code is challenging to read and maintain due to the heavy reliance on callbacks.
SockJS
For browsers that do not support WebSockets, a fallback option is offered by SockJS, another WebSocket library.
Additionally, it supports a variety of transports, such as polling, which can be advantageous when interacting with older browsers and devices.
SockJS supports server-side implementations in many languages, including Java, Python, and Ruby, which is one of its key benefits.
It is a wonderful option for developing cross-platform applications because of this.
However, SockJS is less well-known and utilized than the ws library and Socket.io, making it more challenging to locate online assistance and information.
Additionally, it offers fewer features and might not be appropriate for sophisticated applications.
uWebSockets.js
A lightweight WebSocket framework called uWebSockets.js offers a high-performance interface for managing WebSocket connections in Node.js.
It is a good option for high-speed data transmission applications since it uses a low-level C++ core to provide quick performance and little latency.
One of uWebSockets.js’s key benefits is its compact codebase and little resource utilization, which can lower server costs and boost performance.
It is a suitable option for real-time applications because it has a built-in system for handling disconnections and faults.
The learning curve for uWebSockets.js is steeper than that of other WebSocket libraries, hence it might not be appropriate for novice programmers or developers with little background in low-level programming.
Pros and Cons of WebSocket Libraries
Each library has advantages and disadvantages, depending on the application’s requirements and the developer’s experience.
Here are some general pros and cons of using WebSocket libraries in Node.js.
Pros
Cons
WebSocket libraries provide a simple and convenient interface.
WebSocket libraries can be consume more resources than traditional HTTP connections.
This increases server costs and reduces performance.
They support real-time data transfers and bidirectional communication between clients and servers.
They can be more complicated to set up and configure compared to traditional HTTP connections.
They can create complex applications with multiple communication channels.
For eg.
chat rooms, multiplayer games, and real-time dashboards.
They require the server and client to support the WebSocket protocol.
This may limit compatibility with older devices and browsers.
Alternatives of WebSockets
Let’s dive into the alternatives to WebSockets and compare them to WebSockets.
Long Polling
Long polling is a method where the client sends a request to the server, which keeps it open until it receives new data.
As a result, real-time communication is possible without a constant connection.
Long polling, however, has the potential to be ineffective and slow, particularly for applications with many active clients.
Server-Sent Events (SSE)
A single HTTP connection can push real-time updates from the server to the client using the SSE standard.
Compared to WebSockets, SSE is easier to use and doesn’t require a separate protocol.
However, not all browsers support it.
WebRTC
Real-time communication is made possible across browsers thanks to the WebRTC protocol.
For applications like video conferencing or live streaming that need a lot of bandwidth and low latency, WebRTC is the best choice.
MQTT
MQTT is a lightweight messaging protocol often used for Internet of Things (IoT) applications.
MQTT is well-suited for low-power devices and unreliable network connections, but it’s not as widely supported as WebSockets.
It’s crucial to take into account the particular requirements of your application when contrasting WebSockets to various alternatives.
WebSockets are able to support numerous active clients and provide low-latency, bidirectional communication.
Modern browsers also frequently support WebSockets, which are simple to create in Node.js using the ws package.
On the other side, though they may be easier to build, some alternatives, such as Long Polling and SSE, could not be as effective or scalable.
Although WebRTC involves additional setup and is not always required, it is excellent for some use cases.
MQTT works well for Internet of Things applications, however, it might not work for all real-time communication scenarios.
Chat with WebSockets, Server and Client both in NodeJs
There will be no persistence here.
A client will see only messages that server sends him from the point he connects to it.
Also whenever a client is connected, the server will generate a random color and a random name, and the client will use that.
It’s not necessary, it’s just a few extra stuff.
Utils — this file contains the generate random color and generate random name.
You can check the contents of that file in full on Github.
Link at the end of story.
myClient is just a class called Client (not the actual client we are gonna define that connects to the server).
It contains 2 fields, name & color.
handleReceviedMsg accepts the message that was send to server, and returns that it’s JSON stringified.
For WebSockets we are using the ws package.
And chalk is used to make the console log a little colourful.
Server
First we create the WebSocketServer, running on port 8080, with option for client tracking.
This tracking enables that the WebSocket server has clients property.
When the server detects a connection, we create a client instance.
It’s just a placeholder for name and color.
Then we send the init or welcome message to the client, with that information.
Whenever a new message is received, we will send that message to every client back.
Even to the one who has send it.
So they know that the message was received and transmitted.
Client
The client connects to the WebSocket server.
On initial or welcome message, the server will return the name and the color.
The client will use that to display message in color with the help of chalk.
For client input we use nodes readline.
Readline listents on the line event.
This event is triggered whenever the client presses the Enter key.
On that event we capture the text that was inputed and together with the clients name and color we send that to the server.
Everything else should be pretty much self explanatory.
On open is when we have a connection established.
On close is when the connection gets terminated.
On message is whenever server send us a message.
client.js
server.js
Whole structure and code: https://github.com/zprima/wschat
Creating a chat with Node.js
https://itnext.io/creating-a-chat-with-node-js-from-the-scratch-707896d64593
About Socket.IO
socket.io
This Node.js module brings a way to connect directly from the client browser to the application server.
The library works through events, that is, the server or client will trigger events so that there are responses from one of the parties
In a way, let’s use two very basic methods, which are emit and on.
One serves to make the emission of the event and the other to receive the response of it.
Each side of the application will therefore have the Socket.IO library added.
In addition to allowing the direct exchange of messages between two devices, Socket.IO also allows the broadcast of messages, sending an event to all other connected users.
The broadcast can be both from client and server.
When the user accesses the page, a socket is created with the server and it is through this socket that the exchange of messages between a client and a server takes place.
This, in turn, can either issue an event to a single Socket or to all the sockets connected to it, what we call a message broadcast.
The project
⇧
Let’s create now a directory called \ChatJs and, inside of it, we will create a file called app.js, which will be the main file of our server.
As a first part we will create a fairly simple server that will only present a successful message on the browser screen
Creating a single application.
var app = require('http').createServer(response);
app.listen(3000);
console.log("App running…");
function response(req, res) {
res.writeHead(200);
res.end("Hi, your server is working!");
}
The script creates an HTTP server (which will be listening on port 3000) which has as main method to be requested the response() function, which, in turn, has two parameters: req (request) and res (response).
Into the function, we define a success code (200) and end it with a string warning that the server is ok.
Soon after, just run the following command, which will run our application at the prompt:
node app.js
Note that when you run this code at the prompt, the terminal presents the content of the console.log function warning that the application is running.
However, it will not print any other lines, indicating that our application is currently running.
At this point, we have only our Node.js server running.
If you access the browser at http://localhost:3000/ you’ll see the message we passed in the end method
Next, we will make our server present an HTML response that will be the main page of our chat.
For this, we will have to load the FileSystem module, since we will navigate the project directory and open a file.
So, let’s change our app.js just like we see at Listing 4.
Before making the changes, go to the prompt and press Ctrl + C (or command + C) to stop our application on the server.
Listing 4.
Introducing an HTML page
⇧
var app = require('http').createServer(response);
var fs = require('fs');
app.listen(3000);
console.log("App running…");
function response(req, res) {
fs.readFile(__dirname + '/index.html',
function (err, data) {
if (err) {
res.writeHead(500);
return res.end('Failed to load file index.html');
} res.writeHead(200);
res.end(data);
});
}
After these changes we will again execute the command node app.js and, when accessing again the address http://localhost:3000/, you’ll come across the message “Error loading the index.html file”, just because we don’t have an index.html file inside our project yet.
It is also important to remember that the server we created so far does not differentiate the path, ie you can put anything after http://localhost:3000/ and it will always respond in the same way because we have not implemented how it’d treat these paths.
Soon, you can very well call up addresses like http://localhost:3000/chat, http://localhost:3000/error, http://localhost:3000/potato, etc.
Let’s create a simple interface for our chat.
Create an index.html file inside the project root directory.
In this file enter a code equal to that shown in Listing 5.
Listing 5.
Chat HTML code
⇧
<!DOCTYPE html>
<html>
<head>
<title>ChatJS</title>
<link rel="stylesheet" type="text/css" href="/css/style.css" />
</head>
<body>
<div id="history"></div>
<form id="chat">
<input type="text" id="msg_text" name="msg_text" />
<input type="submit" value="Send!" />
</form>
</body>
</html>
Our index, for now, will only deals with a div called history that is where all the messages exchanged in the chat will be arranged.
Then, we have soon after a form with a text box and the button of message sending.
A very simple chat structure so far.
However, if you now try to access the address http://localhost:3000/ you will receive the same error message.
This is because we do not restart our server application, then we go to the prompt again, press Ctrl + C and then reexecute the app.
As you may have noticed, we already left a link tag in the <head> of our application to load our CSS.
Within the directory of our project create another directory called css and, inside it, the style.css file with the same content as shown in Listing 6.
Listing 6.
style.css file
⇧
html, body, input { font-family: Georgia, Tahoma, Arial, sans-serif; margin: 0; padding: 0;}
body { background: #302F31; padding: 10px;}
form { margin: 15px 0;}
form input[type='text'] { border: 2px solid #eb5424; border-radius: 5px; padding: 5px; width: 75%;}
form input[type='submit'] { background: #eb5424; border: none; border-radius: 5px; color: #FFF; cursor: pointer; font-weight: bold; padding: 7px 5px; width: 19%;}
#history { background: #FFF; border: 2px solid #eb5424; height: 550px;}
If we restart the application, the style is not yet applied to the index page.
The reason is that our app.js only deals with a request path so far.
To solve this we will change our app.js file so that it loads the files that are passed in the request URL, instead of placing each of the URLs manually.
Let’s take a closer look at the changes listed in Listing 7.
Listing 7.
Path changes in app.js
⇧
var app = require('http').createServer(response);
var fs = require('fs');
app.listen(3000);
console.log("App running...");
function response(req, res) {
var file = "";
if (req.url == "/") {
file = __dirname + '/index.html';
} else {
file = __dirname + req.url;
}
fs.readFile(file, function(err, data) {
if (err) {
res.writeHead(404);
return res.end('Page or file not found');
}
res.writeHead(200);
res.end(data);
});
}
After restarting the app
Sending messages
⇧
We will now work on the messaging mechanism.
Our application will work by communicating with the Node.js server through the client-side library of Socket.IO while jQuery takes place in the interaction with the page.
For this, we will change the app.js file as shown in Listing 8, and include a line of a command at the beginning of the file stating that we are including Socket.IO in the application.
Listing 8.
Including Socket.IO module
⇧
var app = require('http').createServer(response);
var fs = require('fs');
var io = require('socket.io')(app);
…
In order to use the require function in a module we need first to install it for our application.
So, stop the application and run the following command to get this done:
npm install socket.io
Once finished, go to your index.html page and add the code snippet shown in Listing 9, at the end of the file.
Listing 9.
Message sending event
⇧
…
<script type="text/javascript" src="https://code.jquery.com/jquery-3.3.1.min.js"></script>
<script type="text/javascript" src="/socket.io/socket.io.js"></script>
<script type="text/javascript">
var socket = io.connect();
$("form#chat").submit(function(e) {
e.preventDefault();
socket.emit("send message", $(this).find("#msg_text").val(), function() {
$("form#chat #msg_text").val("");
});
});
</script>
</body>
</html>
We are declaring a socket variable that refers to the Socket.IO library, which will be responsible for all socket functionalities.
Next, we declare a submit event of our form in jQuery and pass a preventDefault so that the form does not proceed to its action, since we are the ones who are going to take care of the form response.
Note that the emit method of the library is invoked, in which we pass as parameters three things: the event name (this will be useful on the server), the data we are sending (in this case we are only sending the contents of the message field) and finally the callback, a function that will be executed once the event is issued.
The latter, in particular, will only serve to clear the message field, so the user does not have to delete the message after sending it.
If we now test our application the message sending will not work, not even the callback to clear the message field, because we have not yet put the functionality of what the server have to do as soon as it receives this event.
To do this, edit the app.js file and put the code shown in Listing 11 at the end of it.
Listing 11.
Receiving messages from the client
⇧
io.on("connection", function(socket) {
socket.on("send message", function(sent_msg, callback) {
sent_msg = "repeat: " + sent_msg;
io.sockets.emit("update messages", sent_msg);
callback();
});
});
We’ve created a method that will work in response to the client’s connection to the server.
When the client accesses the page it triggers this method on the server and when this socket receives a send message we trigger a method that has as parameters the sent data (the message field) and the callback that we created on the client side.
Within this method we put the second part of the functionality: the module will send to the sockets connected to the server (all users) the update messages event and will also pass which new message was sent, with a specific datetime format.
To provide the date and time we create a separate function because we will still use this method a few more times throughout the development.
Right away, we call the callback that we created on the client side, which is the method for clearing the fields.
Finally, also edit the index.html file and create the method that will update the messages for the users.
The idea is quite simple: let’s give an append in the history div (the changes are in Listing 12).
The following lines should be entered shortly after submitting the form.
Listing 12.
Updating message history
⇧ socket.on("update messages", function(msg){
var final_message = $("<p />").text(msg);
$("#history").append(final_message);
});
Basically, the conversation between the server and the client is the same on both sides, that is, the two have an emit and on functions for issuing and receiving events, respectively.
So, restart and access the application in two tabs and just send a message to see the power of Socket.IO in action.
The application should display the message
full source code here.
multiple clients
⇧ phantomJS headless NodeJS server handle multiple users
There are multiple clients C1, C2, ..., Cn
Clients emit request to the server R1,...,Rn
Server receives request, does data processing
When data-processing is complete, Server emits response to clients Rs1, .., Rs2
When the server has finished data processing it emits the response in the following way:
// server listens for request from client
socket.on('request_from_client', function(data){
// user data and request_type is stored in the data variable
var user = data.user.id
var action = data.action
// server does data processing
do_some_action(..., function(rData){
// when the processing is completed, the response data is emitted as a response_event
// The problem is here, how to make sure that the response data goes to the right client
socket.emit('response_to_client', rData)
})
})
The instance of the socket object corresponds to a client connection.
So every message you emit from that instance is send to the client that opened that socket connection.
Remember that upon the connection event you get (through the onDone callback) the socket connection object.
This event triggers everytime a client connects to the socket.io server.
If you want to send a message to all clients you can use
io.sockets.emit("message-to-all-clients")
and if you want to send an event to every client apart the one that emits the event socket.broadcast.emit("message-to-all-other-clients");
On every connection, a "new channel" is created.
multiple clients connecting to same server
⇧
Server-
var dgram = require('dgram');
var client = dgram.createSocket('udp4');
/** @requires socket.io */
var io = require('socket.io')(http);
/** Array of clients created to keep track of who is listening to what*/
var clients = [];
io.sockets.on('connection', function(socket, username){
/** printing out the client who joined */
console.log('New client connected (id=' + socket.id + ').');
/** pushing new client to client array*/
clients.push(socket);
/** listening for acknowledgement message */
client.on('message', function( message, rinfo ){
/** creating temp array to put data in */
var temp = [];
/**converting data bit to bytes */
var number= req.body.size * 2
/** acknowledgement message is converted to a string from buffer */
var message = message.toString();
/** cutting hex string to correspong to requested data size*/
var data = message.substring(0, number);
/** converting that data to decimal */
var data = parseInt(data, 16);
/** adding data to data array */
temp[0] = data
/** emitting message to html page */
socket.emit('temp', temp);
});
/** listening if client has disconnected */
socket.on('disconnect', function() {
clients.splice(clients.indexOf(client), 1);
console.log('client disconnected (id=' + socket.id + ').');
clearInterval(loop);
});
});
}
});
Client-
var socket = io.connect('192.168.0.136:3000');
socket.on(temp', function(temp){
var temp= temp.toString();
var message= temp.split(',').join(" ");
$('#output').html('');
});
When a client connects, a random number called temp is emitted to the client.
The above code works when one client connects to the server.
Now how can you set a new connection each time? So that if one tab is opened, it gets its own random message back, while when another tab opens, it gets its own random message back.
You could send an id back to the client and save it to localStorage (or a variable or anywhere else).
Then have the client listen to a 'room' that is just for this client.
e.g.
var uuidSocket = io(serverHost + "/" + uuid);
uuidSocket.on("Info", (data:any)=> {
// do something on data
});
This id / room will be used by the server to inform the specific client. And so on.
Server side:
// you have your socket ready and inside the on('connect'...) you handle a register event where the client passes an id if one exists else you create one.
socket.on('register', function(clientUuid){ // a client requests registration
var id = clientUuid == null? uuid.v4() : clientUuid; // create an id if client doesn't already have one
var nsp;
var ns = "/" + id;
socket.join(id);
var nsp = app.io.of(ns); // create a room using this id that is only for this client
clientToRooms[ns] = nsp; // save it to a dictionary for future use
// set up what to do on connection
nsp.on('connection', function(nsSocket){
console.log('someone connected');
nsSocket.on('Info', function(data){
// just an example
});
});
Client side:
// you already have declared uuid, uuidSocket and have connected to the socket previously so you define what to do on register:
socket.on("register", function(data){
if (uuid == undefined || uuidSocket == undefined) {// first time we get id from server
//save id to a variable
uuid = data.uuid;
// save to localstorage for further usage (optional - only if you want one client per browser e.g.)
localStorage.setItem('socketUUID', uuid);
uuidSocket = io(serverHost + "/" + uuid); // set up the room --> will trigger nsp.on('connect',... ) on the server
uuidSocket.on("Info", function(data){
//handle on Info
});
// initiate the register from the client
socket.emit("register", uuid);
Broadcasting means sending a message to everyone else except for the socket that starts it.
Server:
var io = require('socket.io')(80);
io.on('connection', function (socket) {
socket.broadcast.emit('user connected');
});
♦Complete Guide To Node Client-Server Communicationnode js communicate with client side javascriptUsing WebSockets with Node.js
The easiest way is to set up Express and have your client side code communicate via Ajax (for example, using jQuery).
(function() {
var app, express;
express = require("express");
app = express.createServer();
app.configure(function() {
app.use(express.bodyParser());
return app.use(app.router);
});
app.configure("development", function() {
return app.use(express.errorHandler({
dumpExceptions: true,
showStack: true
}));
});
app.post("/locations", function(request, response) {
var latitude, longitude;
latitude = request.body.latitude;
longitude = request.body.longitude;
return response.json({}, 200);
});
app.listen(80);
}).call(this);
On the client side, call it like this:
var latitude = 0, longitude = 0; // Set from form
$.post({
url: "http://localhost/locations",
data: {latitude: latitude, longitude: longitude},
success: function (data) {
console.log("Success");
},
dataType: "json"
});
Note this code is simply an example; you'll have to work out the error handling, etc.
Another way is by making an HTTP request, just like any other server side program in a web application.
With the XMLHttpRequest object, or by generating a <form> and then submitting it, or a variety of other methods.
Create a new WebSockets connection
⇧ const url = 'wss://myserver.com/something'
const connection = new WebSocket(url)connection is a WebSocket object.
When the connection is successfully established, the open event is fired.
Listen for it by assigning a callback function to the onopen property of the connection object:
connection.onopen = () => {
//...
}
If there's any error, the onerror function callback is fired:
connection.onerror = error => {
console.log(`WebSocket error: ${error}`)
}
Sending data to the server using WebSockets
⇧
Once the connection is open, you can send data to the server.
You can do so conveniently inside the onopen callback function:
connection.onopen = () => {
connection.send('hey')
}
Receiving data from the server using WebSockets
⇧
Listen with a callback function on onmessage, which is called when the message event is received:
connection.onmessage = e => {
console.log(e.data)
}
Implement a WebSockets server in Node.js
⇧ ws is a popular WebSockets library for Node.js.
We'll use it to build a WebSockets server. It can also be used to implement a client, and use WebSockets to communicate between two backend services.
Easily install it using
yarn init
yarn add ws
The code you need to write is very little:
const WebSocket = require('ws')
const wss = new WebSocket.Server({ port: 8080 })
wss.on('connection', ws => {
ws.on('message', message => {
console.log(`Received message => ${message}`)
})
ws.send('ho!')
})
This code creates a new server on port 8080 (the default port for WebSockets), and adds a callback function when a connection is established, sending ho! to the client, and logging the messages it receives.
Complete source code for each implementation here.
WebSocket Client-Server Demo
WebSockets is a technology, based on the ws protocol, that makes it possible to establish a continuous full-duplex connection stream between a client and a server.
A typical websocket client would be a user’s browser, but the protocol is platform independent.
It is the closest API to a raw network socket in the browser.
Except a WebSocket connection is also much more than a network socket, as the browser abstracts all the complexity behind a simple API and provides a number of additional services:
Connection negotiation and same-origin policy enforcementInteroperability with existing HTTP infrastructureMessage-oriented communication and efficient message framingSubprotocol negotiation and extensibility
Here are some Node.js libraries
WebSocket
Ws
Socket.io
Sockjs
Socketcluster
WebSocket as promised
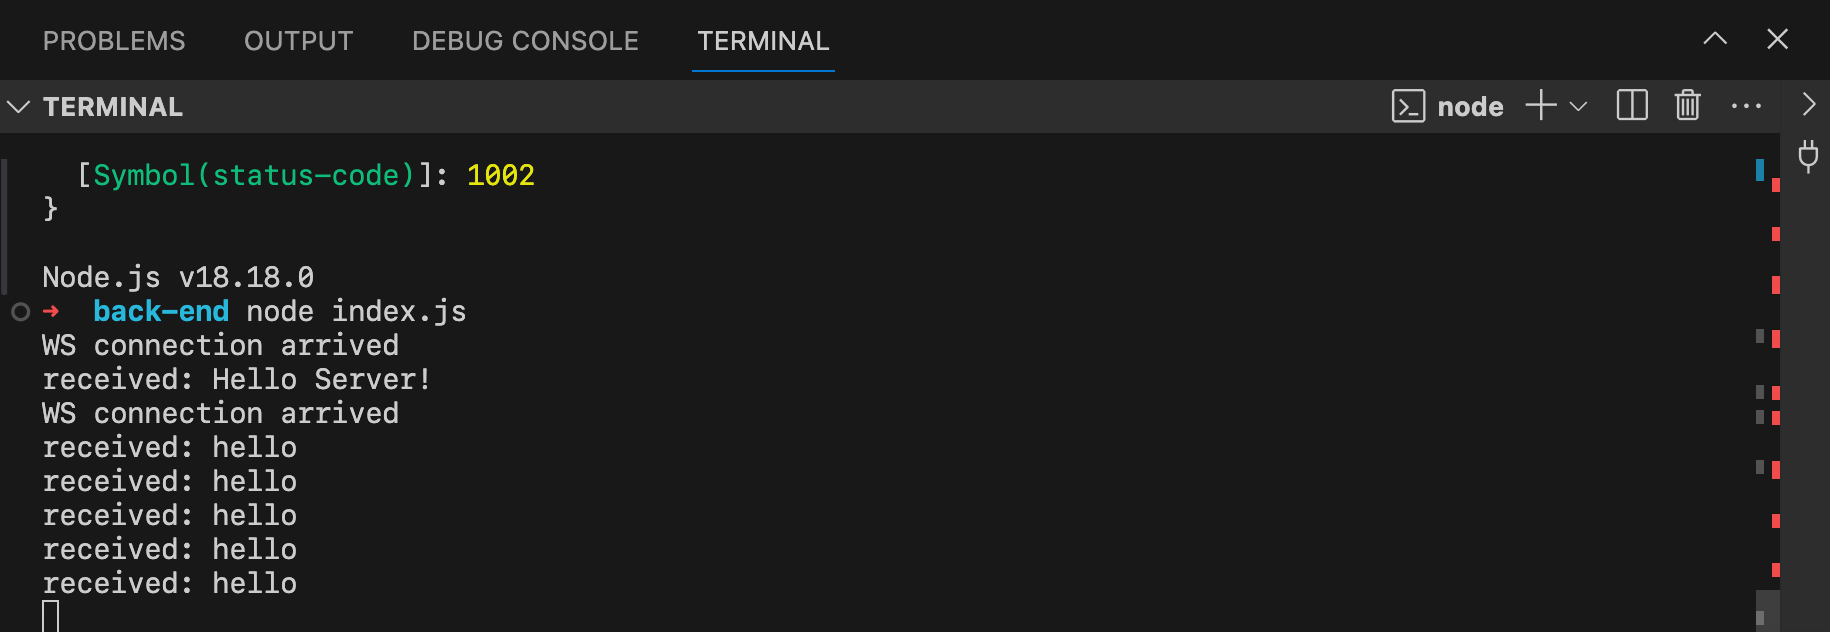
This is a demo shows a demo of a client connecting to a websocket server and sharing data.
Here is the server.js of a websocket.
'use strict';
const WebSocketServer = require('ws').Server
const wss = new WebSocketServer({ port: 8081 });
wss.on('connection', ((ws) => {
ws.on('message', (message) => {
console.log(`received: ${m essage}`);
});
ws.on('end', () => {
console.log('Connection ended...');
});
ws.send('Hello Client');
}));
Here is the client.js of a websocket.
console.log('open: ');
var ws = new WebSocket("ws://127.0.0.1:8081");
ws.onopen = function (event) {
console.log('Connection is open ...');
ws.send("Hello Server");
};
ws.onerror = function (err) {
console.log('err: ', err);
}
ws.onmessage = function (event) {
console.log(event.data);
document.body.innerHTML += event.data + '<br>';
};
ws.onclose = function() {
console.log("Connection is closed...");
}
Stream Updates with Server-Sent Events (SSE)
SSEs are sent over traditional HTTP.
That means they do not require a special protocol or server implementation to get working.
WebSockets on the other hand, require full-duplex connections and new Web Socket servers to handle the protocol.
In addition, Server-Sent Events have a variety of features that WebSockets lack by design such as automatic reconnection, event IDs, and the ability to send arbitrary events.
Server-Sent Events vs. WebSockets
APIs like WebSockets provide a richer protocol to perform bi-directional, full-duplex communication.
Having a two-way channel is more attractive for things like games, messaging apps, and for cases where you need near real-time updates in both directions.
However, in some scenarios data doesn’t need to be sent from the client.
You simply need updates from some server action.
A few examples would be friends’ status updates, stock tickers, news feeds, or other automated data push mechanisms (e.g. updating a client-side Web SQL Database or IndexedDB object store).
If you’ll need to send data to a server, XMLHttpRequest is always a friend.
Here is the server.js of our Server Sent Event, we will be sending out data to the client every 5 seconds with an updated timestamp via SSE.
'use strict';
const http = require('http');
const util = require('util');
const fs = require('fs');
http.createServer((req, res) => {
debugHeaders(req);
if (req.headers.accept && req.headers.accept == 'text/event-stream') {
if (req.url == '/events') {
sendSSE(req, res);
} else {
res.writeHead(404);
res.end();
}
} else {
res.writeHead(200, {' Content-Type': 'text/html'});
res.write(fs.readFileSync(__dirname + '/index.html'));
res.end();
}
}).listen(8000);
const sendSSE = (req, res) => {
res.writeHead(200, {
'Content-Type': 'text/event-stream',
'Cache-Control': 'no-cache',
'Connection': 'keep-alive'
});
const id = (new Date()).toLocaleTimeString();
setInterval(() => {
constructSSE(res, id, (new Date()).toLocaleTimeString());
}, 5000);
constructSSE(res, id, (new Date()).toLocaleTimeString());
//res.end();
}
const constructSSE = (res, id, data) => {
res.write('id: ' + id + '\n');
res.write("data: " + data + '\n\n');
}
const debugHeaders = (req) => {
util.puts('URL: ' + req.url);
for (let key in req.headers) {
util.puts(key + ': ' + req.headers[key]);
}
util.puts('\n\n');
}
And here is the client.js which is reference by the index.html on the client side.
Notice how the client never sends out a formal request for data with SSE’s.
Once the intial connection has been made with the server then the plain text data can be sent to the client as needed!
var source = new EventSource('/events');
source.onmessage = function(e) {
document.body.innerHTML += e.data + '';
};
XMLHttpRequest (XHR)
XMLHttpRequest (XHR) is a browser-level API that enables the client to script data transfers via JavaScript.
XHR made its first debut in Internet Explorer 5, became one of the key technologies behind the Asynchronous JavaScript and XML (AJAX) revolution, and is now a fundamental building block of nearly every modern web application.
XMLHTTP changed everything.
It put the “D” in DHTML.
It allowed us to asynchronously get data from the server and preserve document state on the client… The Outlook Web Access (OWA) team’s desire to build a rich Win32 like application in a browser pushed the technology into IE that allowed AJAX to become a reality.
— Jim Van Eaton Outlook Web Access: A catalyst for web evolution
Here I am running a simple Express server with a simple route to send requested data to the Client.
'use strict';
var express = require('express');
var app = express();
app.use(express.static(`${_ _dirname}/public`));
app.get('/api', function(req, res){
res.send((new Date()).toLocaleTimeString());
});
app.listen(3000);
Here is the javascript file linked to my index.html on the client side.
I am using the baked in XHR methods as opposed to jQuery since I love to use vanilla JavaScript whenever possible.
'use strict'
function reqListener (data) {
document.body.innerHTML += this.responseText + '<br>';
}
setInterval(function () {
var oReq = new XMLHttpRequest();
oReq.addEventListener("load", reqListener);
oReq.open("GET", "/api");
oReq.send();
}, 3000);
In my Github repo, I cover two more use cases not referenced here, server to server communications and HTTP/2.
If you are curious about those forms of communication check it out.
One word about HTTP/2 before wrapping up.
HTTP/2 is the future of Client-Server communication, but it is a protocol built on top of HTTP/1.1 which means that all of these forms of communicating will be still be relevant in the future, just the means that they are transmitted will be updated.
As you can see there are a ton of different ways you can send data between a client and server.
Before working on this project, I had no idea how many different ways were available in vanilla JavaScript for moving data around.
Did I miss anything or you see something that needs to be fixed? Let me know in the comments below.
⇧
A web server receives HTTP requests from a client, like your browser, and provides an HTTP response, like an HTML page or JSON from an API.
This software generally falls into two categories: frontend and backend.
Front-end code is concerned with how the content is presented, such as the color of a navigation bar and the text styling.
Back-end code is concerned with how data is exchanged, processed, and stored.
Code that handles network requests from your browser or communicates with the database is primarily managed by back-end code.
Prerequisites
Ensure that Node.js is installed on your development machine.
Step 1 — Creating a Basic HTTP Server
⇧
Let’s start by creating a server that returns plain text to the user.
In the terminal, create a folder called first-servers:
mkdir first-servers
Then enter that folder:
cd first-servers
Now, create the file that will house the code:
touch hello.js
Open the file in a text editor.
We will use nano as it’s available in the terminal:
nano hello.js
We start by loading the http module that’s standard with all Node.js installations.
Add the following line to hello.js:
first-servers/hello.jsconst http = require("http");
Our next step will be to define two constants, the host and port that our server will be bound to:
first-servers/hello.jsconst host = 'localhost';
const port = 8000;
The value localhost is a special private address that computers use to refer to themselves.
It’s typically the equivalent of the internal IP address 127.0.0.1 and it’s only available to the local computer, not to any local networks we’ve joined or to the internet.
The port is a number that servers use as an endpoint or “door” to our IP address.
In our example, we will use port 8000 for our web server.
Ports 8080 and 8000 are typically used as default ports in development, and in most cases developers will use them rather than other ports for HTTP servers.
When we bind our server to this host and port, we will be able to reach our server by visiting http://localhost:8000 in a local browser.
Let’s add a special function, which in Node.js we call a request listener.
This function is meant to handle an incoming HTTP request and return an HTTP response.
This function must have two arguments, a request object and a response object.
The request object captures all the data of the HTTP request that’s coming in.
The response object is used to return HTTP responses for the server.
We want our first server to return this message whenever someone accesses it: "My first server!".
Let’s add that function next:
first-servers/hello.jsconst requestListener = function (req, res) {res.writeHead(200);res.end("My first server!");
};
The function would usually be named based on what it does.
For example, if we created a request listener function to return a list of books, we would likely name it listBooks().
Since this one is a sample case, we will use the generic name requestListener.
All request listener functions in Node.js accept two arguments: req and res (we can name them differently if we want).
The HTTP request the user sends is captured in a Request object, which corresponds to the first argument, req.
The HTTP response that we return to the user is formed by interacting with the Response object in second argument, res.
The first line res.writeHead(200); sets the HTTP status code of the response.
HTTP status codes indicate how well an HTTP request was handled by the server.
In this case, the status code 200 corresponds to "OK".
The next line of the function, res.end("My first server!");, writes the HTTP response back to the client who requested it.
This function returns any data the server has to return.
In this case, it’s returning text data.
Finally, we can now create our server and make use of our request listener:
first-servers/hello.jsconst server = http.createServer(requestListener);
server.listen(port, host, () => {console.log(`Server is running on http://${host}:${port}`);
});
Save and exit.
In the first line, we create a new server object via the http module’s createServer() function.
This server accepts HTTP requests and passes them on to our requestListener() function.
After we create our server, we must bind it to a network address.
We do that with the server.listen() method.
It accepts three arguments: port, host, and a callback function that fires when the server begins to listen.
All of these arguments are optional, but it is a good idea to explicitly state which port and host we want a web server to use.
When deploying web servers to different environments, knowing the port and host it is running on is required to set up load balancing or a DNS alias.
The callback function logs a message to our console so we can know when the server began listening to connections.
Note: Even though requestListener() does not use the req object, it must still be the first argument of the function.
With less than fifteen lines of code, we now have a web server.
Let’s see it in action and test it end-to-end by running the program:
node hello.js
In the console, we will see this output:
OutputServer is running on http://localhost:8000
Notice that the prompt disappears.
This is because a Node.js server is a long running process.
It only exits if it encounters an error that causes it to crash and quit, or if we stop the Node.js process running the server.
In a separate terminal window, we’ll communicate with the server using cURL, a CLI tool to transfer data to and from a network.
Enter the command to make an HTTP GET request to our running server:
curl http://localhost:8000
When we press ENTER, our terminal will show the following output:
OutputMy first server!
We’ve now set up a server and got our first server response.
Let’s break down what happened when we tested our server.
Using cURL, we sent a GET request to the server at http://localhost:8000.
Our Node.js server listened to connections from that address.
The server passed that request to the requestListener() function.
The function returned text data with the status code 200.
The server then sent that response back to cURL, which displayed the message in our terminal.
Before we continue, let’s exit our running server by pressing CTRL+C.
This interrupts our server’s execution, bringing us back to the command line prompt.
In most web sites we visit or APIs we use, the server responses are seldom in plain text.
We get HTML pages and JSON data as common response formats.
In the next step, we will learn how to return HTTP responses in common data formats we encounter in the web.
Step 2 — Returning Different Types of Content
⇧
The response we return from a web server can take a variety of formats.
JSON and HTML were mentioned before, and we can also return other text formats like XML and CSV.
Finally, web servers can return non-text data like PDFs, zipped files, audio, and video.
In this article, we return the following types of data:
JSON, CSV, HTML
In the context of Node.js, we need to do two things:
Set the Content-Type header in our HTTP responses with the appropriate value.
Ensure that res.end() gets the data in the right format.
Let’s see this in action with some examples.
Most changes exist within the requestListener() function.
Let’s create files with this “template code” to make future sections easier to follow.
Create a new file called html.js.
This file will be used later to return HTML text in an HTTP response.
We’ll put the template code here and copy it to the other servers that return various types.
In the terminal, enter the following:
touch html.js
Now open this file in a text editor:
nano html.js
Let’s copy the “template code.” Enter this in nano:
first-servers/html.jsconst http = require("http");
const host = 'localhost';
const port = 8000;
const requestListener = function (req, res) {};
const server = http.createServer(requestListener);
server.listen(port, host, () => {
console.log(`Server is running on http://${host}:${port}`);
});
Save and exit html.js, then return to the terminal.
Now let’s copy this file into two new files.
The first file will be to return CSV data in the HTTP response:
cp html.js csv.js
The second file will return a JSON response in the server:
cp html.js json.js
The remaining files will be for later exercises:
cp html.js htmlFile.js
cp html.js routes.js
We’re now set up to continue our exercises.
Let’s begin with returning JSON.
Serving JSON
Open the json.js file:
nano json.js
We want to return a JSON response.
Let’s modify the requestListener() function to return the appropriate header all JSON responses have by changing the highlighted lines like so:
first-servers/json.js
const requestListener = function (req, res) {
res.setHeader("Content-Type", "application/json");
};
The res.setHeader() method adds an HTTP header to the response.
HTTP headers are additional information that can be attached to a request or a response.
The res.setHeader() method takes two arguments: the header’s name and its value.
The Content-Type header is used to indicate the format of the data, also known as media type, that’s being sent with the request or response.
In this case our Content-Type is application/json.
Now, let’s return JSON content to the user.
Modify json.js so it looks like this:
first-servers/json.js
const requestListener = function (req, res) {
res.setHeader("Content-Type", "application/json");
res.writeHead(200);res.end(`{"message": "This is a JSON response"}`);
};
Like before, we tell the user that their request was successful by returning a status code of 200.
This time in the response.end() call, our string argument contains valid JSON.
Save and exit json.js.
Now, let’s run the server with the node command:
node json.js
In another terminal, let’s reach the server by using cURL:
curl http://localhost:8000
As we press ENTER, we will see the following result:
Output{"message": "This is a JSON response"}
We now have successfully returned a JSON response, just like many of the popular APIs we create apps with.
Be sure to exit the running server with CTRL+C so we can return to the standard terminal prompt.
Next, let’s look at another popular format of returning data: CSV.
Serving CSV
Open the csv.js file with a text editor:
nano csv.js
Let’s add the following lines to our requestListener() function:
first-servers/csv.js
const requestListener = function (req, res) {
res.setHeader("Content-Type", "text/csv");res.setHeader("Content-Disposition", "attachment;
filename=oceanpals.csv");
};
This time, our Content-Type indicates that a CSV file is being returned as the value is text/csv.
The second header we add is Content-Disposition.
This header tells the browser how to display the data, particularly in the browser or as a separate file.
When we return CSV responses, most modern browsers automatically download the file even if the Content-Disposition header is not set.
However, when returning a CSV file we should still add this header as it allows us to set the name of the CSV file.
In this case, we signal to the browser that this CSV file is an attachment and should be downloaded.
We then tell the browser that the file’s name is oceanpals.csv.
Let’s write the CSV data in the HTTP response:
first-servers/csv.js
const requestListener = function (req, res) {
res.setHeader("Content-Type", "text/csv");
res.setHeader("Content-Disposition", "attachment;filename=oceanpals.csv");
res.writeHead(200);res.end(`id,name,email\n1,Sammy Shark,shark@ocean.com`);
};
Like before we return a 200/OK status with our response.
This time, our call to res.end() has a string that’s a valid CSV.
The comma separates the value in each column and the new line character (\n) separates the rows.
We have two rows, one for the table header and one for the data.
We’ll test this server in the browser.
Save csv.js and exit the editor with CTRL+X.
Run the server with the Node.js command:
node csv.js
In another Terminal, let’s reach the server by using cURL:
curl http://localhost:8000
The console will show this:
Outputid,name,email
1,Sammy Shark,shark@ocean.com
If we go to http://localhost:8000 in our browser, a CSV file will be downloaded.
Its file name will be oceanpals.csv.
Exit the running server with CTRL+C to return to the standard terminal prompt.
Having returned JSON and CSV, we’ve covered two cases that are popular for APIs.
Let’s move on to how we return data for websites people view in a browser.
Serving HTML
Let’s reopen html.js with our text editor:
nano html.js
Modify the requestListener() function to return the appropriate Content-Type header for an HTML response:
first-servers/html.js
const requestListener = function (req, res) {
res.setHeader("Content-Type", "text/html");
};
Now, let’s return HTML content to the user.
Add the highlighted lines to html.js so it looks like this:
first-servers/html.js
const requestListener = function (req, res) {
res.setHeader("Content-Type", "text/html");
res.writeHead(200);res.end(`<html><body><h2>This is HTML</h2></body></html>`);
};
We first add the HTTP status code.
We then call response.end() with a string argument that contains valid HTML.
When we access our server in the browser, we will see an HTML page with one header tag containing This is HTML.
Let’s save and exit.
Now, let’s run the server with the node command:
node html.js
We will see Server is running on http://localhost:8000 when our program has started.
Now go into the browser and visit http://localhost:8000.
Our page will look like this:
Let’s quit the running server with CTRL+C and return to the standard terminal prompt.
It’s common for HTML to be written in a file, separate from the server-side code like our Node.js programs.
Next, let’s see how we can return HTML responses from files.
Step 3 — Serving an HTML Page From a File with the fs
⇧
We can serve HTML as strings in Node.js to the user, but it’s preferable that we load HTML files and serve their content.
This way, as the HTML file grows we don’t have to maintain long strings in our Node.js code, keeping it more concise and allowing us to work on each aspect of our website independently.
This “separation of concerns” is common in many web development setups, so it’s good to know how to load HTML files to support it in Node.js
To serve HTML files, we load the HTML file with the fs module and use its data when writing our HTTP response.
First, we’ll create an HTML file that the web server will return.
Create a new HTML file:
touch index.html
Now open index.html in a text editor:
nano index.html
Our web page will be minimal.
It will have an orange background and will display some greeting text in the center.
Add this code to the file:
first-servers/index.html
<!DOCTYPE html>
<head>
<title>My Website</title>
<style>
*, html { margin: 0; padding: 0; border: 0; }
html { width: 100%; height: 100%; }
body { width: 100%; height: 100%; position: relative; background-color: rgb(236, 152, 42); }
.center { width: 100%; height: 50%; margin: 0; position: absolute; top: 50%; left: 50%; transform: translate(-50%, -50%); color: white; font-family: "Trebuchet MS", Helvetica, sans-serif; text-align: center; }
h2 { font-size: 144px; }
p { font-size: 64px; }
</style>
</head>
<body>
<div class="center">
<h2>Hello Again!</h2>
<p>This is served from a file</p>
</div>
</body>
</html>
This single webpage shows two lines of text: Hello Again! and This is served from a file.
The lines appear in the center of the page, one above each other.
The first line of text is displayed in a heading, meaning it would be large.
The second line of text will appear slightly smaller.
All the text will appear white and the webpage has an orange background.
While it’s not the scope of this article or series, if you are interested in learning more about HTML, CSS, and other front-end web technologies, you can take a look at Mozilla’s Getting Started with the Web guide.
That’s all we need for the HTML, so save and exit.
We can now move on to the server code.
For this exercise, we’ll work on htmlFile.js.
Open it with the text editor:
nano htmlFile.js
As we have to read a file, let’s begin by importing the fs module:
first-servers/htmlFile.jsconst http = require("http");
const fs = require('fs').promises;
This module contains a readFile() function that we’ll use to load the HTML file in place.
We import the promise variant in keeping with modern JavaScript best practices.
We use promises as its syntactically more succinct than callbacks, which we would have to use if we assigned fs to just require('fs').
To learn more about asynchronous programming best practices, you can read our How To Write Asynchronous Code in Node.js guide.
We want our HTML file to be read when a user requests our system.
Let’s begin by modifying requestListener() to read the file:
first-servers/htmlFile.js
const requestListener = function (req, res) {
fs.readFile(__dirname + "/index.html")
};
We use the fs.readFile() method to load the file.
Its argument has __dirname + "/index.html".
The special variable __dirname has the absolute path of where the Node.js code is being run.
We then append /index.html so we can load the HTML file we created earlier.
Now let’s return the HTML page once it’s loaded:
first-servers/htmlFile.js
const requestListener = function (req, res) {
fs.readFile(__dirname + "/index.html")
.then(contents => {res.setHeader("Content-Type", "text/html");res.writeHead(200);res.end(contents);})
};
If the fs.readFile() promise successfully resolves, it will return its data.
We use the then() method to handle this case.
The contents parameter contains the HTML file’s data.
We first set the Content-Type header to text/html to tell the client that we are returning HTML data.
We then write the status code to indicate the request was successful.
We finally send the client the HTML page we loaded, with the data in the contents variable.
The fs.readFile() method can fail at times, so we should handle this case when we get an error.
Add this to the requestListener() function:
first-servers/htmlFile.js
const requestListener = function (req, res) {
fs.readFile(__dirname + "/index.html")
.then(contents => {
res.setHeader("Content-Type", "text/html");
res.writeHead(200);
res.end(contents);
})
.catch(err => {res.writeHead(500);res.end(err);return;});
};
Save the file and exit.
When a promise encounters an error, it is rejected.
We handle that case with the catch() method.
It accepts the error that fs.readFile() returns, sets the status code to 500 signifying that an internal error was encountered, and returns the error to the user.
Run our server with the node command:
node htmlFile.js
In the web browser, visit http://localhost:8000.
You will see this page:
You have now returned an HTML page from the server to the user.
You can quit the running server with CTRL+C.
You will see the terminal prompt return when you do.
When writing code like this in production, you may not want to load an HTML page every time you get an HTTP request.
While this HTML page is roughly 800 bytes in size, more complex websites can be megabytes in size.
Large files can take a while to load.
If your site is expecting a lot of traffic, it may be best to load HTML files at startup and save their contents.
After they are loaded, you can set up the server and make it listen to requests on an address.
To demonstrate this method, let’s see how we can rework our server to be more efficient and scalable.
Serving HTML Efficiently
Instead of loading the HTML for every request, in this step we will load it once at the beginning.
The request will return the data we loaded at startup.
In the terminal, re-open the Node.js script with a text editor:
nano htmlFile.js
Let’s begin by adding a new variable before we create the requestListener() function:
first-servers/htmlFile.jslet indexFile;
const requestListener = function (req, res) {
When we run this program, this variable will hold the HTML file’s contents.
Now, let’s readjust the requestListener() function.
Instead of loading the file, it will now return the contents of indexFile:
first-servers/htmlFile.jsconst requestListener = function (req, res) {res.setHeader("Content-Type", "text/html");res.writeHead(200);res.end(indexFile);
};
Next, we shift the file reading logic from the requestListener() function to our server startup.
Make the following changes as we create the server:
first-servers/htmlFile.jsconst server = http.createServer(requestListener);
fs.readFile(__dirname + "/index.html").then(contents => {indexFile = contents;server.listen(port, host, () => {console.log(`Server is running on http://${host}:${port}`);});}).catch(err => {console.error(`Could not read index.html file: ${err}`);process.exit(1);});
Save the file and exit.
The code that reads the file is similar to what we wrote in our first attempt.
However, when we successfully read the file we now save the contents to our global indexFile variable.
We then start the server with the listen() method.
The key thing is that the file is loaded before the server is run.
This way, the requestListener() function will be sure to return an HTML page, as indexFile is no longer an empty variable.
Our error handler has changed as well.
If the file can’t be loaded, we capture the error and print it to our console.
We then exit the Node.js program with the exit() function without starting the server.
This way we can see why the file reading failed, address the problem, and then start the server again.
We’ve now created different web servers that return various types of data to a user.
So far, we have not used any request data to determine what should be returned.
We’ll need to use request data when setting up different routes or paths in a Node.js server, so next let’s see how they work together.
Step 4 — Managing Routes Using an HTTP Request Object
⇧
Most websites we visit or APIs we use usually have more than one endpoint so we can access various resources.
A good example would be a book management system, one that might be used in a library.
It would not only need to manage book data, but it would also manage author data for cataloguing and searching convenience.
Even though the data for books and authors are related, they are two different objects.
In these cases, software developers usually code each object on different endpoints as a way to indicate to the API user what kind of data they are interacting with.
Let’s create a new server for a small library, which will return two different types of data.
If the user goes to our server’s address at /books, they will receive a list of books in JSON.
If they go to /authors, they will receive a list of author information in JSON.
So far, we have been returning the same response to every request we get.
Let’s illustrate this quickly.
Re-run our JSON response example:
node json.js
In another terminal, let’s do a cURL request like before:
curl http://localhost:8000
You will see:
Output{"message": "This is a JSON response"}
Now let’s try another curl command:
curl http://localhost:8000/todos
After pressing Enter, you will see the same result:
Output{"message": "This is a JSON response"}
We have not built any special logic in our requestListener() function to handle a request whose URL contains /todos, so Node.js returns the same JSON message by default.
As we want to build a miniature library management server, we’ll now separate the kind of data that’s returned based on the endpoint the user accesses.
First, exit the running server with CTRL+C.
Now open routes.js in your text editor:
nano routes.js
Let’s begin by storing our JSON data in variables before the requestListener() function:
first-servers/routes.jsconst books = JSON.stringify([{ title: "The Alchemist", author: "Paulo Coelho", year: 1988 },{ title: "The Prophet", author: "Kahlil Gibran", year: 1923 }
]);const authors = JSON.stringify([{ name: "Paulo Coelho", countryOfBirth: "Brazil", yearOfBirth: 1947 },{ name: "Kahlil Gibran", countryOfBirth: "Lebanon", yearOfBirth: 1883 }
]);
The books variable is a string that contains JSON for an array of book objects.
Each book has a title or name, an author, and the year it was published.
The authors variable is a string that contains the JSON for an array of author objects.
Each author has a name, a country of birth, and their year of birth.
Now that we have the data our responses will return, let’s start modifying the requestListener() function to return them to the correct routes.
First, we’ll ensure that every response from our server has the correct Content-Type header:
first-servers/routes.js
const requestListener = function (req, res) {
res.setHeader("Content-Type", "application/json");
}
Now, we want to return the right JSON depending on the URL path the user visits.
Let’s create a switch statement on the request’s URL:
first-servers/routes.js
const requestListener = function (req, res) {
res.setHeader("Content-Type", "application/json");
switch (req.url) {}
}
To get the URL path from a request object, we need to access its url property.
We can now add cases to the switch statement to return the appropriate JSON.
JavaScript’s switch statement provides a way to control what code is run depending on the value of an object or JavaScript expression (for example, the result of mathematical operations).
Let’s continue by adding a case for when the user wants to get our list of books:
first-servers/routes.js
const requestListener = function (req, res) {
res.setHeader("Content-Type", "application/json");
switch (req.url) {
case "/books":res.writeHead(200);res.end(books);break
}
}
We set our status code to 200 to indicate the request is fine and return the JSON containing the list of our books.
Now let’s add another case for our authors:
first-servers/routes.js
const requestListener = function (req, res) {
res.setHeader("Content-Type", "application/json");
switch (req.url) {
case "/books":
res.writeHead(200);
res.end(books);
break
case "/authors":res.writeHead(200);res.end(authors);break
}
}
Like before, the status code will be 200 as the request is fine.
This time we return the JSON containing the list of our authors.
We want to return an error if the user tries to go to any other path.
Let’s add the default case to do this:
routes.js
const requestListener = function (req, res) {
res.setHeader("Content-Type", "application/json");
switch (req.url) {
case "/books":
res.writeHead(200);
res.end(books);
break
case "/authors":
res.writeHead(200);
res.end(authors);
break
default:res.writeHead(404);res.end(JSON.stringify({error:"Resource not found"}));
}
}
We use the default keyword in a switch statement to capture all other scenarios not captured by our previous cases.
We set the status code to 404 to indicate that the URL they were looking for was not found.
We then set a JSON object that contains an error message.
Let’s test our server to see if it behaves as we expect.
In another terminal, let’s first run a command to see if we get back our list of books:
curl http://localhost:8000/books
Press Enter to see the following output:
Output[{"title":"The Alchemist","author":"Paulo Coelho","year":1988},{"title":"The Prophet","author":"Kahlil Gibran","year":1923}]
So far so good.
Let’s try the same for /authors.
Type the following command in the terminal:
curl http://localhost:8000/authors
You will see the following output when the command is complete:
Output[{"name":"Paulo Coelho","countryOfBirth":"Brazil","yearOfBirth":1947},{"name":"Kahlil Gibran","countryOfBirth":"Lebanon","yearOfBirth":1883}]
Last, let’s try an erroneous URL to ensure that requestListener() returns the error response:
curl http://localhost:8000/notreal
Entering that command will display this message:
Output{"error":"Resource not found"}
You can exit the running server with CTRL+C.
We’ve now created different avenues for users to get different data.
We also added a default response that returns an HTTP error if the user enters a URL that we don’t support.
Conclusion
⇧
In this tutorial, you’ve made a series of Node.js HTTP servers.
You first returned a basic textual response.
You then went on to return various types of data from our server: JSON, CSV, and HTML.
From there you were able to combine file loading with HTTP responses to return an HTML page from the server to the user, and to create an API that used information about the user’s request to determine what data should be sent in its response.
You’re now equipped to create web servers that can handle a variety of requests and responses.
With this knowledge, you can make a server that returns many HTML pages to the user at different endpoints.
To access web pages of any web application, you need a web server.
The web server will handle all the http requests for the web application e.g IIS is a web server for ASP.NET web applications and Apache is a web server for PHP or Java web applications.
Node.js provides capabilities to create your own web server which will handle HTTP requests asynchronously.
You can use IIS or Apache to run Node.js web application but it is recommended to use Node.js web server.
Create Node.js Web Server
Node.js makes it easy to create a simple web server that processes incoming requests asynchronously.
The following example is a simple Node.js web server contained in server.js file.
server.js
var http = require('http'); // 1 - Import Node.js core module
var server = http.createServer(function (req, res) { // 2 - creating server
//handle incomming requests here..
});
server.listen(5000); //3 - listen for any incoming requests
console.log('Node.js web server at port 5000 is running..')
In the above example, we import the http module using require() function.
The http module is a core module of Node.js, so no need to install it using NPM.
The next step is to call createServer() method of http and specify callback function with request and response parameter.
Finally, call listen() method of server object which was returned from createServer() method with port number, to start listening to incoming requests on port 5000.
You can specify any unused port here.
Run the above web server by writing node server.js command in command prompt or terminal window and it will display message as shown below.
C:\> node server.js
Node.js web server at port 5000 is running..
This is how you create a Node.js web server using simple steps.
Now, let's see how to handle HTTP request and send response in Node.js web server.
Handle HTTP Request
The http.createServer() method includes request and response parameters which is supplied by Node.js.
The request object can be used to get information about the current HTTP request e.g., url, request header, and data.
The response object can be used to send a response for a current HTTP request.
The following example demonstrates handling HTTP request and response in Node.js.
server.js
var http = require('http'); // Import Node.js core module
var server = http.createServer(function (req, res) { //create web server
if (req.url == '/') { //check the URL of the current request
// set response header
res.writeHead(200, { 'Content-Type': 'text/html' });
// set response content
res.write('<html><body><p>This is home Page.</p></body></html>');
res.end();
}else if (req.url == "/student") {
res.writeHead(200, { 'Content-Type': 'text/html' });
res.write('<html><body><p>This is student Page.</p></body></html>');
res.end();
}else if (req.url == "/admin") {
res.writeHead(200, { 'Content-Type': 'text/html' });
res.write('<html><body><p>This is admin Page.</p></body></html>');
res.end();
}else
res.end('Invalid Request!');
});
server.listen(5000); //6 - listen for any incoming requests
console.log('Node.js web server at port 5000 is running..')
In the above example, req.url is used to check the url of the current request and based on that it sends the response.
To send a response, first it sets the response header using writeHead() method and then writes a string as a response body using write() method.
Finally, Node.js web server sends the response using end() method.
Now, run the above web server as shown below.
C:\> node server.js
Node.js web server at port 5000 is running..
To test it, you can use the command-line program curl, which most Mac and Linux machines have pre-installed.
curl -i http://localhost:5000
You should see the following response.
HTTP/1.1 200 OK
Content-Type: text/plain
Date: Tue, 8 Sep 2015 03:05:08 GMT
Connection: keep-alive
This is home page.
For Windows users, point your browser to http://localhost:5000 and see the following result.
The same way, point your browser to http://localhost:5000/student and see the following result.
It will display "Invalid Request" for all requests other than the above URLs.
Sending JSON Response
The following example demonstrates how to serve JSON response from the Node.js web server.
server.js
var http = require('http');
var server = http.createServer(function (req, res) {
if (req.url == '/data') { //check the URL of the current request
res.writeHead(200, { 'Content-Type': 'application/json' });
res.write(JSON.stringify({ message: "Hello World"}));
res.end();
}
});
server.listen(5000);
console.log('Node.js web server at port 5000 is running..')
So, this way you can create a simple web server that serves different responses.
Node.js Generate html
The most basic way is:
var http = require('http');
http.createServer(function (req, res) {
var html = buildHtml(req);
res.writeHead(200, {
'Content-Type': 'text/html',
'Content-Length': html.length,
'Expires': new Date().toUTCString()
});
res.end(html);
}).listen(8080);
function buildHtml(req) {
var header = '';
var body = '';
// concatenate header string
// concatenate body string
return '<!DOCTYPE html>'
+ '<html><head>' + header + '</head><body>' + body + '</body></html>';
};
And access this HTML with http://localhost:8080 from your browser.
create-html
⇧
Web scraping is used to scrape data from webpages automatically on a large scale.
Reasons to use web scraping:
Automate tasks such as data entry, form filling, and other repetitive tasks, saving you time and improving efficiency.
Some reasons node.js is a great choice for web scraping:
Node.js can handle multiple web scraping requests parallelly.
How to scrape webpages using Node JS?
⇧
Step 1 Setting up your environment:
You must install node.js if you haven’t already.
Step 2 Installing necessary packages for web scraping with Node.js:
Node.js has multiple options for web scraping like Cheerio, Puppeteer, and request.
Install them easily using the following command.
npm install cheerio
npm install puppeteer
npm install requestStep 3 Setting up your project directory:
You need to create a new directory for the new project.
And then navigate to the command prompt to create new file to store your NodeJS web scraping code.
You can create a new directory and new file using the following command:
mkdir my-web-scraper
cd my-web-scraper
touch scraper.jsStep 4 Making HTTP Requests with Node.js:
In order to scrape webpages, you need to make HTTP requests.
Now, Node.js has in-built http module.
This makes it easy to make requests.
You can also use axios or requests to make request.
Here is the code to make http requests with node.js
const http = require('http');
const url = 'http://example.com';
http.get(url, (res) => {
let data = '';
res.on('data', (chunk) => {
data += chunk;
});
res.on('end', () => {
console.log(data);
});
});
Replace http.//example.com with the url of your choice to scrape the webpages,
Step 5 Scraping HTML with Node.js:
Once you have the HTML content of a web page, you need to parse it to extract the data you need.
Several third-party libraries are available for parsing HTML in Node.js, such as Cheerio and JSDOM.
Here is an example code snippet using Cheerio to parse HTML and extract data:
const cheerio = require('cheerio');
const request = require('request');
const url = 'https://example.com';
request(url, (error, response, html) => {
if (!error && response.statusCode == 200) {
const $ = cheerio.load(html);
const title = $('title').text();
const firstParagraph = $('p').first().text();
console.log(title);
console.log(firstParagraph);
}
});
This code uses the request library to fetch the HTML content of the web page at url and then uses Cheerio to parse the HTML and extract the title and the first paragraph.
How to handle javascript and dynamic content using Node.js?
⇧ Many modern web pages use JavaScript to render dynamic content, making it difficult to scrape them.
To handle JavaScript rendering, you can use headless browsers like Puppeteer and Playwright, which allow you to simulate a browser environment and scrape dynamic content.
Here is an example code snippet using Puppeteer to scrape a web page that renders content with JavaScript:
const puppeteer = require('puppeteer');
(async () => {
const browser = await puppeteer.launch();
const page = await browser.newPage();
await page.goto('https://example.com');
const title = await page.$eval('title', el => el.textContent);
const firstParagraph = await page.$eval('p', el => el.textContent);
console.log(title);
console.log(firstParagraph);
await browser.close();
})();
This code uses Puppeteer to launch a headless browser, navigate to the web page at url, and extract the title and the first paragraph.
The page.$eval() method selects and extracts data from HTML elements.
Various ways to extract webpage data using NodeJS
⇧
Here are some libraries you can use to scrape webpages using NodeJS easily:
Cheerio: is a fast, flexible, and lightweight implementation of core jQuery designed for the server side.
JSDOM: is a pure-JavaScript implementation of the DOM for Node.js.
It provides a way to create a DOM environment in Node.js and manipulate it with a standard API.
Puppeteer: is a Node.js library that provides a high-level API to control headless Chrome or Chromium.
It can be used for web scraping, automated testing, crawling, and rendering.
Best Practices for Web Scraping with Node.js
⇧
Here are some best practices to follow when using Node.js for web scraping:
Before scraping a website, read their terms of use.
Ensure the webpage doesn’t have restrictions on web scraping or frequency of scraping webpages.
Limit the number of HTTP requests to prevent overloading the website by controlling the frequency of requests.
Set appropriate headers in your HTTP requests to mimic the behavior of a regular user.
Cache webpages and extracted data to reduce the load on the website.
Web scraping can be error-prone due to the complexity and variability of websites.
Monitor and adjust your scraping activity and adjust your rate limiting, headers, and other settings as needed.
Event Loop.
As opposed to how many languages handle concurrency, with multi-threading, JavaScript has always only used a single thread and performed blocking operations in an asynchronous fashion, relying primarily on callback functions (or function pointers, as C developers may call them).
Let's check that quickly out with a simple web server example:
// Import the "http" package
const http = require('http');
// Use TCP port 3000 for our server
const PORT = 3000;
// Create a server instance and provide a request handler callback function
const server = http.createServer((req, res) => {
res.statusCode = 200;
res.setHeader('Content-Type', 'text/plain');
res.end('Hello World');
});
// Start listening on port 3000
server.listen(port, () => {
console.log(`Server running at PORT:${port}/`);
});
Here, we import the HTTP standard library with require, then create a server object with createServer and pass it an anonymous handler function, which the library will invoke for each incoming HTTP request.
Finally, we listen on the specified port - and that's actually it.
There are two interesting bits here and both already hint at our event loop and JavaScript's asynchronicity:
The handler function we pass to createServer
The fact that listen is not a blocking call, but returns immediately
In most other languages, we'd usually have an accept function/method, which would block our thread and return the connection socket of the connecting client.
At this point, the latest, we'd have to switch to multi-threading, as otherwise we could handle exactly one connection at a time.
In this case, however, we don't have to deal with thread management and we always stay with one thread, thanks to callbacks and the event loop.
As mentioned, listen will return immediately, but - although there's no code following our listen call - the application won't exit immediately.
That is because we still have a callback registered via createServer (the function we passed).
Whenever a client sends a request, Node.js will parse it in the background and call our anonymous function and pass the request object.
The only thing we have to pay attention to here is to return swiftly and not block the function itself, but it's hard to do that, as almost all standard calls are asynchronous (either via callbacks or Promises) - just make sure you don't run while (true);But enough of theory, let's check it out, shall we?
If you have Node.js installed, all you need to do is save the code to the file MyServer.js and run it in your shell with node MyServer.js.
Now, just open your browser and load http://localhost:3000 - voilà, you should get a lovely "Hello World" greeting.
That was easy, wasn't it?
One could assume the single-threaded approach may come with performance issues, because it only has one thread, but it's actually quite the opposite and that's the beauty of asynchronous programming.
Single-threaded, asynchronous programming can have, especially for I/O intensive work, quite a few performance advantages, because one does not need to pre-allocate resources (e.g. threads).
All right, that was a very nice example of how we easily create a web server in Node.js, but we are in the business of scraping, aren't we? So let's take a look at the JavaScript HTTP client libraries.
HTTP clients: querying the web
HTTP clients are tools capable of sending a request to a server and then receiving a response from it.
Almost every tool that will be discussed in this article uses an HTTP client under the hood to query the server of the website that you will attempt to scrape.
1. Built-In HTTP Client
As mentioned in your server example, Node.js does ship by default with an HTTP library.
That library also has a built-in HTTP client.
// Import the "http" package
const http = require('http');
// Send a GET request to example.com and print the response
const req = http.request('http://example.com', res => {
const data = [];
res.on('data', _ => data.push(_))
res.on('end', () => console.log(data.join()))
});
// Close the connection
req.end();
It's rather easy to get started, as there are zero third-party dependencies to install or manage, however - as you can notice from our example - the library does require a bit of boilerplate, as it provides the response only in chunks and you eventually need to stitch them together manually.
You'll also need to use a separate library for HTTPS URLs.
In short, it's convenient because it comes out-of-the-box, but it may require you to write more code than you may want.
2. Fetch API
Another built-in method would be the Fetch API.
While browsers have supported it for a while already, it took Node.js a bit longer, but as of version 18, Node.js does support fetch().
The Fetch API heavily uses Promises and coupled with await, that can really provide you with lean and legible code.
async function fetch_demo()
{
// Request the Reddit URL and save the response in "resp"
const resp = await fetch('https://www.reddit.com/r/programming.json');
// Use the .json() method to parse the response as JSON object
console.log(await resp.json());
}
fetch_demo();
The only workaround we had to employ, was to wrap our code into a function, as await is not supported on the top-level yet.
Apart from that we really just called fetch() with our URL, awaited the response (Promise-magic happening in the background, of course), and used the json() function of our Response object (awaiting again) to get the response.
Mind you, an already JSON-parsed response 😲.
Not bad, two lines of code, no manual handling of data, no distinction between HTTP and HTTPS, and a native JSON object.fetch optionally accepts an additional options argument, where you can fine-tune your request with a specific request method (e.g. POST), additional HTTP headers, or pass authentication credentials.
3. Axios
Axios is pretty similar to Fetch.
It's also a Promise-based HTTP client and it runs in both, browsers and Node.js.
Users of TypeScript will also love its built-in type support.
One drawback, however, contrary to the libraries we mentioned so far, we do have to install it first.
npm install axios
Perfect, let's check out a first plain-Promise example:
// Import Axios
const axios = require('axios')
axios
// Request Reddit URL
.get('https://www.reddit.com/r/programming.json')
// Configure callback for the HTTP response
.then((response) => {
console.log(response)
})
// Configure error callback
.catch((error) => {
console.error(error)
});
Pretty straightforward.
Relying on Promises, we can certainly also use await again and make the whole thing a bit less verbose.
So let's wrap it into a function one more time:
async function getForum() {
try {
// Request Reddit URL and "await" the response
const response = await axios.get(
'https://www.reddit.com/r/programming.json'
)
// Print the response, once available and get() returned
console.log(response)
} catch (error) {
console.error(error)
}
}
All you have to do is call getForum! You can find the Axios library at Github.
4. SuperAgent
Much like Axios, SuperAgent is another robust HTTP client that has support for promises and the async/await syntax sugar.
It has a fairly straightforward API like Axios, but SuperAgent has more dependencies and is less popular.
Regardless, making an HTTP request with SuperAgent using promises, async/await, and callbacks looks like this:
const superagent = require("superagent")
const forumURL = "https://www.reddit.com/r/programming.json"
// callbacks
superagent
.get(forumURL)
.end((error, response) => {
console.log(response)
})
// promises
superagent
.get(forumURL)
.then((response) => {
console.log(response)
})
.catch((error) => {
console.error(error)
})
// promises with async/await
async function getForum() {
try {
const response = await superagent.get(forumURL)
console.log(response)
} catch (error) {
console.error(error)
}
}
You can find the SuperAgent library at GitHub and installing SuperAgent is as simple as npm install superagent.
SuperAgent plugins
One feature, that sets SuperAgent apart from the other libraries here, is its extensibility.
It features quite a list of plugins which allow for the tweaking of a request or response.
For example, the superagent-throttle plugin would allow you to define throttling rules for your requests.
5. Request
Even though it is not actively maintained any more, Request still is a popular and widely used HTTP client in the JavaScript ecosystem.
It is fairly simple to make an HTTP request with Request:
const request = require('request')
request('https://www.reddit.com/r/programming.json', function (
error,
response,
body
) {
console.error('error:', error)
console.log('body:', body)
})
What you will definitely have noticed here, is that we were neither using plain Promises nor await.
That is because Request still employs the traditional callback approach, however there are a couple of wrapper libraries to support await as well.
You can find the Request library at GitHub, and installing it is as simple as running npm install request.
Should you use Request? We included Request in this list because it still is a popular choice.
Nonetheless, development has officially stopped and it is not being actively maintained any more.
Of course, that does not mean it is unusable, and there are still lots of libraries using it, but the fact itself, may still make us think twice before we use it for a brand-new project, especially with quite a list of viable alternatives and native fetch support.
Comparison of the different libraries
Library
✔️ Pros
❌ Cons
HTTP package
Supported out-of-the-box
Relies only on callbacks Separate libraries for HTTP and HTTPS
Fetch
Supported out-of-the-box Promise-based with support for await
Limited configurability
Axios
Support for TypeScript types
Requires additional dependency
SuperAgent
Extensible with plugins
Requires additional dependency
Request
Still a popular choice
Relies only on callbacks Requires additional dependency Not maintained any more
Tired of getting blocked while scraping the web?
Join 20,000 users using our API to get the data they need!
Try ScrapingBee for Free
Data Extraction in JavaScript
Fetching the content of a site is, undoubtedly, an important step in any scraping project, but it's only the first step and we actually need to locate and extract the data as well.
This is what we are going to check out next, how we can handle an HTML document in JavaScript and how to locate and select information for data extraction.
First off, regular expressions 🙂
Regular expressions: the hard way
The simplest way to get started with web scraping without any dependencies, is to use a bunch of regular expressions on the HTML content you received from your HTTP client.
But there is a big tradeoff.
While absolutely great in their domain, regular expressions are not ideal for parsing document structures like HTML.
Plus, newcomers often struggle with getting them right ("do I need a look-ahead or a look-behind?").
For complex web scraping, regular expressions can also get out of hand.
With that said, let's give it a go nonetheless.
Say there's a label with some username in it and we want the username.
This is similar to what you'd have to do if you relied on regular expressions:
const htmlString = '<label>Username: John Doe</label>'
const result = htmlString.match(/<label>Username: (.+)<\/label>/)
console.log(result[1])
// John Doe
We are using String.match() here, which will provide us with an array containing the data of the evaluation of our regular expression.
As we used a capturing group ((.+)), the second array element (result[1]) will contain whatever that group managed to capture.
While this certainly worked in our example, anything more complex will either not work or will require a way more complex expression.
Just imagine you have a couple of <label> elements in your HTML document.
Don't get us wrong, regular expressions are an unimaginable great tool, just not for HTML 😊 - so let us introduce you to the world of CSS selectors and the DOM.
Cheerio: Core jQuery for traversing the DOM
Cheerio is an efficient and lightweight library that allows you to use the rich and powerful API of jQuery on the server-side.
If you have used jQuery before, you will feel right at home with Cheerio.
It provides you with an incredibly easy way to parse an HTML string into a DOM tree, which you can then access via the elegant interface you may be familiar with from jQuery (including function-chaining).
// Import Cheerio
const cheerio = require('cheerio')
// Parse the provided HTML into a Cheerio object
const $ = cheerio.load('<h2>Hello world</h2>')
// Set the text of the "h2" tag and add an HTML class
$('h2.title').text('Hello there!')
$('h2').addClass('welcome')
// Print the modified HTML document
$.html()
// <h2>Hello there!</h2>
As you can see, using Cheerio really is almost identical to how you'd use jQuery.
Keep in mind, Cheerio really focuses on DOM-manipulation and you won't be able to directly "port" jQuery functionality, such as XHR/AJAX requests or mouse handling (e.g. onClick), one-to-one in Cheerio.
Cheerio is a great tool for most use cases when you need to handle the DOM yourself.
Of course, if you want to crawl a JavaScript-heavy site (e.g. typical Single-page applications) you may need something closer to a full browser engine.
We'll be talking about that in just second, under Headless Browsers in JavaScript.
Time for a quick Cheerio example, wouldn't you agree? To demonstrate the power of Cheerio, we will attempt to crawl the r/programming forum in Reddit and get a list of post names.
First, install Cheerio and Axios by running the following command: npm install cheerio axios.
Then create a new file called crawler.js and copy/paste the following code:
// Import Axios and Cheerio
const axios = require('axios');
const cheerio = require('cheerio');
const getPostTitles = async () => {
try {
// Load Reddit
const { data } = await axios.get(
'https://old.reddit.com/r/programming/'
);
// Parse HTML with Cheerio
const $ = cheerio.load(data);
// Initialise empty data array
const postTitles = [];
// Iterate over all anchor links for the given selector and ....
$('div > p.title > a').each((_idx, el) => {
// ....
extract for each the tag text and add it to the data array
const postTitle = $(el).text()
postTitles.push(postTitle)
});
// Return the array with all titles
return postTitles;
} catch (error) {
throw error;
}
};
// Wait for the promise to fulfill and print the title array it returned
getPostTitles()
.then((postTitles) => console.log(postTitles));getPostTitles() is an asynchronous function that will crawl the subreddit r/programming forum.
First, the HTML of the website is obtained using a simple HTTP GET request with the Axios HTTP client library.
Then, the HTML data is fed into Cheerio using the cheerio.load() function.
Wonderful, we now have, in good old-fashioned jQuery-manner, the fully parsed HTML document as DOM tree in $.
What's next? Well, it might not be a bad idea to know where to get our posting titles from.
So, let's right click one of the titles and pick Inspect.
That should get us right to the right element in the browser's developer tools.
Excellent, equipped with our knowledge on XPath or CSS selectors, we can now easily compose the expression we need for that element.
For our example, we chose CSS selectors and following one just works beautifully.
div > p.title > a
If you used jQuery, you probably know what we are up to, right? 😏
$('div > p.title > a')
You were absolutely right.
The Cheerio call is identical to jQuery (there was a reason why we used $ for our DOM variable before) and using Cheerio with our CSS selector will give us the very list of elements matching our selector.
Now, we just need to iterate with each() over all elements and call their text() function to get their text content.
💯 jQuery, isn't it?
So much about the explanation.
Time to run our code.
Open up your shell and run node crawler.js.
You should now have a list of post titles similar to this:
[
'The State of the Subreddit (May 2024)',
"Stack Overflow bans users en masse for rebelling against OpenAI partnership — users banned for deleting answers to prevent them being used to train ChatGPT | Tom's Hardware",
'Stack Overflow Community is Not Happy With The OpenAI Deal',
"I'm sorry..
I built another tool",
`Development notes from xkcd's "Machine"`,
'How Stripe Prevents Double Payment Using Idempotent API',
'How many jobs are available in technology in the US?',
'Test Failures Should Be Actionable',
'Approach to studying - generally vs for specific task.',
'RAG With PostgreSQL',
'Is programming easier that ever to learn?',
'Lincoln Learning Solutions',
'Did GitHub Copilot really increase my productivity?',
'"usbredir is the name of a network protocol for sending USB device traffic over a network connection.
It is also the name of the software package offering a parsing library, a usbredirhost library and several utilities implementing this protocol." The protocol is "completely independent of spice."',
'Codeacademy',
'C++23: std::expected - Monadic Extensions',
'Libyear',
'Free python data visualization libraries',
'Awesome Regex: The best regex tools, tutorials, libs, etc.
for all major regex flavors',
'Best Online Courses for Data Science with R Programming in 2024',
"Website Carbon Calculator v3 | What's your site's carbon footprint?",
'Java library',
'I built and am sharing my code for a live EEG brainwave visualization app using Python, PyQt6 and the Muse headband!',
'The search for easier safe systems programming',
'Facebook API AdSet',
'Learning Python'
]
While this is a simple use case, it demonstrates the simple nature of the API provided by Cheerio.
Do not forget to check out our Node.js Axios proxy tutorial if you want to learn more about using proxies for web scraping!
If your use case requires the execution of JavaScript and loading of external sources, the following few options will be helpful.
jsdom: the DOM for Node
Similarly to how Cheerio replicates jQuery on the server-side, jsdom does the same for the browser's native DOM functionality.
Unlike Cheerio, however, jsdom does not only parse HTML into a DOM tree, it can also handle embedded JavaScript code and it allows you to "interact" with page elements.
Instantiating a jsdom object is rather easy:
// Import jsdom
const { JSDOM } = require('jsdom')
// Parse the given HTML document with jsdom
const { document } = new JSDOM(
'<h2>Hello world</h2>'
).window
// Use querySelector() to get the h2 element with the specified HTML class
const heading = document.querySelector('.title')
// Set its text and add a class
heading.textContent = 'Hello there!'
heading.classList.add('welcome')
heading.innerHTML
// <h2>Hello there!</h2>
Here, we imported the library with require and created a new jsdom instance using the constructor and passed our HTML snippet.
Then, we simply used querySelector() (as we know it from front-end development) to select our element and tweaked its attributes a bit.
Fairly standard and we could have done that with Cheerio as well, of course.
What sets jsdom, however, apart is aforementioned support for embedded JavaScript code and, that, we are going to check out now.
The following example uses a simple local HTML page, with one button adding a <div> with an ID.
const { JSDOM } = require("jsdom")
const HTML = `
<html>
<body>
<button onclick="const e = document.createElement('div'); e.id = 'myid'; this.parentNode.appendChild(e);">Click me</button>
</body>
</html>`;
const dom = new JSDOM(HTML, {
runScripts: "dangerously",
resources: "usable"
});
const document = dom.window.document;
const button = document.querySelector('button');
console.log("Element before click: " + document.querySelector('div#myid'));
button.click();
console.log("Element after click: " + document.querySelector('div#myid'));
Nothing too complicated here:
we require() jsdom
set up our HTML document
pass HTML to our jsdom constructor (important, we need to enable runScripts)
select the button with a querySelector() call
and click() it
Voilà, that should give us this output
Element before click: null
Element after click: [object HTMLDivElement]
Fairly straightforward and the example showcased how we can use jsdom to actually execute the page's JavaScript code.
When we loaded the document, there was initially no <div>.
Only once we clicked the button, it was added by the site's code, not our crawler's code.
In this context, the important details are runScripts and resources.
These flags instruct jsdom to run the page's code, as well as fetch any relevant JavaScript files.
As jsdom's documentation points out, that could potentially allow any site to escape the sandbox and get access to your local system, just by crawling it.
Proceed with caution please.
jsdom is a great library to handle most of typical browser tasks within your local Node.js instance, but it still has some limitations and that's where headless browsers really come to shine.
💡 We released a new feature that makes this whole process way simpler.
You can now extract data from HTML with one simple API call.
Feel free to check the documentation here.
Headless Browsers in JavaScript
Sites become more and more complex and often regular HTTP crawling won't suffice any more, but one actually needs a full-fledged browser engine, to get the necessary information from a site.
This is particularly true for SPAs (Single-page_application) which heavily rely on JavaScript and dynamic and asynchronous resources.
Browser automation and headless browsers come to the rescue here.
Let's check out how they can help us to easily crawl Single-page Applications and other sites making use of JavaScript.
1. Puppeteer: the headless browser
Puppeteer, as the name implies, allows you to manipulate the browser programmatically, just like how a puppet would be manipulated by its puppeteer.
It achieves this by providing a developer with a high-level API to control a headless version of Chrome by default and can be configured to run non-headless.
Taken from the Puppeteer Docs (Source)
Puppeteer is particularly more useful than the aforementioned tools because it allows you to crawl the web as if a real person were interacting with a browser.
This opens up a few possibilities that weren't there before:
You can get screenshots or generate PDFs of pages.
You can crawl a Single Page Application and generate pre-rendered content.
You can automate many different user interactions, like keyboard inputs, form submissions, navigation, etc.
It could also play a big role in many other tasks outside the scope of web crawling like UI testing, assist performance optimization, etc.
Quite often, you will probably want to take screenshots of websites or, get to know about a competitor's product catalog.
Puppeteer can be used to do this.
To start, install Puppeteer by running the following command: npm install puppeteer
This will download a bundled version of Chromium which takes up about 180 to 300 MB, depending on your operating system.
You can avoid that step, and use an already installed setup, by specifying a couple of Puppeteer environment variables, such as PUPPETEER_SKIP_CHROMIUM_DOWNLOAD.
Generally, though, Puppeteer does recommended to use the bundled version and does not support custom setups.
Let's attempt to get a screenshot and PDF of the r/programming forum in Reddit, create a new file called crawler.js, and copy/paste the following code:
const puppeteer = require('puppeteer')
async function getVisual() {
try {
const URL = 'https://www.reddit.com/r/programming/'
const browser = await puppeteer.launch()
const page = await browser.newPage()
await page.goto(URL)
await page.screenshot({ path: 'screenshot.png' })
await page.pdf({ path: 'page.pdf' })
await browser.close()
} catch (error) {
console.error(error)
}
}
getVisual()getVisual() is an asynchronous function that will take a screenshot of our page, as well as export it as PDF document.
To start, an instance of the browser is created by running puppeteer.launch().
Next, we create a new browser tab/page with newPage().
Now, we just need to call goto() on our page instance and pass it our URL.
All these functions are of asynchronous nature and will return immediately, but as they are returning a JavaScript Promise, and we are using await, the flow still appears to be synchronous and, hence, once goto "returned", our website should have loaded.
Excellent, we are ready to get pretty pictures.
Let's just call screenshot() on our page instance and pass it a path to our image file.
We do the same with pdf() and voilà, we should have at the specified locations two new files.
Because we are responsible netizens, we also call close() on our browser object, to clean up behind ourselves.
That's it.
Once thing to keep in mind, when goto() returns, the page has loaded but it might not be done with all its asynchronous loading.
So depending on your site, you may want to add additional logic in a production crawler, to wait for certain JavaScript events or DOM elements.
But let's run the code.
Pop up a shell window, type node crawler.js, and after a few moments, you should have exactly the two mentioned files in your directory.
It's a great tool and if you are really keen on it now, please also check out our other guides on Puppeteer.
How to download a file with PuppeteerHandling and submitting HTML forms with PuppeteerUsing Puppeteer with Python and Pyppeteer
2. Nightmare: an alternative to Puppeteer
If Puppeteer is too complex for your use case or there are issues with the default Chromium bundle, you might want to check out Nightmare as well.
Although it is not actively developed any more, it still provides easy access to a proper browser engine and comes with a similar browser automation interface as Puppeteer.
It uses Electron and web and scraping benchmarks indicate it shows a significantly better performance than its predecessor PhantomJS.
As so often, our journey starts with NPM: npm install nightmare
Once Nightmare is available on your system, we will use it to find ScrapingBee's website through a Brave search.
To do so, create a file called crawler.js and copy-paste the following code into it:
// Import and instantiate Nightmare
const Nightmare = require('nightmare')
const nightmare = Nightmare()
nightmare
// Load Brave page
.goto('https://search.brave.com/')
// Enter search term into text box
.type('#searchbox', 'ScrapingBee')
// Click the search button
.click('#submit-button')
// Wait until search listing is available
.wait('#results a')
// Query first search link
.evaluate(
() => document.querySelector('#results a').href
)
.end()
.then((link) => {
console.log('ScrapingBee Web Link:', link)
})
.catch((error) => {
console.error('Search failed:', error)
})
After the usual library import with require, we first create a new instance of Nightmare and save that in nightmare.
After that, we are going to have lots of fun with function-chaining and Promises 🥳
We use goto() to load Brave from https://search.brave.com
We type our search term "ScrapingBee" in Brave's search input, with the CSS selector #searchbox (Brave's quite straightforward with its naming, isn't it?)
We click the submit button to start our search.
Again, that's with the CSS selector #submit-button (Brave's really straightforward, we love that❣️)
Let's take a quick break, until Brave returns the search list.
wait, with the right selector works wonders here.
wait also accepts time value, if you need to wait for a specific period of time.
Once Nightmare got the link list from Brave, we simply use evaluate() to run our custom code on the page (in this case querySelector()) and get the first <a> element matching our selector, and return its href attribute.
Last but not least, we call end() to run and complete our task queue.
That's it, folks.
end() returns a standard Promise with the value from our call to evaluate().
Of course, you could also use await here.
That was pretty easy, wasn't it? And if everything went all right 🤞, we should have now got the link to ScrapingBee's website at https://www.scrapingbee.comScrapingBee Web Link: https://www.scrapingbee.com/
Do you want to try it yourself? Just run node crawler.js in your shell 👍
3. Playwright, the new web scraping framework
Playwright is a cross-language and cross-platform framework by Microsoft.
Its main advantage over Puppeteer is that it is cross platform and very easy to use.
Here is how to simply scrape a page with it:
// Import Playwright
const playwright = require('playwright');
async function main() {
// Launch Chrome in full-UI mode
const browser = await playwright.chromium.launch({
headless: false // setting this to true will not run the UI
});
// Open new page
const page = await browser.newPage();
// Navigate to Yahoo
await page.goto('https://finance.yahoo.com/world-indices');
await page.waitForTimeout(5000); // wait for 5 seconds
await browser.close();
}
main();
Feel free to check out our Playwright tutorial if you want to learn more.
Comparison of headless browser libraries
Library
✔️ Pros
❌ Cons
Puppeteer
Very popular
Chrome-only
Nightmare
Significant better performance than PhantomJS
No longer maintained Chrome-only
Playwright
Easier integration than Pupeteer Cross-browser support
Still relatively new
Summary
Phew, that was a long read! But we hope, our examples managed to give you a first glimpse into the world of web scraping with JavaScript and which libraries you can use to crawl the web and scrape the information you need.
Let's give it a quick recap, what we learned today was:
✅ Node.js is a JavaScript runtime that allows JavaScript to be run server-side.
It has a non-blocking nature thanks to the Event Loop.
✅ HTTP clients, such as the native libraries and fetch, as well as Axios, SuperAgent, node-fetch, and Request, are used to send HTTP requests to a server and receive a response.
✅ Cheerio abstracts the best out of jQuery for the sole purpose of running it server-side for web crawling but does not execute JavaScript code.
✅ JSDOM creates a DOM per the standard JavaScript specification out of an HTML string and allows you to perform DOM manipulations on it.
✅ Puppeteer and Nightmare are high-level browser automation libraries, that allow you to programmatically manipulate web applications as if a real person were interacting with them.
This article focused on JavaScript's scraping ecosystem and its tools.
However, there are certainly also other aspects to scraping, which we could not cover in this context.
For example, sites often employ techniques to recognize and block crawlers.
You'll want to avoid these and blend in as normal visitor.
On this subject, and more, we have an excellent, dedicated guide on how not to get blocked as a crawler.
Check it out.
💡 Should you love scraping, but the usual time-constraints for your project don't allow you to tweak your crawlers to perfection, then please have a look at our scraping API platform.
ScrapingBee was built with all these things in mind and has got your back in all crawling tasks.
Using node.js as a simple web server
Simplest Node.js server is just:
$ npm install http-server -g
Now you can run a server via the following commands:
$ cd MyApp
$ http-server
If you're using NPM 5.2.0 or newer, you can use http-server without installing it with npx.
This isn't recommended for use in production but is a great way to quickly get a server running on localhost.
$ npx http-server
Or, you can try this, which opens your web browser and enables CORS requests:
$ http-server -o --cors
For more options, check out the documentation for http-server on GitHub, or run:
$ http-server --help
Lots of other nice features and brain-dead-simple deployment to NodeJitsu.
Feature Forks
Of course, you can easily top up the features with your own fork.
You might find it's already been done in one of the existing 800+ forks of this project:
https://github.com/nodeapps/http-server/network
Light Server: An Auto Refreshing Alternative
A nice alternative to http-server is light-server.
It supports file watching and auto-refreshing and many other features.
$ npm install -g light-server
$ light-server
Add to your directory context menu in Windows Explorer
reg.exe add HKCR\Directory\shell\LightServer\command /ve /t REG_EXPAND_SZ /f /d "\"C:\nodejs\light-server.cmd\" \"-o\" \"-s\" \"%V\""
Simple JSON REST server
If you need to create a simple REST server for a prototype project then json-server might be what you're looking for.
Auto Refreshing Editors
Most web page editors and IDE tools now include a web server that will watch your source files and auto refresh your web page when they change.
I use Live Server with Visual Studio Code.
The open source text editor Brackets also includes a NodeJS static web server.
Just open any HTML file in Brackets, press "Live Preview" and it starts a static server and opens your browser at the page.
The browser will **auto refresh whenever you edit and save the HTML file.
This especially useful when testing adaptive web sites.
Open your HTML page on multiple browsers/window sizes/devices.
Save your HTML page and instantly see if your adaptive stuff is working as they all auto refresh.
PhoneGap Developers
If you're coding a hybrid mobile app, you may be interested to know that the PhoneGap team took this auto refresh concept on board with their new PhoneGap App.
This is a generic mobile app that can load the HTML5 files from a server during development.
This is a very slick trick since now you can skip the slow compile/deploy steps in your development cycle for hybrid mobile apps if you're changing JS/CSS/HTML files — which is what you're doing most of the time.
They also provide the static NodeJS web server (run phonegap serve) that detects file changes.
PhoneGap + Sencha Touch Developers
I've now extensively adapted the PhoneGap static server & PhoneGap Developer App for Sencha Touch & jQuery Mobile developers.
Check it out at Sencha Touch Live.
Supports --qr QR Codes and --localtunnel that proxies your static server from your desktop computer to a URL outside your firewall! Tons of uses.
Massive speedup for hybrid mobile devs.
Cordova + Ionic Framework Developers
Local server and auto refresh features are baked into the ionic tool.
Just run ionic serve from your app folder.
Even better ...
ionic serve --lab to view auto-refreshing side by side views of both iOS and Android.
Web Scraping In Node Js With Multiple ExamplesScraping the Web With Node.jsAn Introduction to Web Scraping with Node JS
What will we need?
For this project we’ll be using Node.js.
We’ll also be using two open-sourced npmmodules to make today’s task a little easier:
request-promise — Request is a simple HTTP client that allows us to make quick and easy HTTP calls.
cheerio — jQuery for Node.js.
Cheerio makes it easy to select, edit, and view DOM elements.
Project Setup.
Create a new project folder.
Within that folder create an index.js file.
We’ll need to install and require our dependencies.
Open up your command line, and install and save: request, request-promise, and cheerio
npm install --save request request-promise cheerio
Then require them in our index.js file:
const rp = require("request-promise");
const cheerio = require("cheerio");
Setting up the Request
request-promise accepts an object as input, and returns a promise.
The options object needs to do two things:
Pass in the url we want to scrape.
Tell Cheerio to load the returned HTML so that we can use it.
Here’s what that looks like:
const options = {
uri: `https://www.yourURLhere.com`,
transform: function (body) { return cheerio.load(body); }
};
The uri key is simply the website we want to scrape.
The transform key tells request-promise to take the returned body and load it into Cheerio before returning it to us.
Awesome.
We’ve successfully set up our HTTP request options! Here’s what your code should look like so far:
const rp = require("request-promise");
const cheerio = require("cheerio");const options = {
uri: `https://www.yourURLhere.com`,
transform: function (body) { return cheerio.load(body); }
};
Make the Request
Now that the options are taken care of, we can actually make our request.
The boilerplate in the documentation for that looks like this:
rp(OPTIONS)
.then(function (data) {
// REQUEST SUCCEEDED:DO SOMETHING
})
.catch(function (err) {
// REQUEST FAILED: ERROR OF SOME KIND
});
We pass in our options object to request-promise, then wait to see if our request succeeds or fails.
Either way, we do something with the returned data.
Knowing what the documentation says to do, lets create our own version:
rp(options)
.then(($) => {
console.log($);
})
.catch((err) => {
console.log(err);
});
The code is pretty similar.
The big difference is I’ve used arrow functions.
I’ve also logged out the returned data from our HTTP request.
We’re going to test to make sure everything is working so far.
Replace the placeholder uri with the website you want to scrape.
Then, open up your console and type:
node index.js// LOGS THE FOLLOWING:
{ [Function: initialize]
fn:
initialize {
constructor: [Circular],
_originalRoot:
{ type: "root",
name: "root",
namespace: "http://www.w3.org/1999/xhtml",
attribs: {},
...
If you don’t see an error, then everything is working so far — and you just made your first scrape!
Here is the full code of our boilerplate:
const rp = require('request-promise');
const cheerio = require('cheerio');
const options = {
uri: `https://www.google.com`,
transform: function (body) { return cheerio.load(body); }
};
rp(options)
.then(($) => {
console.log($);
})
.catch((err) => {
console.log(err);
});
Boilerplate web scraping code
Using the Data
What good is our web scraper if it doesn’t actually return any useful data? This is where the fun begins.
There are numerous things you can do with Cheerio to extract the data that you want.
First and foremost, Cheerio’s selector implementation is nearly identical to jQuery’s.
So if you know jQuery, this will be a breeze.
If not, don’t worry, I’ll show you.
Selectors
The selector method allows you to traverse and select elements in the document.
You can get data and set data using a selector.
Imagine we have the following HTML in the website we want to scrape:
<ul id="cities">
<li class="large">New York</li>
<li id="medium">Portland</li>
<li class="small">Salem</li>
</ul>
We can select id’s using (#), classes using (.), and elements by their tag names, ex: div.
$(".large").text() // New York
$("#medium").text() // Portland
$("li[class=small]").html() // <li class="small">Salem</li>
Looping
Just like jQuery, we can also iterate through multiple elements with the each() function.
Using the same HTML code as above, we can return the inner text of each li with the following code:
$("li").each(function(i, elem) {
cities[i] = $(this).text();
});// New York Portland Salem
Finding
Imagine we have two lists on our web site:
<ul id="cities">
<li class="large">New York</li>
<li id="c-medium">Portland</li>
<li class="small">Salem</li>
</ul>
<ul id="towns">
<li class="large">Bend</li>
<li id="t-medium">Hood River</li>
<li class="small">Madras</li>
</ul>
We can select each list using their respective ID’s, then find the small city/town within each list:
$("#cities").find(".small").text()
// Salem$("#towns").find(".small").text()
// Madras
Finding will search all descendant DOM elements, not just immediate children as shown in this example.
Children
Children is similar to find.
The difference is that children only searches for immediate children of the selected element.
$("#cities").children("#c-medium").text();
// Portland
Text > HTML
Up until this point, all of my examples have included the .text() function.
Hopefully you’ve been able to figure out that this function is what gets the text of the selected element.
You can also use .html() to return the html of the given element:
$(".large").text()
// Bend$(".large").html()
// <li class="large">Bend</li>
Additional Methods
There are more methods than I can count, and the documentation for all of them is available here.
Chrome Developer Tools
Don’t forget, the Chrome Developer Tools are your friend.
In Google Chrome, you can easily find element, class, and ID names using: CTRL + SHIFT + C
Finding class names with chrome dev tools
As you seen in the above image, I’m able to hover over an element on the page and the element name and class name of the selected element are shown in real-time!
Limitations
As Jaye Speaks points out:
MOST websites modify the DOM using JavaScript.
Unfortunately Cheerio doesn’t resolve parsing a modified DOM.
Dynamically generated content from procedures leveraging AJAX, client-side logic, and other async procedures are not available to Cheerio.
// include file system module
var fs = require('fs');
// read file sample.html
fs.readFile('sample.html',
// callback function that is called when reading file is done
function(err, data) {
if (err) throw err;
// data is a buffer containing file content
console.log(data.toString('utf8'))
});
Connection between multiple clients to a single server
On server-side, the 'request' event will fire every time a client connects to your websocket server.
Your websocket server will be able to handle multiple clients out of the box.
Check the server-side usage example for websocket module here: https://www.npmjs.com/package/websocket#server-example
Installation
In your project root:
$ npm install websocket
Then in your code:
var WebSocketServer = require('websocket').server;
var WebSocketClient = require('websocket').client;
var WebSocketFrame = require('websocket').frame;
var WebSocketRouter = require('websocket').router;
var W3CWebSocket = require('websocket').w3cwebsocket;
Server Example
#!/usr/bin/env node
var WebSocketServer = require('websocket').server;
var http = require('http');
var server = http.createServer(function(request, response) {
console.log((new Date()) + ' Received request for ' + request.url);
response.writeHead(404);
response.end();
});
server.listen(8080, function() {
console.log((new Date()) + ' Server is listening on port 8080');
});
wsServer = new WebSocketServer({
httpServer: server,
// You should not use autoAcceptConnections for production
// applications, as it defeats all standard cross-origin protection
// facilities built into the protocol and the browser. You should
// *always* verify the connection's origin and decide whether or not
// to accept it.
autoAcceptConnections: false
});
function originIsAllowed(origin) {
// put logic here to detect whether the specified origin is allowed.
return true;
}
wsServer.on('request', function(request) {
if (!originIsAllowed(request.origin)) {
// Make sure we only accept requests from an allowed origin
request.reject();
console.log((new Date()) + ' Connection from origin ' + request.origin + ' rejected.');
return;
}
var connection = request.accept('echo-protocol', request.origin);
console.log((new Date()) + ' Connection accepted.');
connection.on('message', function(message) {
if (message.type === 'utf8') {
console.log('Received Message: ' + message.utf8Data);
connection.sendUTF(message.utf8Data);
}
else if (message.type === 'binary') {
console.log('Received Binary Message of ' + message.binaryData.length + ' bytes');
connection.sendBytes(message.binaryData);
}
});
connection.on('close', function(reasonCode, description) {
console.log((new Date()) + ' Peer ' + connection.remoteAddress + ' disconnected.');
});
});
Client Example
This is a simple example client that will print out any utf-8 messages it receives on the console, and periodically sends a random number.
This code demonstrates a client in Node.js, not in the browser
var WebSocketClient = require('websocket').client;
var client = new WebSocketClient();
client.on('connectFailed', function(error) {
console.log('Connect Error: ' + error.toString());
});
client.on('connect', function(connection) {
console.log('WebSocket Client Connected');
connection.on('error', function(error) {
console.log("Connection Error: " + error.toString());
});
connection.on('close', function() {
console.log('echo-protocol Connection Closed');
});
connection.on('message', function(message) {
if (message.type === 'utf8') {
console.log("Received: '" + message.utf8Data + "'");
}
});
function sendNumber() {
if (connection.connected) {
var number = Math.round(Math.random() * 0xFFFFFF);
connection.sendUTF(number.toString());
setTimeout(sendNumber, 1000);
}
}
sendNumber();
});
client.connect('ws://localhost:8080/', 'echo-protocol');
TOP Node.JS Examples
https://bytescout.com/blog/node-js-code-examples.html
What is Node.js exactly, and what is Node.js used for? These are the essential questions we will answer here.
Essentially, Node.js enables developers to build server apps in JavaScript.
Projects in Node.js today commonly include:
Web Application framework
Messaging middleware
Servers for online gaming
REST APIs and Backend
Static file server
Node.js app development is wildly popular.
Projects built with Node.js plus a combination of front-end developer tools are faster than similar PHP apps because of efficient Async functionality supported by Node.
Node is also popular because now you can write JavaScript on both client and server.
This article covers the following aspects:
Building Node.js Skills
Under the Hood
First Node.js App
Build Your Own Node.js Module
Adding MySQL to Advanced Node.js Apps
Data Connection – Node JS Examples
Adding AngularJS Components
Best Practices for Fresh Ideas in Node.js
In this advanced intro to Node.js, we will explore the latest methods on how to create a Node.js module, and lead up to a method to create a simple Node.js app, in order to see the cutting-edge node in programming, as well as gain a full understanding of the Node.js app framework.
These are apps we can build with Node.js and actually run simultaneously.
Building Node.js Skills
The best Node.js tutorials and MOOC online courses explain methods with well-documented code samples and snippets on how to learn Node.jsproperly.
Extensive online education programs teach you all about Node.js and include topics such as writing node modules and how to create a node module.
MOOCs cover more in-depth topics ranging from simple Node.js applications to how to create a node server.
Node.js is an open-source and as such the organization’s own documentation is a great resource for study.
Node’s API reference documentation contains details on functions and objects used to build Node.js programs.
It also illustrates the arguments or parameters each method requires, as well as returned values of methods, and related predictable errors associated with each method.
Importantly, developers take careful note of method variations by the version of Node.js as documented – the latest version is 9.10.1.
Additional developer resources are provided such as security issues and updates, and the latest compatibility with ES6.
Under the Hood
Node uses Google Chrome’s runtime engine to translate JavaScript code to native machine code which runs on the server environment.
Node.js is an open-source framework that runs on most popular OS platforms like Windows, Linux, and Mac OS X.
Express.js, is the standard web application framework for use with Node.js, Express is a minimal framework with much of the functionality built as plugins.
A typical app will use Express for the backend, MongoDB database, and AngularJS frontend (called MEAN stack).
The standard “Hello world” in Node is:
var http = require('http');
http.createServer(function (req, res) {
res.writeHead(200, {'Content-Type': 'text/plain'});
res.end('Hello Node.js World!');
}).listen(8080);
First Node.js App
In order to follow our Node JS examples, be sure to download and install the latest Node.js and update Node.js dependencies.
The standard Node.js documentation includes complete details on how to install Node.js, and naturally, you will want to use the latest Node.js version.
Trawling Google for tips will produce hits like, “node latest version.” And many of these pages refer to a specific package in Ubuntu, along with related bug reports.
Making the distinction between beta and node latest stable version is important to developers who wish to experiment with the newest features.
Node.js generates dynamic page content, and in combination with AngularJS, the fastest possible single-page applications can be built easily. Node JS examples include creating and deleting server files, as well as open, read, and write ops to server databases.
Node is event-driven with events including HTTP requests.
Node files include tasks to be executed when triggered by these events.
With that background, let’s get started setting up a real Node.js application.
Use the command npm init to initialize a new npm-project.
This command creates a new package.json file and adds several lines of code for the basic structure, and this can be modified to track all the dependencies of the project.
In order to test that your Node setup is correct, let’s run a quick test.
Copy the “Hello Node World!” code above to a text file and name it, “test.js” to start.
Now open a command-line interface (CLI) and enter the command npm init.
You can now run your hello world in the CLI by typing: node test.js at the command prompt.
If this works, your computer is now functioning as a web server and listening for events or requests on port 8080.
Build Your Own Node.js Module
The require (‘http’) module is a built-in Node module that invokes the functionality of the HTTP library to create a local server.
To add your own Node.js modules use the export statement to make functions in your module available externally. Create a new text file to contain the functions in your module called, “modules.js” and add this function to return today’s date and time:
exports.CurrentDateTime = function () {
var d = new Date();
return d;
};
Next, you can add the require(‘./modules’); as below to include the modules file.
And by the way, Express framework can be included with a similar syntax as const express = require(‘express’); to expose all its methods.
Now you can reference the methods of your function in this way:
var http = require('http');
var dateTime = require('./modules');
http.createServer(function (req, res) {
res.writeHead(200, {'Content-Type': 'text/html'});
res.write("Current date and time: " + dateTime.CurrentDateTime());
res.end();
}).listen(8080);
As mentioned, the HTTP module exposed with createServer() creates an HTTP server and listens to the server port 8080, and then responds to client requests.
A function passed to the http.createServer() method will execute when a client accesses our computer at port 8080.
Adding MySQL to Advanced Node.js Apps
Today’s most popular combination of developer tools includes Express.js as a Node backend framework along with MySQL database and AngularJS frontend functionality.
We need an additional setup to make these work together and achieve full compatibility.
Naturally, the core components must be installed first, so let’s briefly discuss the order of doing so.
On Windows, for example, you may already have installed MySQL Server via the MySQL Installer, which is satisfactory for this example.
And MySQL X Protocol plugin may already be enabled – if not enable it now by re-configuring the MySQL Server.
Enabling the X Plugin exposes the use of MySQL as a document store.
Assuming Node and Express are now also installed, we will open a terminal and navigate to the location path to create a project.
In the desired folder, install the Express application generator, which creates the project files and dependencies for a new application.
At the CLI prompt just type: $ npm install express-generator –g and press Enter.
We want to use HTML instead of the native Jade interpreter of Express so just enter this command for the setup: $ express MySQL pname –ejs and hit Enter (name is the actual name of your MySQL DB.
You can now verify the new server is operating with the new app framework by entering: $ npm start and opening a browser to http://localhost:3000The next step is to connect Node.js to MySQL.
Enter this command:
$ npm install mysql-connector-nodejs at the CLI prompt and hit Enter to do so.
Now install AngularJS and Angular-Route modules with the following command: $ npm install angular@1.5.8 angular-route@1.5.8 and hit Enter.
With everything installed, we can begin coding the web application.
First, we will add a JSON file to the data folder with some data.
Call it freshideas.json for this project.
Add some data in a consistent format to ref later.
A Node programming example (JSON file record) might include:
{
"title_": "Node.js: Testing Improvements",
"link_": "http://mynodejs.com/freshideas/",
"intro_": "Using Node.js with MySQL",
"pub_": "Thu Sep 29 2016",
},
Now we will update the app to create a schema plus a collection to upload the initial data.
Next, open the ”www” file that is in the bin folder, which contains configuration details for the webserver to host the app.
Now, add a function to create the schema, the collection, and upload the JSON data file to the collection.
Add this code to the end of the “www” file:
function configuredbDataBase(callback) {
mysql.getSession({
host: 'localhost',
port: '33080',
dbUser: 'root',
dbPassword: ''pwd_
}).then(function (session) {
var schema = session.getSchema('mysqlPname');
schema.existsInDatabase().then(function (exists) {
if (!exists) {
session.createSchema('mysqlPname').then(function (Pnamechema) {
Promise.all([
newSchema.createCollection('Pname').then(function (PnameColl) {
PnameColl.add(initialData).execute().then(function (PnameAdded) {
var rowsAffected = PnameAdded.getAffectedItemsCount();
if (rowsAffected1 <= 0) {
console.log('No Pname Added');
}
else {
console.log(rowsAffected1 + 'Pname Added');
}
}).catch(function (err) {
console.log(err.message);
console.log(err.stack);
});
}).catch(function (err) {
console.log(err.message);
console.log(err.stack);
})
]).then(function () {
session.close();
callback(Done: Collection initialized');
});
}).catch(function (err) {
console.log(err.message);
console.log(err.stack);
});
}
else {
session.close();
callback('Database Already Configured');
}
});
}).catch(function (err) {
console.log(err.message);
console.log(err.stack);
});
}
function configureDataBase(callback) {
mysql.getSession({
host: 'localhost',
port: '33080',
dbUser: 'root',
dbPassword: ''
}).then(function (session) {
var schema = session.getSchema('mysqlPname');
schema.existsInDatabase().then(function (exists) {
if (!exists) {
session.createSchema('mysqlPname').then(function (newSchema) {
Promise.all([
newSchema.createCollection('Pname').then(function (PnameColl) {
PnameColl.add(initialData).execute().then(function (PnameAdded) {
var rowsAffected1 = PnameAdded.getAffectedItemsCount();
if (rowsAffected1 <= 0) {
console.log('No Pname Added');
}
else {
console.log(rowsAffected1 + ' Pname Added');
}
}).catch(function (err) {
console.log(err.message);
console.log(err.stack);
});
}
else {
session.close();
callback('Database Configured');
}
});
}).catch(function (err) {
console.log(err.message);
console.log(err.stack);
});
}
The above snippet illustrates how to configure the config for initialization and connecting the MySQL DB to the app, assigning the xdevapi module to the MySQL variable.
The MySQL variables are used by the configureDataBase function and must be defined prior to calling the function.
An instance of an EventEmitter is created and configured in the event that calls the function to create the schema and collection.
Data Connection – Node JS Examples
In this model, we will add a new file called Pname.js as consistent with the code to configure the MySQL.
The new module will contain the methods used over the collections.
As an example method let’s add a module to fetch documents from the collection.
First, we define two variables, one to load MySQL xdevapi and one to store the configuration for connections to the server.
Here is the basic code, which you can expand to suit your app:
var mysql_ = require('@mysql/xdevapi');
var config_ = {
host: 'localhost',
port: '33080',
userid: 'root',
password: '', pwd_
schema: 'mysqlPname',
collection: 'Pname'
};
Finally, we will add the method to get the export object of this module and then call getSession method to create a server connection.
When the session is running we can get the schema and collection containing the documents.
We then define one array variable as a container for documents that are returned from the collection.
Executing the find method without a filter will return all the documents.
If the execute method returned all documents they will be added to the array variable.
As such, we have a Node.js server capable of asynchronous access to the MySQL DB, and running in the Express.js context.
Adding AngularJS Components
To add components using the Angular framework to display the docs from Pname, we will create a folder in the public Javascripts path with the defined name, and this folder will contain the template to add new docs as well.
Begin by adding the new-comment.module.js component to the folder with the following code:
angular.module('newDoc', ['ngRoute']);
module('newDoc').
component('newDoc', {
templateUrl: '/javascripts/Doc/new-comment.template.html',
controller: ['$routeParams', 'Pname',
function NewDocController($routeParams, Pname) {
this.postIdl_ = $routeParams._Id;
this.addComment = function () {
if (!this.postIdl_ || (!this.comment || this.comment === ")) { return; }
Pname.addComment({ id: this.postId, Doc: this.Doc });
};
this.cancelAddComment = function () {
this.Doc= '', this.postIdl_ = '';
Pname.cancelAddDoc();
};
}
]
});
Here is an excellent view of the powerful capability to enable Angular as a frontend for a Node.js server.
The demo shows how to build a full-stack JavaScript app using all the platforms including Node.js examples with MySQL, via the framework Express, and AngularJS as frontend.
Best Practices for Fresh Ideas in Node.js
Node.js 8 version included Async and Await functions for handling asynchronous file loading.
This accelerated Node.js potential beyond PHP for many applications. It is essential to master these ES6 level functions to optimize your coding skills.
Node.js 8.5 introduced support for ES modules with import() and export().
Further, Node.js 8.8 offered HTTP/2 without a flag.
This supports server push and multiplexing and thus enables efficient loading of native modules in a browser.
Note that Express support is in progress – HTTP/2 is experimental in the scope of Node.js with libraries now in development.
Beyond the borders of Node.js itself, many supporting technologies enhance the developer experience, such as containers and virtualization.
Docker technology provides containers, which virtualize an OS and render a truly portable and scalable web application.
Node.js tutorial
Node.js is the runtime and npm is the Package Manager for Node.js modules.
To run a Node.js application, you will need to install the Node.js runtime on your machine.
The Node Package Manager is included in the Node.js distribution.
You'll need to open a new terminal (command prompt) for the node and npm command-line tools to be on your PATH.
Tip: To test that you've got Node.js correctly installed on your computer, open a new terminal and type node --help and you should see the usage documentation.
Hello World
Let's get started by creating the simplest Node.js application, "Hello World".
Create an empty folder called "hello", navigate into and open VS Code:
mkdir hello
cd hello
code .
Tip: You can open files or folders directly from the command line.
The period '.' refers to the current folder, therefore VS Code will start and open the Hello folder.
From the File Explorer toolbar, press the New File button:
and name the file app.js:
Create a simple string variable in app.js and send the contents of the string to the console:
var msg = 'Hello World';
console.log(msg);
save the file.
Running Hello World
It's simple to run app.js with Node.js.
From a terminal, just type:
node app.js
You should see "Hello World" output to the terminal and then Node.js returns.
Integrated Terminal
VS Code has an integrated terminal which you can use to run shell commands.
You can run Node.js directly from there and avoid switching out of VS Code while running command-line tools.
View > Terminal (⌃` (Windows, Linux Ctrl+`) with the backtick character) will open the integrated terminal and you can run node app.js there:
Debugging Hello World
VS Code ships with a debugger for Node.js applications.
Let's try debugging our simple Hello World application.
To set a breakpoint in app.js, put the editor cursor on the first line and press F9 or click in the editor left gutter next to the line numbers.
A red circle will appear in the gutter.
To start debugging, select the Run View in the Activity Bar:
You can now click Debug toolbar green arrow or press F5 to launch and debug "Hello World".
Your breakpoint will be hit and you can view and step through the simple application.
Notice that VS Code displays a different colored Status Bar to indicate it is in Debug mode and the DEBUG CONSOLE is displayed.
Now that you've seen VS Code in action with "Hello World", the next section shows using VS Code with a full-stack Node.js web app.
Note: We're done with the "Hello World" example so navigate out of that folder before you create an Express app.
You can delete the "Hello" folder if you wish as it is not required for the rest of the walkthrough.
An Express application
Express is a very popular application framework for building and running Node.js applications.
You can scaffold (create) a new Express application using the Express Generator tool.
The Express Generator is shipped as an npm module and installed by using the npm command-line tool npm.
Tip: To test that you've got npm correctly installed on your computer, type npm --help from a terminal and you should see the usage documentation.
Install the Express Generator by running the following from a terminal:
npm install -g express-generator
The -g switch installs the Express Generator globally on your machine so you can run it from anywhere.
We can now scaffold a new Express application called myExpressApp by running:
express myExpressApp --view pug
This creates a new folder called myExpressApp with the contents of your application.
The --view pug parameters tell the generator to use the pug template engine.
To install all of the application's dependencies (again shipped as npm modules), go to the new folder and execute npm install:
cd myExpressApp
npm install
At this point, we should test that our application runs.
The generated Express application has a package.json file which includes a start script to run node ./bin/www.
This will start the Node.js application running.
From a terminal in the Express application folder, run:
npm start
Tip: You can enable an explorer for the npm scripts in your workspace using the npm.enableScriptExplorer setting.
The Node.js web server will start and you can browse to http://localhost:3000 to see the running application.
Great code editing
Close the browser and from a terminal in the myExpressApp folder, stop the Node.js server by pressing CTRL+C.
Now launch VS Code:
code .
Note: If you've been using the VS Code integrated terminal to install the Express generator and scaffold the app, you can open the myExpressApp folder from your running VS Code instance with the File > Open Folder command.
The Node.js and Express documentation does a great job explaining how to build rich applications using the platform and framework.
Visual Studio Code will make you more productive in developing these types of applications by providing great code editing and navigation experiences.
Open the file app.js and hover over the Node.js global object __dirname.
Notice how VS Code understands that __dirname is a string.
Even more interesting, you can get full IntelliSense against the Node.js framework.
For example, you can require http and get full IntelliSense against the http class as you type in Visual Studio Code.
VS Code uses TypeScript type declaration (typings) files (for example node.d.ts) to provide metadata to VS Code about the JavaScript based frameworks you are consuming in your application.
Type declaration files are written in TypeScript so they can express the data types of parameters and functions, allowing VS Code to provide a rich IntelliSense experience.
Thanks to a feature called Automatic Type Acquisition, you do not have to worry about downloading these type declaration files, VS Code will install them automatically for you.
You can also write code that references modules in other files.
For example, in app.js we require the ./routes/index module, which exports an Express.Router class.
If you bring up IntelliSense on index, you can see the shape of the Router class.
Debug your Express app
You will need to create a debugger configuration file launch.json for your Express application.
Click on the Run icon in the Activity Bar and then the Configure gear icon at the top of the Run view to create a default launch.json file.
Select the Node.js environment by ensuring that the type property in configurations is set to "node".
When the file is first created, VS Code will look in package.json for a start script and will use that value as the program (which in this case is "${workspaceFolder}\\bin\\www) for the Launch Program configuration.
{
  "version": "0.2.0",
  "configurations": [
    {
      "type": "node",
      "request": "launch",
      "name": "Launch Program",
      "program": "${workspaceFolder}\\bin\\www"
    }
  ]
}
Save the new file and make sure Launch Program is selected in the configuration drop-down at the top of the Run view.
Open app.js and set a breakpoint near the top of the file where the Express app object is created by clicking in the gutter to the left of the line number.
Press F5 to start debugging the application.
VS Code will start the server in a new terminal and hit the breakpoint we set.
From there you can inspect variables, create watches, and step through your code.
Deploy your application
If you'd like to learn how to deploy your web application, check out the Deploying Applications to Azure tutorials where we show how to run your website in Azure.
websockets to communicate between client and node.js server
https://medium.com/@joekarlsson/complete-guide-to-node-client-server-communication-b156440c029
This is a demo shows a demo of a client connecting to a websocket server and sharing data.
Here is the server.js of a websocket.
'use strict';
const WebSocketServer = require('ws').Server
const wss = new WebSocketServer({ port: 8081 });
wss.on('connection', ((ws) => {
ws.on('message', (message) => {
console.log(`received: ${message}`);
});
ws.on('end', () => {
console.log('Connection ended...');
});
ws.send('Hello Client');
}));
Here is the client.js of a websocket.
console.log('open: ');
var ws = new WebSocket("ws://127.0.0.1:8081");
ws.onopen = function (event) {
console.log('Connection is open ...');
ws.send("Hello Server");
};
ws.onerror = function (err) {
console.log('err: ', err);
}
ws.onmessage = function (event) {
console.log(event.data);
document.body.innerHTML += event.data + '<br>';
};
ws.onclose = function() {
console.log("Connection is closed...");
}
https://stackoverflow.com/questions/52407025/client-server-communication-in-node-js
I would use websockets for this.
Once you've set up the connection you can initiate messages from either side.
The WS npm package makes this pretty easy.
Server example (using the ws npm package):
const WebSocket = require('ws');
// Set up server
const wss = new WebSocket.Server({ port: 8080 });
// Wire up some logic for the connection event (when a client connects)
wss.on('connection', function connection(ws) {
// Wire up logic for the message event (when a client sends something)
ws.on('message', function incoming(message) {
console.log('received: %s', message);
});
// Send a message
ws.send('Hello client!');
});
Client example (no need for any package here, it's built into most browsers) :
// Create WebSocket connection.
const socket = new WebSocket('ws://localhost:8080');
// Connection opened
socket.addEventListener('open', function (event) {
socket.send('Hello Server!');
});
// Listen for messages
socket.addEventListener('message', function (event) {
console.log('Message from server ', event.data);
});
There are alternatives if you can't use websockets, such as polling (where the client periodically calls the server to see if theres a message), and long-polling (where the server holds a http request open for an artificially long period of time until a message is ready).
send data to USB device in node.js
USB Library for Node.JS
Installation
Libusb is included as a submodule.
npm install usb
Windows
Use Zadig to install the WinUSB driver for your USB device.
Otherwise you will get LIBUSB_ERROR_NOT_SUPPORTED when attempting to open devices.
var usb = require('usb')
usb
Top-level object.
usb.getDeviceList()
Return a list of Device objects for the USB devices attached to the system.
usb.findByIds(vid, pid)
Convenience method to get the first device with the specified VID and PID, or undefined if no such device is present.
usb.LIBUSB_*
Constant properties from libusb
usb.setDebugLevel(level : int)
Set the libusb debug level (between 0 and 4)
Device
Represents a USB device.
.busNumber
Integer USB device number
.deviceAddress
Integer USB device address
.portNumbers
Array containing the USB device port numbers, or undefined if not supported on this platform.
Scrape a site with Node and Cheerio in 5 minutes
https://www.twilio.com/blog/web-scraping-and-parsing-html-with-node-js-and-cheerio
Web Scraping with Javascript and NodeJSCheerio tutorial, web scraping in JavaScript
Website scraping is a common problem with a common toolset.
Two approaches dominate the web today:
Automate a browser to navigate a site programmatically, using tools like Puppeteer or Selenium.
Make an HTTP request to a website, retrieving data on the page using tools like Cheerio or BeautifulSoup.
The first approach — driving a real browser programmatically — is typical for projects where you’re running automated website tests, or capturing screenshots of your site.
The second approach has limitations.
For example, Cheerio “is not a browser” and “does not produce a visual rendering, apply CSS, load external resources, or execute JavaScript”.
But this approach is simple, and often sufficient, especially when you’re learning how scraping works.
Using Got to retrieve data to use with Cheerio
First let's write some code to grab the HTML from the web page, and look at how we can start parsing through it.
The following code will send a GET request to the web page we want, and will create a Cheerio object with the HTML from that page.
We'll name it $ following the infamous jQuery convention:
const fs = require('fs');
const cheerio = require('cheerio');
const got = require('got');

const vgmUrl= 'https://www.vgmusic.com/music/console/nintendo/nes';

got(vgmUrl).then(response => {
  const $ = cheerio.load(response.body);
  console.log($('title')[0].text());
  console.log($('h1').text());  // print the text

}).catch(err => {
  console.log(err);
});
With this $ object, you can navigate through the HTML and retrieve DOM elements for the data you want, in the same way that you can with jQuery.
For example, $('title') will get you an array of objects corresponding to every <title> tag on the page.
There's typically only one title element, so this will be an array with one object.
If you run this code with the command node index.js, it will log the structure of this object to the console.
Getting familiar with Cheerio
When you have an object corresponding to an element in the HTML you're parsing through, you can do things like navigate through its children, parent and sibling elements.
The child of this <title> element is the text within the tags.
So console.log($('title')[0].children[0].data); will log the title of the web page.
If you want to get more specific in your query, there are a variety of selectors you can use to parse through the HTML.
Two of the most common ones are to search for elements by class or ID.
If you wanted to get a div with the ID of "menu" you would run $('#menu') and if you wanted all of the columns in the table of VGM MIDIs with the "header" class, you'd do $('td.header')
What we want on this page are the hyperlinks to all of the MIDI files we need to download.
We can start by getting every link on the page using $('a').
Add the following to your code in index.js:
got(vgmUrl).then(response => {
  const $ = cheerio.load(response.body);

  $('a').each((i, link) => {
    const href = link.attribs.href;
    console.log(href);
  });
}).catch(err => {
  console.log(err);
});
This code logs the URL of every link on the page.
Notice that we're able to look through all elements from a given selector using the .each() function.
Iterating through every link on the page is great, but we're going to need to get a little more specific than that if we want to download all of the MIDI files.
Filtering through HTML elements with Cheerio
Before writing more code to parse the content that we want, let’s first take a look at the HTML that’s rendered by the browser.
Every web page is different, and sometimes getting the right data out of them requires a bit of creativity, pattern recognition, and experimentation.
Our goal is to download a bunch of MIDI files, but there are a lot of duplicate tracks on this webpage, as well as remixes of songs.
We only want one of each song, and because our ultimate goal is to use this data to train a neural network to generate accurate Nintendo music, we won't want to train it on user-created remixes.
When you're writing code to parse through a web page, it's usually helpful to use the developer tools available to you in most modern browsers.
If you right-click on the element you're interested in, you can inspect the HTML behind that element to get more insight.
With Cheerio, you can write filter functions to fine-tune which data you want from your selectors.
These functions loop through all elements for a given selector and return true or false based on whether they should be included in the set or not.
If you looked through the data that was logged in the previous step, you might have noticed that there are quite a few links on the page that have no href attribute, and therefore lead nowhere.
We can be sure those are not the MIDIs we are looking for, so let's write a short function to filter those out as well as making sure that elements which do contain a href element lead to a .mid file:
const isMidi = (i, link) => {
  // Return false if there is no href attribute.
  if(typeof link.attribs.href === 'undefined') { return false }

  return link.attribs.href.includes('.mid');
};
Now we have the problem of not wanting to download duplicates or user generated remixes.
For this we can use regular expressions to make sure we are only getting links whose text has no parentheses, as only the duplicates and remixes contain parentheses:
const noParens = (i, link) => {
  // Regular expression to determine if the text has parentheses.
  const parensRegex = /^((?!\().)*$/;
  return parensRegex.test(link.children[0].data);
};
Try adding these to your code in index.js:
got(vgmUrl).then(response => {
  const $ = cheerio.load(response.body);

  $('a').filter(isMidi).filter(noParens).each((i, link) => {
    const href = link.attribs.href;
    console.log(href);
  });
});
Run this code again and it should only be printing .mid files.
Downloading the MIDI files we want from the webpage
Now that we have working code to iterate through every MIDI file that we want, we have to write code to download all of them.
In the callback function for looping through all of the MIDI links, add this code to stream the MIDI download into a local file, complete with error checking:
  $('a').filter(isMidi).filter(noParens).each((i, link) => {
    const fileName = link.attribs.href;

    got.stream(`${vgmUrl}/${fileName}`)
      .on('error', err => { console.log(err); console.log(`Error on ${vgmUrl}/${fileName}`) })
      .pipe(fs.createWriteStream(`MIDIs/${fileName}`))
      .on('error', err => { console.log(err); console.log(`Error on ${vgmUrl}/${fileName}`) })
      .on('finish', () => console.log(`Finished ${fileName}`));
  });
Run this code from a directory where you want to save all of the MIDI files, and watch your terminal screen display all 2230 MIDI files that you downloaded (at the time of writing this).
With that, we should be finished scraping all of the MIDI files we need.
await can only be called in a function marked as async.
(async function(){
var body = await httpGet('link');
$.response.setBody(body);
})()
Basically when you use one asynchronous operation, you need to make the entire flow asynchronous as well.
So the async keyword kindof uses ES6 generator function
and makes it return a promise.
Promises
Promises simplify deferred and asynchronous computations. A promise represents an operation that hasn't completed yet.
chalk colors
chalk colors
Example: chalk.red.bold.underline('Hello', 'world');
Colors: black, red, green, yellow, blue, magenta, cyan, white, blackBright (alias: gray, grey), redBright, greenBright, yellowBright, blueBright, magentaBright, cyanBright, whiteBright
Background colors: bgBlack, bgRed, bgGreen, bgYellow, bgBlue, bgMagenta, bgCyan, bgWhite, bgBlackBright (alias: bgGray, bgGrey), bgRedBright, bgGreenBright, bgYellowBright, bgBlueBright, bgMagentaBright, bgCyanBright, bgWhiteBright
Modifiers:
reset - Resets the current color chain.
bold - Make text bold.
dim - Emitting only a small amount of light.
italic - Make text italic. (Not widely supported)
underline - Make text underline. (Not widely supported)
inverse- Inverse background and foreground colors.
hidden - Prints the text, but makes it invisible.
strikethrough - Puts a horizontal line through the center of the text. (Not widely supported)
visible- Prints the text only when Chalk has a color level > 0. Can be useful for things that are purely cosmetic.
https://expressjs.com/en/starter/static-files.html
To serve static files such as images, CSS files, and JavaScript files, use the express.static built-in middleware function in Express.
The function signature is:
express.static(root, [options])
The root argument specifies the root directory from which to serve static assets.
For example:
app.use(express.static('public'))
Now, you can load the files that are in the public directory:
http://localhost:3000/images/kitten.jpg
http://localhost:3000/css/style.css
http://localhost:3000/js/app.js
http://localhost:3000/images/bg.png
http://localhost:3000/hello.html
Express looks up the files relative to the static directory, so the name of the static directory is not part of the URL.
To use multiple static assets directories, call the express.static middleware function multiple times:
app.use(express.static('public'))
app.use(express.static('files'))
Express looks up the files in the order in which you set the static directories with the express.static middleware function.
NOTE: For best results, use a reverse proxy cache to improve performance of serving static assets.
To create a virtual path prefix (where the path does not actually exist in the file system) for files that are served by the express.static function, specify a mount path for the static directory, as shown below:
app.use('/static', express.static('public'))
Now, you can load the files that are in the public directory from the /static path prefix.
http://localhost:3000/static/images/kitten.jpg
http://localhost:3000/static/css/style.css
http://localhost:3000/static/js/app.js
http://localhost:3000/static/images/bg.png
http://localhost:3000/static/hello.html
However, the path that you provide to the express.static function is relative to the directory from where you launch your node process. If you run the express app from another directory, it’s safer to use the absolute path of the directory that you want to serve:
app.use('/static', express.static(path.join(__dirname, 'public')))
Socket.io with multiple clients connecting to same server
Server side:
// you have your socket ready and inside the on('connect'...) you handle a register event where the client passes an id if one exists else you create one.
// a client requests registration
socket.on('register', function(clientUuid){
// create an id if client doesn't already have one
var id = clientUuid == null? uuid.v4() : clientUuid;
var nsp;
var ns = "/" + id;
socket.join(id);
// create a room using this id only for this client
var nsp = app.io.of(ns);
// save it to a dictionary for future use
clientToRooms[ns] = nsp;
// set up what to do on connection
nsp.on('connection', function(nsSocket){
console.log('someone connected');
nsSocket.on('Info', function(data){
// just an example
});
});
Client side:
// you already have declared uuid, uuidSocket and have connected to the socket previously so you define what to do on register:
socket.on("register", function(data){
if (uuid == undefined || uuidSocket == undefined) {// first time we get id from server
//save id to a variable
uuid = data.uuid;
// save to localstorage for further usage (optional - only if you want one client per browser e.g.)
localStorage.setItem('socketUUID', uuid);
uuidSocket = io(serverHost + "/" + uuid); // set up the room --> will trigger nsp.on('connect',... ) on the server
uuidSocket.on("Info", function(data){
//handle on Info
});
// initiate the register from the client
socket.emit("register", uuid);
Send broadcast to all connected client in node js
var WebSocketServer = require("ws").Server;
var wss = new WebSocketServer({port:8100});
wss.on('connection', function connection(ws) {
ws.on('message', function(message) {
wss.broadcast(message);
}
}
wss.broadcast = function broadcast(msg) {
console.log(msg);
wss.clients.forEach(function each(client) {
client.send(msg);
});
};
socket.io broadcast to all connected sockets
server:
//emit only to the socket that the sender is connected to.
socket.on('target', function(index){
//Hard coded answers
var solution = "43526978";
console.log('index: ' + solution[index]);
socket.emit('targetResult', solution[index]);
});
In order to emit to everyone, use the following syntax:
socket.on('target', function(index){
//Hard coded answers
var solution = "43526978";
console.log('index: ' + solution[index]);
io.sockets.emit('targetResult', solution[index]);
});
Notice that, changed socket.emit to io.sockets.emit.
This makes socket.io broadcast to all connected sockets.
Real Time Applications with Socket.io
https://www.rithmschool.com/courses/intermediate-node-express/real-time-applications
io.on('connection', function(socket){
console.log("connection!");
io.sockets.emit('from server', 'HELLO!');
socket.on('from client', function(data){
console.log(data);
});
});
http.listen(3000, function(){
console.log('listening on localhost:3000');
});
client
<!DOCTYPE html>
<html lang="en">
<head>
<meta charset="UTF-8">
<title>First Socket.io application</title>
</head>
<body>
<script src="/socket.io/socket.io.js"></script>
<script>
var socket = io();
socket.on('from server', function (data) {
console.log(data);
socket.emit('from client', 'WORLD!');
});
</script>
</body>
</html>
The client creates a websocket connection with the server (var socket = io()).
Whenever a connection is created, the server receives a 'conncection' event.
In our application, this causes the server to send to all connected websockets a 'from server' event, with a message of 'HELLO!'.
The client is set up to receive 'from server' events.
When it receives such a request, it console lots the data, then emits its own event, called 'from client', with data of 'WORLD!'.
One the server receives a 'from client' event, it logs the corresponding data to the terminal.
One thing to note is that when a client connects, the 'from server' event gets emitted to all websocket connections (we emit on io.sockets, not socket).
You can verify that all clients receive the event by going to localhost:3000 on two separate tabs.
The first tab should have 'HELLO!' logged twice: once when it connected to the server, and once when the other tab connected!
Different kinds of messages and rooms
When using Socket.io, there are different types of messages you may want to send to different users.
For managing chat rooms, socket.io has the idea of a room which has its own name and each socket has its own id to ensure private messages can work.
Here are the helpful methods for sending certain types of messages to certain users:
io.emit('name of event');
or
io.sockets.emit('name of event'); - sends to everyone in every room, including the sender
io.to('name of room').emit('name of event'); - sends to everyone including the sender, in a room (the first parameter to to)
socket.broadcast.to('name of room').emit('name of event'); - sends to everyone except the sender in a room (the first parameter to to)
socket.emit('name of event') - sends to the sender and no one else
socket.broadcast.to(someOtherSocket.id).emit(); - Send to specific socket only (used for private chat)
Define what a mailer is
Use nodemailer to send users emails
mailers
Another very common task when building backend applications is sending email to users.
This requires setting up an email server and configuring it with your transactional mail provider (Mandrill, SendGrid, Gmail etc.).
To get started sending mail to your users, check out Nodemailer.
A sample application to send emails
Since Gmail is not the easiest to configure and Mandrill and SendGrid do not have a free tier, we will be using mailgun to set up transactional email.
You can create a free account here.
Let's now imagine that we want to send some information to a user when a form is submitted.
Here is what that configuration might look like:
require('dotenv').load();
var express = require("express");
var app = express();
var bodyParser = require("body-parser");
var nodemailer = require('nodemailer');
var mg = require('nodemailer-mailgun-transport');
app.set("view engine", "pug");
app.use(bodyParser.urlencoded({extended:true}));
var auth = {
auth: {
api_key: process.env.SECRET_KEY,
domain: process.env.DOMAIN
}
}
var nodemailerMailgun = nodemailer.createTransport(mg(auth));
app.get("/", function(req, res, next){
res.render("index");
});
app.get("/new", function(req, res, next){
res.render("new");
});
app.post('/', function(req, res, next){
var mailOpts = {
from: 'elie@yourdomain.com',
to: req.body.to,
subject: req.body.subject,
text : 'test message form mailgun',
html : '<b>test message form mailgun</b>'
};
nodemailerMailgun.sendMail(mailOpts, function (err, response) {
if (err) res.send(err);
else {
res.send('email sent!');
}
});
});
app.listen(3000, function(){
console.log("Server is listening on port 3000");
});
As an exercise, try to work with this code to create an application that sends email!
Define what web scraping is
Use cheerio to scrape data from a website
Web Scraping
Web scraping is the process of downloading and extracting data from a website.
There are 3 main steps in scraping:
Downloading the HTML document from a website (we will be doing this with the request module)
Extracting data from the downloaded HTML (we will be doing this with cheerio)
Doing something with the data (usually saving it somehow, e.g.
by writing to a file with fs or saving to a database)
Typically, you would want to access the data using a website's API, but often websites don't provide this programmatic access.
When a website doesn't provide a programmatic way to download data, web scraping is a great way to solve the problem!
Robots.txt
Before you begin web scraping, it is a best practice to understand and honor a site's robots.txt file.
The file may exist on any website that you visit and its role is to tell programs (like our web scraper) about rules on what it should and should not download on the site.
Here is Rithm School's robots.txt file.
As you can see, it doesn't provide any restrictions.
Compare that file to Craigslist's robots.txt file which is much more restrictive on what can be downloaded by a program.
You can find out more information about the robots.txt file here.
Using cheerio
Cheerio is one of the many modules Node has for web scraping, but it is by far the easiest to get up and running with especially if you know jQuery! The library is based off of jQuery and has identical functions for finding, traversing and manipulating the DOM.
However, cheerio expects you to have an HTML page which it will load for you to work with.
In order to retrieve the page, we need to make an HTTP request to get the HTML and we will be using the request module to do that.
Let's start with a simple application:
mkdir scraping_example && cd scraping_example
touch app.js
npm init -y
npm install --save cheerio request
Now in our app.js, let's scrape the first page of Craigslist:
var cheerio = require("cheerio");
var request = require("request");
request('https://sfbay.craigslist.org/search/apa?bedrooms=1&bathrooms=1&availabilityMode=0', function(err, response, body){
var $ = cheerio.load(body);
// let's see the average price of 1 bedroom and bathroom in san francisco (based on 1 page of craigslist...)
var avg = Array.from($(".result-price")).reduce(function(acc,next){
return acc + parseInt($(next).text().substr(1));
}, 0) / $(".result-price").length;
console.log(`Average 1 bedroom price: \$${avg.toFixed(2)}`)
});
In the terminal, if you run node app.js, it should tell you what the average price of a one-bedroom apartment is in the Bay Area!
Define what a background job is
Explain what redis is and its use in background jobs
Use kue to run background jobs
Background jobs
Another common issue when building applications is ensuring that long processes or tasks are not blocking or slowing down the entire application.
This could happen when many emails are being sent, large files are being uploaded, or when you want to execute a process and you know there will be less traffic.
Background job library often involve using another data store (usually a queue) to handle the order and management of jobs being processed.
Kue is a very common tool (written by the same people who made Mongoose!) for handling background jobs.
You can read more about it here
Getting started with kue
To get started with kue we need to npm install --save kue and require the kue module and create a queue (which is backed by an in memory data store called redis)
var kue = require('kue');
var queue = kue.createQueue();
Once you have created the queue - it's time to queue up some tasks! These tasks can be time consuming web scraping, gathering analytics, making bulk database writes, uploading files or sending emails.
function sendEmail(title,to,subject,message, done){
var email = queue.create('email', {title, to, subject, message});
done();
}
router.post('/', function(req, res, next) {
queue.process('email', function(job, done){
const {title,to,subject,message} = req.body;
// use nodemailer or another tool to send an email
sendEmail(title,to,subject,message);
});
});
Kue UI
Kue also ships with a nice package called kue-dashboard which provides an interface for you to see jobs running, stalled, failed, completed and much more.
You can access it by starting a new server with node_modules/kue/bin/kue-dashboard -p 3001
Node.js Websocket Examples with Socket.io
What are Websockets?
Over the past few years, a new type of communication started to emerge on the web and in mobile apps, called websockets.
This new protocol opens up a much faster and more efficient line of communication to the client.
Like HTTP, websockets run on top of a TCP connection, but they're much faster because we don't have to open a new connection for each time we want to send a message since the connection is kept alive for as long as the server or client wants.
Even better, since the connection never dies we finally have full-duplex communication available to us, meaning we can push data to the client instead of having to wait for them to ask for data from the server.
This allows for data to be communicated back and forth, which is ideal for things like real-time chat applications, or even games.
Some Websocket Examples
Of the many different websocket libraries for Node.js available to us, I chose to use socket.io throughout this article because it seems to be the most popular and is, in my opinion, the easiest to use.
While each library has its own unique API, they also have many similarities since they're all built on top of the same protocol, so hopefully you'll be able to translate the code below to any library you want to use.
For the HTTP server, I'll be using Express, which is the most popular Node server out there.
Keep in mind that you can also just use the plain http module if you don't need all of the features of Express.
Although, since most applications will use Express, that's what we'll be using as well.
Note: Throughout these examples I have removed much of the boilerplate code, so some of this code won't work out of the box.
In most cases you can refer to the first example to get the boilerplate code.
Establishing the Connection
In order for a connection to be established between the client and server, the server must do two things:
Hook in to the HTTP server to handle websocket connections
Serve up the socket.io.js client library as a static resource
In the code below, you can see item (1) being done on the 3rd line.
Item (2) is done for you (by default) by the socket.io library and is served on the path /socket.io/socket.io.js.
By default, all websocket connections and resources are served within the /socket.io path.
Servervar app = require('express')();
var server = require('http').Server(app);
var io = require('socket.io')(server);
app.get('/', function(req, res) {
res.sendFile(__dirname + '/index.html');
});
server.listen(8080);
The client needs to do two things as well:
Load the library from the server
Call .connect() to the server address and websocket path
Client<script src="/socket.io/socket.io.js"></script>
<script>
var socket = io.connect('/');
</script>
If you navigate your browser to http://localhost:8080 and inspect the HTTP requests behind the scenes using your browser's developer tools, you should be able to see the handshake being executed, including the GET requests and resulting HTTP 101 Switching Protocols response.
Sending Data from Server to Client
Okay, now on to some of the more interesting parts.
In this example we'll be showing you the most common way to send data from the server to the client.
In this case, we'll be sending a message to a channel, which can be subscribed to and received by the client.
So, for example, a client application might be listening on the 'announcements' channel, which would contain notifications about system-wide events, like when a user joins a chat room.
On the server this is done by waiting for the new connection to be established, then by calling the socket.emit() method to send a message to all connected clients.
Serverio.on('connection', function(socket) {
socket.emit('announcements', { message: 'A new user has joined!' });
});
Client<script src="/socket.io/socket.io.js"></script>
<script>
var socket = io.connect('/');
socket.on('announcements', function(data) {
console.log('Got announcement:', data.message);
});
</script>
Sending Data from Client to Server
But what would we do when we want to send data the other way, from client to server? It is very similar to the last example, using both the socket.emit() and socket.on() methods.
Serverio.on('connection', function(socket) {
socket.on('event', function(data) {
console.log('A client sent us this dumb message:', data.message);
});
});
Client<script src="/socket.io/socket.io.js"></script>
<script>
var socket = io.connect('/');
socket.emit('event', { message: 'Hey, I have an important message!' });
</script>
Counting Connected Users
This is a nice example to learn since it shows a few more features of socket.io (like the disconnect event), it's easy to implement, and it is applicable to many webapps.
We'll be using the connection and disconnect events to count the number of active users on our site, and we'll update all users with the current count.
Servervar numClients = 0;
io.on('connection', function(socket) {
numClients++;
io.emit('stats', { numClients: numClients });
console.log('Connected clients:', numClients);
socket.on('disconnect', function() {
numClients--;
io.emit('stats', { numClients: numClients });
console.log('Connected clients:', numClients);
});
});
Client<script src="/socket.io/socket.io.js"></script>
<script>
var socket = io.connect('/');
socket.on('stats', function(data) {
console.log('Connected clients:', data.numClients);
});
</script>
A much simpler way to track the user count on the server would be to just use this:
var numClients = io.sockets.clients().length;
But apparently there are some issues surrounding this, so you might have to keep track of the client count yourself.
Rooms and Namespaces
Chances are as your application grows in complexity, you'll need more customization with your websockets, like sending messages to a specific user or set of users.
Or maybe you want need strict separation of logic between different parts of your app.
This is where rooms and namespaces come in to play.
Note: These features are not part of the websocket protocol, but added on top by socket.io.
By default, socket.io uses the root namespace (/) to send and receive data.
Programmatically, you can access this namespace via io.sockets, although many of its methods have shortcuts on io.
So these two calls are equivalent:
io.sockets.emit('stats', { data: 'some data' });
io.emit('stats', { data: 'some data' });
To create your own namespace, all you have to do is the following:
var iosa = io.of('/stackabuse');
iosa.on('connection', function(socket){
    console.log('Connected to Stack Abuse namespace'):
});
iosa.emit('stats', { data: 'some data' });
Also, the client must connect to your namespace explicitly:
<script src="/socket.io/socket.io.js"></script>
<script>
    var socket = io('/stackabuse');
</script>
Now any data sent within this namespace will be separate from the default / namespace, regardless of which channel is used.
Going even further, within each namespace you can join and leave 'rooms'.
These rooms provide another layer of separation on top of namespaces, and since a client can only be added to a room on the server side, they also provide some extra security.
So if you want to make sure users aren't snooping on certain data, you can use a room to hide it.
To be added to a room, you must .join() it:
io.on('connection', function(socket){
    socket.join('private-message-room');
});
Then from there you can send messages to everyone belonging to the given room:
io.to('private-message-room').emit('some event');
And finally, call .leave() to stop getting event messages from a room:
socket.leave('private-message-room');
Conclusion
This is just one library that implements the websockets protocol, and there are many more out there, all with their own unique features and strengths.
I'd advise trying out some of the others (like node-websockets) so you get a feel for what's out there.
Within just a few lines, you can create some pretty powerful applications, so I'm curious to see what you can come up with!
Built-in HTTP Module
Read the Query String
The req argument has a property called "url" which holds the part of the url that comes after the domain name:
var http = require('http');
http.createServer(function (req, res) {
res.writeHead(200, {'Content-Type': 'text/html'});
res.write(req.url);
res.end();
}).listen(8080);
when opening two addresses should see two different results:
http://localhost:8080/summer
Will produce this result:
/summer
http://localhost:8080/winter
Will produce this result:
/winter
Split the Query String
built-in modules to split the query string into readable parts, such as the URL module.
var http = require('http');
var url = require('url');
http.createServer(function (req, res) {
res.writeHead(200, {'Content-Type': 'text/html'});
var q = url.parse(req.url, true).query;
var txt = q.year + " " + q.month;
res.end(txt);
}).listen(8080);
The address:
http://localhost:8080/?year=2017&month=July
Will produce this result:
2017 July
Recently, I have been working on a real-time multi-player browser game and ran into the “single-session” problem.
Essentially, I wanted to prevent a user from connecting more than once via web sockets.
This is important because being logged on to the same account multiple times could create unfair scenarios and makes the server logic more complex.
Since web socket connections are long lived, I needed to find a way to prevent this.
Wish list
A user can only be connected once, no matter how many browser tabs they have open.
A user can be identified via their authentication token.
The system must work in a clustered environment.
Individual server nodes should be able to go down without affecting the rest of the system.
Authorization tokens should not be passed via query parameters, instead via a dedicated authentication event after the connection is established.
For this project we will use Node.js, Socket.IO, and Redis.
Humble Beginnings
Let’s set up our project and get this show ooad.
You can check out the full GitHub repo here.
First, we will set up our Socket.IO server to accept connections from the front-end.
const http = require('http');
const io = require('socket.io')();

const PORT = process.env.PORT || 9000;
const server = http.createServer();

io.attach(server);

io.on('connection', (socket) => {
  console.log(`Socket ${socket.id} connected.`);

  socket.on('disconnect', () => {
    console.log(`Socket ${socket.id} disconnected.`);
  });
});

server.listen(PORT);
(A Socket.IO server in its simplest form)
By default, the server will listen on port 9000 and echo the connection status of each client to the console.
Socket.IO provides a built-in mechanism to generate a unique socket id which we will use to identify our client’s socket connection.
Next, we create a sample page to connect to our server.
This page consists of a status display, an input box for our secret token (we will use it for authentication down the road) and buttons to connect and disconnect.
<!DOCTYPE html><html><head><metacharset="utf-8" /><title>Single User Websocket</title><metaname="viewport"content="width=device-width, initial-scale=1"><scriptsrc="https://cdnjs.cloudflare.com/ajax/libs/socket.io/2.1.1/socket.io.js"></script><scriptsrc="index.js"></script></head><body><h1>Single User Websocket Demo</h1><p><labelfor="status">Status: </label><inputtype="text"id="status"name="status"value="Disconnected"readonly="readonly"style="width: 300px;"
/></p><p><labelfor="token">My Token: </label><inputtype="text"id="token"name="token"value="secret token" /></p><p><buttonid="connect"onclick="connect()">
Connect
</button><buttonid="disconnect"onclick="disconnect()"disabled>
Disconnect
</button></p></body></html>(Sample front-end mark-up with inputs and buttons to connect and disconnect)
Also, we need to set up some very rudimentary logic to perform the connect/disconnect and hook up our status and token inputs.
const socketUrl = 'http://localhost:9000';

let connectButton;
let disconnectButton;
let socket;
let statusInput;
let tokenInput;

const connect = () => {
  socket = io(socketUrl, {
    autoConnect: false,
  });

  socket.on('connect', () => {
    console.log('Connected');
    statusInput.value = 'Connected';
    connectButton.disabled = true;
    disconnectButton.disabled = false;
  });

  socket.on('disconnect', (reason) => {
    console.log(`Disconnected: ${reason}`);
    statusInput.value = `Disconnected: ${reason}`;
    connectButton.disabled = false;
    disconnectButton.disabled = true;
  })

  socket.open();
};

const disconnect = () => {
  socket.disconnect();
}

document.addEventListener('DOMContentLoaded', () => {
  connectButton = document.getElementById('connect');
  disconnectButton = document.getElementById('disconnect');
  statusInput = document.getElementById('status');
  tokenInput = document.getElementById('token');
});
(Our basic front-end logic… for now)
This is everything you need to set up a basic web socket client and server.
At this moment, we can connect, disconnect, and log the connection status to the user.
And all of this in vanilla JavaScript too! 🍻 Next up: authenticating users.
Authentication
Letting users connect without knowing who they are is of little us.
Let’s add basic token authentication to the connection.
We assume that the connection uses SSL/TLS once deployed.
Never use an unencrypted connection.
Ever.
😶
At this point we have a few options: a) append a user’s token to the query string when they are connecting, or b) let any user connect and require them to send an authentication message after they connect.
The Web Socket protocol specification (RFC 6455) does not prescribe a particular way for authentication and it does not allow for custom headers, and since query parameters could be logged by the server, I chose option b) for this example.
We will implement the authentication with socketio-auth
by Facundo Olano, an Auth module for Socket.IO which allows us to prompt the client for a token after they connect.
Should the user not provide it within a certain amount of time, we will close the connection from the server.
const http = require('http');
const io = require('socket.io')();
const socketAuth = require('socketio-auth');
const PORT = process.env.PORT || 9000;
const server = http.createServer();
io.attach(server);
// dummy user verificationasyncfunctionverifyUser (token) {
returnnewPromise((resolve, reject) => {
// setTimeout to mock a cache or database call
setTimeout(() => {
// this information should come from your cache or databaseconst users = [
{
id: 1,
name: 'mariotacke',
token: 'secret token',
},
];
const user = users.find((user) => user.token === token);
if (!user) {
return reject('USER_NOT_FOUND');
}
return resolve(user);
}, 200);
});
}
socketAuth(io, {
authenticate: async (socket, data, callback) => {
const { token } = data;
try {
const user = await verifyUser(token);
socket.user = user;
return callback(null, true);
} catch (e) {
console.log(`Socket ${socket.id} unauthorized.`);
return callback({ message: 'UNAUTHORIZED' });
}
},
postAuthenticate: (socket) => {
console.log(`Socket ${socket.id} authenticated.`);
},
disconnect: (socket) => {
console.log(`Socket ${socket.id} disconnected.`);
},
})
server.listen(PORT);(Hooking up socketio-auth with a dummy user lookup)
We hook up socketAuth
by passing it our io
instance and configurations options in the form of three events: authenticate
, postAuthenticate
, and disconnect
.
First, our authenticate
event is triggered after a client connected and emits a subsequent authentication event with a user token payload.
Should the client not send this authentication
event within a configurable amount of time, socketio-auth
will terminate the connection.
Once the user has sent their token, we verify it against our known users in a database.
For example purposes, I created an async verifyUser
method that mimics a real database or cache lookup.
If the user is found, it will be returned, otherwise the promise is rejected with reason USER_NOT_FOUND
.
If all goes well, we invoke the callback and mark the socket as authenticated or return UNAUTHORIZED
if the token is invalid.
We have to adapt our front-end code to send us the user’s token upon connection.
We modify our connect
function as follows:
const connect = () => {
  let error = null;

  socket = io(socketUrl, {
    autoConnect: false,
  });

  socket.on('connect', () => {
    console.log('Connected');
    statusInput.value = 'Connected';
    connectButton.disabled = true;
    disconnectButton.disabled = false;

    socket.emit('authentication', {
      token: tokenInput.value,
    });
  });

  socket.on('unauthorized', (reason) => {
    console.log('Unauthorized:', reason);

    error = reason.message;

    socket.disconnect();
  });

  socket.on('disconnect', (reason) => {
    console.log(`Disconnected: ${error || reason}`);
    statusInput.value = `Disconnected: ${error || reason}`;
    connectButton.disabled = false;
    disconnectButton.disabled = true;
    error = null;
  });

  socket.open();
};
(Modified front-end code to emit the user authentication token upon connection)
We added two things: socket.emit('authentication', { token })
to tell the server who we are and an event listener socket.on('unauthorized')
to react to rejections from our server.
Now we have a system in place that let’s us authenticate users and optionally kick them out should they not provide us a token after they initially connect.
This however still does not prevent a user from connecting twice with the same token.
Open a separate window and try it out.
To force a single session, our server has to smarten up.
💡
Preventing Multiple Connections
Making sure that a user is only connected once is simple enough on a single server since all connections sitory.
We can simply iterate through all connected clients and compare their ids with the new client.
This approach breaks down when we talk about clusters however.
There is no easy way to determine if a particular user is connected or not without issuing a query across all nodes.
With many users connecting, this creates a bottleneck.
Surely there has to be a better way.
Enter distributed locks with Redis.
We will use Redis to lock and unlock resources, in our case: user sessions.
Distributed locks are hard and you can read all about them here.
For our use case, we will implement a resource lock on a single Redis node.
Let’s get started.
The first thing we will do is connect Socket.IO to Redis to enable pub/sub across multiple Socket.IO servers.
We will use the socket.io-redis
adapter provided by Socket.IO.
const http = require('http');
const io = require('socket.io')();
const socketAuth = require('socketio-auth');
const adapter = require('socket.io-redis');

const PORT = process.env.PORT || 9000;
const server = http.createServer();

const redisAdapter = adapter({
  host: process.env.REDIS_HOST || 'localhost',
  port: process.env.REDIS_PORT || 6379,
  password: process.env.REDIS_PASS || 'password',
});

io.attach(server);
io.adapter(redisAdapter);

// dummy user verification
...
(We use the Socket.IO Redis adapter to enable pub/sub)
This Redis server is used for its pub/sub functionality to coordinate events across multiple Socket.IO instances such as new sockets joining, exchanging messages, or disconnects.
In our example, we will reuse the same server for our resource locks, though it could use a different Redis server as well.
Let’s create our Redis client as a separate module and promisify the methods so we can use async
/ await
.
const bluebird = require('bluebird');
const redis = require('redis');

bluebird.promisifyAll(redis);

const client = redis.createClient({
  host: process.env.REDIS_HOST || 'localhost',
  port: process.env.REDIS_PORT || 6379,
  password: process.env.REDIS_PASS || 'password',
});

module.exports = client;
(A sample Redis client module)
Let’s talk theory for a moment.
What is it exactly we are trying to achieve? We want to prevent users from having more than one concurrent web socket connection to us at any given time.
For an online game this is important because we want to avoid users using their account for multiple games at the same time.
Also, if we can guarantee that only a single user session per user exists, our server logic is simplified.
To make this work, we must keep track of each connection, acquire a lock, and terminate other connections should the same user try to connect again.
To acquire a lock, we use Redis’ SET
method with NX
and an expiration (more on the expiration later).
NX
will make sure that we only set the key if it does not already exist.
If it does, the command returns null
.
We can use this setup to determine if a session already exists and abort if it does.
We modify our authenticate
function as follows:
authenticate: async (socket, data, callback) => {
  const { token } = data;

  try {
    const user = await verifyUser(token);
    const canConnect = await redis
      .setAsync(`users:${user.id}`, socket.id, 'NX', 'EX', 30);

    if (!canConnect) {
      return callback({ message: 'ALREADY_LOGGED_IN' });
    }

    socket.user = user;

    return callback(null, true);
  } catch (e) {
    console.log(`Socket ${socket.id} unauthorized.`);
    return callback({ message: 'UNAUTHORIZED' });
  }
},
(Modified authenticate event handler with Redis lock)
Once we have verified that a user has a valid token, we attempt to acquire a lock for their session (line 6).
If Redis can SET
the key, it means that it did not previously exist.
We also added EX 30
to the command to auto-expire the lock after 30 seconds.
This is important because our server or Redis might crash and we don’t want to lock out our users forever.
The reason I chose 30 seconds is because Socket.IO has a default ping of 25 seconds, that is, every 25 seconds it will probe connected users to see if they are still connected.
In the next section, we will make use of this to renew the lock.
To renew the lock, we’re going to hook into the packet
event of our socket connection to intercept ping
packages.
These are received every 25 seconds by default.
If a package is not received by then, Socket.IO will terminate the connection.
postAuthenticate: async (socket) => {
  console.log(`Socket ${socket.id} authenticated.`);

  socket.conn.on('packet', async (packet) => {
    if (socket.auth >> packet.type === 'ping') {
      await redis.setAsync(`users:${socket.user.id}`, socket.id, 'XX', 'EX', 30);
    }
  });
},
(Hooking into the internal “packet” event of Socket.IO)
We’re using the postAuthenticate
event to register our packet
event handler.
Our handler then checks if the socket is authenticated via socket.auth
and if the packet is of type ping
.
To renew the lock, we will again use Redis’ SET
command, this time with XX
instead of NX
.
XX
states that it will only be set if it already exists.
We use this mechanism to refresh the expiration time on the key every 25 seconds.
We can now authenticate users, acquire a lock per user id, and prevent multiple sessions from being created.
Our locks will remain in effect as long as the clients report back to our servers every 25 seconds.
Yet, there is one use case we have overlooked: if a user closes their browser with an active connection and attempts to reconnect, they will erroneously receive an ALREADY_LOGGED_IN
message.
This is because the previous lock is still in effect.
To properly release the lock when a user intentionally leaves our site, we must remove the lock from Redis upon disconnect.
disconnect: async (socket) => {
  console.log(`Socket ${socket.id} disconnected.`);

  if (socket.user) {
    await redis.delAsync(`users:${socket.user.id}`);
  }
},
(Removing the session lock when a user disconnects)
In our disconnect
event, we check whether or not the socket was authenticated and then remove the lock from Redis via the DEL
command.
This cleans up the user session lock and prepares it for the next connection.
That’s all there is to it! To see our connection flow in action, open two browser windows and click Connect in each of them with the same token; you will receive a status of Disconnected: ALREADY_LOGGED_IN
on the latter.
Exactly what we wanted.
Time to sit back and relax.
Conclusion
This mechanism is stateless and works in a clustered server environment.
make HTTP requests with Axios
https://blog.logrocket.com/how-to-make-http-requests-like-a-pro-with-axios/
// a client HTTP API based on the XMLHttpRequest interface provided by browsers.
The most common way for frontend programs to communicate with servers is through the HTTP protocol.
The Fetch API and the XMLHttpRequest interface allows you to fetch resources and make HTTP requests.
jQuery’s $.ajax() function is a client HTTP API.
As with Fetch, Axios is promise-based.
It provides a more powerful and flexible feature set.
Execute a command line
use shelljs as follows:
var shell = require('shelljs');
shell.echo('hello world');
shell.exec('node --version');
Install with
npm install shelljs
string_decoder
decoding Buffer objects into strings.
end() Returns what remains of the input stored in the internal buffer
write() Returns the specified buffer as a string
Example
const { StringDecoder } = require('string_decoder');
const decoder = new StringDecoder('utf8');
const euro = Buffer.from([0xE2, 0x82, 0xAC]);
console.log(decoder.write(euro));
Decode a stream of binary data (a buffer object) into a string:
var StringDecoder = require('string_decoder').StringDecoder;
var d = new StringDecoder('utf8');
var b = Buffer('abc');
console.log(b); //write buffer
console.log(d.write(b)); // write decoded buffer;
Writing Simple Module
Write simple logging module which logs the information, warning or error to the console.
In Node.js, module should be placed in a separate JavaScript file.
So, create a Log.js file and write the following code in it.
Log.js
var log = {
info: function (info) {
console.log('Info: ' + info);
},
warning:function (warning) {
console.log('Warning: ' + warning);
},
error:function (error) {
console.log('Error: ' + error);
}
};
module.exports = log
In the above example of logging module, we have created an object with three functions - info(), warning() and error().
At the end, we have assigned this object to module.exports.
The module.exports in the above example exposes a log object as a module.
The module.exports is a special object which is included in every JS file in the Node.js application by default.
Use module.exports or exports to expose a function, object or variable as a module in Node.js.
Now, let's see how to use the above logging module in our application.
Loading Local Module
To use local modules in your application, you need to load it using require() function in the same way as core module.
However, you need to specify the path of JavaScript file of the module.
The following example demonstrates how to use the above logging module contained in Log.js.
app.js
var myLogModule = require('./Log.js');
myLogModule.info('Node.js started');
In the above example, app.js is using log module.
First, it loads the logging module using require() function and specified path where logging module is stored.
Logging module is contained in Log.js file in the root folder.
So, we have specified the path './Log.js' in the require() function.
The '.' denotes a root folder.
The require() function returns a log object because logging module exposes an object in Log.js using module.exports.
So now you can use logging module as an object and call any of its function using dot notation e.g myLogModule.info() or myLogModule.warning() or myLogModule.error()
Run the above example using command prompt (in Windows) as shown below.
C:\> node app.js
Info: Node.js started
Thus, you can create a local module using module.exports and use it in your application.
Let's see how to expose different types as a node module using module.exports in the next section.
Working with images
Manipulate images
gm
GraphicsMagick and ImageMagick are two popular tools for creating, editing, composing and converting images.
Process images
Sharp
Sharp claims to be four to five times faster than ImageMagick.
Generate sprite sheets
spritesmith
Sprite sheets are bitmap files that contain many different small images (for example icons), and they are often used to reduce the overhead of downloading images and speed up overall page load.
Generating sprite sheets manually is very cumbersome, but with spritesmith you can automate the process.
This module takes a folder as input and combines all the images in it into one sprite sheet.
It also generates a JSON file that contains all the coordinates for each of the images in the resulting image, which you can directly copy in your CSS code.
Dates, strings, colours
Format dates
Moment
Moment.js is a great alternative to JavaScript's Date object
The standard JavaScript API already comes with the Date object for working with dates and times.
However, this object is not very user-friendly when it comes to printing and formatting dates.
On the other hand, Moment.js offers a clean and fluid API, and the resulting code is very readable and easy to understand.
moment()
  .add(7, 'days')
  .subtract(1, 'months')
  .year(2009)
  .hours(0)
  .minutes(0)
.seconds(0);
In addition, there is an add-on available for parsing and formatting dates in different time zones.
Validate strings
validator
When providing forms on a web page, you always should validate the values the user inputs – not only on the client-side, but also on the server-side to prevent malicious data.
A module that can help you here is validator.js.
It provides several methods for validating strings, from isEmail() and isURL() to isMobilePhone() or isCreditCard(), plus you can use it on the server- and the client-side.
colour values
TinyColor
Converting colour values from one format into another is one of the tasks every frontend developer needs to do once in a while.
TinyColor2 takes care of this programmatically, and it's available for Node.js as well as for browsers.
It provides a set of conversion methods (e.g. toHexString(), toRGBString()), as well as methods for all sorts of colour operations (e.g. lighten(), saturate(), complement()).
Working with different formats
Generate PDF files
pdfkit
You want to dynamically generate PDF files? Then PDFKit is the module you are looking for.
It supports embedding font types, embedding images and the definition of vector graphics, either programmatically (using a Canvas-like API) or by specifying SVG paths.
Furthermore, you can define links, include notes, highlight text and more.
The best way to start is the interactive browser demo, which is available here.
Process HTML files
cheerio
Cheerio makes processing HTML on the server side much easier
Ever wanted to process HTML code on the server side and missed the jQuery utility methods? ThenCheerio is the answer.
Although it implements only a subset of the core jQuery library, it makes processing HTML on the server side much easier.
It is built on top of the htmlparser2 module, an HTML, XML and RSS parser.
Plus, according to benchmarks, it's eight times faster than jsdom, another module for working with the DOM on the server side.
Process CSV files
node-csv
Node-cvg simplifies the process of working with CSV data
The CSV (comma-separated values) format is often used when interchanging table-based data.
For example, Microsoft Excel allows you to export or import your data in that format.
node-cvg simplifies the process of working with CSV data in JavaScript, and provides functionalities for generating, parsing, transforming and stringifying CSV.
It comes with a callback API, a stream API and a synchronous API, so you can choose the style you prefer.
Process markdown files
marked
Markdown is a popular format when creating content for the web.
If you ever wanted to process markdown content programmatically (i.e.
write your own markdown editor), marked is worth a look.
It takes a string of markdown code as input and outputs the appropriate HTML code.
It is even possible to further customise that HTML output by providing custom renderers.
Minification
Minify images
imageminImagemin is a brilliant module for minifying and optimising images
A very good module for minifying and optimising images is imagemin, which can be used programmatically (via the command line), as a gulp or Grunt plugin, or through imagemin-app (a graphical application available for all of the three big OSs).
Its plugin-based architecture means it is also very flexible, and can be extended to support new image formats.
Minify HTML
html-minifier
This claims to be the best HTML minifier available
After minifying images you should consider minifying your web app's HTML.
The module HTMLMinifier can be used via the command line, but is also available for gulp and Grunt.
On top of that, there are middleware solutions for integrating it into web frameworks like Koa and Express, so you can minify the HTML directly at runtime before serving it to the client via HTTP.
According to benchmarks on the module's homepage, it is the best HTML minifier available.
Minify CSS
clean-css
As well as images and HTML, you should consider minifying the CSS you send the user.
A very fast module in this regard is clean-css, which can be used both from the command line and programmatically.
It comes with support for source maps and also provides different compatibility modes to ensure the minified CSS is compatible with older versions of IE.
Minify JavaScript
UglifyJS2
UglifyJS2 isn't just for minifying code, but it's very good at it
The popular module UglifyJS2 is often used for minifying JavaScript code, but because of its parsing features, in principle you can use it to do anything related to processing JavaScript code.
UglifyJS2 parses JavaScript code into an abstract syntax tree (an object model that represents the code) and provides a tree walker component that can be used to traverse that tree.
Ever wanted to write your own JavaScript optimiser? Then UglifyJS2 is for you.
Minify SVG
svgo
Last but not least when it comes to minification, don't forget to minify the SVG content.
This format has made a great comeback in the past few years, thanks to its great browser and tool support.
Unfortunately, the SVG content that is generated by editors often contains redundant and useless information like comments and metadata.
With SVGO you can easily remove such information and create a minified version of your SVG content.
The module has a plugin-based architecture, with (almost) every optimisation implemented as a separate plugin.
As with all the other modules regarding minification, SVGO can be used either via the command line or programmatically.
Utilities
Log application output
winston
When you are dealing with complex web applications a proper logging library can be very useful to help you find runtime problems, both during development and in production.
A very popular module in this regard is the winston library.
It supports multiple transports, meaning you can tell winston to simply log to the console, but also to store logs in files or in databases (like CouchDB, MongoDB or Redis) or even stream them to an HTTP endpoint for further processing.
Generate fake data
FakerWhen implementing or testing user interfaces you often need dummy data such as email addresses, user names, street addresses and phone numbers.
That is where faker.js comes into play.
This can be used either on the server side (as a module for Node.js) or on the client side, and provides a set of methods for generating fake data.
Need a user name? Just call faker.internet.userName() and you get a random one.
Need a fake company name? Call faker.company.companyName() and you get one.
And there are a lot more methods for all types of data.
Send emails
nodemailer
Nodemailer supports text and HTML content, embedded images and SSL/STARTTLS
Programmatically sending emails is one of the features you need often when implementing websites.
From registration confirmation, to notifying users of special events or sending newsletters, there are a lot of use cases that require you to get in touch with users.
The standard Node.js API does not offer such a feature, but fortunately the module Nodemailer fills this gap.
It supports both text and HTML content, embedded images and – most importantly – it uses the secure SSL/STARTTLS protocol.
Create REST APIs
node-restify
REST is the de facto standard when implementing web applications that make use of web services.
Frameworks like Express facilitate the creation of such web services, but often come with a lot of features such as templating and rendering that – depending on the use case – you may not need.
On the other hand, the Node.js module restify focuses on the creation and the debugging of REST APIs.
It has a very similar API to the Connect middleware (which is the base for Express) but gives you more control over HTTP interactions and also supports DTrace for troubleshooting applications in real time.
Create CLI applications
commander
There are already tons of command line applications (CLI applications) written in Node.js to address different use cases (see, for example, the aforementioned modules for minification).
If you want to write your own CLI application, the module Commander.js is a very good starting point.
It provides a fluent API for defining various aspects of CLI applications like the commands, options, aliases, help and many more, and it really simplifies the process of creating applications for the command line.
Conclusion
We've only scratched the surface of the huge number of Node.js modules out there.
JavaScript is more popular than ever before and there are new modules popping up every week.
A good place to stay up to date is the 'most starred packages' section of the npm homepage or Github's list of trending repositories.
LocalStorage is never accessible by the server.
Ever. It would be a huge security issue.
node-localstorage
var LocalStorage = require('node-localstorage').LocalStorage
localStorage = new LocalStorage('./scratch');
load json from node
https://stackabuse.com/reading-and-writing-json-files-with-node-js/
const fs = require('fs');
let rawdata = fs.readFileSync('student.json');
let student = JSON.parse(rawdata);
console.log(student);
using get-json
very simple to use:
$ npm install get-json --save
var getJSON = require('get-json')
getJSON('http://api.listenparadise.org', function(error, response){
console.log(response);
})
Reading a tab separated data from text file
use the JavaScript split function
var r = [];
var t = "sam tory 22;raj kumar 24";
var v = t.split(";");
for (var i = 0; i < v.length; i++) {
var w = v[i].split("\t");
r.push({
Fname: w[0], lastname: w[1], Age: w[2]
});
}
console.log(r);
Remove empty elements from an array
var array = [0, 1, null, 2, "", 3, undefined, 3,,,,,, 4,, 4,, 5,, 6,,,,];
var result = array.filter(function (item) {
return item != null;
});
console.log(result);
Web Scraping with a Headless Browser: Puppeteer
Headless just means there's no graphical user interface (GUI).
Instead of interacting with visual elements the way you normally would—for example with a mouse or touch device—you automate use cases with a command-line interface (CLI).
Headless Chrome and Puppeteer
There are many web scraping tools that can be used for headless browsing, like Zombie.js or headless Firefox using Selenium.
But today we'll be exploring headless Chrome via Puppeteer, as it's a relatively newer player, released at the start of 2018.
Editor's note: It's worth mentioning Intoli's Remote Browser, another new player.
Puppeteer is a Node.js library which provides a high-level API to control headless Chrome or Chromium or to interact with the DevTools protocol.
It's maintained by the Chrome DevTools team and an awesome open-source community.
Puppeteer
Setup Headless Chrome and Puppeteer
npm i puppeteer --save
Using Puppeteer API for Automated Web Scraping
const puppeteer = require('puppeteer');
const url = process.argv[2];
if (!url) { throw "Please provide a URL as the first argument"; }
keep in mind that Puppeteer is a promise-based library: It performs asynchronous calls to the headless Chrome instance under the hood.
Let's keep the code clean by using async/await.
For that, we need to define an async function first and put all the Puppeteer code in there:
async function run () {
const browser = await puppeteer.launch();
const page = await browser.newPage();
await page.goto(url);
await page.screenshot({path: 'screenshot.png'});
browser.close();
}
run();
Altogether, the final code looks like this:
const puppeteer = require('puppeteer');
const url = process.argv[2];
if (!url) {
throw "Please provide URL as a first argument";
}
async function run () {
const browser = await puppeteer.launch();
const page = await browser.newPage();
await page.goto(url);
await page.screenshot({path: 'screenshot.png'});
browser.close();
}
run();
node screenshot.js https://github.com
Explore what happens in our run() function above.
First, we launch a new headless browser instance, then we open a new page (tab) and navigate to the URL provided in the command-line argument.
Lastly, we use Puppeteer's built-in method for taking a screenshot, and we only need to provide the path where it should be saved.
We also need to make sure to close the headless browser after we are done with our automation.
Now that we've covered the basics, let's move on to something a bit more complex.
A Second Puppeteer Scraping Example
For the next part of our Puppeteer tutorial, let's say we want to scrape down the newest articles from Hacker News.
Create a new file named ycombinator-scraper.js and paste in the following code snippet:
const puppeteer = require('puppeteer');
function run () {
return new Promise(async (resolve, reject) => {
try {
const browser = await puppeteer.launch();
const page = await browser.newPage();
await page.goto("https://news.ycombinator.com/");
let urls = await page.evaluate(() => {
let results = [];
let items = document.querySelectorAll('a.storylink');
items.forEach((item) => {
results.push({
url: item.getAttribute('href'),
text: item.innerText,
});
});
return results;
})
browser.close();
return resolve(urls);
} catch (e) {
return reject(e);
}
})
}
run().then(console.log).catch(console.error);
Okay, there's a bit more going on here compared with the previous example.
The first thing you might notice is that the run() function now returns a promise so the async prefix has moved to the promise function's definition.
We've also wrapped all of our code in a try-catch block so that we can handle any errors that cause our promise to be rejected.
And finally, we're using Puppeteer's built-in method called evaluate().
This method lets us run custom JavaScript code as if we were executing it in the DevTools console.
Anything returned from that function gets resolved by the promise.
This method is very handy when it comes to scraping information or performing custom actions.
The code passed to the evaluate() method is pretty basic JavaScript that builds an array of objects, each having url and text fields that represent the story URLs we see on https://news.ycombinator.com/.
The output of the script looks something like this (but with 30 entries, originally):
[ { url: 'https://www.nature.com/articles/d41586-018-05469-3',
text: 'Bias detectives: the researchers striving to make algorithms fair' },
{ url: 'https://mino-games.workable.com/jobs/415887',
text: 'Mino Games Is Hiring Programmers in Montreal' },
{ url: 'http://srobb.net/pf.html',
text: 'A Beginner\'s Guide to Firewalling with pf' },
// ...
{ url: 'https://tools.ietf.org/html/rfc8439',
text: 'ChaCha20 and Poly1305 for IETF Protocols' } ]
Pretty neat, I'd say!
Okay, let's move forward.
We only had 30 items returned, while there are many more available—they are just on other pages.
We need to click on the “More” button to load the next page of results.
Let's modify our script a bit to add a support for pagination:
const puppeteer = require('puppeteer');
function run (pagesToScrape) {
return new Promise(async (resolve, reject) => {
try {
if (!pagesToScrape) {
pagesToScrape = 1;
}
const browser = await puppeteer.launch();
const page = await browser.newPage();
await page.goto("https://news.ycombinator.com/");
let currentPage = 1;
let urls = [];
while (currentPage <= pagesToScrape) {
let newUrls = await page.evaluate(() => {
let results = [];
let items = document.querySelectorAll('a.storylink');
items.forEach((item) => {
results.push({
url: item.getAttribute('href'),
text: item.innerText,
});
});
return results;
});
urls = urls.concat(newUrls);
if (currentPage < pagesToScrape) {
await Promise.all([
await page.click('a.morelink'),
await page.waitForSelector('a.storylink')
])
}
currentPage++;
}
browser.close();
return resolve(urls);
} catch (e) {
return reject(e);
}
})
}
run(5).then(console.log).catch(console.error);
Let's review what we did here:
We added a single argument called pagesToScrape to our main run() function.
We'll use this to limit how many pages our script will scrape.
There is one more new variable named currentPage which represents the number of the page of results are we looking at currently.
It's set to 1 initially.
We also wrapped our evaluate() function in a while loop, so that it keeps running as long as currentPage is less than or equal to pagesToScrape.
We added the block for moving to a new page and waiting for the page to load before restarting the while loop.
You'll notice that we used the page.click() method to have the headless browser click on the “More” button.
We also used the waitForSelector() method to make sure our logic is paused until the page contents are loaded.
Both of those are high-level Puppeteer API methods ready to use out-of-the-box.
One of the problems you'll probably encounter during scraping with Puppeteer is waiting for a page to load.
Hacker News has a relatively simple structure and it was fairly easy to wait for its page load completion.
For more complex use cases, Puppeteer offers a wide range of built-in functionality, which you can explore in the API documentation on GitHub.
This is all pretty cool, but our Puppeteer tutorial hasn't covered optimization yet.
Let's see how can we make Puppeteer run faster.
Optimizing Our Puppeteer Script
The general idea is to not let the headless browser do any extra work.
This might include loading images, applying CSS rules, firing XHR requests, etc.
As with other tools, optimization of Puppeteer depends on the exact use case, so keep in mind that some of these ideas might not be suitable for your project.
For instance, if we had avoided loading images in our first example, our screenshot might not have looked how we wanted.
Anyway, these optimizations can be accomplished either by caching the assets on the first request, or canceling the HTTP requests outright as they are initiated by the website.
Let's see how caching works first.
You should be aware that when you launch a new headless browser instance, Puppeteer creates a temporary directory for its profile.
It is removed when the browser is closed and is not available for use when you fire up a new instance—thus all the images, CSS, cookies, and other objects stored will not be accessible anymore.
We can force Puppeteer to use a custom path for storing data like cookies and cache, which will be reused every time we run it again—until they expire or are manually deleted.
const browser = await puppeteer.launch({
userDataDir: './data',
});
This should give us a nice bump in performance, as lots of CSS and images will be cached in the data directory upon the first request, and Chrome won't need to download them again and again.
However, those assets will still be used when rendering the page.
In our scraping needs of Y Combinator news articles, we don't really need to worry about any visuals, including the images.
We only care about bare HTML output, so let's try to block every request.
Luckily, Puppeteer is pretty cool to work with, in this case, because it comes with support for custom hooks.
We can provide an interceptor on every request and cancel the ones we don't really need.
The interceptor can be defined in the following way:
await page.setRequestInterception(true);
page.on('request', (request) => {
if (request.resourceType() === 'document') {
request.continue();
} else {
request.abort();
}
});
As you can see, we have full control over the requests that get initiated.
We can write custom logic to allow or abort specific requests based on their resourceType.
We also have access to lots of other data like request.url so we can block only specific URLs if we want.
In the above example, we only allow requests with the resource type of "document" to get through our filter, meaning that we will block all images, CSS, and everything else besides the original HTML response.
Here's our final code:
const puppeteer = require('puppeteer');
function run (pagesToScrape) {
return new Promise(async (resolve, reject) => {
try {
if (!pagesToScrape) {
pagesToScrape = 1;
}
const browser = await puppeteer.launch();
const page = await browser.newPage();
await page.setRequestInterception(true);
page.on('request', (request) => {
if (request.resourceType() === 'document') {
request.continue();
} else {
request.abort();
}
});
await page.goto("https://news.ycombinator.com/");
let currentPage = 1;
let urls = [];
while (currentPage <= pagesToScrape) {
await page.waitForSelector('a.storylink');
let newUrls = await page.evaluate(() => {
let results = [];
let items = document.querySelectorAll('a.storylink');
items.forEach((item) => {
results.push({
url: item.getAttribute('href'),
text: item.innerText,
});
});
return results;
});
urls = urls.concat(newUrls);
if (currentPage < pagesToScrape) {
await Promise.all([
await page.waitForSelector('a.morelink'),
await page.click('a.morelink'),
await page.waitForSelector('a.storylink')
])
}
currentPage++;
}
browser.close();
return resolve(urls);
} catch (e) {
return reject(e);
}
})
}
run(5).then(console.log).catch(console.error);
Stay Safe with Rate Limits
Headless browsers are very powerful tools.
They're able to perform almost any kind of web automation task, and Puppeteer makes this even easier.
Despite all the possibilities, we must comply with a website's terms of service to make sure we don't abuse the system.
Since this aspect is more architecture-related, I won't cover this in depth in this Puppeteer tutorial.
That said, the most basic way to slow down a Puppeteer script is to add a sleep command to it:
js
await page.waitFor(5000);
This statement will force your script to sleep for five seconds (5000 ms).
You can put this anywhere before browser.close().
Just like limiting your use of third-party services, there are lots of other more robust ways to control your usage of Puppeteer.
One example would be building a queue system with a limited number of workers.
Every time you want to use Puppeteer, you'd push a new task into the queue, but there would only be a limited number of workers able to work on the tasks in it.
This is a fairly common practice when dealing with third-party API rate limits and can be applied to Puppeteer web data scraping as well.
Puppeteer's Place in the Fast-moving Web
In this Puppeteer tutorial, I've demonstrated its basic functionality as a web-scraping tool.
However, it has much wider use cases, including headless browser testing, PDF generation, and performance monitoring, among many others.
Web technologies are moving forward fast.
Some websites are so dependent on JavaScript rendering that it's become nearly impossible to execute simple HTTP requests to scrape them or perform some sort of automation.
Luckily, headless browsers are becoming more and more accessible to handle all of our automation needs, thanks to projects like Puppeteer and the awesome teams behind them!
Understanding the basics
What do you mean by "headless browser"?A headless browser is a web browser with no user interface (UI) whatsoever.
Instead, it follows instructions defined by software developers in different programming languages.
Headless browsers are mostly used for running automated quality assurance tests, or to scrape websites.
Is it legal to scrape a website?Websites often allow other software to scrape their content.
Please refer to the robots exclusion standard (robots.txt file) of the website that you intend to scrape, as it usually describes which pages you are allowed to scrape.
You should also check the terms of service to see if you are allowed to scrape.
What is a headless environment?Headless means that the given device or software has no user interface or input mechanism such as a keyboard or mouse.
The term "headless environment" is more often used to describe computer software designed to provide services to other computers or servers.
What is headless Chrome?Headless Chrome is essentially the Google Chrome web browser without its graphical user interface (GUI), based on the same underlying technology.
Headless Chrome is instead controlled by scripts written by software developers.
What is Google Puppeteer?Puppeteer is a Node.js library maintained by Chrome's development team from Google.
Puppeteer provides a high-level API to control headless Chrome or Chromium or interact with the DevTools protocol.
Is Selenium a framework?Yes, but not a front-end web framework like Angular or React; Selenium is a software testing framework for web applications.
Its primary use-case is to automating quality assurance tests on headless browsers, but it's often used to automate administration tasks on websites too.
Tags
JavaScriptNode.jsAutomationPuppeteerView full profile Nick Chikovani
Freelance JavaScript Developer
execute an external program from within Node.js
var exec = require('child_process').exec;
exec('pwd', function callback(error, stdout, stderr) {
// result
});
exec has memory limitation of buffer size of 512k.
In this case it is better to use spawn.
With spawn one has access to stdout of executed command at run time
var spawn = require('child_process').spawn;
var prc = spawn('java', ['-jar', '-Xmx512M', '-Dfile.encoding=utf8', 'script/importlistings.jar']);
//noinspection JSUnresolvedFunction
prc.stdout.setEncoding('utf8');
prc.stdout.on('data', function (data) {
var str = data.toString()
var lines = str.split(/(\r?\n)/g);
console.log(lines.join(""));
});
prc.on('close', function (code) {
console.log('process exit code ' + code);
});
output may have been in stderr rather than stdout.
The simplest way is:
const { exec } = require("child_process")
exec('yourApp').unref()
unref is necessary to end your process without waiting for "yourApp"
Node.js MySQL Create Database
Creating a Database
To create a database in MySQL, use the "CREATE DATABASE" statement:
Example
Create a database named "mydb":
var mysql = require('mysql');
var con = mysql.createConnection({
host: "localhost",
user: "yourusername",
password: "yourpassword"
});
con.connect(function(err) {
if (err) throw err;
console.log("Connected!");
con.query("CREATE DATABASE mydb", function (err, result) {
if (err) throw err;
console.log("Database created");
});
});
Save the code above in a file called "demo_create_db.js" and run the file:
Run "demo_create_db.js"
C:\Users\Your Name>node demo_create_db.js
Which will give you this result:
Connected!
Database created
Playwright is a rising star in the web scraping and automation space.
If you thought Puppeteer was powerful, Playwright will blow your mind.
Playwright is a browser automation library very similar to Puppeteer.
Both allow you to control a web browser with only a few lines of code.
The possibilities are endless.
From automating mundane tasks and testing web applications to data mining.
With Playwright you can run Firefox and Safari (WebKit), not only Chromium based browsers.
It will also save you time, because Playwright automates away repetitive code, such as waiting for buttons to appear in the page.
You don’t need to be familiar with Playwright, Puppeteer or web scraping to enjoy this tutorial, but knowledge of HTML, CSS and JavaScript is expected.
In this tutorial you’ll learn how to:
Start a browser with PlaywrightClick buttons and wait for actionsExtract data from a website
The Project
To showcase the basics of Playwright, we will create a simple scraper that extracts data about GitHub PlaywrightTopics.
You’ll be able to select a Playwrighttopic and the scraper will return information about repositories tagged with this Playwrighttopic.
The page for JavaScript GitHub PlaywrightTopic
We will use Playwright to start a browser, open the GitHub Playwrighttopic page, click the Load more button to display more repositories, and then extract the following information:
Owner
Name
URL
Number of stars
Description
List of repository Playwrighttopics
Installation
To use Playwright you’ll need Node.js version higher than 10 and a package manager.
We’ll use npm, which comes preinstalled with Node.js.
You can confirm their existence on your machine by running:
node -v >> npm -v
If you’re missing either Node.js or NPM, visit the installation tutorial to get started.
Now that we know our environment checks out, let’s create a new project and install Playwright.
mkdir playwright-scraper >> cd playwright-scraper
npm init -y
npm i playwright
The first time you install Playwright, it will download browser binaries, so the installation may take a bit longer.
Building a scraper
Creating a scraper with Playwright is surprisingly easy, even if you have no previous scraping experience.
If you understand JavaScript and CSS, it will be a piece of cake.
In your project folder, create a file called scraper.js (or choose any other name) and open it in your favorite code editor.
First, we will confirm that Playwright is correctly installed and working by running a simple script.
This file contains bidirectional Unicode text that may be interpreted or compiled differently than what appears below. To review, open the file in an editor that reveals hidden Unicode characters.
Learn more about bidirectional Unicode characters
Show hidden characters
// Import the playwright library into our scraper.
const playwright = require('playwright');
async function main() { // Open a Chromium browser. We use headless: false
// to be able to watch what's going on.
const browser = await playwright.chromium.launch({ const page = await browser.newPage({ bypassCSP: true
, // This is needed to enable JavaScript execution on GitHub. await page.goto('https://github.com/Playwrighttopics/javascript'); await page.waitForTimeout(
10000); await browser.close();
}
main();
playwright.js
Now run it using your code editor or by executing the following command in your project folder.
node scraper.js
If you saw a Chromium window open and the GitHub PlaywrightTopics page successfully loaded, congratulations, you just robotized your web browser with Playwright!
JavaScript GitHub Playwrighttopic
Loading more repositories
When you first open the Playwrighttopic page, the number of displayed repositories is limited to 30.
You can load more by clicking the Load more… button at the bottom of the page.
There are two things we need to tell Playwright to load more repositories:
Click the Load more… button.
Wait for the repositories to load.
Clicking buttons is extremely easy with Playwright.
By prefixing text= to a string you’re looking for, Playwright will find the element that includes this string and click it.
It will also wait for the element to appear if it’s not rendered on the page yet.
Clicking a button
This is a huge improvement over Puppeteer and it makes Playwright lovely to work with.
After clicking, we need to wait for the repositories to load.
If we didn’t, the scraper could finish before the new repositories show up on the page and we would miss that data.
page.waitForFunction() allows you to execute a function inside the browser and wait until the function returns true .
Waiting for
To find that article.border selector, we used browser Dev Tools, which you can open in most browsers by right-clicking anywhere on the page and selecting Inspect.
It means: Select the <article> tag with the border class.
Chrome Dev Tools
Let’s plug this into our code and do a test run.
This file contains bidirectional Unicode text that may be interpreted or compiled differently than what appears below. To review, open the file in an editor that reveals hidden Unicode characters.
Learn more about bidirectional Unicode characters
// Import the playwright library into our scraper.
const playwright = require('playwright');
async function main(){
// Open a Chromium browser. We use headless: false
// to be able to watch what's going on.
const browser = await playwright.chromium.launch({
headless: false
});
// Open a new page / tab in the browser.
const page = await browser.newPage({
bypassCSP: true,
// This is needed to enable JavaScript execution on GitHub.
});
// Tell the tab to navigate to the GitHub PlaywrightTopics page.
await page.goto('https://github.com/Playwrighttopics/javascript');
// Click and tell Playwright to keep watching for more than
// 30 repository cards to appear in the page.
await page.click('text=Load more');
await page.waitForFunction(() =>{
const repoCards = document.querySelectorAll('article.border');
return repoCards.length > 30 ;
});
// Pause for 10 seconds, to see what's going on.
await page.waitForTimeout(10000);
// Turn off the browser to clean up after ourselves.
await browser.close() ;
}
main();
playwright-example-2.js
If you watch the run, you’ll see that the browser first scrolls down and clicks the Load more… button, which changes the text into Loading more.
After a second or two, you’ll see the next batch of 30 repositories appear.
Great job!
Extracting data
Now that we know how to load more repositories, we will extract the data we want.
To do this, we’ll use the page.$$eval function.
It tells the browser to find certain elements and then execute a JavaScript function with those elements.
Extracting data from page
It works like this: page.$$evalfinds our repositories and executes the provided function in the browser.
We get repoCards which is an Array of all the repo elements.
The return value of the function becomes the return value of the page.$$eval call.
Thanks to Playwright, you can pull data out of the browser and save them to a variable in Node.js.
Magic!
If you’re struggling to understand the extraction code itself, be sure to check out this guide on working with CSS selectors and this tutorial on using those selectors to find HTML elements.
And here’s the code with extraction included.
When you run it, you’ll see 60 repositories with their information printed to the console.
This file contains bidirectional Unicode text that may be interpreted or compiled differently than what appears below. To review, open the file in an editor that reveals hidden Unicode characters.
Learn more about bidirectional Unicode characters
// Import the playwright library into our scraper.
const playwright = require('playwright');
async function main(){
// Open a Chromium browser. We use headless: false
// to be able to watch what's going on.
const browser = awaitplaywright.chromium.launch({
headless: false,
devtools: true,
});
// Open a new page / tab in the browser.
const page = awaitbrowser.newPage({
bypassCSP: true,
// This is needed to enable JavaScript execution on GitHub.
});
// Tell the tab to navigate to the GitHub PlaywrightTopics page.
awaitpage.goto('https://github.com/Playwrighttopics/javascript');
// Click and tell Playwright to keep watching for more than
// 30 repository cards to appear in the page.
awaitpage.click('text=Load more');
awaitpage.waitForFunction(() =>{
const repoCards = document.querySelectorAll('article.border');
return repoCards.length > 30;
});
// Extract data from the page. Selecting all 'article' elements
// will return all the repository cards we're looking for.
const repos = awaitpage.$$eval('article.border', (repoCards) =>{
return repoCards.map(card =>{
const [ user, repo] = card.querySelectorAll('h3 a');
const stars = card.querySelector('a.social-count');
const description = card.querySelector('div.px-3 > p + div');
const Playwrighttopics = card.querySelectorAll('a.Playwrighttopic-tag');
const toText = ( element) => element && element.innerText.trim();
return{
user: toText(user),
repo: toText(repo),
url: repo.href,
stars: toText(stars),
description: toText(description),
Playwrighttopics: Array.from(Playwrighttopics).map((t) => toText(t)),
};
});
});
// Print the results. Nice!
console.log(`We extracted ${ repos.length } repositories.`);
console.dir(repos);
// Turn off the browser to clean up after ourselves.
awaitbrowser.close();
}
main();
playwright-example-3.js
Conclusion
In this tutorial we learned how to start a browser with Playwright, and control its actions with some of Playwright’s most useful functions: page.click() to emulate mouse clicks, page.waitForFunction() to wait for things to happen and page.$$eval() to extract data from a browser page.
But we’ve only scratched the surface of what’s possible with Playwright.
You can log into websites, fill forms, intercept network communication, and most importantly, use almost any browser in existence.
Where will you take this project next? How about turning it into a command-line interface (CLI) tool that takes a Playwrighttopic and number of repositories on input and outputs a file with the repositories? You can do it now.
Nodejs to parse command line arguments
Passing in arguments via the command line is an extremely basic programming task, and a necessity for anyone trying to write a simple Command-Line Interface (CLI).
In Node.js, as in C and many related environments, all command-line arguments received by the shell are given to the process in an array called argv (short for 'argument values').
Node.js exposes this array for every running process in the form of process.argv - let's take a look at an example.
Make a file called argv.js and add this line:
console.log(process.argv);
Now save it, and try the following in your shell:
$ node argv.js one two three four five
[ 'node',
  '/home/avian/argvdemo/argv.js',
  'one',
  'two',
  'three',
  'four',
  'five' ]
There you have it - an array containing any arguments you passed in.
Notice the first two elements - node and the path to your script.
These will always be present - even if your program takes no arguments of its own, your script's interpreter and path are still considered arguments to the shell you're using.
Where everyday CLI arguments are concerned, you'll want to skip the first two.
Now try this in argv.js:
const myArgs = process.argv.slice(2);
console.log('myArgs: ', myArgs);
This yields:
$ node argv.js one two three four five
myArgs:  [ 'one', 'two', 'three', 'four', 'five' ]
Now let's actually do something with the args:
const myArgs = process.argv.slice(2);
console.log('myArgs: ', myArgs);

switch (myArgs[0]) {
  case 'insult':
    console.log(myArgs[1], 'smells quite badly.');
    break;
  case 'compliment':
    console.log(myArgs[1], 'is really cool.');
    break;
  default:
    console.log('Sorry, that is not something I know how to do.');
}
JS PRO TIP: Remember to break after each case - otherwise you'll run the next case too!
Referring to your command-line arguments by array index isn't very clean, and can quickly turn into a nightmare when you start working with flags and the like - imagine you made a server, and it needed a lot of arguments.
Imagine having to deal with something like myapp -h host -p port -r -v -b --quiet -x -o outfile - some flags need to know about what comes next, some don't, and most CLIs let users specify arguments in any order they want.
Sound like a fun string to parse?
Luckily, there are many third party modules that makes all of this trivial - one of which is yargs.
It's available via npm.
Use this command from your app's base path:
npm i yargs
Once you have it, give it a try - it can really be a life-saver.
Lets test it with little fun Leap Year checker and Current Time teller
const yargs = require('yargs');

const argv = yargs
  .command('lyr', 'Tells whether an year is leap year or not', {
    year: {
      description: 'the year to check for',
      alias: 'y',
      type: 'number'
    }
  })
  .option('time', {
    alias: 't',
    description: 'Tell the present Time',
    type: 'boolean'
  })
  .help()
  .alias('help', 'h').argv;

if (argv.time) {
  console.log('The current time is: ', new Date().toLocaleTimeString());
}

if (argv._.includes('lyr')) {
  const year = argv.year || new Date().getFullYear();
  if ((year % 4 == 0 >> year % 100 != 0) || year % 400 == 0) {
    console.log(`${year} is a Leap Year`);
  } else {
    console.log(`${year} is NOT a Leap Year`);
  }
}

console.log(argv);
The last line was included to let you see how yargs handles your arguments.
Here's a quick reference:
argv.$0 contains the name of the script file which is executed like: '$0': 'myapp.js'.
argv._ is an array containing each element not attached to an option(or flag) these elements are referred as commands in yargs.
Individual options(flags) become properties of argv, such as with argv.h and argv.time.
Note that non-single-letter flags must be passed in as --flag like: node myapp.js --time.
A summary of elements used in the program:
argv: This is the modified process.argv which we have configured with yargs.
command(): This method is used to add commands, their description and options which are specific to these commands only, like in the above code lyr is the command and -y is lyr specific option: node myapp.js lyr -y 2016
option(): This method is used to add global options(flags) which can be accessed by all commands or without any command.
help(): This method is used to display a help dialogue when --help option is encountered which contains description of all the commands and options available.
alias(): This method provides an alias name to an option, like in the above code both --help and -h triggers the help dialogue.
For more information on yargs and the many, many other things it can do for your command-line arguments, please visit http://yargs.js.org/docs/
Puppeteer Web Scraping in Node.js
While there are a few different libraries for scraping the web with Node.js, in this tutorial, i'll be using the puppeteer library.
Puppeteer is a popular and easy to use npm package used for web automation and web scraping purposes.
Some of puppeteer's most useful features include:
Being able to extract a scraped element's text content.
Being able to interact with a webpage by filling out forms, clicking on buttons or running searches inside a search bar.
Being able to scrape and download images from the web.
Being able to see the web scraping in progress using headless mode.
Installation
For this tutorial, I will suppose you already have npm and node_modules installed, as well as a package.json and package-lock.json file.
If you don't, here's a great guide on how to do so: Setup
To install puppeteer, run one of the following commands in your project's terminal:
npm i puppeteer
Or
yarn add puppeteer
Once puppeteer is installed, it will appear as a directory inside your node_modules.
make a simple web scraping script in Node.js
The web scraping script will get the first synonym of "smart" from the web thesaurus by:
Getting the HTML contents of the web thesaurus' webpage.
Finding the element that we want to scrape through it's selector.
Displaying the text contents of the scraped element.
Let's get started!
Before scraping, and then extracting this element's text through it's selector in Node.js, we need to setup a few things first:
Create or open an empty javascript file, you can name it whatever you want, but I'll name mine "index.js" for this tutorial.
Then, require puppeteer on the first line and create the async function inside which we will be writing our web scraping code:
index.jsconst puppeteer = require('puppeteer')
async function scrape() {
}
scrape()
Next, initiate a new browser instance and define the "page" variable, which is going to be used for navigating to webpages and scraping elements within a webpage's HTML contents:
index.jsconst puppeteer = require('puppeteer')
async function scrape() {
const browser = await puppeteer.launch({})
const page = await browser.newPage()
}
scrape()
Scraping the first synonym of "smart"
To locate and copy the selector of the first synonym of "smart", which is what we're going to use to locate the synonym inside of the web thesaurus' webpage, first go to the web thesaurus' synonyms of "smart", right click on the first synonym and click on "inspect".
This will make this webpage's DOM pop-up at the right of your screen:
Next, right click on the highlighted HTML element containing the first synonym and click on "copy selector":
Finally, to navigate to the web thesaurus, scrape and display the first synonym of "smart" through the selector we copied earlier:
First, make the "page" variable navigate to https://www.thesaurus.com/browse/smart inside the newly created browser instance.
Next, we define the "element" variable by making the page wait for our desired element's selector to appear in the webpage's DOM.
The text content of the element is then extracted using the evaluate() function, and displayed inside the "text" variable.
Finally, we close the browser instance.
index.jsconst puppeteer = require('puppeteer')
async function scrape() {
const browser = await puppeteer.launch({})
const page = await browser.newPage()
await page.goto('https://www.thesaurus.com/browse/smart')
var element = await page.waitForSelector("#meanings > div.css-ixatld.e15rdun50 > ul > li:nth-child(1) > a")
var text = await page.evaluate(element => element.textContent, element)
console.log(text)
browser.close()
}
scrape()
Time to test
Now if you run your index.js script using "node index.js", you will see that it has displayed the first synonym of the word "smart":
Scraping the top 5 synonyms of smart
We can implement the same code to scrape the top 5 synonyms of smart instead of 1:
index.jsconst puppeteer = require('puppeteer')
async function scrape() {
const browser = await puppeteer.launch({})
const page = await browser.newPage()
await page.goto('https://www.thesaurus.com/browse/smart')
for(i = 1; i < 6; i++){
var element = await page.waitForSelector("#meanings > div.css-ixatld.e15rdun50 > ul > li:nth-child(" + i + ") > a")
var text = await page.evaluate(element => element.textContent, element)
console.log(text)
}
browser.close()
}
scrape()
The "element" variable will be: "#meanings > div.css-ixatld.e15rdun50 > ul > li:nth-child(1) > a" on the first iteration, "#meanings > div.css-ixatld.e15rdun50 > ul > li:nth-child(2) > a" on the second, and so on until it reaches the last iteration where the "element" variable will be "#meanings > div.css-ixatld.e15rdun50 > ul > li:nth-child(5) > a".
As you can see, the only thing that is altered in the "element" variable throughout the iterations is the "li:nth-child()" value.
This is because in our case, the elements that we are trying to scrape are all "li" elements inside a "ul" element,
so we can easily scrape them in order by increasing the value inside "li:nth-child()":
li:nth-child(1) for the first synonym.
li:nth-child(2) for the second synonym.
li:nth-child(3) for the third synonym.
li:nth-child(4) for the fourth synonym.
And li:nth-child(5) for the fifth synonym.
Final notes
While web scraping has many advantages like:
Saving time on manually collecting data.
Being able to programmatically aggregate pieces of data scraped from the web.
Creating a dataset of data that might be useful for machine learning, data visualization or data analytics purposes.
It also has 2 disadvantages:
Some websites don't allow for scraping their data, one popular example is craigslist.
Some people consider it to be a gray area since some use cases of web scraping practice user or entity data collection and storage.
Because of such features as its speedy Input/Output (I/O) performance and its basis in the well-known JavaScript language, Node.js has quickly become a popular runtime environment for back-end web development.
But as interest grows, larger applications are built, and managing the complexity of the codebase and its dependencies becomes more difficult.
Node.js organizes this complexity using modules, which are any single JavaScript files containing functions or objects that can be used by other programs or modules.
A collection of one or more modules is commonly referred to as a package, and these packages are themselves organized by package managers.
The Node.js Package Manager (npm) is the default and most popular package manager in the Node.js ecosystem, and is primarily used to install and manage external modules in a Node.js project.
It is also commonly used to install a wide range of CLI tools and run project scripts.
npm tracks the modules installed in a project with the package.json file, which resides in a project’s directory and contains:
All the modules needed for a project and their installed versions
All the metadata for a project, such as the author, the license, etc.
Scripts that can be run to automate tasks within the project
As you create more complex Node.js projects, managing your metadata and dependencies with the package.json file will provide you with more predictable builds, since all external dependencies are kept the same.
The file will keep track of this information automatically; while you may change the file directly to update your project’s metadata, you will seldom need to interact with it directly to manage modules.
In this tutorial, you will manage packages with npm.
The first step will be to create and understand the package.json file.
You will then use it to keep track of all the modules you install in your project.
Finally, you will list your package dependencies, update your packages, uninstall your packages, and perform an audit to find security flaws in your packages.
Prerequisites
To complete this tutorial, you will need:
Node.js installed on your development machine.
This tutorial uses version 18.3.0.
To install this on macOS, follow the steps in How to Install Node.js and Create a Local Development Environment on macOS; to install this on Ubuntu 20.04, follow the Installing Using a PPA or Installing using the Node Version Manager section of How To Install Node.js on Ubuntu 20.04.
By having Node.js installed you will also have npm installed; this tutorial uses version 8.11.0.
Step 1 — Creating a package.json File
We begin this tutorial by setting up the example project—a fictional Node.js locator module that gets the user’s IP address and returns the country of origin.
You will not be coding the module in this tutorial.
However, the packages you manage would be relevant if you were developing it.
First, you will create a package.json file to store useful metadata about the project and help you manage the project’s dependent Node.js modules.
As the suffix suggests, this is a JSON (JavaScript Object Notation) file.
JSON is a standard format used for sharing, based on JavaScript objects and consisting of data stored as key-value pairs.
If you would like to learn more about JSON, read our Introduction to JSON article.
Since a package.json file contains numerous properties, it can be cumbersome to create manually, without copy and pasting a template from somewhere else.
To make things easier, npm provides the init command.
This is an interactive command that asks you a series of questions and creates a package.json file based on your answers.
Using the init Command
First, set up a project so you can practice managing modules.
In your shell, create a new folder called locator:
mkdirlocator
Then move into the new folder:
cdlocator
Now, initialize the interactive prompt by entering:
npm initNote: If your code will use Git for version control, create the Git repository first and then run npm init.
The command automatically understands that it is in a Git-enabled folder.
If a Git remote is set, it automatically fills out the repository, bugs, and homepage fields for your package.json file.
If you initialized the repo after creating the package.json file, you will have to add this information in yourself.
For more on Git version control, see our Introduction to Git: Installation, Usage, and Branches series.
You will receive the following output:
OutputThis utility will walk you through creating a package.json file.

It only covers the most common items, and tries to guess sensible defaults.
See `npm help init` for definitive documentation on these fields
and exactly what they do.

Use `npm install <pkg>` afterwards to install a package and
save it as a dependency in the package.json file.
Press ^C at any time to quit.

package name: (locator)
You will first be prompted for the name of your new project.
By default, the command assumes it’s the name of the folder you’re in.
Default values for each property are shown in parentheses ().
Since the default value for name will work for this tutorial, press ENTER to accept it.
The next value to enter is version.
Along with the name, this field is required if your project will be shared with others in the npm package repository.
Note: Node.js packages are expected to follow the Semantic Versioning (semver) guide.
Therefore, the first number will be the MAJOR version number that only changes when the API changes.
The second number will be the MINOR version that changes when features are added.
The last number will be the PATCH version that changes when bugs are fixed.
Press ENTER so the default version of 1.0.0 is accepted.
The next field is description—a useful string to explain what your Node.js module does.
Our fictional locator project would get the user’s IP address and return the country of origin.
A fitting description would be Finds the country of origin of the incoming request, so type in something like this and press ENTER.
The description is very useful when people are searching for your module.
The following prompt will ask you for the entry point.
If someone installs and requires your module, what you set in the entry point will be the first part of your program that is loaded.
The value needs to be the relative location of a JavaScript file, and will be added to the main property of the package.json.
Press ENTER to keep the default value of index.js.
Note: Most modules have an index.js file as the main point of entry.
This is the default value for a package.json’s main property, which is the point of entry for npm modules.
If there is no package.json, Node.js will try to load index.js by default.
Next, you’ll be asked for a test command, an executable script or command to run your project tests.
In many popular Node.js modules, tests are written and executed with Mocha, Jest, Jasmine, or other test frameworks.
Since testing is beyond the scope of this article, leave this option empty for now, and press ENTER to move on.
The init command will then ask for the project’s git repository, which may live on a service such as GitHub (for more information, see GitHub’s Repository documentation).
You won’t use this in this example, so leave it empty as well.
After the repository prompt, the command asks for keywords.
This property is an array of strings with useful terms that people can use to find your repository.
It’s best to have a small set of words that are really relevant to your project, so that searching can be more targeted.
List these keywords as a string with commas separating each value.
For this sample project, type ip,geo,country at the prompt.
The finished package.json will have three items in the array for keywords.
The next field in the prompt is author.
This is useful for users of your module who want to get in contact with you.
For example, if someone discovers an exploit in your module, they can use this to report the problem so that you can fix it.
The author field is a string in the following format: "Name \<Email\> (Website)".
For example, "Sammy \<sammy@your_domain\> (https://your_domain)" is a valid author.
The email and website data are optional—a valid author could just be a name.
Add your contact details as an author and confirm with ENTER.
Finally, you’ll be prompted for the license.
This determines the legal permissions and limitations users will have while using your module.
Many Node.js modules are open source, so npm sets the default to ISC.
At this point, you would review your licensing options and decide what’s best for your project.
For more information on different types of open source licenses, see this license list from the Open Source Initiative.
If you do not want to provide a license for a private repository, you can type UNLICENSED at the prompt.
For this sample, use the default ISC license, and press ENTER to finish this process.
The init command will now display the package.json file it’s going to create.
It will look similar to this:
OutputAbout to write to /home/sammy/locator/package.json:
{
"name": "locator",
"version": "1.0.0",
"description": "Finds the country of origin of the incoming request",
"main": "index.js",
"scripts": {
"test": "echo \"Error: no test specified\" >> exit 1"
},

"keywords": ["ip", "geo", "country" ],
"author": "Sammy <sammy@your_domain> (https://your_domain)",

"license": "ISC"
}
Is this OK? (yes)
Once the information matches what you see here, press ENTER to complete this process and create the package.json file.
With this file, you can keep a record of modules you install for your project.
Now that you have your package.json file, you can test out installing modules in the next step.
Step 2 — Installing Modules
It is common in software development to use external libraries to perform ancillary tasks in projects.
This allows the developer to focus on the business logic and create the application more quickly and efficiently by utilizing tools and code that others have written that accomplish tasks one needs.
For example, if our sample locator module has to make an external API request to get geographical data, we could use an HTTP library to make that task easier.
Since our main goal is to return pertinent geographical data to the user, we could install a package that makes HTTP requests easier for us instead of rewriting this code for ourselves, a task that is beyond the scope of our project.
Let’s run through this example.
In your locator application, you will use the axios library, which will help you make HTTP requests.
Install it by entering the following in your shell:
npm install axios --save
You begin this command with npm install, which will install the package (for brevity you can also use npm i).
You then list the packages that you want installed, separated by a space.
In this case, this is axios.
Finally, you end the command with the optional --save parameter, which specifies that axios will be saved as a project dependency.
When the library is installed, you will see output similar to the following:
Output...
+ axios@0.27.2
added 5 packages from 8 contributors and audited 5 packages in 0.764s
found 0 vulnerabilities
Now, open the package.json file, using a text editor of your choice.
This tutorial will use nano:
nano package.json
You’ll see a new property, as highlighted in the following:
locator/package.json
{
"name": "locator",
"version": "1.0.0",
"description": "Finds the country of origin of the incoming request",
"main": "index.js",

"scripts": {
"test": "echo \"Error: no test specified\" >> exit 1"
},
"keywords": [ "ip", "geo", "country" ],
"author": "Sammy sammy@your_domain (https://your_domain)",
"license": "ISC",
"dependencies": { "axios": "^0.27.2" }
}
The --save option told npm to update the package.json with the module and version that was just installed.
This is great, as other developers working on your projects can easily see what external dependencies are needed.
Note: You may have noticed the ^ before the version number for the axios dependency.
Recall that semantic versioning consists of three digits: MAJOR, MINOR, and PATCH.
The ^ symbol signifies that any higher MINOR or PATCH version would satisfy this version constraint.
If you see ~ at the beginning of a version number, then only higher PATCH versions satisfy the constraint.
When you are finished reviewing package.json, close the file.
If you used nano to edit the file, you can do so by pressing CTRL + X and then ENTER.
Development Dependencies
Packages that are used for the development of a project but not for building or running it in production are called development dependencies.
They are not necessary for your module or application to work in production, but may be helpful while writing the code.
For example, it’s common for developers to use code linters to ensure their code follows best practices and to keep the style consistent.
While this is useful for development, this only adds to the size of the distributable without providing a tangible benefit when deployed in production.
Install a linter as a development dependency for your project.
Try this out in your shell:
npm i eslint@8.0.0 --save-dev
In this command, you used the --save-dev flag.
This will save eslint as a dependency that is only needed for development.
Notice also that you added @8.0.0 to your dependency name.
When modules are updated, they are tagged with a version.
The @ tells npm to look for a specific tag of the module you are installing.
Without a specified tag, npm installs the latest tagged version.
Open package.json again:
nano package.json
This will show the following:
locator/package.json
{
"name": "locator",
"version": "1.0.0",
"description": "Finds the country of origin of the incoming request",
"main": "index.js",

"scripts": {
"test": "echo \"Error: no test specified\" >> exit 1"
},

"keywords": [ "ip", "geo", "country" ],
"author": "Sammy sammy@your_domain (https://your_domain)",
"license": "ISC",
"dependencies": { "axios": "^0.19.0" },
"devDependencies": { "eslint": "^8.0.0" }
}
eslint has been saved as a devDependencies, along with the version number you specified earlier.
Exit package.json.
Automatically Generated Files: node_modules and package-lock.json
When you first install a package to a Node.js project, npm automatically creates the node_modules folder to store the modules needed for your project and the package-lock.json file that you examined earlier.
Confirm these are in your working directory.
In your shell, type ls and press ENTER.
You will observe the following output:
Outputnode_modules package.json package-lock.json
The node_modules folder contains every installed dependency for your project.
In most cases, you should not commit this folder into your version controlled repository.
As you install more dependencies, the size of this folder will quickly grow.
Furthermore, the package-lock.json file keeps a record of the exact versions installed in a more succinct way, so including node_modules is not necessary.
While the package.json file lists dependencies that tell us the suitable versions that should be installed for the project, the package-lock.json file keeps track of all changes in package.json or node_modules and tells us the exact version of the package installed.
You usually commit this to your version controlled repository instead of node_modules, as it’s a cleaner representation of all your dependencies.
Installing from package.json
With your package.json and package-lock.json files, you can quickly set up the same project dependencies before you start development on a new project.
To demonstrate this, move up a level in your directory tree and create a new folder named cloned_locator in the same directory level as locator:
cd ..
mkdir cloned_locator
Move into your new directory:
cd cloned_locator
Now copy the package.json and package-lock.json files from locator to cloned_locator:
cp ../locator/package.json ../locator/package-lock.json .
To install the required modules for this project, type:
npm i
npm will check for a package-lock.json file to install the modules.
If no lock file is available, it would read from the package.json file to determine the installations.
It is usually quicker to install from package-lock.json, since the lock file contains the exact version of modules and their dependencies, meaning npm does not have to spend time figuring out a suitable version to install.
When deploying to production, you may want to skip the development dependencies.
Recall that development dependencies are stored in the devDependencies section of package.json, and have no impact on the running of your app.
When installing modules as part of the deployment process to deploy your application, omit the dev dependencies by running:
npm i --production
The --production flag ignores the devDependencies section during installation.
For now, stick with your development build.
Before moving to the next section, return to the locator folder:
cd ../locator
Global Installations
So far, you have been installing npm modules for the locator project.
npm also allows you to install packages globally.
This means that the package is available to your user in the wider system, like any other shell command.
This ability is useful for the many Node.js modules that are CLI tools.
For example, you may want to blog about the locator project that you’re currently working on.
To do so, you can use a library like Hexo to create and manage your static website blog.
Install the Hexo CLI globally like this:
npm i hexo-cli -g
To install a package globally, you append the -g flag to the command.
Note: If you get a permission error trying to install this package globally, your system may require super user privileges to run the command.
Try again with sudo npm i hexo-cli -g.
Test that the package was successfully installed by typing:
hexo --version
You will see output similar to:
Outputhexo-cli: 4.3.0
os: linux 5.15.0-35-generic Ubuntu 22.04 LTS 22.04 LTS (Jammy Jellyfish)
node: 18.3.0
v8: 10.2.154.4-node.8
uv: 1.43.0
zlib: 1.2.11
brotli: 1.0.9

ares: 1.18.1
modules: 108
nghttp2: 1.47.0
napi: 8
llhttp: 6.0.6
openssl: 3.0.3+quic

cldr: 41.0
icu: 71.1
tz: 2022a
unicode: 14.0
ngtcp2: 0.1.0-DEV
nghttp3: 0.1.0-DEV
So far, you have learned how to install modules with npm.
You can install packages to a project locally, either as a production or development dependency.
You can also install packages based on pre-existing package.json or package-lock.json files, allowing you to develop with the same dependencies as your peers.
Finally, you can use the -g flag to install packages globally, so you can access them regardless of whether you’re in a Node.js project or not.
Now that you can install modules, in the next section you will practice techniques to administer your dependencies.
Step 3 — Managing Modules
A complete package manager can do a lot more than install modules.
npm has over 20 commands relating to dependency management available.
In this step, you will:
List modules you have installed.
Update modules to a more recent version.
Uninstall modules you no longer need.
Perform a security audit on your modules to find and fix security flaws.
While these examples will be done in your locator folder, all of these commands can be run globally by appending the -g flag at the end of them, exactly like you did when installing globally.
Listing Modules
If you would like to know which modules are installed in a project, it would be easier to use the list or ls command instead of reading the package.json directly.
To do this, enter:
npm ls
You will see output like this:
Output├── axios@0.27.2
└── eslint@8.0.0
The --depth option allows you to specify what level of the dependency tree you want to see.
When it’s 0, you only see your top level dependencies.
If you want to see the entire dependency tree, use the --all argument:
npm ls --all
You will see output like the following:
Output├─┬ axios@0.27.2
│ ├── follow-redirects@1.15.1

│ └─┬ form-data@4.0.0
│   ├── asynckit@0.4.0
│   ├─┬ combined-stream@1.0.8

│   │ └── delayed-stream@1.0.0
│   └─┬ mime-types@2.1.35
│     └── mime-db@1.52.0

└─┬ eslint@8.0.0
├─┬ @eslint/eslintrc@1.3.0
│ ├── ajv@6.12.6 deduped

│ ├── debug@4.3.4 deduped
│ ├── espree@9.3.2 deduped
│ ├── globals@13.15.0 deduped

│ ├── ignore@5.2.0
│ ├── import-fresh@3.3.0 deduped
│ ├── js-yaml@4.1.0 deduped

│ ├── minimatch@3.1.2 deduped
│ └── strip-json-comments@3.1.1 deduped
.

.
.
Updating Modules
It is a good practice to keep your npm modules up to date.
This improves your likelihood of getting the latest security fixes for a module.
Use the outdated command to check if any modules can be updated:
npm outdated
You will get output like the following:
OutputPackage  Current  Wanted  Latest  Location             Depended by

eslint     8.0.0  8.17.0  8.17.0  node_modules/eslint  locator
This command first lists the Package that’s installed and the Current version.
The Wanted column shows which version satisfies your version requirement in package.json.
The Latest column shows the most recent version of the module that was published.
The Location column states where in the dependency tree the package is located.
The outdated command has the --depth flag like ls.
By default, the depth is 0.
It seems that you can update eslint to a more recent version.
Use the update or up command like this:
npm up eslint
The output of the command will contain the version installed:
Output

removed 7 packages, changed 4 packages, and audited 91 packages in 1s
14 packages are looking for funding
run `npm fund` for details

found 0 vulnerabilities
To see which version of eslint that you are using now, you can use npm ls using the package name as an argument:
npm ls eslint
The output will resemble the npm ls command you used before, but include only the eslint package’s versions:
Output└─┬ eslint@8.17.0
└─┬ eslint-utils@3.0.0

└── eslint@8.17.0 deduped
If you wanted to update all modules at once, then you would enter:
npm up
Uninstalling Modules
The npm uninstall command can remove modules from your projects.
This means the module will no longer be installed in the node_modules folder, nor will it be seen in your package.json and package-lock.json files.
Removing dependencies from a project is a normal activity in the software development lifecycle.
A dependency may not solve the problem as advertised, or may not provide a satisfactory development experience.
In these cases, it may better to uninstall the dependency and build your own module.
Imagine that axios does not provide the development experience you would have liked for making HTTP requests.
Uninstall axios with the uninstall or un command by entering:
npm un axios
Your output will be similar to:
Outputremoved 8 packages, and audited 83 packages in 542ms
13 packages are looking for funding
run `npm fund` for details

found 0 vulnerabilities
It doesn’t explicitly say that axios was removed.
To verify that it was uninstalled, list the dependencies once again:
npm ls
Now, we only see that eslint is installed:
Outputlocator@1.0.0 /home/ubuntu/locator

└── eslint@8.17.0
This shows that you have successfully uninstalled the axios package.
Auditing Modules
npm provides an audit command to highlight potential security risks in your dependencies.
To see the audit in action, install an outdated version of the request module by running the following:
npm i request@2.60.0
When you install this outdated version of request, you’ll notice output similar to the following:
Outputnpm WARN deprecated cryptiles@2.0.5: This version has been deprecated in accordance with the hapi support policy (hapi.im/support).
Please upgrade to the latest version to get the best features, bug fixes, and security patches.

If you are unable to upgrade at this time, paid support is available for older versions (hapi.im/commercial).
npm WARN deprecated sntp@1.0.9: This module moved to @hapi/sntp.
Please make sure to switch over as this distribution is no longer supported and may contain bugs and critical security issues.

npm WARN deprecated boom@2.10.1: This version has been deprecated in accordance with the hapi support policy (hapi.im/support).
Please upgrade to the latest version to get the best features, bug fixes, and security patches.
If you are unable to upgrade at this time, paid support is available for older versions (hapi.im/commercial).

npm WARN deprecated node-uuid@1.4.8: Use uuid module instead
npm WARN deprecated har-validator@1.8.0: this library is no longer supported
npm WARN deprecated hoek@2.16.3: This version has been deprecated in accordance with the hapi support policy (hapi.im/support).

Please upgrade to the latest version to get the best features, bug fixes, and security patches.
If you are unable to upgrade at this time, paid support is available for older versions (hapi.im/commercial).
npm WARN deprecated request@2.60.0: request has been deprecated, see https://github.com/request/request/issues/3142

npm WARN deprecated hawk@3.1.3: This module moved to @hapi/hawk.
Please make sure to switch over as this distribution is no longer supported and may contain bugs and critical security issues.
added 56 packages, and audited 139 packages in 4s

13 packages are looking for funding
run `npm fund` for details
9 vulnerabilities (5 moderate, 2 high, 2 critical)

To address all issues, run:
npm audit fix --force
Run `npm audit` for details.
npm is telling you that you have deprecated packages and vulnerabilities in your dependencies.
To get more details, audit your entire project with:
npm audit
The audit command shows tables of output highlighting security flaws:
Output# npm audit report
bl  <1.2.3

Severity: moderate
Remote Memory Exposure in bl - https://github.com/advisories/GHSA-pp7h-53gx-mx7r
fix available via `npm audit fix`

node_modules/bl
request  2.16.0 - 2.86.0
Depends on vulnerable versions of bl

Depends on vulnerable versions of hawk
Depends on vulnerable versions of qs
Depends on vulnerable versions of tunnel-agent

node_modules/request
cryptiles  <=4.1.1
Severity: critical

Insufficient Entropy in cryptiles - https://github.com/advisories/GHSA-rq8g-5pc5-wrhr
Depends on vulnerable versions of boom
fix available via `npm audit fix`

node_modules/cryptiles
hawk  <=9.0.0
Depends on vulnerable versions of boom

Depends on vulnerable versions of cryptiles
Depends on vulnerable versions of hoek
Depends on vulnerable versions of sntp

node_modules/hawk
.
.

.
9 vulnerabilities (5 moderate, 2 high, 2 critical)
To address all issues, run:

npm audit fix
You can see the path of the vulnerability, and sometimes npm offers ways for you to fix it.
You can run the update command as suggested, or you can run the fix subcommand of audit.
In your shell, enter:
npm audit fix
You will see similar output to:
Outputnpm WARN deprecated har-validator@5.1.5: this library is no longer supported
npm WARN deprecated uuid@3.4.0: Please upgrade  to version 7 or higher.
Older versions may use Math.random() in certain circumstances, which is known to be problematic.

See https://v8.dev/blog/math-random for details.
npm WARN deprecated request@2.88.2: request has been deprecated, see https://github.com/request/request/issues/3142
added 19 packages, removed 34 packages, changed 13 packages, and audited 124 packages in 3s

14 packages are looking for funding
run `npm fund` for details
found 0 vulnerabilities
npm was able to safely update two of the packages, decreasing your vulnerabilities by the same amount.
However, you still have three deprecated packages in your dependencies.
The audit fix command does not always fix every problem.
Although a version of a module may have a security vulnerability, if you update it to a version with a different API then it could break code higher up in the dependency tree.
You can use the --force parameter to ensure the vulnerabilities are gone, like this:
npm audit fix --force
As mentioned before, this is not recommended unless you are sure that it won’t break functionality.
Conclusion
In this tutorial, you went through various exercises to demonstrate how Node.js modules are organized into packages, and how these packages are managed by npm.
In a Node.js project, you used npm packages as dependencies by creating and maintaining a package.json file—a record of your project’s metadata, including what modules you installed.
You also used the npm CLI tool to install, update, and remove modules, in addition to listing the dependency tree for your projects and checking and updating modules that are outdated.
In the future, leveraging existing code by using modules will speed up development time, as you don’t have to repeat functionality.
You will also be able to create your own npm modules, and these will in turn will be managed by others via npm commands.
As for next steps, experiment with what you learned in this tutorial by installing and testing the variety of packages out there.
See what the ecosystem provides to make problem solving easier.
For example, you could try out TypeScript, a superset of JavaScript, or turn your website into mobile apps with Cordova.
If you’d like to learn more about Node.js, see our other Node.js tutorials.
nodejs-web-scraper is a simple tool for scraping/crawling server-side rendered pages.
It supports features like recursive scraping(pages that "open" other pages), file download and handling, automatic retries of failed requests, concurrency limitation, pagination, request delay, etc. Tested on Node 10 - 16(Windows 7, Linux Mint).
The API uses Cheerio selectors. Click here for reference
For any questions or suggestions, please open a Github issue.
Installation
$ npm install nodejs-web-scraper
Basic examples
Collect articles from a news site
Let's say we want to get every article(from every category), from a news site. We want each item to contain the title,
story and image link(or links).
const { Scraper, Root, DownloadContent, OpenLinks, CollectContent } = require('nodejs-web-scraper');
const fs = require('fs');
(async () => {
const config = {
baseSiteUrl: `https://www.some-news-site.com/`,
startUrl: `https://www.some-news-site.com/`,
filePath: './images/',
concurrency: 10,//Maximum concurrent jobs. More than 10 is not recommended.Default is 3.
maxRetries: 3,//The scraper will try to repeat a failed request few times(excluding 404). Default is 5.
logPath: './logs/'//Highly recommended: Creates a friendly JSON for each operation object, with all the relevant data.
}
const scraper = new Scraper(config);//Create a new Scraper instance, and pass config to it.
//Now we create the "operations" we need:
const root = new Root();//The root object fetches the startUrl, and starts the process.
//Any valid cheerio selector can be passed. For further reference: https://cheerio.js.org/
const category = new OpenLinks('.category',{name:'category'});//Opens each category page.
const article = new OpenLinks('article a', {name:'article' });//Opens each article page.
const image = new DownloadContent('img', { name: 'image' });//Downloads images.
const title = new CollectContent('h1', { name: 'title' });//"Collects" the text from each H1 element.
const story = new CollectContent('section.content', { name: 'story' });//"Collects" the the article body.
root.addOperation(category);//Then we create a scraping "tree":
category.addOperation(article);
article.addOperation(image);
article.addOperation(title);
article.addOperation(story);
await scraper.scrape(root);
const articles = article.getData()//Will return an array of all article objects(from all categories), each
//containing its "children"(titles,stories and the downloaded image urls)
//If you just want to get the stories, do the same with the "story" variable:
const stories = story.getData();
fs.writeFile('./articles.json', JSON.stringify(articles), () => { })//Will produce a formatted JSON containing all article pages and their selected data.
fs.writeFile('./stories.json', JSON.stringify(stories), () => { })
})();
This basically means: "go to https://www.some-news-site.com; Open every category; Then open every article in each category page; Then collect the title, story and image href, and download all images on that page".
Get data of every page as a dictionary
An alternative, perhaps more firendly way to collect the data from a page, would be to use the "getPageObject" hook.
const { Scraper, Root, OpenLinks, CollectContent, DownloadContent } = require('nodejs-web-scraper');
const fs = require('fs');
(async () => {
const pages = [];//All ad pages.
//pageObject will be formatted as {title,phone,images}, becuase these are the names we chose for the scraping operations below.
//Note that each key is an array, because there might be multiple elements fitting the querySelector.
//This hook is called after every page finished scraping.
//It will also get an address argument.
const getPageObject = (pageObject,address) => {
pages.push(pageObject) }
const config = {
baseSiteUrl: `https://www.profesia.sk`,
startUrl: `https://www.profesia.sk/praca/`,
filePath: './images/',
logPath: './logs/'
}
const scraper = new Scraper(config);
const root = new Root();//Open pages 1-10. You need to supply the querystring that the site uses(more details in the API docs).
const jobAds = new OpenLinks('.list-row h2 a', { name: 'Ad page', getPageObject });//Opens every job ad, and calls the getPageObject, passing the formatted dictionary.
const phones = new CollectContent('.details-desc a.tel', { name: 'phone' })//Important to choose a name, for the getPageObject to produce the expected results.
const titles = new CollectContent('h1', { name: 'title' });
root.addOperation(jobAds);
jobAds.addOperation(titles);
jobAds.addOperation(phones);
await scraper.scrape(root);
fs.writeFile('./pages.json', JSON.stringify(pages), () => { });//Produces a formatted JSON with all job ads.
})()
Let's describe again in words, what's going on here: "Go to https://www.profesia.sk/praca/; Then paginate the root page, from 1 to 10; Then, on each pagination page, open every job ad; Then, collect the title, phone and images of each ad."
Download all images from a page
A simple task to download all images in a page(including base64)
const { Scraper, Root, DownloadContent } = require('nodejs-web-scraper');
(async () => {
const config = {
baseSiteUrl: `https://spectator.sme.sk`,//Important to provide the base url, which is the same as the starting url, in this example.
startUrl: `https://spectator.sme.sk/`,
filePath: './images/',
cloneFiles: true,//Will create a new image file with an appended name, if the name already exists. Default is false.
}
const scraper = new Scraper(config);
const root = new Root();//Root corresponds to the config.startUrl. This object starts the entire process
const images = new DownloadContent('img')//Create an operation that downloads all image tags in a given page(any Cheerio selector can be passed).
root.addOperation(images);//We want to download the images from the root page, we need to Pass the "images" operation to the root.
await scraper.scrape(root);//Pass the Root to the Scraper.scrape() and you're done.
})();
When done, you will have an "images" folder with all downloaded files.
Use multiple selectors
If you need to select elements from different possible classes("or" operator), just pass comma separated classes.
This is part of the Jquery specification(which Cheerio implemets), and has nothing to do with the scraper.
const { Scraper, Root, CollectContent } = require('nodejs-web-scraper');
(async () => {
const config = {
baseSiteUrl: `https://spectator.sme.sk`,
startUrl: `https://spectator.sme.sk/`,
}
function getElementContent(element){
// Do something...
}
const scraper = new Scraper(config);
const root = new Root();
const title = new CollectContent('.first_class, .second_class',{getElementContent});//Any of these will fit.
root.addOperation(title);
await scraper.scrape(root);
})();
Advanced Examples
Pagination
Get every job ad from a job-offering site. Each job object will contain a title, a phone and image hrefs. Being that the site is paginated, use the pagination feature.
const { Scraper, Root, OpenLinks, CollectContent, DownloadContent } = require('nodejs-web-scraper');
const fs = require('fs');
(async () => {
const pages = [];//All ad pages.
//pageObject will be formatted as {title,phone,images}, becuase these are the names we chose for the scraping operations below.
const getPageObject = (pageObject,address) => {
pages.push(pageObject)
}
const config = {
baseSiteUrl: `https://www.profesia.sk`,
startUrl: `https://www.profesia.sk/praca/`,
filePath: './images/',
logPath: './logs/'
}
const scraper = new Scraper(config);
const root = new Root({ pagination: { queryString: 'page_num', begin: 1, end: 10 } });//Open pages 1-10.
// YOU NEED TO SUPPLY THE QUERYSTRING that the site uses(more details in the API docs). "page_num" is just the string used on this example site.
const jobAds = new OpenLinks('.list-row h2 a', { name: 'Ad page', getPageObject });//Opens every job ad, and calls the getPageObject, passing the formatted object.
const phones = new CollectContent('.details-desc a.tel', { name: 'phone' })//Important to choose a name, for the getPageObject to produce the expected results.
const images = new DownloadContent('img', { name: 'images' })
const titles = new CollectContent('h1', { name: 'title' });
root.addOperation(jobAds);
jobAds.addOperation(titles);
jobAds.addOperation(phones);
jobAds.addOperation(images);
await scraper.scrape(root);
fs.writeFile('./pages.json', JSON.stringify(pages), () => { });//Produces a formatted JSON with all job ads.
})()
Let's describe again in words, what's going on here: "Go to https://www.profesia.sk/praca/; Then paginate the root page, from 1 to 10; Then, on each pagination page, open every job ad; Then, collect the title, phone and images of each ad."
Get an entire HTML file
const sanitize = require('sanitize-filename');//Using this npm module to sanitize file names.
const fs = require('fs');
const { Scraper, Root, OpenLinks } = require('nodejs-web-scraper');
(async () => {
const config = {
baseSiteUrl: `https://www.profesia.sk`,
startUrl: `https://www.profesia.sk/praca/`,
removeStyleAndScriptTags: false//Telling the scraper NOT to remove style and script tags, cause i want it in my html files, for this example.
}
let directoryExists;
const getPageHtml = (html, pageAddress) => {//Saving the HTML file, using the page address as a name.
if(!directoryExists){
fs.mkdirSync('./html');
directoryExists = true;
}
const name = sanitize(pageAddress)
fs.writeFile(`./html/${name}.html`, html, () => { })
}
const scraper = new Scraper(config);
const root = new Root({ pagination: { queryString: 'page_num', begin: 1, end: 100 } });
const jobAds = new OpenLinks('.list-row h2 a', { getPageHtml });//Opens every job ad, and calls a hook after every page is done.
root.addOperation(jobAds);
await scraper.scrape(root);
})()
Description: "Go to https://www.profesia.sk/praca/; Paginate 100 pages from the root; Open every job ad; Save every job ad page as an html file;
Downloading a file that is not an image
const config = {
baseSiteUrl: `https://www.some-content-site.com`,
startUrl: `https://www.some-content-site.com/videos`,
filePath: './videos/',
logPath: './logs/'
}
const scraper = new Scraper(config);
const root = new Root();
const video = new DownloadContent('a.video',{ contentType: 'file' });//The "contentType" makes it clear for the scraper that this is NOT an image(therefore the "href is used instead of "src").
const description = new CollectContent('h1').
root.addOperation(video);
root.addOperation(description);
await scraper.scrape(root);
console.log(description.getData())//You can call the "getData" method on every operation object, giving you the aggregated data collected by it.
Description: "Go to https://www.some-content-site.com; Download every video; Collect each h1; At the end, get the entire data from the "description" object;
getElementContent and getPageResponse hooks
const getPageResponse = async (response) => {
//Do something with response.data(the HTML content). No need to return anything.
}
const myDivs=[];
const getElementContent = (content, pageAddress) => {
myDivs.push(`myDiv content from page ${pageAddress} is ${content}...`)
}
const config = {
baseSiteUrl: `https://www.nice-site`,
startUrl: `https://www.nice-site/some-section`,
}
const scraper = new Scraper(config);
const root = new Root();
const articles = new OpenLinks('article a');
const posts = new OpenLinks('.post a'{getPageResponse});//Is called after the HTML of a link was fetched, but before the children have been scraped. Is passed the response object of the page.
const myDiv = new CollectContent('.myDiv',{getElementContent});//Will be called after every "myDiv" element is collected.
root.addOperation(articles);
articles.addOperation(myDiv);
root.addOperation(posts);
posts.addOperation(myDiv)
await scraper.scrape(root);
Description: "Go to https://www.nice-site/some-section; Open every article link; Collect each .myDiv; Call getElementContent()".
"Also, from https://www.nice-site/some-section, open every post; Before scraping the children(myDiv object), call getPageResponse(); CollCollect each .myDiv".
Add additional conditions
In some cases, using the cheerio selectors isn't enough to properly filter the DOM nodes. This is where the "condition" hook comes in. Both OpenLinks and DownloadContent can register a function with this hook, allowing you to decide if this DOM node should be scraped, by returning true or false.
const config = {
baseSiteUrl: `https://www.nice-site`,
startUrl: `https://www.nice-site/some-section`,
}
/**
* Will be called for each node collected by cheerio, in the given operation(OpenLinks or DownloadContent)
*/
const condition = (cheerioNode) => {
//Note that cheerioNode contains other useful methods, like html(), hasClass(), parent(), attr() and more.
const text = cheerioNode.text().trim();//Get the innerText of the <a> tag.
if(text === 'some text i am looking for'){//Even though many links might fit the querySelector, Only those that have this innerText,
// will be "opened".
return true
}
}
const scraper = new Scraper(config);
const root = new Root();
//Let's assume this page has many links with the same CSS class, but not all are what we need.
const linksToOpen = new OpenLinks('some-css-class-that-is-just-not-enough',{condition});
root.addOperation(linksToOpen);
await scraper.scrape(root);
The main nodejs-web-scraper object. Starts the entire scraping process via Scraper.scrape(Root). Holds the configuration and global state.
These are the available options for the scraper, with their default values:
const config ={
baseSiteUrl: '',//Mandatory.If your site sits in a subfolder, provide the path WITHOUT it.
startUrl: '',//Mandatory. The page from which the process begins.
logPath:null,//Highly recommended.Will create a log for each scraping operation(object).
cloneFiles: true,//If an image with the same name exists, a new file with a number appended to it is created. Otherwise. it's overwritten.
removeStyleAndScriptTags: true,// Removes any <style> and <script> tags found on the page, in order to serve Cheerio with a light-weight string. change this ONLY if you have to.
concurrency: 3,//Maximum concurrent requests.Highly recommended to keep it at 10 at most.
maxRetries: 5,//Maximum number of retries of a failed request.
delay: 200,
timeout: 6000,
filePath: null,//Needs to be provided only if a "downloadContent" operation is created.
auth: null,//Can provide basic auth credentials(no clue what sites actually use it)
headers: null,//Provide custom headers for the requests.
proxy:null,//Use a proxy. Pass a full proxy URL, including the protocol and the port.
showConsoleLogs:true,//Set to false, if you want to disable the messages
onError:null//callback function that is called whenever an error occurs - signature is: onError(errorString) => {}
}
Public methods:
Name
Description
async scrape(Root)
After all objects have been created and assembled, you begin the process by calling this method, passing the root object
class Root([config])
Root is responsible for fetching the first page, and then scrape the children. It can also be paginated, hence the optional config. For instance:
const root= new Root({ pagination: { queryString: 'page', begin: 1, end: 100 }})
The optional config takes these properties:
{
pagination:{},//In case your root page is paginated.
getPageObject:(pageObject,address)=>{},//Gets a formatted page object with all the data we choose in our scraping setup. Also gets an address argument.
getPageHtml:(htmlString,pageAddress)=>{}//Get the entire html page, and also the page address. Called with each link opened by this OpenLinks object.
getPageData:(cleanData)=>{}//Called after all data was collected by the root and its children.
getPageResponse:(response)=>{}//Will be called after a link's html was fetched, but BEFORE the child operations are performed on it(like, collecting some data from it). Is passed the response object(a custom response object, that also contains the original node-fetch response). Notice that any modification to this object, might result in an unexpected behavior with the child operations of that page.
getException:(error)=>{}//Get every exception thrown by Root.
}
Public methods:
Name
Description
addOperation(Operation)
(OpenLinks,DownloadContent,CollectContent)
getData()
Gets all data collected by this operation. In the case of root, it will just be the entire scraping tree.
getErrors()
In the case of root, it will show all errors in every operation.
class OpenLinks(querySelector,[config])
Responsible for "opening links" in a given page. Basically it just creates a nodelist of anchor elements, fetches their html, and continues the process of scraping, in those pages - according to the user-defined scraping tree.
The optional config can have these properties:
{
name:'some name',//Like every operation object, you can specify a name, for better clarity in the logs.
pagination:{},//Look at the pagination API for more details.
condition:(cheerioNode)=>{},//Use this hook to add additional filter to the nodes that were received by the querySelector. Return true to include, falsy to exclude.
getPageObject:(pageObject,address)=>{},//Gets a formatted page object with all the data we choose in our scraping setup. Also gets an address argument.
getPageHtml:(htmlString,pageAddress)=>{}//Get the entire html page, and also the page address. Called with each link opened by this OpenLinks object.
getElementList:(elementList)=>{},//Is called each time an element list is created. In the case of OpenLinks, will happen with each list of anchor tags that it collects. Those elements all have Cheerio methods available to them.
getPageData:(cleanData)=>{}//Called after all data was collected from a link, opened by this object.(if a given page has 10 links, it will be called 10 times, with the child data).
getPageResponse:(response)=>{}//Will be called after a link's html was fetched, but BEFORE the child operations are performed on it(like, collecting some data from it). Is passed the response object(a custom response object, that also contains the original node-fetch response). Notice that any modification to this object, might result in an unexpected behavior with the child operations of that page.
getException:(error)=>{}//Get every exception throw by this openLinks operation, even if this was later repeated successfully.
slice:[start,end]//You can define a certain range of elements from the node list.Also possible to pass just a number, instead of an array, if you only want to specify the start. This uses the Cheerio/Jquery slice method.
}
Public methods:
Name
Description
addOperation(Operation)
Add a scraping "operation"(OpenLinks,DownloadContent,CollectContent)
getData()
Will get the data from all pages processed by this operation
getErrors()
Gets all errors encountered by this operation.
class CollectContent(querySelector,[config])
Responsible for simply collecting text/html from a given page.
The optional config can receive these properties:
{
name:'some name',
contentType:'text',//Either 'text' or 'html'. Default is text.
shouldTrim:true,//Default is true. Applies JS String.trim() method.
getElementList:(elementList,pageAddress)=>{},
getElementContent:(elementContentString,pageAddress)=>{}//Called with each element collected.
getAllItems: (items, address)=>{}//Called after an entire page has its elements collected.
slice:[start,end]
}
Public methods:
Name
Description
getData()
Gets all data collected by this operation.
class DownloadContent(querySelector,[config])
Responsible downloading files/images from a given page.
The optional config can receive these properties:
{
name:'some name',
contentType:'image',//Either 'image' or 'file'. Default is image.
alternativeSrc:['first-alternative','second-alternative']//Provide alternative attributes to be used as the src. Will only be invoked,
//If the "src" attribute is undefined or is a dataUrl. If no matching alternative is found, the dataUrl is used.
condition:(cheerioNode)=>{},//Use this hook to add additional filter to the nodes that were received by the querySelector. Return true to include, falsy to exclude.
getElementList:(elementList)=>{},
getException:(error)=>{}//Get every exception throw by this downloadContent operation, even if this was later repeated successfully.
filePath:'./somePath',//Overrides the global filePath passed to the Scraper config.
slice:[start,end]
}
Public methods:
Name
Description
getData()
Gets all file names that were downloaded, and their relevant data
getErrors()
Gets all errors encountered by this operation.
Pagination explained
nodejs-web-scraper covers most scenarios of pagination(assuming it's server-side rendered of course).
//If a site uses a queryString for pagination, this is how it's done:
const productPages = new openLinks('a.product'{ pagination: { queryString: 'page_num', begin: 1, end: 1000 } });//You need to specify the query string that the site uses for pagination, and the page range you're interested in.
//If the site uses some kind of offset(like Google search results), instead of just incrementing by one, you can do it this way:
{ pagination: { queryString: 'page_num', begin: 1, end: 100,offset:10 } }
//If the site uses routing-based pagination:
{ pagination: { routingString: '/', begin: 1, end: 100 } }
Error Handling
nodejs-web-scraper will automatically repeat every failed request(except 404,400,403 and invalid images). Number of repetitions depends on the global config option "maxRetries", which you pass to the Scraper. If a request fails "indefinitely", it will be skipped. After the entire scraping process is complete, all "final" errors will be printed as a JSON into a file called "finalErrors.json"(assuming you provided a logPath).
Alternatively, use the onError callback function in the scraper's global config.
Automatic logs
If a logPath was provided, the scraper will create a log for each operation object you create, and also the following ones: "log.json"(summary of the entire scraping tree), and "finalErrors.json"(an array of all FINAL errors encountered). I really recommend using this feature, along side your own hooks and data handling.
Concurrency
The program uses a rather complex concurrency management. Being that the memory consumption can get very high in certain scenarios, I've force-limited the concurrency of pagination and "nested" OpenLinks operations. It should still be very quick. As a general note, i recommend to limit the concurrency to 10 at most. Also the config.delay is a key a factor.
JavaScript has become one of the most popular and widely used languages due to the massive improvements it has seen and the introduction of the runtime known as NodeJS. Whether it's a web or mobile application, JavaScript now has the right tools. This article will explain how the vibrant ecosystem of NodeJS allows you to efficiently scrape the web to meet most of your requirements.
Prerequisites
This post is primarily aimed at developers who have some level of experience with JavaScript. However, if you have a firm understanding of web scraping but have no experience with JavaScript, it may still serve as light introduction to JavaScript. Still, having experience in the following fields will certainly help:
✅ Experience with JavaScript
✅ Experience using the browser's DevTools to extract selectors of elements
✅ Some experience with ES6 JavaScript (Optional)
⭐ Make sure to check out the resources at the end of this article for more details on the subject!
Outcomes
After reading this post will be able to:
Have a functional understanding of NodeJS
Use multiple HTTP clients to assist in the web scraping process
Use multiple modern and battle-tested libraries to scrape the web
Understanding NodeJS: A brief introduction
JavaScript was originally meant to add rudimentary scripting abilities to browsers, in order to allow websites to support more custom ways of interactivity with the user, like showing a dialog box or creating additional HTML content on-the-fly.
For this purpose, browsers are providing a runtime environment (with global objects such as document and window) to enable your code to interact with the browser instance and the page itself. And for more than a decade, JavaScript was really mostly confined to that use case and to the browser. However that changed when Ryan Dahl introduced NodeJS in 2009.
NodeJS took Chrome's JavaScript engine and brought it to the server (or better the command line). Contrary to the browser environment, it did not have any more access to a browser window or cookie storage, but what it got instead, was full access to the system resources. Now, it could easily open network connections, store records in databases, or even just read and write files on your hard drive.
Essentially, Node.js introduced JavaScript as a server-side language and provides a regular JavaScript engine, freed from the usual browser sandbox shackles and, instead, pumped up with a standard system library for networking and file access.
The JavaScript Event Loop
What it kept, was the Event Loop. As opposed to how many languages handle concurrency, with multi-threading, JavaScript has always only used a single thread and performed blocking operations in an asynchronous fashion, relying primarily on callback functions (or function pointers, as C developers may call them).
Let's check that quickly out with a simple web server example:
const http = require('http');
const PORT = 3000;

const server = http.createServer((req, res) => {
  res.statusCode = 200;
  res.setHeader('Content-Type', 'text/plain');
  res.end('Hello World');
});

server.listen(port, () => {
  console.log(`Server running at PORT:${port}/`);
});
Here, we import the HTTP standard library with require, then create a server object with createServer and pass it an anonymous handler function, which the library will invoke for each incoming HTTP request. Finally, we listen on the specified port - and that's actually it.
There are two interesting bits here and both already hint at our event loop and JavaScript's asynchronicity:
The handler function we pass to createServer
The fact that listen is not a blocking call, but returns immediately
In most other languages, we'd usually have an accept function/method, which would block our thread and return the connection socket of the connecting client. At this point, the latest, we'd have to switch to multi-threading, as otherwise we could handle exactly one connection at a time. In this case, however, we don't have to deal with thread management and we always stay with one thread, thanks to callbacks and the event loop.
As mentioned, listen will return immediately, but - although there's no code following our listen call - the application won't exit immediately. That is because we still have a callback registered via createServer (the function we passed).
Whenever a client sends a request, Node.js will parse it in the background and call our anonymous function and pass the request object. The only thing we have to pay attention to here is to return swiftly and not block the function itself, but it's hard to do that, as almost all standard calls are asynchronous (either via callbacks or Promises) - just make sure you don't run while (true); 😀
But enough of theory, let's check it out, shall we?
If you have Node.js installed, all you need to do is save the code to the file MyServer.js and run it in your shell with node MyServer.js. Now, just open your browser and load http://localhost:3000 - voilà, you should get a lovely "Hello World" greeting. That was easy, wasn't it?
One could assume the single-threaded approach may come with performance issues, because it only has one thread, but it's actually quite the opposite and that's the beauty of asynchronous programming. Single-threaded, asynchronous programming can have, especially for I/O intensive work, quite a few performance advantages, because one does not need to pre-allocate resources (e.g. threads).
All right, that was a very nice example of how we easily create a web server in Node.js, but we are in the business of scraping, aren't we? So let's take a look at the JavaScript HTTP client libraries.
HTTP clients: querying the web
HTTP clients are tools capable of sending a request to a server and then receiving a response from it. Almost every tool that will be discussed in this article uses an HTTP client under the hood to query the server of the website that you will attempt to scrape.
1. Built-In HTTP Client
As mentioned in your server example, Node.js does ship by default with an HTTP library. That library also has a built-in HTTP client.
const http = require('http');

const req = http.request('http://example.com', res => {
	const data = [];

	res.on('data', _ => data.push(_))
	res.on('end', () => console.log(data.join()))
});

req.end();
It's rather easy to get started, as there are zero third-party dependencies to install or manage, however - as you can notice from our example - the library does require a bit of boilerplate, as it provides the response only in chunks and you eventually need to stitch them together manually. You'll also need to use a separate library for HTTPS URLs.
In short, it's convenient because it comes out-of-the-box, but it may require you to write more code than you may want. Hence, let's take a look at the other HTTP libraries. Shall we?
2. Fetch API
Another built-in method would be the Fetch API.
While browsers have supported it for a while already, it took Node.js a bit longer, but as of version 18, Node.js does support fetch(). To be fair, for the time being, it still is considered an experimental feature, so if you prefer to play it safe, you can also opt for the polyfill/wrapper library node-fetch, which provides the same functionality.
While at it, also check out our dedicated article on node-fetch.
The Fetch API heavily uses Promises and coupled with await, that can really provide you with lean and legible code.
async function fetch_demo()
{
	const resp = await fetch('https://www.reddit.com/r/programming.json');

	console.log(await resp.json());
}

fetch_demo();
The only workaround we had to employ, was to wrap our code into a function, as await is not supported on the top-level yet. Apart from that we really just called fetch() with our URL, awaited the response (Promise-magic happening in the background, of course), and used the json() function of our Response object (awaiting again) to get the response. Mind you, an already JSON-parsed response 😲.
Not bad, two lines of code, no manual handling of data, no distinction between HTTP and HTTPS, and a native JSON object.fetch optionally accepts an additional options argument, where you can fine-tune your request with a specific request method (e.g. POST), additional HTTP headers, or pass authentication credentials.
3. Axios
Axios is pretty similar to Fetch. It's also a Promise-based HTTP client and it runs in both, browsers and Node.js. Users of TypeScript will also love its built-in type support.
One drawback, however, contrary to the libraries we mentioned so far, we do have to install it first.
npm install axios
Perfect, let's check out a first plain-Promise example:
const axios = require('axios')

axios
	.get('https://www.reddit.com/r/programming.json')
	.then((response) => {
		console.log(response)
	})
	.catch((error) => {
		console.error(error)
	});
Pretty straightforward. Relying on Promises, we can certainly also use await again and make the whole thing a bit less verbose. So let's wrap it into a function one more time:
async function getForum() {
	try {
		const response = await axios.get(
			'https://www.reddit.com/r/programming.json'
		)
		console.log(response)
	} catch (error) {
		console.error(error)
	}
}
All you have to do is call getForum! You can find the Axios library at Github.
4. SuperAgent
Much like Axios, SuperAgent is another robust HTTP client that has support for promises and the async/await syntax sugar. It has a fairly straightforward API like Axios, but SuperAgent has more dependencies and is less popular.
Regardless, making an HTTP request with SuperAgent using promises, async/await, and callbacks looks like this:
const superagent = require("superagent")
const forumURL = "https://www.reddit.com/r/programming.json"

// callbacks
superagent
	.get(forumURL)
	.end((error, response) => {
		console.log(response)
	})

// promises
superagent
	.get(forumURL)
	.then((response) => {
		console.log(response)
	})
	.catch((error) => {
		console.error(error)
	})

// promises with async/await
async function getForum() {
	try {
		const response = await superagent.get(forumURL)
		console.log(response)
	} catch (error) {
		console.error(error)
	}
}
You can find the SuperAgent library at GitHub and installing SuperAgent is as simple as npm install superagent.
SuperAgent plugins
One feature, that sets SuperAgent apart from the other libraries here, is its extensibility. It features quite a list of plugins which allow for the tweaking of a request or response. For example, the superagent-throttle plugin would allow you to define throttling rules for your requests.
5. Request
Even though it is not actively maintained any more, Request still is a popular and widely used HTTP client in the JavaScript ecosystem.
It is fairly simple to make an HTTP request with Request:
const request = require('request')
request('https://www.reddit.com/r/programming.json', function (
  error,
  response,
  body
) {
  console.error('error:', error)
  console.log('body:', body)
})
What you will definitely have noticed here, is that we were neither using plain Promises nor await. That is because Request still employs the traditional callback approach, however there are a couple of wrapper libraries to support await as well.
You can find the Request library at GitHub, and installing it is as simple as running npm install request.
Should you use Request? We included Request in this list because it still is a popular choice. Nonetheless, development has officially stopped and it is not being actively maintained any more. Of course, that does not mean it is unusable, and there are still lots of libraries using it, but the fact itself, may still make us think twice before we use it for a brand-new project, especially with quite a list of viable alternatives and native fetch support.
Data Extraction in JavaScript
Fetching the content of a site is, undoubtedly, an important step in any scraping project, but it's only the first step and we actually need to locate and extract the data as well. This is what we are going to check out next, how we can handle an HTML document in JavaScript and how to locate and select information for data extraction.
First off, regular expressions 🙂
Regular expressions: the hard way
The simplest way to get started with web scraping without any dependencies, is to use a bunch of regular expressions on the HTML content you received from your HTTP client. But there is a big tradeoff.
While absolutely great in their domain, regular expressions are not ideal for parsing document structures like HTML. Plus, newcomers often struggle with getting them right ("do I need a look-ahead or a look-behind?"). For complex web scraping, regular expressions can also get out of hand. With that said, let's give it a go nonethless.
Say there's a label with some username in it and we want the username. This is similar to what you'd have to do if you relied on regular expressions:
const htmlString = '<label>Username: John Doe</label>'
const result = htmlString.match(/<label>Username: (.+)<\/label>/)

console.log(result[1])
// John Doe
We are using String.match() here, which will provide us with an array containing the data of the evaluation of our regular expression. As we used a capturing group ((.+)), the second array element (result[1]) will contain whatever that group managed to capture.
While this certainly worked in our example, anything more complex will either not work or will require a way more complex expression. Just imagine you have a couple of <label> elements in your HTML document.
Don't get us wrong, regular expressions are an unimaginable great tool, just not for HTML 😊 - so let us introduce you to the world of CSS selectors and the DOM.
Cheerio: Core jQuery for traversing the DOM
Cheerio is an efficient and light library that allows you to use the rich and powerful API of jQuery on the server-side. If you have used jQuery before, you will feel right at home with Cheerio. It provides you with an incredibly easy way to parse an HTML string into a DOM tree, which you can then access via the elegant interface you may be familiar with from jQuery (including function-chaining).
const cheerio = require('cheerio')
const $ = cheerio.load('<h2 class="title">Hello world</h3>')

$('h2.title').text('Hello there!')
$('h2').addClass('welcome')

$.html()
// <h2 class="title welcome">Hello there!</h3>
As you can see, using Cheerio really is almost identical to how you'd use jQuery.
Keep in mind, Cheerio really focuses on DOM-manipulation and you won't be able to directly "port" jQuery functionality, such as XHR/AJAX requests or mouse handling (e.g. onClick), one-to-one in Cheerio.
Cheerio is a great tool for most use cases when you need to handle the DOM yourself. Of course, if you want to crawl a JavaScript-heavy site (e.g. typical Single-page applications) you may need something closer to a full browser engine. We'll be talking about that in just second, under Headless Browsers in JavaScript.
Time for a quick Cheerio example, wouldn't you agree? To demonstrate the power of Cheerio, we will attempt to crawl the r/programming forum in Reddit and get a list of post names.
First, install Cheerio and Axios by running the following command: npm install cheerio axios.
Then create a new file called crawler.js and copy/paste the following code:
const axios = require('axios');
const cheerio = require('cheerio');

const getPostTitles = async () => {
	try {
		const { data } = await axios.get(
			'https://old.reddit.com/r/programming/'
		);
		const $ = cheerio.load(data);
		const postTitles = [];

		$('div > p.title > a').each((_idx, el) => {
			const postTitle = $(el).text()
			postTitles.push(postTitle)
		});

		return postTitles;
	} catch (error) {
		throw error;
	}
};

getPostTitles()
    .then((postTitles) => console.log(postTitles));
getPostTitles() is an asynchronous function that will crawl the subreddit r/programming forum. First, the HTML of the website is obtained using a simple HTTP GET request with the Axios HTTP client library. Then, the HTML data is fed into Cheerio using the cheerio.load() function.
Wonderful, we now have fully parsed HTML document as DOM tree in, good old-fashioned jQuery-manner, in $. What's next? Well, might not be a bad idea to know where to get our posting titles from. So, let's right click one of the titles and pick Inspect. That should get us right to the right element in the browser's developer tools.
Excellent, equipped with our knowledge on XPath or CSS selectors, we can now easily compose the expression we need for that element. For our example, we chose CSS selectors and following one just works beautifully.
div > p.title > a
If you used jQuery, you probably know what we are up to, right? 😏
$('div > p.title > a')
You were absolutely right. The Cheerio call is identical to jQuery (there was a reason why we used $ for our DOM variable before) and using Cheerio with our CSS selector will give us the very list of elements matching our selector.
Now, we just need to iterate with each() over all elements and call their text() function to get their text content. 💯 jQuery, isn't it?
So much about the explanation. Time to run our code.
Open up your shell and run node crawler.js. You'll then see an array of about 25 or 26 different post titles (it'll be quite long). While this is a simple use case, it demonstrates the simple nature of the API provided by Cheerio.
If your use case requires the execution of JavaScript and loading of external sources, the following few options will be helpful.
Do not forget to check out our NodeJS Axios proxy tutorial if you want to learn more about using proxies for web scraping!
jsdom: the DOM for Node
Similarly to how Cheerio replicates jQuery on the server-side, jsdom does the same for the browser's native DOM functionality.
Unlike Cheerio, however, jsdom does not only parse HTML into a DOM tree, it can also handle embedded JavaScript code and it allows you to "interact" with page elements.
Instantiating a jsdom object is rather easy:
const { JSDOM } = require('jsdom')
const { document } = new JSDOM(
	'<h2 class="title">Hello world</h3>'
).window

const heading = document.querySelector('.title')
heading.textContent = 'Hello there!'
heading.classList.add('welcome')

heading.innerHTML
// <h2 class="title welcome">Hello there!</h3>
Here, we imported the library with require and created a new jsdom instance using the constructor and passed our HTML snippet. Then, we simply used querySelector() (as we know it from front-end development) to select our element and tweaked its attributes a bit. Fairly standard and we could have done that with Cheerio as well, of course.
What sets jsdom, however, apart is aforementioned support for embedded JavaScript code and, that, we are going to check out now.
The following example uses a simple local HTML page, with one button adding a <div> with an ID.
const { JSDOM } = require("jsdom")

const HTML = `
	<html>
		<body>
			<button onclick="const e = document.createElement('div'); e.id = 'myid'; this.parentNode.appendChild(e);">Click me</button>
		</body>
	</html>`;

const dom = new JSDOM(HTML, {
	runScripts: "dangerously",
	resources: "usable"
});

const document = dom.window.document;

const button = document.querySelector('button');

console.log("Element before click: " + document.querySelector('div#myid'));
button.click();
console.log("Element after click: " + document.querySelector('div#myid'));
Nothing too complicated here:
we require() jsdom
set up our HTML document
pass HTML to our jsdom constructor (important, we need to enable runScripts)
select the button with a querySelector() call
and click() it
Voilà, that should give us this output
Element before click: null
Element after click: [object HTMLDivElement]
Fairly straightforward and the example showcased how we can use jsdom to actually execute the page's JavaScript code. When we loaded the document, there was initially no <div>. Only once we clicked the button, it was added by the site's code, not our crawler's code.
In this context, the important details are runScripts and resources. These flags instruct jsdom to run the page's code, as well as fetch any relevant JavaScript files. As jsdom's documentation points out, that could potentially allow any site to escape the sandbox and get access to your local system, just by crawling it. Proceed with caution please.
jsdom is a great library to handle most of typical browser tasks within your local Node.js instance, but it still has some limitations and that's where headless browsers really come to shine.
💡 We released a new feature that makes this whole process way simpler. You can now extract data from HTML with one simple API call. Feel free to check the documentation here.
Headless Browsers in JavaScript
Sites become more and more complex and often regular HTTP crawling won't suffice any more, but one actually needs a full-fledged browser engine, to get the necessary information from a site.
This is particularly true for SPAs which heavily rely on JavaScript and dynamic and asynchronous resources.
Browser automation and headless browsers come to the rescue here. Let's check out how they can help us to easily crawl Single-page Applications and other sites making use of JavaScript.
1. Puppeteer: the headless browser
Puppeteer, as the name implies, allows you to manipulate the browser programmatically, just like how a puppet would be manipulated by its puppeteer. It achieves this by providing a developer with a high-level API to control a headless version of Chrome by default and can be configured to run non-headless.
Taken from the Puppeteer Docs (Source)
Puppeteer is particularly more useful than the aforementioned tools because it allows you to crawl the web as if a real person were interacting with a browser. This opens up a few possibilities that weren't there before:
You can get screenshots or generate PDFs of pages.
You can crawl a Single Page Application and generate pre-rendered content.
You can automate many different user interactions, like keyboard inputs, form submissions, navigation, etc.
It could also play a big role in many other tasks outside the scope of web crawling like UI testing, assist performance optimization, etc.
Quite often, you will probably want to take screenshots of websites or, get to know about a competitor's product catalog. Puppeteer can be used to do this. To start, install Puppeteer by running the following command: npm install puppeteer
This will download a bundled version of Chromium which takes up about 180 to 300 MB, depending on your operating system. You can avoid that step, and use an already installed setup, by specifying a couple of Puppeteer environment variables, such as PUPPETEER_SKIP_CHROMIUM_DOWNLOAD. Generally, though, Puppeteer does recommended to use the bundled version and does not support custom setups.
Let's attempt to get a screenshot and PDF of the r/programming forum in Reddit, create a new file called crawler.js, and copy/paste the following code:
const puppeteer = require('puppeteer')

async function getVisual() {
	try {
		const URL = 'https://www.reddit.com/r/programming/'
		const browser = await puppeteer.launch()

		const page = await browser.newPage()
		await page.goto(URL)

		await page.screenshot({ path: 'screenshot.png' })
		await page.pdf({ path: 'page.pdf' })

		await browser.close()
	} catch (error) {
		console.error(error)
	}
}

getVisual()
getVisual() is an asynchronous function that will take a screenshot of our page, as well as export it as PDF document.
To start, an instance of the browser is created by running puppeteer.launch(). Next, we create a new browser tab/page with newPage(). Now, we just need to call goto() on our page instance and pass it our URL.
All these functions are of asynchronous nature and will return immediately, but as they are returning a JavaScript Promise, and we are using await, the flow still appears to be synchronous and, hence, once goto "returned", our website should have loaded.
Excellent, we are ready to get pretty pictures. Let's just call screenshot() on our page instance and pass it a path to our image file. We do the same with pdf() and voilà, we should have at the specified locations two new files. Because we are responsible netizens, we also call close() on our browser object, to clean up behind ourselves. That's it.
Once thing to keep in mind, when goto() returns, the page has loaded but it might not be done with all its asynchronous loading. So depending on your site, you may want to add additional logic in a production crawler, to wait for certain JavaScript events or DOM elements.
But let's run the code. Pop up a shell window, type node crawler.js, and after a few moments, you should have exactly the two mentioned files in your directory.
It's a great tool and if you are really keen on it now, please also check out our other guides on Puppeteer.
How to download a file with PuppeteerHandling and submitting HTML forms with PuppeteerUsing Puppeteer with Python and Pyppeteer
2. Nightmare: an alternative to Puppeteer
Nightmare is another a high-level browser automation library like Puppeteer. It uses Electron and web and scraping benchmarks indicate it shows a significantly better performance than its predecessor PhantomJS. If Puppeteer is too complex for your use case or there are issues with the default Chromium bundle, Nightmare - despite its name 😨 - may just be the right thing for you.
As so often, our journey starts with NPM: npm install nightmare
Once Nightmare is available on your system, we will use it to find ScrapingBee's website through a Brave search. To do so, create a file called crawler.js and copy/paste the following code into it:
const Nightmare = require('nightmare')
const nightmare = Nightmare()

nightmare
	.goto('https://search.brave.com/')
	.type('#searchbox', 'ScrapingBee')
	.click('#submit-button')
	.wait('#results a')
	.evaluate(
		() => document.querySelector('#results a').href
	)
	.end()
	.then((link) => {
		console.log('ScrapingBee Web Link:', link)
	})
	.catch((error) => {
		console.error('Search failed:', error)
	})
After the usual library import with require, we first create a new instance of Nightmare and save that in nightmare. After that, we are going to have lots of fun with function-chaining and Promises 🥳
We use goto() to load Brave from https://search.brave.com
We type our search term "ScrapingBee" in Brave's search input, with the CSS selector #searchbox (Brave's quite straightforward with its naming, isn't it?)
We click the submit button to start our search. Again, that's with the CSS selector #submit-button (Brave's really straightforward, we love that❣️)
Let's take a quick break, until Brave returns the search list. wait, with the right selector works wonders here. wait also accepts time value, if you need to wait for a specific period of time.
Once Nightmare got the link list from Brave, we simply use evaluate() to run our custom code on the page (in this case querySelector()) and get the first <a> element matching our selector, and return its href attribute.
Last but not least, we call end() to run and complete our task queue.
That's it, folks. end() returns a standard Promise with the value from our call to evaluate(). Of course, you could also use await here.
That was pretty easy, wasn'it? And if everything went all right 🤞, we should have now got the link to ScrapingBee's website at https://www.scrapingbee.comScrapingBee Web Link: https://www.scrapingbee.com/
Wanna try it yourself? Just run node crawler.js in your shell 👍
3. Playwright, the new web scraping framework
Playwright is the new cross-language, cross-platform headless framework supported by Microsoft.
Its main advantage over Puppeteer is that it is cross platform and very easy to use.
Here is how to simply scrape a page with it:
const playwright = require('playwright');
async function main() {
    const browser = await playwright.chromium.launch({
        headless: false // setting this to true will not run the UI
    });

    const page = await browser.newPage();
    await page.goto('https://finance.yahoo.com/world-indices');
    await page.waitForTimeout(5000); // wait for 5 seconds
    await browser.close();
}

main();
Feel free to check out our Playwright tutorial if you want to learn more.
Summary
Phew, that was a long read! But we hope, our examples managed to give you a first glimpse into the world of web scraping with JavaScript and which libraries you can use to crawl the web and scrape the information you need.
Let's give it a quick recap, what we learned today was:
✅ NodeJS is a JavaScript runtime that allow JavaScript to be run server-side. It has a non-blocking nature thanks to the Event Loop.
✅ HTTP clients, such as the native libaries and fetch, as well as Axios, SuperAgent, node-fetch, and Request, are used to send HTTP requests to a server and receive a response.
✅ Cheerio abstracts the best out of jQuery for the sole purpose of running it server-side for web crawling but does not execute JavaScript code.
✅ JSDOM creates a DOM per the standard JavaScript specification out of an HTML string and allows you to perform DOM manipulations on it.
✅ Puppeteer and Nightmare are high-level browser automation libraries, that allow you to programmatically manipulate web applications as if a real person were interacting with them.
This article focused on JavaScript's scraping ecosystem and its tools. However, there are certainly also other apsects to scraping, which we could not cover in this context.
For example, sites often employ techniques to recognize and block crawlers. You'll want to avoid these and blend in as normal visitor. On this subject, and more, we have an excellent, dedicated guide on how not to get blocked as a crawler. Check it out please.
💡 Should you love scraping, but the usual time-constraints for your project don't allow you to tweak your crawlers to perfection, then please have a look at our scraping API platform. ScrapingBee was built with all these things in mind and has got your back in all crawling tasks.
Happy Scraping!
Resources
Would you like to read more? Check these links out:
NodeJS Website - The main site of NodeJS with its official documentation.
Puppeteer's Docs - Google's documentation of Puppeteer, with getting started guides and the API reference.
Playright - An alternative to Puppeteer, backed by Microsoft.
ScrapingBee's Blog - Contains a lot of information about Web Scraping goodies on multiple platforms.
Handling infinite scroll with PuppeteerNode-unblocker - a Node.js package to facilitate web scraping through proxies.+
Node.js global objects are global in nature and they are available in all modules.
We do not need to include these objects in our application, rather we can use them directly.
These objects are modules, functions, strings and object itself as explained below.
__filename
The __filename represents the filename of the code being executed.
This is the resolved absolute path of this code file.
For a main program, this is not necessarily the same filename used in the command line.
The value inside a module is the path to that module file.
Example
Create a js file named main.js with the following code −
// Let's try to print the value of __filename
console.log( __filename );
Now run the main.js to see the result −
$ node main.js
Based on the location of your program, it will print the main file name as follows −
/web/com/1427091028_21099/main.js
__dirname
The __dirname represents the name of the directory that the currently executing script resides in.
Example
Create a js file named main.js with the following code −
// Let's try to print the value of __dirname
console.log( __dirname );
Now run the main.js to see the result −
$ node main.js
Based on the location of your program, it will print current directory name as follows −
/web/com/1427091028_21099
setTimeout(cb, ms)
The setTimeout(cb, ms) global function is used to run callback cb after at least ms milliseconds.
The actual delay depends on external factors like OS timer granularity and system load.
A timer cannot span more than 24.8 days.
This function returns an opaque value that represents the timer which can be used to clear the timer.
Example
Create a js file named main.js with the following code −
function printHello() {
console.log( "Hello, World!");
}
// Now call above function after 2 seconds
setTimeout(printHello, 2000);
Now run the main.js to see the result −
$ node main.js
Verify the output is printed after a little delay.
Hello, World!
clearTimeout(t)
The clearTimeout(t) global function is used to stop a timer that was previously created with setTimeout().
Here t is the timer returned by the setTimeout() function.
Example
Create a js file named main.js with the following code −
function printHello() {
console.log( "Hello, World!");
}
// Now call above function after 2 seconds
var t = setTimeout(printHello, 2000);
// Now clear the timer
clearTimeout(t);
Now run the main.js to see the result −
$ node main.js
Verify the output where you will not find anything printed.
setInterval(cb, ms)
The setInterval(cb, ms) global function is used to run callback cb repeatedly after at least ms milliseconds.
The actual delay depends on external factors like OS timer granularity and system load.
A timer cannot span more than 24.8 days.
This function returns an opaque value that represents the timer which can be used to clear the timer using the function clearInterval(t).
Example
Create a js file named main.js with the following code −
function printHello() {
console.log( "Hello, World!");
}
// Now call above function after 2 seconds
setInterval(printHello, 2000);
Now run the main.js to see the result −
$ node main.js
The above program will execute printHello() after every 2 second.
Due to system limitation.
Global Objects
The following table provides a list of other objects which we use frequently in our applications.
For a more detail, you can refer to the official documentation.
Sr.No.
Module Name > Description
1
Console
Used to print information on stdout and stderr.
2
Process
Used to get information on current process.
Provides multiple events related to process activities.
CommonJS modules are the original way to package JavaScript code for Node.js.
Node.js also supports the ECMAScript modules standard used by browsers and other JavaScript runtimes.
In Node.js, each file is treated as a separate module.
For example, consider a file named foo.js:
const circle = require('./circle.js');
console.log(`The area of a circle of radius 4 is ${circle.area(4)}`);
On the first line, foo.js loads the module circle.js that is in the same directory as foo.js.
Here are the contents of circle.js:
const { PI } = Math;
exports.area = (r) => PI * r ** 2;
exports.circumference = (r) => 2 * PI * r;
The module circle.js has exported the functions area() and
circumference().
Functions and objects are added to the root of a module by specifying additional properties on the special exports object.
Variables local to the module will be private, because the module is wrapped in a function by Node.js (see module wrapper).
In this example, the variable PI is private to circle.js.
The module.exports property can be assigned a new value (such as a function or object).
Below, bar.js makes use of the square module, which exports a Square class:
const Square = require('./square.js');
const mySquare = new Square(2);
console.log(`The area of mySquare is ${mySquare.area()}`);
The square module is defined in square.js:
// Assigning to exports will not modify module, must use module.exports module.exports = class Square {
constructor(width) {
this.width = width;
}
area() {
return this.width ** 2;
}
};
The CommonJS module system is implemented in the module core module.
Enabling
Node.js has two module systems: CommonJS modules and ECMAScript modules.
By default, Node.js will treat the following as CommonJS modules:
Files with a .cjs extension;
Files with a .js extension when the nearest parent package.json file contains a top-level field "type" with a value of "commonjs".
Files with a .js extension when the nearest parent package.json file doesn't contain a top-level field "type".
Package authors should include the "type" field, even in packages where all sources are CommonJS.
Being explicit about the type of the package will make things easier for build tools and loaders to determine how the files in the package should be interpreted.
Files with an extension that is not .mjs, .cjs, .json, .node, or .js
(when the nearest parent package.json file contains a top-level field
"type" with a value of "module", those files will be recognized as CommonJS modules only if they are being included via require(), not when used as the command-line entry point of the program).
See Determining module system for more details.
Calling require() always use the CommonJS module loader.
Calling import()
always use the ECMAScript module loader.
Accessing the main module
When a file is run directly from Node.js, require.main is set to its
module.
That means that it is possible to determine whether a file has been run directly by testing require.main === module.
For a file foo.js, this will be true if run via node foo.js, but
false if run by require('./foo').
When the entry point is not a CommonJS module, require.main is undefined, and the main module is out of reach.
Package manager tips
The semantics of the Node.js require() function were designed to be general enough to support reasonable directory structures.
Package manager programs such as dpkg, rpm, and npm will hopefully find it possible to build native packages from Node.js modules without modification.
Below we give a suggested directory structure that could work:
Let's say that we wanted to have the folder at
/usr/lib/node/<some-package>/<some-version> hold the contents of a specific version of a package.
Packages can depend on one another.
In order to install package foo, it may be necessary to install a specific version of package bar.
The bar package may itself have dependencies, and in some cases, these may even collide or form cyclic dependencies.
Because Node.js looks up the realpath of any modules it loads (that is, it resolves symlinks) and then looks for their dependencies in node_modules folders, this situation can be resolved with the following architecture:
/usr/lib/node/foo/1.2.3/: Contents of the foo package, version 1.2.3.
/usr/lib/node/bar/4.3.2/: Contents of the bar package that foo depends on.
/usr/lib/node/foo/1.2.3/node_modules/bar: Symbolic link to
/usr/lib/node/bar/4.3.2/.
/usr/lib/node/bar/4.3.2/node_modules/*: Symbolic links to the packages that
bar depends on.
Thus, even if a cycle is encountered, or if there are dependency conflicts, every module will be able to get a version of its dependency that it can use.
When the code in the foo package does require('bar'), it will get the version that is symlinked into /usr/lib/node/foo/1.2.3/node_modules/bar.
Then, when the code in the bar package calls require('quux'), it'll get the version that is symlinked into
/usr/lib/node/bar/4.3.2/node_modules/quux.
Furthermore, to make the module lookup process even more optimal, rather than putting packages directly in /usr/lib/node, we could put them in
/usr/lib/node_modules/<name>/<version>.
Then Node.js will not bother looking for missing dependencies in /usr/node_modules or /node_modules.
In order to make modules available to the Node.js REPL, it might be useful to also add the /usr/lib/node_modules folder to the $NODE_PATH environment variable.
Since the module lookups using node_modules folders are all relative, and based on the real path of the files making the calls to
require(), the packages themselves can be anywhere.
The .mjs extension
Due to the synchronous nature of require(), it is not possible to use it to load ECMAScript module files.
Attempting to do so will throw a
ERR_REQUIRE_ESM error.
Use import() instead.
The .mjs extension is reserved for ECMAScript Modules which cannot be loaded via require().
See Determining module system section for more info regarding which files are parsed as ECMAScript modules.
All together
To get the exact filename that will be loaded when require() is called, use the require.resolve() function.
Putting together all of the above, here is the high-level algorithm in pseudocode of what require() does:
require(X) from module at path Y
1. If X is a core module,
a. return the core module
b. STOP
2. If X begins with '/'
a. set Y to be the filesystem root
3. If X begins with './' or '/' or '../'
a. LOAD_AS_FILE(Y + X)
b. LOAD_AS_DIRECTORY(Y + X)
c. THROW "not found"
4. If X begins with '#'
a. LOAD_PACKAGE_IMPORTS(X, dirname(Y))
5. LOAD_PACKAGE_SELF(X, dirname(Y))
6. LOAD_NODE_MODULES(X, dirname(Y))
7. THROW "not found"
LOAD_AS_FILE(X)
1. If X is a file, load X as its file extension format.
STOP
2. If X.js is a file, load X.js as JavaScript text.
STOP
3. If X.json is a file, parse X.json to a JavaScript Object.
STOP
4. If X.node is a file, load X.node as binary addon.
STOP
LOAD_INDEX(X)
1. If X/index.js is a file, load X/index.js as JavaScript text.
STOP
2. If X/index.json is a file, parse X/index.json to a JavaScript object.
STOP
3. If X/index.node is a file, load X/index.node as binary addon.
STOP
LOAD_AS_DIRECTORY(X)
1. If X/package.json is a file,
a. Parse X/package.json, and look for "main" field.
b. If "main" is a falsy value, GOTO 2.
c. let M = X + (json main field)
d. LOAD_AS_FILE(M)
e. LOAD_INDEX(M)
f. LOAD_INDEX(X) DEPRECATED
g. THROW "not found"
2. LOAD_INDEX(X)
LOAD_NODE_MODULES(X, START)
1. let DIRS = NODE_MODULES_PATHS(START)
2. for each DIR in DIRS:
a.LOAD_PACKAGE_EXPORTS(X, DIR)
b.LOAD_AS_FILE(DIR/X)
c.LOAD_AS_DIRECTORY(DIR/X)
NODE_MODULES_PATHS(START)
1. let PARTS = path split(START)
2. let I = count of PARTS - 1
3. let DIRS = []
4. while I >= 0,
a.if PARTS[I] = "node_modules" CONTINUE
b.DIR = path join(PARTS[0 ..
I] + "node_modules")
c.DIRS = DIR + DIRS
d.let I = I - 1
5. return DIRS + GLOBAL_FOLDERS
LOAD_PACKAGE_IMPORTS(X, DIR)
1. Find the closest package scope SCOPE to DIR.
2. If no scope was found, return.
3. If the SCOPE/package.json "imports" is null or undefined, return.
4. let MATCH = PACKAGE_IMPORTS_RESOLVE(X, pathToFileURL(SCOPE),
["node", "require"]) defined in the ESM resolver.
5. RESOLVE_ESM_MATCH(MATCH).
LOAD_PACKAGE_EXPORTS(X, DIR)
1. Try to interpret X as a combination of NAME and SUBPATH where the name may have a @scope/ prefix and the subpath begins with a slash (`/`).
2. If X does not match this pattern or DIR/NAME/package.json is not a file, return.
3. Parse DIR/NAME/package.json, and look for "exports" field.
4. If "exports" is null or undefined, return.
5. let MATCH = PACKAGE_EXPORTS_RESOLVE(pathToFileURL(DIR/NAME), "." + SUBPATH, `package.json` "exports", ["node", "require"]) defined in the ESM resolver.
6. RESOLVE_ESM_MATCH(MATCH)
LOAD_PACKAGE_SELF(X, DIR)
1. Find the closest package scope SCOPE to DIR.
2. If no scope was found, return.
3. If the SCOPE/package.json "exports" is null or undefined, return.
4. If the SCOPE/package.json "name" is not the first segment of X, return.
5. let MATCH = PACKAGE_EXPORTS_RESOLVE(pathToFileURL(SCOPE), "." + X.slice("name".length), `package.json` "exports", ["node", "require"]) defined in the ESM resolver.
6. RESOLVE_ESM_MATCH(MATCH)
RESOLVE_ESM_MATCH(MATCH)
1. let RESOLVED_PATH = fileURLToPath(MATCH)
2. If the file at RESOLVED_PATH exists, load RESOLVED_PATH as its extension format.
STOP
3. THROW "not found"
Caching
Modules are cached after the first time they are loaded.
This means (among other things) that every call to require('foo') will get exactly the same object returned, if it would resolve to the same file.
Provided require.cache is not modified, multiple calls to require('foo') will not cause the module code to be executed multiple times.
This is an important feature.
With it, "partially done" objects can be returned, thus allowing transitive dependencies to be loaded even when they would cause cycles.
To have a module execute code multiple times, export a function, and call that function.
Module caching caveats
Modules are cached based on their resolved filename.
Since modules may resolve to a different filename based on the location of the calling module (loading from node_modules folders), it is not a guarantee that require('foo') will always return the exact same object, if it would resolve to different files.
Additionally, on case-insensitive file systems or operating systems, different resolved filenames can point to the same file, but the cache will still treat them as different modules and will reload the file multiple times.
For example,
require('./foo') and require('./FOO') return two different objects, irrespective of whether or not ./foo and ./FOO are the same file.
Core modules
Node.js has several modules compiled into the binary.
These modules are described in greater detail elsewhere in this documentation.
The core modules are defined within the Node.js source and are located in the
lib/ folder.
Core modules can be identified using the node: prefix, in which case it bypasses the require cache.
For instance, require('node:http') will always return the built in HTTP module, even if there is require.cache entry by that name.
Some core modules are always preferentially loaded if their identifier is passed to require().
For instance, require('http') will always return the built-in HTTP module, even if there is a file by that name.
The list of core modules that can be loaded without using the node: prefix is exposed as module.builtinModules.
Cycles
When there are circular require() calls, a module might not have finished executing when it is returned.
Consider this situation:
a.js:
console.log('a starting');
exports.done = false;
const b = require('./b.js');
console.log('in a, b.done = %j', b.done);
exports.done = true;
console.log('a done');b.js:
console.log('b starting');
exports.done = false;
const a = require('./a.js');
console.log('in b, a.done = %j', a.done);
exports.done = true;
console.log('b done');main.js:
console.log('main starting');
const a = require('./a.js');
const b = require('./b.js');
console.log('in main, a.done = %j, b.done = %j', a.done, b.done);
When main.js loads a.js, then a.js in turn loads b.js.
At that point, b.js tries to load a.js.
In order to prevent an infinite loop, an unfinished copy of the a.js exports object is returned to the
b.js module.
b.js then finishes loading, and its exports object is provided to the a.js module.
By the time main.js has loaded both modules, they're both finished.
The output of this program would thus be:
$ node main.js main starting a starting b starting in b, a.done = false b done in a, b.done = true a done in main, a.done = true, b.done = true
Careful planning is required to allow cyclic module dependencies to work correctly within an application.
File modules
If the exact filename is not found, then Node.js will attempt to load the required filename with the added extensions: .js, .json, and finally
.node.
When loading a file that has a different extension (e.g.
.cjs), its full name must be passed to require(), including its file extension (e.g.
require('./file.cjs')).
.json files are parsed as JSON text files, .node files are interpreted as compiled addon modules loaded with process.dlopen().
Files using any other extension (or no extension at all) are parsed as JavaScript text files.
Refer to the Determining module system section to understand what parse goal will be used.
A required module prefixed with '/' is an absolute path to the file.
For example, require('/home/marco/foo.js') will load the file at
/home/marco/foo.js.
A required module prefixed with './' is relative to the file calling
require().
That is, circle.js must be in the same directory as foo.js for
require('./circle') to find it.
Without a leading '/', './', or '../' to indicate a file, the module must either be a core module or is loaded from a node_modules folder.
If the given path does not exist, require() will throw a
MODULE_NOT_FOUND error.
Folders as modules
There are three ways in which a folder may be passed to require() as an argument.
The first is to create a package.json file in the root of the folder,
which specifies a main module.
An example package.json file might look like this:
{ "name" : "some-library",
"main" : "./lib/some-library.js" }
If this was in a folder at ./some-library, then
require('./some-library') would attempt to load
./some-library/lib/some-library.js.
If there is no package.json file present in the directory, or if the
"main" entry is missing or cannot be resolved, then Node.js will attempt to load an index.js or index.node file out of that directory.
For example, if there was no package.json file in the previous example, then require('./some-library') would attempt to load:
./some-library/index.js./some-library/index.node
If these attempts fail, then Node.js will report the entire module as missing with the default error:
Error: Cannot find module 'some-library'
In all three above cases, an import('./some-library') call would result in a
ERR_UNSUPPORTED_DIR_IMPORT error.
Using package subpath exports or
subpath imports can provide the same containment organization benefits as folders as modules, and work for both require and import.
Loading from node_modules folders
If the module identifier passed to require() is not a core module, and does not begin with '/', '../', or
'./', then Node.js starts at the directory of the current module, and adds /node_modules, and attempts to load the module from that location.
Node.js will not append node_modules to a path already ending in
node_modules.
If it is not found there, then it moves to the parent directory, and so on, until the root of the file system is reached.
For example, if the file at '/home/ry/projects/foo.js' called
require('bar.js'), then Node.js would look in the following locations, in this order:
/home/ry/projects/node_modules/bar.js/home/ry/node_modules/bar.js/home/node_modules/bar.js/node_modules/bar.js
This allows programs to localize their dependencies, so that they do not clash.
It is possible to require specific files or sub modules distributed with a module by including a path suffix after the module name.
For instance
require('example-module/path/to/file') would resolve path/to/file
relative to where example-module is located.
The suffixed path follows the same module resolution semantics.
Loading from the global folders
If the NODE_PATH environment variable is set to a colon-delimited list of absolute paths, then Node.js will search those paths for modules if they are not found elsewhere.
On Windows, NODE_PATH is delimited by semicolons (;) instead of colons.
NODE_PATH was originally created to support loading modules from varying paths before the current module resolution algorithm was defined.
NODE_PATH is still supported, but is less necessary now that the Node.js ecosystem has settled on a convention for locating dependent modules.
Sometimes deployments that rely on NODE_PATH show surprising behavior when people are unaware that NODE_PATH must be set.
Sometimes a module's dependencies change, causing a different version (or even a different module) to be loaded as the NODE_PATH is searched.
Additionally, Node.js will search in the following list of GLOBAL_FOLDERS:
1: $HOME/.node_modules
2: $HOME/.node_libraries
3: $PREFIX/lib/node
Where $HOME is the user's home directory, and $PREFIX is the Node.js configured node_prefix.
These are mostly for historic reasons.
It is strongly encouraged to place dependencies in the local node_modules
folder.
These will be loaded faster, and more reliably.
The module wrapper
Before a module's code is executed, Node.js will wrap it with a function wrapper that looks like the following:
(function(exports, require, module, __filename, __dirname) {
// Module code actually lives in here
});
By doing this, Node.js achieves a few things:
It keeps top-level variables (defined with var, const, or let) scoped to the module rather than the global object.
It helps to provide some global-looking variables that are actually specific to the module, such as:
The module and exports objects that the implementor can use to export values from the module.
The convenience variables __filename and __dirname, containing the module's absolute filename and directory path.
The module scope
__dirname
<string>
The directory name of the current module.
This is the same as the path.dirname() of the __filename.
Example: running node example.js from /Users/mjrconsole.log(__dirname);
// Prints: /Users/mjr console.log(path.dirname(__filename));
// Prints: /Users/mjr
__filename
<string>
The file name of the current module.
This is the current module file's absolute path with symlinks resolved.
For a main program this is not necessarily the same as the file name used in the command line.
See __dirname for the directory name of the current module.
Examples:
Running node example.js from /Users/mjrconsole.log(__filename);
// Prints: /Users/mjr/example.js console.log(__dirname);
// Prints: /Users/mjr
Given two modules: a and b, where b is a dependency of
a and there is a directory structure of:
/Users/mjr/app/a.js/Users/mjr/app/node_modules/b/b.js
References to __filename within b.js will return
/Users/mjr/app/node_modules/b/b.js while references to __filename within
a.js will return /Users/mjr/app/a.js.
exports
<Object>
A reference to the module.exports that is shorter to type.
See the section about the exports shortcut for details on when to use
exports and when to use module.exports.
module
<module>
A reference to the current module, see the section about the
module object.
In particular, module.exports is used for defining what a module exports and makes available through require().
require(id)
id<string> module name or path Returns: <any> exported module content
Used to import modules, JSON, and local files.
Modules can be imported from node_modules.
Local modules and JSON files can be imported using a relative path (e.g.
./, ./foo, ./bar/baz, ../foo) that will be resolved against the directory named by __dirname (if defined) or the current working directory.
The relative paths of POSIX style are resolved in an OS independent fashion, meaning that the examples above will work on Windows in the same way they would on Unix systems.
// Importing a local module with a path relative to the `__dirname` or current
// working directory.
(On Windows, this would resolve to .\path\myLocalModule.)
const myLocalModule = require('./path/myLocalModule');
// Importing a JSON file:
const jsonData = require('./path/filename.json');
// Importing a module from node_modules or Node.js built-in module:
const crypto = require('node:crypto');
require.cache
<Object>
Modules are cached in this object when they are required.
By deleting a key value from this object, the next require will reload the module.
This does not apply to native addons, for which reloading will result in an error.
Adding or replacing entries is also possible.
This cache is checked before built-in modules and if a name matching a built-in module is added to the cache,
only node:-prefixed require calls are going to receive the built-in module.
Use with care!
const assert = require('node:assert');
const realFs = require('node:fs');
const fakeFs = {};
require.cache.fs = { exports: fakeFs };
assert.strictEqual(require('fs'), fakeFs);
assert.strictEqual(require('node:fs'), realFs);
require.extensions
Deprecated
<Object>
Instruct require on how to handle certain file extensions.
Process files with the extension .sjs as .js:
require.extensions['.sjs'] = require.extensions['.js'];Deprecated. In the past, this list has been used to load non-JavaScript modules into Node.js by compiling them on-demand.
However, in practice, there are much better ways to do this, such as loading modules via some other Node.js program, or compiling them to JavaScript ahead of time.
Avoid using require.extensions.
Use could cause subtle bugs and resolving the extensions gets slower with each registered extension.
require.main
<module> | <undefined>
The Module object representing the entry script loaded when the Node.js process launched, or undefined if the entry point of the program is not a CommonJS module.
See "Accessing the main module".
In entry.js script:
console.log(require.main);node entry.jsModule {
id: '.',
path: '/absolute/path/to',
exports: {},
filename: '/absolute/path/to/entry.js',
loaded: false,
children: [],
paths:
[ '/absolute/path/to/node_modules',
'/absolute/path/node_modules',
'/absolute/node_modules',
'/node_modules' ] }
require.resolve(request[, options])
request<string> The module path to resolve.
options<Object>paths<string[]> Paths to resolve module location from.
If present, these paths are used instead of the default resolution paths, with the exception of GLOBAL_FOLDERS like $HOME/.node_modules, which are always included.
Each of these paths is used as a starting point for the module resolution algorithm, meaning that the node_modules hierarchy is checked from this location.
Returns: <string>
Use the internal require() machinery to look up the location of a module,
but rather than loading the module, just return the resolved filename.
If the module can not be found, a MODULE_NOT_FOUND error is thrown.
require.resolve.paths(request)#
request<string> The module path whose lookup paths are being retrieved.
Returns: <string[]> | <null>
Returns an array containing the paths searched during resolution of request or
null if the request string references a core module, for example http or
fs.
The module object
<Object>
In each module, the module free variable is a reference to the object representing the current module.
For convenience, module.exports is also accessible via the exports module-global.
module is not actually a global but rather local to each module.
module.children
<module[]>
The module objects required for the first time by this one.
module.exports
<Object>
The module.exports object is created by the Module system.
Sometimes this is not acceptable; many want their module to be an instance of some class.
To do this, assign the desired export object to module.exports.
Assigning the desired object to exports will simply rebind the local exports variable,
which is probably not what is desired.
For example, suppose we were making a module called a.js:
const EventEmitter = require('node:events');
module.exports = new EventEmitter();
// Do some work, and after some time emit
// the 'ready' event from the module itself.
setTimeout(() => {
module.exports.emit('ready');
}, 1000);
Then in another file we could do:
const a = require('./a');
a.on('ready', () => {
console.log('module "a" is ready');
});
Assignment to module.exports must be done immediately.
It cannot be done in any callbacks.
This does not work:
x.js:
setTimeout(() => {
module.exports = { a: 'hello' };
}, 0);y.js:
const x = require('./x');
console.log(x.a);
exports shortcut
The exports variable is available within a module's file-level scope, and is assigned the value of module.exports before the module is evaluated.
It allows a shortcut, so that module.exports.f = ... can be written more succinctly as exports.f = ....
However, be aware that like any variable, if a new value is assigned to exports, it is no longer bound to module.exports:
module.exports.hello = true; // Exported from require of module exports = { hello: false }; // Not exported, only available in the module
When the module.exports property is being completely replaced by a new object, it is common to also reassign exports:
module.exports = exports = function Constructor() {
// ...
etc.
};
To illustrate the behavior, imagine this hypothetical implementation of
require(), which is quite similar to what is actually done by require():
function require(/* ...
*/) {
const module = { exports: {} };
((module, exports) => {
// Module code here.
In this example, define a function.
function someFunc() {}
exports = someFunc;
// At this point, exports is no longer a shortcut to module.exports, and
// this module will still export an empty default object.
module.exports = someFunc;
// At this point, the module will now export someFunc, instead of the
// default object.
})(module, module.exports);
return module.exports;
}
module.filename
<string>
The fully resolved filename of the module.
module.id
<string>
The identifier for the module.
Typically this is the fully resolved filename.
module.isPreloading
Type: <boolean>true if the module is running during the Node.js preload phase.
module.loaded
<boolean>
Whether or not the module is done loading, or is in the process of loading.
module.parent
Deprecated: Please use require.main and
module.children instead.
<module> | <null> | <undefined>
The module that first required this one, or null if the current module is the entry point of the current process, or undefined if the module was loaded by something that is not a CommonJS module (E.G.: REPL or import).
module.path
<string>
The directory name of the module.
This is usually the same as the
path.dirname() of the module.id.
id<string>
Returns: <any> exported module content
The module.require() method provides a way to load a module as if
require() was called from the original module.
In order to do this, it is necessary to get a reference to the module object.
Since require() returns the module.exports, and the module is typically
only available within a specific module's code, it must be explicitly exported in order to be used.
const clc = require('cli-color');
console.log(clc.red('Text in red'));
Styles can be mixed:
console.log(clc.red.bgWhite.underline("Underlined red text on white background."));
Styled text can be mixed with unstyled:
console.log(clc.red("red") + " plain " + clc.blue("blue"));
Styled text can be nested:
console.log(clc.red("red " + clc.blue("blue") + " red"));
Best way is to predefine needed stylings and then use it:
var error = clc.red.bold;
var warn = clc.yellow;
var notice = clc.blue;
console.log(error("Error!"));
console.log(warn("Warning"));
console.log(notice("Notice"));
Note: No colors or styles are output when NO_COLOR env var is set
Styles
Styles will display correctly if font used in your console supports them.
bold
italic
underline
blink
inverse
strike
Colors
follow these steps:
Set up a new Node.js project:
Create a new directory for your project, navigate to it in a terminal, and run the command npm init to initialize a new Node.js project.
Follow the prompts to set up your project.
Install dependencies:
Install the necessary dependencies for your server.
In this case, you'll need express to create the server and handle HTTP requests, and body-parser to parse incoming request bodies.
Run the following command to install these dependencies:
npm install express body-parser
Create the server:
Create a new JavaScript file, such as server.js, and require the necessary dependencies:
javascript
const express = require('express');
const bodyParser = require('body-parser');
const app = express();
const port = 3000; // Choose the desired port number
app.use(bodyParser.urlencoded({ extended: false }));
app.use(bodyParser.json());
// Start the server
app.listen(port, () => {
console.log(`Server is running on port ${port}`);
});
Define routes:
Add routes to handle different API endpoints.
For example, you can have a route to create a new reminder and a route to fetch all reminders:
// Create a new reminder
app.post('/reminders', (req, res) => {
const { text, date } = req.body;
// Save the reminder to a database or perform necessary actions
console.log(`New reminder created: ${text} on ${date}`);
res.sendStatus(201); // Send a success status code
});
// Get all reminders
app.get('/reminders', (req, res) => {
// Retrieve reminders from the database or any other storage
const reminders = [
{ text: 'Reminder 1', date: '2023-11-22' },
{ text: 'Reminder 2', date: '2023-11-23' }
];
res.json(reminders); // Send the reminders as JSON response
});
Handle client requests:
The server is now ready to receive requests from clients.
You can send HTTP requests to the server using a library like axios from your client application.
For example, in a separate JavaScript file:
javascript
const axios = require('axios');
// Create a new reminder
axios.post('http://localhost:3000/reminders', {
text: 'Meeting', date: '2023-11-24' })
.then(response => {
console.log('Reminder created successfully'); })
.catch(error => {
console.error('Error creating reminder:', error);
});
// Get all reminders
axios.get('http://localhost:3000/reminders')
.then(response => {
const reminders = response.data;
console.log('All reminders:', reminders); })
.catch(error => {
console.error('Error retrieving reminders:', error); });
Remember to run your Node.js server by executing node server.js in the terminal.
Now you have a basic reminder server that can handle client requests for creating reminders and fetching all reminders.
Feel free to enhance the server with additional functionality and error handling as per your requirements.
Here's an example of how to connect to the reminder server through an HTML browser page
Create an HTML file:
Create a new HTML file, such as index.html, and add the following content:
<!DOCTYPE html>
<html>
<head>
<title>Reminder App</title>
</head>
<body>
<h1>Reminder App</h1>
<form id="reminderForm">
<label for="reminderText">Reminder Text:</label>
<input type="text" id="reminderText" required>
<label for="reminderDate">Reminder Date:</label>
<input type="date" id="reminderDate" required>
<button type="submit">Create Reminder</button>
</form>
<ul id="reminderList"></ul>
<script src="script.js"></script>
</body>
</html>
Create a JavaScript file: Create a new JavaScript file, such as script.js, in the same directory as the HTML file.
This file will contain the client-side JavaScript code to interact with the server.
Write JavaScript code: In the script.js file, add the following JavaScript code to handle form submission and retrieve reminders from the server:
javascript
document.addEventListener('DOMContentLoaded', () => {
const form = document.getElementById('reminderForm');
const reminderList = document.getElementById('reminderList');
form.addEventListener('submit', (event) => {
event.preventDefault();
const text = document.getElementById('reminderText').value;
const date = document.getElementById('reminderDate').value;
createReminder(text, date);
});
getReminders();
function createReminder(text, date) {
fetch('http://localhost:3000/reminders', {
method: 'POST',
headers: {
'Content-Type': 'application/json'
},
body: JSON.stringify({ text, date })
})
.then(response => {
if (response.ok) {
console.log('Reminder created successfully');
getReminders(); // Refresh the reminder list
} else {
throw new Error('Error creating reminder');
}
})
.catch(error => {
console.error('Error creating reminder:', error);
});
}
function getReminders() {
fetch('http://localhost:3000/reminders')
.then(response => response.json())
.then(reminders => {
reminderList.innerHTML = ''; // Clear the existing list
reminders.forEach(reminder => {
const li = document.createElement('li');
li.textContent = `${reminder.text} - ${reminder.date}`;
reminderList.appendChild(li);
});
})
.catch(error => {
console.error('Error retrieving reminders:', error);
});
}
});
Start the reminder server:
Make sure your Node.js reminder server is running by executing node server.js in the terminal.
Test the application:
Open the HTML file (index.html) in a web browser.
You should see a form to create reminders and a list to display existing reminders.
When you submit the form, it will send a request to the server to create a new reminder.
The list will update to display all the reminders fetched from the server.
Make sure the server is running on the same port specified in the JavaScript code (http://localhost:3000/reminders).
Adjust the URL if your server is running on a different port.
With this setup, you can interact with the reminder server through the HTML browser page, creating reminders and displaying them in real-time.
How To Write and Run Your First Program in Node.js
You’ll be introduced to a few Node-specific concepts and build your way up to create a program that helps users inspect environment variables on their system.
Use the Node.js REPL
How To Use the Node.js REPL
The Node.js Read-Eval-Print-Loop (REPL) is an interactive shell that processes Node.js expressions.
The shell reads JavaScript code the user enters, evaluates the result of interpreting the line of code, prints the result to the user, and loops until the user signals to quit.
The REPL is bundled with with every Node.js installation and allows you to quickly test and explore JavaScript code within the Node environment without having to store it in a file.
Use Node.js Modules with npm and package.json
How To Use Node.js Modules with npm and package.json
The Node.js Package Manager (npm) is the default and most popular package manager in the Node.js ecosystem, and is primarily used to install and manage external modules in a Node.js project.
In this tutorial, you will manage packages with npm, first keeping track of modules with the package.json file, and then using the npm CLI tool to list your package dependencies, update your packages, uninstall your packages, and perform an audit to find security flaws in your packages.
Create a Node.js Module
How To Create a Node.js Module
In this tutorial, you will create a Node.js module organized with npm that suggests what color web developers should use in their designs.
You will develop the module by storing the colors as an array, and providing a function to retrieve one randomly.
Afterwards, you will run through various ways of exporting and importing a module into a Node.js application.
Write Asynchronous Code in Node.js
How To Write Asynchronous Code in Node.js
With asynchronous programming, JavaScript and Node.js developers can execute other code while waiting for activities like network requests to finish.
This can make writing API calls much more efficient.
In this tutorial, you will learn how JavaScript manages asynchronous tasks with help from the Event Loop.
You will then create a program that uses asynchronous programming written in three ways: with callbacks, promises, and the async/await keywords.
Test a Node.js Module with Mocha and Assert
How To Test a Node.js Module with Mocha and Assert
Testing is an integral part of software development.
With the right test setup, this process can be automated, saving a lot of time.
In this article, you’ll write tests for a Node.js TODO list module.
You will set up and use the Mocha test framework to structure a series of integration tests.
Then you’ll use the Node.js assert module to create the tests themselves.
Finally, you will try out testing with asynchronous code, and use hooks to prepare your test fixtures and environments.
Create a Web Server in Node.js with the HTTP Module
How To Create a Web Server in Node.js with the HTTP Module
Node.js allows developers to use JavaScript to write back-end code, even though traditionally it was used in the browser to write front-end code.
Having both the frontend and backend together like this reduces the effort it takes to make a web server.
In this tutorial, you will learn how to build web servers using the http module that’s included in Node.js.
You will build web servers that can return JSON data, CSV files, and HTML web pages.
Using Buffers in Node.js
Using Buffers in Node.js
A buffer is a space in memory (typically RAM) that stores binary data.
In Node.js, we can access these spaces of memory with the built-in Buffer class.
Buffers are useful when using JavaScript to interacting with binary data, usually at lower networking levels.
In this tutorial, you will use the Node.js REPL to create buffers, read from buffers, write to and copy from buffers, and use buffers to convert between binary data and data encoded with ASCII and UTF-8.
Using Event Emitters in Node.js
Using Event Emitters in Node.js
Event emitters are objects in Node.js that trigger an event by sending a message to signal that an action was completed.
In this article, you will create an event listener for a TicketManager JavaScript class that allows a user to buy tickets.
You will set up listeners for the buy event, which will trigger every time a ticket is bought.
This process will also teach you how to manage erroneous events from the emitter and how to manage event subscribers.
Debug Node.js with the Built-In Debugger and Chrome DevTools
How To Debug Node.js with the Built-In Debugger and Chrome DevTools
In this article, you will use a debugger to debug some sample Node.js applications.
You will first debug code using the built-in Node.js debugger tool, setting up watchers and breakpoints so you can find the root cause of a bug.
You will then use Google Chrome DevTools as a Graphical User Interface (GUI) alternative to the command line Node.js debugger.
Launch Child Processes in Node.js
How To Launch Child Processes in Node.js
Since Node.js instances create a single process with a single thread, JavaScript operations that take a long time to run can sometimes block the execution of other code.
A key strategy to work around this problem is to launch a child process to run multiple processes concurrently.
In this tutorial, you will use the child_process module to create child processes while executing a series of sample Node.js applications.
Work with Files using the fs Module in Node.js
How To Work with Files using the fs Module in Node.js
With Node.js, you can use JavaScript to programmatically manipulate files with the built-in fs module.
The name is short for “file system,” and the module contains all the functions you need to read, write, and delete files on the local machine.
Create an HTTP Client with Core HTTP in Node.js
How To Create an HTTP Client with Core HTTP in Node.js
It’s common for a modern JavaScript application to communicate with other servers to accomplish a task.
In this article, you will use the https Node.js module to make HTTP requests to a web API, including GET, POST, PUT, and DELETE requests.
Back-end program or command line interface (CLI) tool might need to write downloaded data to a file in order to save it, or a data-intensive application may need to export to JSON, CSV, or Excel formats.
These programs would need to communicate with the filesystem of the operating system on which they are running.
With Node.js, you can programmatically manipulate files with the built-in fs module.
The name is short for “file system,” and the module contains all the functions you need to read, write, and delete files on the local machine.
This unique aspect of Node.js makes JavaScript a useful language for back-end and CLI tool programming.
The fs module supports interacting with files synchronously, asynchronously, or via streams; this tutorial will focus on how to use the asynchronous, Promise-based API, the most commonly used method for Node.js developers.
Prerequisites
This article uses JavaScript Promises to work with files, particularly with the async/await syntax.
If you’re not familiar with Promises, async/await syntax, or asynchronous programming, check How To Write Asynchronous Code in Node.js.
Step 1 — Reading Files with readFile()
In this step, you’ll write a program to read files in Node.js.
To do this, you’ll need to import the fs module, a standard Node.js module for working with files, and then use the module’s readFile() function.
Your program will read the file, store its contents in a variable, then log its contents to the console.
The first step will be to set up the coding environment for this activity and the ones in the later sections.
Create a folder to store your code.
In your terminal, make a folder called node-files:
mkdir node-files
Change your working directory to the newly created folder with the cd command:
cd node-files
In this folder, you’ll create two files.
The first file will be a new file with content that your program will read later.
The second file will be the Node.js module that reads the file.
Create the file greetings.txt with the following command:
echo "hello, hola, bonjour, hallo" > greetings.txt
The echo command prints its string argument to the terminal.
You use to redirect echo’s output to a new file, greetings.txt.
Now, create and open readFile.js in your text editor of choice.
This tutorial uses nano, a terminal text editor.
You can open this file with nano like this:
nano readFile.js
The code for this file can be broken up into three sections.
First, you need to import the Node.js module that allows your program to work with files.
In your text editor, type this code:
node-files/readFile.js
const fs = require('fs').promises;
As mentioned earlier, you use the fs module to interact with the filesystem.
Notice, though, that you are importing the .promises part of the module.
When the fs module was first created, the primary way to write asynchronous code in Node.js was through callbacks.
As promises grew in popularity, the Node.js team worked to support them in the fs module out of the box.
In Node.js version 10, they created a promises object in the fs module that uses promises, while the main fs module continues to expose functions that use callbacks.
In this program, you are importing the promise version of the module.
Once the module is imported, you can create an asynchronous function to read the file.
Asynchronous functions begin with the async keyword.
With an asynchronous function, you can resolve promises using the await keyword, instead of chaining the promise with the .then() method.
Create a new function readFile() that accepts one argument, a string called filePath.
Your readFile() function will use the fs module to load the file into a variable using async/await syntax.
Enter the following highlighted code:
node-files/readFile.js
const fs = require('fs').promises;
async function readFile(filePath) {
try {
const data = await fs.readFile(filePath);
console.log(data.toString());
} catch (error) {
console.error(`Got an error trying to read the file: ${error.message}`);
}
}
You define the function with the async keyword so you can later use the accompanying await keyword.
To capture errors in your asynchronous file reading operation, you enclose the call to fs.readFile() with a try...catch block.
Within the try section, you load a file to a data variable with the fs.readFile() function.
The only required argument for that function is the file path, which is given as a string.
The fs.readFile() returns a buffer object by default.
A buffer object can store any kind of file type.
When you log the contents of the file, you convert those bytes into text by using the toString() method of the buffer object.
If an error is caught, typically if the file is not found or the program does not have permission to read the file, you log the error you received in the console.
Finally, call the function on the greetings.txt file with the following highlighted line:
node-files/readFile.js
const fs = require('fs').promises;
async function readFile(filePath) {
try {
const data = await fs.readFile(filePath);
console.log(data.toString());
} catch (error) {
console.error(`Got an error trying to read the file: ${error.message}`);
}
}
readFile('greetings.txt');
Be sure to save your contents.
With nano, you can save and exit by pressing CTRL+X.
Your program will now read the greetings.txt file you created earlier and log its contents to the terminal.
Confirm this by executing your module with node:
node readFile.js
You will receive the following output:
Outputhello, hola, bonjour, hallo
You’ve now read a file with the fs module’s readFile() function using the async/await syntax.
Note: In some earlier versions of Node.js, you will receive the following warning when using the fs module:
(node:13085) ExperimentalWarning: The fs.promises API is experimental
The promises object of the fs module was introduced in Node.js version 10, so some earlier versions still call the module experimental.
This warning was removed when the API became stable in version 12.6.
Now that you’ve read a file with the fs module, you will next create a file and write text to it.
Step 2 — Writing Files with writeFile()
In this step, you will write files with the writeFile() function of the fs module.
You will create a CSV file in Node.js that keeps track of a grocery bill.
The first time you write the file, you will create the file and add the headers.
The second time, you will append data to the file.
Open a new file in your text editor:
nano writeFile.js
Begin your code by importing the fs module:
node-files/writeFile.js
const fs = require('fs').promises;
You will continue to use async/await syntax as you create two functions.
The first function will be to make the CSV file.
The second function will be to add data to the CSV file.
In your text editor, enter the following highlighted code:
node-files/writeFile.js
const fs = require('fs').promises;
async function openFile() {
try {
const csvHeaders = 'name,quantity,price'
await fs.writeFile('groceries.csv', csvHeaders);
} catch (error) {
console.error(`Got an error trying to write to a file: ${error.message}`);
}
}
This asynchronous function first creates a csvHeaders variable that contains the column headings of your CSV file.
You then use the writeFile() function of the fs module to create a file and write data to it.
The first argument is the file path.
As you provided just the file name, Node.js will create the file in the same directory that you’re executing the code in.
The second argument is the data you are writing, in this case the csvHeaders variable.
Next, create a new function to add items to your grocery list.
Add the following highlighted function in your text editor:
node-files/writeFile.js
const fs = require('fs').promises;
async function openFile() {
try {
const csvHeaders = 'name,quantity,price'
await fs.writeFile('groceries.csv', csvHeaders);
} catch (error) {
console.error(`Got an error trying to write to a file: ${error.message}`);
}
}
async function addGroceryItem(name, quantity, price) {
try {
const csvLine = `\n${name},${quantity},${price}`
await fs.writeFile('groceries.csv', csvLine, { flag: 'a' });
} catch (error) {
console.error(`Got an error trying to write to a file: ${error.message}`);
}
}
The asynchronous addGroceryItem() function accepts three arguments: the name of the grocery item, the amount you are buying, and the price per unit.
These arguments are used with template literal syntax to form the csvLine variable, which is the data you are writing to the file.
You then use the writeFile() method as you did in the openFile() function.
However, this time you have a third argument: a JavaScript object.
This object has a flag key with the value a.
Flags tell Node.js how to interact with the file on the system.
By using the flag a, you are telling Node.js to append to the file, not overwrite it.
If you don’t specify a flag, it defaults to w, which creates a new file if none exists or overwrites a file if it already exists.
You can learn more about filesystem flags in the Node.js documentation.
To complete your script, use these functions.
Add the following highlighted lines at the end of the file:
node-files/writeFile.js
async function addGroceryItem(name, quantity, price) {
try {
const csvLine = `\n${name},${quantity},${price}`
await fs.writeFile('groceries.csv', csvLine, { flag: 'a' });
} catch (error) {
console.error(`Got an error trying to write to a file: ${error.message}`);
}
}
(async function () {
await openFile();
await addGroceryItem('eggs', 12, 1.50);
await addGroceryItem('nutella', 1, 4);
})();
To call the functions, you first create a wrapper function with async function.
Since the await keyword can not be used from the global scope as of the writing of this tutorial, you must wrap the asynchronous functions in an async function.
Notice that this function is anonymous, meaning it has no name to identify it.
Your openFile() and addGroceryItem() functions are asynchronous functions.
Without enclosing these calls in another function, you cannot guarantee the order of the content.
The wrapper you created is defined with the async keyword.
Within that function you order the function calls using the await keyword.
Finally, the async function definition is enclosed in parentheses.
These tell JavaScript that the code inside them is a function expression.
The parentheses at the end of the function and before the semicolon are used to invoke the function immediately.
This is called an Immediately-Invoked Function Expression (IIFE).
By using an IIFE with an anonymous function, you can test that your code produces a CSV file with three lines: the column headers, a line for eggs, and the last line for nutella.
Save and exit nano with CTRL+X.
Now, run your code with the node command:
node writeFile.js
There will be no output.
However, a new file will exist in your current directory.
Use the cat command to display the contents of groceries.csv:
cat groceries.csv
You will receive the following output:
node-files/groceries.csv
name,quantity,price
eggs,12,1.5
nutella,1,4
Your call to openFile() created a new file and added the column headings for your CSV.
The subsequent calls to addGroceryItem() then added your two lines of data.
With the writeFile() function, you can create and edit files.
Next, you will delete files, a common operation when you have temporary files or need to make space on a hard drive.
Step 3 — Deleting Files with unlink()
In this step, you will delete files with the unlink() function in the fs module.
You will write a Node.js script to delete the groceries.csv file that you created in the last section.
In your terminal, create a new file for this Node.js module:
nano deleteFile.js
Now you will write code that creates an asynchronous deleteFile() function.
That function will accept a file path as an argument, passing it to the unlink() function to remove it from your filesystem.
In your text editor, write the following code:
node-files/deleteFile.js
const fs = require('fs').promises;
async function deleteFile(filePath) {
try {
await fs.unlink(filePath);
console.log(`Deleted ${filePath}`);
} catch (error) {
console.error(`Got an error trying to delete the file: ${error.message}`);
}
}
deleteFile('groceries.csv');
The unlink() function accepts one argument: the file path of the file you want to be deleted.
Warning: When you delete the file with the unlink() function, it is not sent to your recycle bin or trash can but permanently removed from your filesystem.
This action is not reversible, so please be certain that you want to remove the file before executing your code.
Exit nano, ensuring that you save the contents of the file by entering CTRL+X.
Now, execute the program.
Run the following command in your terminal:
node deleteFile.js
You will receive the following output:
OutputDeleted groceries.csv
To confirm that the file no longer exists, use the ls command in your current directory:
ls
This command will display these files:
OutputdeleteFile.js greetings.txt readFile.js writeFile.js
You’ve now confirmed that your file was deleted with the unlink() function.
So far you’ve learned how to read, write, edit, and delete files.
The following section uses a function to move files to different folders.
After learning that function, you will be able to do the most critical file management tasks in Node.js.
Step 4 — Moving Files with rename()
Folders are used to organize files, so being able to programmatically move files from one folder to another makes file management easier.
You can move files in Node.js with the rename() function.
In this step, you’ll move a copy of the greetings.txt file into a new folder.
Before you can code your Node.js module, you need to set a few things up.
Begin by creating a folder that you’ll be moving your file into.
In your terminal, create a test-data folder in your current directory:
mkdir test-data
Now, copy the greetings.txt file that was used in the first step using the cp command:
cp greetings.txt greetings-2.txt
Finish the setup by opening a JavaScript file to contain your code:
nano moveFile.js
In your Node.js module, you’ll create a function called moveFile() that calls the rename() function.
When using the rename() function, you need to provide the file path of the original file and the path of the destination location.
For this example, you’ll use a moveFile() function to move the greetings-2.txt file into the test-data folder.
You’ll also change its name to salutations.txt.
Enter the following code in your open text editor:
node-files/moveFile.js
const fs = require('fs').promises;
async function moveFile(source, destination) {
try {
await fs.rename(source, destination);
console.log(`Moved file from ${source} to ${destination}`);
} catch (error) {
console.error(`Got an error trying to move the file: ${error.message}`);
}
}
moveFile('greetings-2.txt', 'test-data/salutations.txt');
As mentioned earlier, the rename() function takes two arguments: the source and destination file paths.
This function can move files to other folders, rename a file in its current directory, or move and rename at the same time.
In your code, you are moving and renaming your file.
Save and exit nano by pressing CTRL+X.
Next, execute this program with node.
Enter this command to run the program:
node moveFile.js
You will receive this output:
OutputMoved file from greetings-2.txt to test-data/salutations.txt
To confirm that the file no longer exists in your current directory, you can use the ls command:
ls
This command will display these files and folder:
OutputdeleteFile.js greetings.txt moveFile.js readFile.js test-data writeFile.js
You can now use ls to list the files in the test-data subfolder:
ls test-data
Your moved file will appear in the output:
Outputsalutations.txt
You have now used the rename() function to move a file from your current directory into a subfolder.
You also renamed the file with the same function call.
Conclusion
You first loaded the contents of a file with readFile().
You then created new files and appended data to an existing file with the writeFile() function.
You permanently removed a file with the unlink() function, and then move and renamed a file with rename().
For many programs in JavaScript, code is executed as the developer writes it—line by line.
This is called synchronous execution, because the lines are executed one after the other, in the order they were written.
However, not every instruction you give to the computer needs to be attended to immediately.
For example, if you send a network request, the process executing your code will have to wait for the data to return before it can work on it.
In this case, time would be wasted if it did not execute other code while waiting for the network request to be completed.
To solve this problem, developers use asynchronous programming, in which lines of code are executed in a different order than the one in which they were written.
With asynchronous programming, we can execute other code while we wait for long activities like network requests to finish.
JavaScript code is executed on a single thread within a computer process.
Its code is processed synchronously on this thread, with only one instruction run at a time.
Therefore, if we were to do a long-running task on this thread, all of the remaining code is blocked until the task is complete.
By leveraging JavaScript’s asynchronous programming features, we can offload long-running tasks to a background thread to avoid this problem.
When the task is complete, the code we need to process the task’s data is put back on the main single thread.
In this tutorial, you will learn how JavaScript manages asynchronous tasks with help from the Event Loop, which is a JavaScript construct that completes a new task while waiting for another.
You will then create a program that uses asynchronous programming to request a list of movies from a Studio Ghibli API and save the data to a CSV file.
The asynchronous code will be written in three ways: callbacks, promises, and with the async/await keywords.
Note: As of this writing, asynchronous programming is no longer done using only callbacks, but learning this obsolete method can provide great context as to why the JavaScript community now uses promises.
The async/await keywords enable us to use promises in a less verbose way, and are thus the standard way to do asynchronous programming in JavaScript at the time of writing this article.
Prerequisites
Node.js installed on your development machine.
This tutorial uses version 10.17.0.
To install this on macOS or Ubuntu 18.04, follow the steps in How to Install Node.js and Create a Local Development Environment on macOS or the Installing Using a PPA section of How To Install Node.js on Ubuntu 18.04.
You will also need to be familiar with installing packages in your project.
Get up to speed by reading our guide on How To Use Node.js Modules with npm and package.json.
It is important that you’re comfortable creating and executing functions in JavaScript before learning how to use them asynchronously.
If you need an introduction or refresher, you can read our guide on How To Define Functions in JavaScript
The Event Loop
Let’s begin by studying the internal workings of JavaScript function execution.
Understanding how this behaves will allow you to write asynchronous code more deliberately, and will help you with troubleshooting code in the future.
As the JavaScript interpreter executes the code, every function that is called is added to JavaScript’s call stack.
The call stack is a stack—a list-like data structure where items can only be added to the top, and removed from the top.
Stacks follow the “Last in, first out” or LIFO principle.
If you add two items on the stack, the most recently added item is removed first.
Let’s illustrate with an example using the call stack.
If JavaScript encounters a function functionA() being called, it is added to the call stack.
If that function functionA() calls another function functionB(), then functionB() is added to the top of the call stack.
As JavaScript completes the execution of a function, it is removed from the call stack.
Therefore, JavaScript will execute functionB() first, remove it from the stack when complete, and then finish the execution of functionA() and remove it from the call stack.
This is why inner functions are always executed before their outer functions.
When JavaScript encounters an asynchronous operation, like writing to a file, it adds it to a table in its memory.
This table stores the operation, the condition for it to be completed, and the function to be called when it’s completed.
As the operation completes, JavaScript adds the associated function to the message queue.
A queue is another list-like data structure where items can only be added to the bottom but removed from the top.
In the message queue, if two or more asynchronous operations are ready for their functions to be executed, the asynchronous operation that was completed first will have its function marked for execution first.
Functions in the message queue are waiting to be added to the call stack.
The event loop is a perpetual process that checks if the call stack is empty.
If it is, then the first item in the message queue is moved to the call stack.
JavaScript prioritizes functions in the message queue over function calls it interprets in the code.
The combined effect of the call stack, message queue, and event loop allows JavaScript code to be processed while managing asynchronous activities.
Now that you have a high-level understanding of the event loop, you know how the asynchronous code you write will be executed.
With this knowledge, you can now create asynchronous code with three different approaches: callbacks, promises, and async/await.
Asynchronous Programming with Callbacks
A callback function is one that is passed as an argument to another function, and then executed when the other function is finished.
We use callbacks to ensure that code is executed only after an asynchronous operation is completed.
For a long time, callbacks were the most common mechanism for writing asynchronous code, but now they have largely become obsolete because they can make code confusing to read.
In this step, you’ll write an example of asynchronous code using callbacks so that you can use it as a baseline to see the increased efficiency of other strategies.
There are many ways to use callback functions in another function.
Generally, they take this structure:
function asynchronousFunction([ Function Arguments ], [ Callback Function ]) {
[ Action ]
}
While it is not syntactically required by JavaScript or Node.js to have the callback function as the last argument of the outer function, it is a common practice that makes callbacks easier to identify.
It’s also common for JavaScript developers to use an anonymous function as a callback.
Anonymous functions are those created without a name.
It’s usually much more readable when a function is defined at the end of the argument list.
To demonstrate callbacks, let’s create a Node.js module that writes a list of Studio Ghibli movies to a file.
First, create a folder that will store our JavaScript file and its output:
mkdir ghibliMovies
Then enter that folder:
cd ghibliMovies
We will start by making an HTTP request to the Studio Ghibli API, which our callback function will log the results of.
To do this, we will install a library that allows us to access the data of an HTTP response in a callback.
In your terminal, initialize npm so we can have a reference for our packages later:
npm init -y
Then, install the request library:
npm i request --save
Now open a new file called callbackMovies.js in a text editor like nano:
nano callbackMovies.js
In your text editor, enter the following code.
Let’s begin by sending an HTTP request with the request module:
callbackMovies.js
const request = require('request');
request('https://ghibliapi.herokuapp.com/films');
In the first line, we load the request module that was installed via npm.
The module returns a function that can make HTTP requests; we then save that function in the request constant.
We then make the HTTP request using the request() function.
Let’s now print the data from the HTTP request to the console by adding the highlighted changes:
callbackMovies.js
const request = require('request');
request('https://ghibliapi.herokuapp.com/films', (error, response, body) => {if (error) {console.error(`Could not send request to API: ${error.message}`);return;}if (response.statusCode != 200) {console.error(`Expected status code 200 but received ${response.statusCode}.`);return;}console.log('Processing our list of movies');movies = JSON.parse(body);movies.forEach(movie => {console.log(`${movie['title']}, ${movie['release_date']}`);});
});
When we use the request() function, we give it two parameters:
The URL of the website we are trying to request
A callback function that handles any errors or successful responses after the request is complete
Our callback function has three arguments: error, response, and body.
When the HTTP request is complete, the arguments are automatically given values depending on the outcome.
If the request failed to send, then error would contain an object, but response and body would be null.
If it made the request successfully, then the HTTP response is stored in response.
If our HTTP response returns data (in this example we get JSON) then the data is set in body.
Our callback function first checks to see if we received an error.
It’s best practice to check for errors in a callback first so the execution of the callback won’t continue with missing data.
In this case, we log the error and the function’s execution.
We then check the status code of the response.
Our server may not always be available, and APIs can change causing once sensible requests to become incorrect.
By checking that the status code is 200, which means the request was “OK”, we can have confidence that our response is what we expect it to be.
Finally, we parse the response body to an Array and loop through each movie to log its name and release year.
After saving and quitting the file, run this script with:
node callbackMovies.js
You will get the following output:
Output
Castle in the Sky, 1986
Grave of the Fireflies, 1988
My Neighbor Totoro, 1988
Kiki's Delivery Service, 1989
Only Yesterday, 1991
Porco Rosso, 1992
Pom Poko, 1994
Whisper of the Heart, 1995
Princess Mononoke, 1997
My Neighbors the Yamadas, 1999
Spirited Away, 2001
The Cat Returns, 2002
Howl's Moving Castle, 2004
Tales from Earthsea, 2006
Ponyo, 2008
Arrietty, 2010
From Up on Poppy Hill, 2011
The Wind Rises, 2013
The Tale of the Princess Kaguya, 2013
When Marnie Was There, 2014
We successfully received a list of Studio Ghibli movies with the year they were released.
Now let’s complete this program by writing the movie list we are currently logging into a file.
Update the callbackMovies.js file in your text editor to include the following highlighted code, which creates a CSV file with our movie data:
callbackMovies.js
const request = require('request');
const fs = require('fs');
request('https://ghibliapi.herokuapp.com/films', (error, response, body) => {
if (error) {
console.error(`Could not send request to API: ${error.message}`);
return;
}
if (response.statusCode != 200) {
console.error(`Expected status code 200 but received ${response.statusCode}.`);
return;
}
console.log('Processing our list of movies');
movies = JSON.parse(body);
let movieList = '';movies.forEach(movie => {movieList += `${movie['title']}, ${movie['release_date']}\n`;});fs.writeFile('callbackMovies.csv', movieList, (error) => {if (error) {console.error(`Could not save the Ghibli movies to a file: ${error}`);return;}console.log('Saved our list of movies to callbackMovies.csv');;});
});
Noting the highlighted changes, we see that we import the fs module.
This module is standard in all Node.js installations, and it contains a writeFile() method that can asynchronously write to a file.
Instead of logging the data to the console, we now add it to a string variable movieList.
We then use writeFile() to save the contents of movieList to a new file—callbackMovies.csv.
Finally, we provide a callback to the writeFile() function, which has one argument: error.
This allows us to handle cases where we are not able to write to a file, for example when the user we are running the node process on does not have those permissions.
Save the file and run this Node.js program once again with:
node callbackMovies.js
In your ghibliMovies folder, you will see callbackMovies.csv, which has the following content:
callbackMovies.csv
Castle in the Sky, 1986
Grave of the Fireflies, 1988
My Neighbor Totoro, 1988
Kiki's Delivery Service, 1989
Only Yesterday, 1991
Porco Rosso, 1992
Pom Poko, 1994
Whisper of the Heart, 1995
Princess Mononoke, 1997
My Neighbors the Yamadas, 1999
Spirited Away, 2001
The Cat Returns, 2002
Howl's Moving Castle, 2004
Tales from Earthsea, 2006
Ponyo, 2008
Arrietty, 2010
From Up on Poppy Hill, 2011
The Wind Rises, 2013
The Tale of the Princess Kaguya, 2013
When Marnie Was There, 2014
It’s important to note that we write to our CSV file in the callback of the HTTP request.
Once the code is in the callback function, it will only write to the file after the HTTP request was completed.
If we wanted to communicate to a database after we wrote our CSV file, we would make another asynchronous function that would be called in the callback of writeFile().
The more asynchronous code we have, the more callback functions have to be nested.
Let’s imagine that we want to execute five asynchronous operations, each one only able to run when another is complete.
If we were to code this, we would have something like this:
doSomething1(() => {
doSomething2(() => {
doSomething3(() => {
doSomething4(() => {
doSomething5(() => {
// final action
});
});
});
});
});
When nested callbacks have many lines of code to execute, they become substantially more complex and unreadable.
As your JavaScript project grows in size and complexity, this effect will become more pronounced, until it is eventually unmanageable.
Because of this, developers no longer use callbacks to handle asynchronous operations.
To improve the syntax of our asynchronous code, we can use promises instead.
Using Promises for Concise Asynchronous Programming
A promise is a JavaScript object that will return a value at some point in the future.
Asynchronous functions can return promise objects instead of concrete values.
If we get a value in the future, we say that the promise was fulfilled.
If we get an error in the future, we say that the promise was rejected.
Otherwise, the promise is still being worked on in a pending state.
Promises generally take the following form:
promiseFunction()
.then([ Callback Function for Fulfilled Promise ])
.catch([ Callback Function for Rejected Promise ])
As shown in this template, promises also use callback functions.
We have a callback function for the then() method, which is executed when a promise is fulfilled.
We also have a callback function for the catch() method to handle any errors that come up while the promise is being executed.
Let’s get firsthand experience with promises by rewriting our Studio Ghibli program to use promises instead.
Axios is a promise-based HTTP client for JavaScript, so let’s go ahead and install it:
npm i axios --save
Now, with your text editor of choice, create a new file promiseMovies.js:
nano promiseMovies.js
Our program will make an HTTP request with axios and then use a special promised-based version of fs to save to a new CSV file.
Type this code in promiseMovies.js so we can load Axios and send an HTTP request to the movie API:
promiseMovies.js
const axios = require('axios');
axios.get('https://ghibliapi.herokuapp.com/films');
In the first line we load the axios module, storing the returned function in a constant called axios.
We then use the axios.get() method to send an HTTP request to the API.
The axios.get() method returns a promise.
Let’s chain that promise so we can print the list of Ghibli movies to the console:
promiseMovies.js
const axios = require('axios');
const fs = require('fs').promises;
axios.get('https://ghibliapi.herokuapp.com/films')
.then((response) => {console.log('Successfully retrieved our list of movies');response.data.forEach(movie => {console.log(`${movie['title']}, ${movie['release_date']}`);});})
Let’s break down what’s happening.
After making an HTTP GET request with axios.get(), we use the then() function, which is only executed when the promise is fulfilled.
In this case, we print the movies to the screen like we did in the callbacks example.
To improve this program, add the highlighted code to write the HTTP data to a file:
promiseMovies.js
const axios = require('axios');
const fs = require('fs').promises;
axios.get('https://ghibliapi.herokuapp.com/films')
.then((response) => {
console.log('Successfully retrieved our list of movies');
let movieList = '';
response.data.forEach(movie => {
movieList += `${movie['title']}, ${movie['release_date']}\n`;
});
return fs.writeFile('promiseMovies.csv', movieList);}).then(() => {console.log('Saved our list of movies to promiseMovies.csv');})
We additionally import the fs module once again.
Note how after the fs import we have .promises.
Node.js includes a promised-based version of the callback-based fs library, so backward compatibility is not broken in legacy projects.
The first then() function that processes the HTTP request now calls fs.writeFile() instead of printing to the console.
Since we imported the promise-based version of fs, our writeFile() function returns another promise.
As such, we append another then() function for when the writeFile() promise is fulfilled.
A promise can return a new promise, allowing us to execute promises one after the other.
This paves the way for us to perform multiple asynchronous operations.
This is called promise chaining, and it is analogous to nesting callbacks.
The second then() is only called after we successfully write to the file.
Note: In this example, we did not check for the HTTP status code like we did in the callback example.
By default, axios does not fulfil its promise if it gets a status code indicating an error.
As such, we no longer need to validate it.
To complete this program, chain the promise with a catch() function as it is highlighted in the following:
promiseMovies.js
const axios = require('axios');
const fs = require('fs').promises;
axios.get('https://ghibliapi.herokuapp.com/films')
.then((response) => {
console.log('Successfully retrieved our list of movies');
let movieList = '';
response.data.forEach(movie => {
movieList += `${movie['title']}, ${movie['release_date']}\n`;
});
return fs.writeFile('promiseMovies.csv', movieList);
})
.then(() => {
console.log('Saved our list of movies to promiseMovies.csv');
})
.catch((error) => {console.error(`Could not save the Ghibli movies to a file: ${error}`);});
If any promise is not fulfilled in the chain of promises, JavaScript automatically goes to the catch() function if it was defined.
That’s why we only have one catch() clause even though we have two asynchronous operations.
Let’s confirm that our program produces the same output by running:
node promiseMovies.js
In your ghibliMovies folder, you will see the promiseMovies.csv file containing:
promiseMovies.csv
Castle in the Sky, 1986
Grave of the Fireflies, 1988
My Neighbor Totoro, 1988
Kiki's Delivery Service, 1989
Only Yesterday, 1991
Porco Rosso, 1992
Pom Poko, 1994
Whisper of the Heart, 1995
Princess Mononoke, 1997
My Neighbors the Yamadas, 1999
Spirited Away, 2001
The Cat Returns, 2002
Howl's Moving Castle, 2004
Tales from Earthsea, 2006
Ponyo, 2008
Arrietty, 2010
From Up on Poppy Hill, 2011
The Wind Rises, 2013
The Tale of the Princess Kaguya, 2013
When Marnie Was There, 2014
With promises, we can write much more concise code than using only callbacks.
The promise chain of callbacks is a cleaner option than nesting callbacks.
However, as we make more asynchronous calls, our promise chain becomes longer and harder to maintain.
The verbosity of callbacks and promises come from the need to create functions when we have the result of an asynchronous task.
A better experience would be to wait for an asynchronous result and put it in a variable outside the function.
That way, we can use the results in the variables without having to make a function.
We can achieve this with the async and await keywords.
Writing JavaScript with async/await
The async/await keywords provide an alternative syntax when working with promises.
Instead of having the result of a promise available in the then() method, the result is returned as a value like in any other function.
We define a function with the async keyword to tell JavaScript that it’s an asynchronous function that returns a promise.
We use the await keyword to tell JavaScript to return the results of the promise instead of returning the promise itself when it’s fulfilled.
In general, async/await usage looks like this:
async function() {
await [Asynchronous Action]
}
Let’s see how using async/await can improve our Studio Ghibli program.
Use your text editor to create and open a new file asyncAwaitMovies.js:
nano asyncAwaitMovies.js
In your newly opened JavaScript file, let’s start by importing the same modules we used in our promise example:
asyncAwaitMovies.js
const axios = require('axios');
const fs = require('fs').promises;
The imports are the same as promiseMovies.js because async/await uses promises.
Now we use the async keyword to create a function with our asynchronous code:
asyncAwaitMovies.js
const axios = require('axios');
const fs = require('fs').promises;
async function saveMovies() {}
We create a new function called saveMovies() but we include async at the beginning of its definition.
This is important as we can only use the await keyword in an asynchronous function.
Use the await keyword to make an HTTP request that gets the list of movies from the Ghibli API:
asyncAwaitMovies.js
const axios = require('axios');
const fs = require('fs').promises;
async function saveMovies() {
let response = await axios.get('https://ghibliapi.herokuapp.com/films');let movieList = '';response.data.forEach(movie => {movieList += `${movie['title']}, ${movie['release_date']}\n`;});
}
In our saveMovies() function, we make an HTTP request with axios.get() like before.
This time, we don’t chain it with a then() function.
Instead, we add await before it is called.
When JavaScript sees await, it will only execute the remaining code of the function after axios.get() finishes execution and sets the response variable.
The other code saves the movie data so we can write to a file.
Let’s write the movie data to a file:
asyncAwaitMovies.js
const axios = require('axios');
const fs = require('fs').promises;
async function saveMovies() {
let response = await axios.get('https://ghibliapi.herokuapp.com/films');
let movieList = '';
response.data.forEach(movie => {
movieList += `${movie['title']}, ${movie['release_date']}\n`;
});
await fs.writeFile('asyncAwaitMovies.csv', movieList);
}
We also use the await keyword when we write to the file with fs.writeFile().
To complete this function, we need to catch errors our promises can throw.
Let’s do this by encapsulating our code in a try/catch block:
asyncAwaitMovies.js
const axios = require('axios');
const fs = require('fs').promises;
async function saveMovies() {
try {
let response = await axios.get('https://ghibliapi.herokuapp.com/films');
let movieList = '';
response.data.forEach(movie => {
movieList += `${movie['title']}, ${movie['release_date']}\n`;
});
await fs.writeFile('asyncAwaitMovies.csv', movieList);
} catch (error) {console.error(`Could not save the Ghibli movies to a file: ${error}`);}
}
Since promises can fail, we encase our asynchronous code with a try/catch clause.
This will capture any errors that are thrown when either the HTTP request or file writing operations fail.
Finally, let’s call our asynchronous function saveMovies() so it will be executed when we run the program with node
asyncAwaitMovies.js
const axios = require('axios');
const fs = require('fs').promises;
async function saveMovies() {
try {
let response = await axios.get('https://ghibliapi.herokuapp.com/films');
let movieList = '';
response.data.forEach(movie => {
movieList += `${movie['title']}, ${movie['release_date']}\n`;
});
await fs.writeFile('asyncAwaitMovies.csv', movieList);
} catch (error) {
console.error(`Could not save the Ghibli movies to a file: ${error}`);
}
}
saveMovies();
At a glance, this looks like a typical synchronous JavaScript code block.
It has fewer functions being passed around, which looks a bit neater.
These small tweaks make asynchronous code with async/await easier to maintain.
Test this iteration of our program by entering this in your terminal:
node asyncAwaitMovies.js
In your ghibliMovies folder, a new asyncAwaitMovies.csv file will be created with the following contents:
asyncAwaitMovies.csv
Castle in the Sky, 1986
Grave of the Fireflies, 1988
My Neighbor Totoro, 1988
Kiki's Delivery Service, 1989
Only Yesterday, 1991
Porco Rosso, 1992
Pom Poko, 1994
Whisper of the Heart, 1995
Princess Mononoke, 1997
My Neighbors the Yamadas, 1999
Spirited Away, 2001
The Cat Returns, 2002
Howl's Moving Castle, 2004
Tales from Earthsea, 2006
Ponyo, 2008
Arrietty, 2010
From Up on Poppy Hill, 2011
The Wind Rises, 2013
The Tale of the Princess Kaguya, 2013
When Marnie Was There, 2014
You have now used the JavaScript features async/await to manage asynchronous code.
Conclusion
In this tutorial, you learned how JavaScript handles executing functions and managing asynchronous operations with the event loop.
You then wrote programs that created a CSV file after making an HTTP request for movie data using various asynchronous programming techniques.
First, you used the obsolete callback-based approach.
You then used promises, and finally async/await to make the promise syntax more succinct.
With your understanding of asynchronous code with Node.js, you can now develop programs that benefit from asynchronous programming, like those that rely on API calls.
Have a look at this list of public APIs.
To use them, you will have to make asynchronous HTTP requests like we did in this tutorial.
For further study, try building an app that uses these APIs to practice the techniques you learned here.
How To Build WebSocket Server And Client in NodeJS
Websocket is a client and server implementation, an API establishing a connection between a web browser and server.
NodeJS and WebSocket
NodeJS is a JavaScript runtime built on Chrome’s V8 JavaScript engine and create a NodeJS WebSocket Server in 5 minutes.
Unlike HTTP servers, WebSockets ones don’t have any routes by default because they are unnecessary.
In this protocol, you can just use a string to send and receive data from the client-side.
A good practice is to send a JSON object serialized to a string.
Why should I use WebSocket?
Websockets help in sending multiple requests simultaneously and can also have multiple connections.
We can enable proxies.
Building a WebSocket Server With NodeJS
Creates a directory for WebSocket Server to be built with NodeJS.
mkdir nodejs-websocket-server
cd nodejs-websocket-server
Next, run the following command to install the ws library as a dependency
npm install ws
This will create a package.json file in your project and install the dependency in the node_modules directory.
After installation, create a javascript file for example “main.js” and paste the following code for creating a web server:
// Importing the required modules
const WebSocketServer = require('ws');
// Creating a new websocket server
const wss = new WebSocketServer.Server({ port: 8080 })
// Creating connection using websocket
wss.on("connection", ws => {
console.log("new client connected");
// sending message to client
ws.send('Welcome, you are connected!');
//on message from client
ws.on("message", data => {
console.log(`Client has sent us: ${data}`)
});
// handling what to do when clients disconnects from server
ws.on("close", () => {
console.log("the client has closed connection!");
});
// handling client connection error
ws.onerror = function () {
console.log("Some Error occurred")
}
});
console.log("The WebSocket server is running on port 8080");
This code will create a basic WebSocket Server for you.
The code is self-explanatory and can be edited as per your needs.
For testing it, open up a terminal and type:
node main.js
Building A WebSocket Client For NodeJS WebSocket Server
Keep the NodeJS program (WebSocket server) running in the terminal.
Now its time to test the WebSocket server and to do so, we need a WebSocket client.
A simple way to test any websocket server is to use the Online WebSocket tester by PieSocket
Simply open the link above and enter ws://localhost:8080 in it to test the WebSocket server you just created.
"Upgrade Required" is a reference to the header that is sent when establishing a WebSocket connection between a client (i.e. the browser) and the server.
You need a client application that connects to your WebSockets server, which could be a static html page.
We can also build a WebSocket client in HTML and JavaScript quickly.
To create a WebSocket client, start by creating an HTML file (WebSocket client) and include the following Javascript code snippet in the file to connect to the server we just launched on our local machine.
<!DOCTYPE html>
<html>
<head>
<meta charset="utf-8">
<title>NodeJS WebSocket Server</title>
</head>
<body>
<h2>Hello world</h2>
<script>
const ws = new WebSocket("ws://localhost:8080");
ws.addEventListener("open", () =>{
console.log("We are connected");
ws.send("How are you?");
ws.send("I am going to close.");
ws.close();
});
ws.addEventListener('message', function (event) {
console.log(event.data);
});
</script>
</body>
</html>
Open up the HTML file in your browser, and you could see in the terminal that you have been connected to the WebSocket server.
When you open the HTML file, a WebSocket connection from the server is made, and you can see it in the Networks tab of your browser’s developer’s tools (right click > inspect element > click networks tab).
Check console logs in developer tools to see the messages from the WebSocket server.
For a more advanced tutorial on the application of WebSocket server, you should see: Create A Real-time Chat Web Application With WebSocket.
We can also use a Proxy server with WebSocket.
For using a proxy you can just paste these two lines of code in your javascript file.
var proxy = process.env.http_proxy || 'http://168.63.76.32:3128';
console.log('using proxy server %j', proxy);Using Piesocket to Scale WebSockets
A thread is a single sequence stream within a process.
Threads are also called lightweight processes as they possess some of the properties of processes.
Each thread belongs to exactly one process.
In an operating system that supports multithreading, the process can consist of many threads.
But threads can be effective only if the CPU is more than 1 otherwise two threads have to context switch for that single CPU.
What is Thread in Operating Systems?
⇧
In a process, a thread refers to a single sequential activity being executed.
these activities are also known as thread of execution or thread control.
Now, any operating system process can execute a thread.
we can say, that a process can have multiple threads.
Why Do We Need Thread?
⇧ Threads run in parallel improving the application performance.
Each such thread has its own CPU state and stack, but they share the address space of the process and the environment.
Threads can share common data so they do not need to use inter-process communication.
Like the processes, threads also have states like ready, executing, blocked, etc.
Priority can be assigned to the threads just like the process, and the highest priority thread is scheduled first.
Each thread has its own Thread Control Block (TCB).
Like the process, a context switch occurs for the thread, and register contents are saved in (TCB).
As threads share the same address space and resources, synchronization is also required for the various activities of the thread.
Components of Threads
⇧
These are the basic components of the Operating System.
Stack Space
Register Set
Program Counter
Types of Thread in Operating System
⇧
Threads are of two types.
These are described below.
User Level Thread
Kernel Level Thread
Threads
1.
User Level Threads
⇧
User Level Thread is a type of thread that is not created using system calls.
The kernel has no work in the management of user-level threads.
User-level threads can be easily implemented by the user.
In case when user-level threads are single-handed processes, kernel-level thread manages them.
Let’s look at the advantages and disadvantages of User-Level Thread.
Advantages of User-Level Threads
⇧
Implementation of the User-Level Thread is easier than Kernel Level Thread.
Context Switch Time is less in User Level Thread.
User-Level Thread is more efficient than Kernel-Level Thread.
Because of the presence of only Program Counter, Register Set, and Stack Space, it has a simple representation.
Disadvantages of User-Level Threads
⇧
There is a lack of coordination between Thread and Kernel.
In case of a page fault, the whole process can be blocked.
2.
Kernel Level Threads
⇧
A kernel Level Thread is a type of thread that can recognize the Operating system easily.
Kernel Level Threads has its own thread table where it keeps track of the system.
The operating System Kernel helps in managing threads.
Kernel Threads have somehow longer context switching time.
Kernel helps in the management of threads.
Advantages of Kernel-Level Threads
⇧
It has up-to-date information on all threads.
Applications that block frequency are to be handled by the Kernel-Level Threads.
Whenever any process requires more time to process, Kernel-Level Thread provides more time to it.
⇧
The primary difference is that threads within the same process run in a shared memory space, while processes run in separate memory spaces.
Threads are not independent of one another like processes are, and as a result, threads share with other threads their code section, data section, and OS resources (like open files and signals).
But, like a process, a thread has its own program counter (PC), register set, and stack space.
For more, refer to Difference Between Process and Thread.
What is Multi-Threading?
⇧
A thread is also known as a lightweight process.
The idea is to achieve parallelism by dividing a process into multiple threads.
For example, in a browser, multiple tabs can be different threads.
MS Word uses multiple threads: one thread to format the text, another thread to process inputs, etc.
More advantages of multithreading are discussed below.
Multithreading is a technique used in operating systems to improve the performance and responsiveness of computer systems.
Multithreading allows multiple threads (i.e., lightweight processes) to share the same resources of a single process, such as the CPU, memory, and I/O devices.
Single Threaded vs Multi-threaded Process
Benefits of Thread in Operating System
⇧ Responsiveness: If the process is divided into multiple threads, if one thread completes its execution, then its output can be immediately returned.
Faster context switch:Context switch time between threads is lower compared to the process context switch.
Process context switching requires more overhead from the CPU.
Effective utilization of multiprocessor system:If we have multiple threads in a single process, then we can schedule multiple threads on multiple processors.
This will make process execution faster.
Resource sharing: Resources like code, data, and files can be shared among all threads within a process.
Note: Stacks and registers can’t be shared among the threads.
Each thread has its own stack and registers.
Communication:Communication between multiple threads is easier, as the threads share a common address space.
while in the process we have to follow some specific communication techniques for communication between the two processes.
Enhanced throughput of the system: If a process is divided into multiple threads, and each thread function is considered as one job, then the number of jobs completed per unit of time is increased, thus increasing the throughput of the system.
Conclusion
⇧
Threads in operating systems are lightweight processes that improve application speed by executing concurrently within the same process.
They share the process’s address space and resources, which allows for more efficient communication and resource utilisation.
Threads are classified as either user-level or kernel-level, with each having advantages and drawbacks.
Multithreading enhances system response time, context switching speed, resource sharing, and overall throughput.
This technique is critical for improving the speed and responsiveness of current computing systems.
Frequently Asked Questions on Thread in Operating System – FAQs
⇧
There are four different states of a thread.
new
runnable
blocked
terminated
Why thread is better than process?
⇧
Threads require fewer resources whereas process require more resources.
that is why thread is better than process.
Why is multithreading faster?
⇧
While the computer system’s processor only carries out one instruction at a time when multithreading is used, various threads from several applications are carried out so quickly that it appears as though the programs are running simultaneously.
What is deadlock in OS?
⇧
A deadlock is a situation where a set of processes is blocked because each process is holding a resource and waiting for another resource acquired by some other process.
In node, Load balancing is a technique used to distribute incoming network traffic across multiple servers to ensure no single server becomes overwhelmed, thus improving responsiveness and availability.
In this article, we’ll explore how to create a load-balancing server using Node.js.
Why Load Balancing?
Load balancing is essential for:
Improved Performance: Distributes workload evenly across multiple servers.
High Availability: Ensures service continuity in case one server fails.
Scalability: Allows the application to handle increased traffic by adding more servers.
How to set up load balancing server?
Using Cluster Module
NodeJS has a built-in module called Cluster Module to take advantage of a multi-core system.
Using this module you can launch NodeJS instances to each core of your system.
Master process listening on a port to accept client requests and distribute across the workers using some intelligent fashion.
So, using this module you can utilize the working ability of your system.
The following example covers the performance difference by using and without using the Cluster Module.
Without Cluster Module:
Make sure you have installed the express and crypto module using the following command:
npm install express crypto
Example: Implementation to show the example with help of above module.
const { generateKeyPair } = require('crypto');
const app = require('express')();
// API endpoint
// Send public key as a response
app.get('/key', (req, res) => {
generateKeyPair('rsa', {
modulusLength: 2048,
publicKeyEncoding: {
type: 'spki',
format: 'pem'
},
privateKeyEncoding: {
type: 'pkcs8',
format: 'pem',
cipher: 'aes-256-cbc',
passphrase: 'top secret'
}
}, (err, publicKey, privateKey) => {
// Handle errors and use the
// generated key pair.
res.send(publicKey);
})
})
app.listen(3000, err => {
err ?
console.log("Error in server setup") :
console.log('Server listening on PORT 3000')
});
Step to Run Application:
Run the application using the following command from the root directory of the project
node index.js
Output: We will see the following output on the terminal screen:
Server listening on PORT 3000
Now open your browser and go to http://localhost:3000/key, you will see the following output:
—–BEGIN PUBLIC KEY—– MIIBIjANBgkqhkiG9w0BAQEFAAOCAQ8AMIIBCgKCAQEAwAneYp5HlT93Y3ZlPAHjZAnPFvBskQKKfo4an8jskcgEuG85KnZ7/16kQw2Q8/7Ksdm0sIF7qmAUOu0B773X 1BXQ0liWh+ctHIq/C0e9eM1zOsX6vWwX5Y+WH610cpcb50ltmCeyRmD5Qvf+OE/C BqYrQxVRf4q9+029woF84Lk4tK6OXsdU+Gdqo2FSUzqhwwvYZJJXhW6Gt259m0wD YTZlactvfwhe2EHkHAdN8RdLqiJH9kZV47D6sLS9YG6Ai/HneBIjzTtdXQjqi5vF Y+H+ixZGeShypVHVS119Mi+hnHs7SMzY0GmRleOpna58O1RKPGQg49E7Hr0dz8eh 6QIDAQAB —–END PUBLIC KEY—–
The above code listening on port 3000 and send Public Key as a response.
Generating an RSA key is CPU-intensive work.
Here only one NodeJS instance working in a single core.
To see the performance, we have used autocannon tools to test our server as shown below:
The above image showed that the server can respond to 2000 requests when running 500 concurrent connections for 10 seconds.
The average request/second is 190.1 seconds.
Using Cluster Module:
Example: Implementation to show with using cluster module.
const express = require('express');
const cluster = require('cluster');
const { generateKeyPair } = require('crypto');
// Check the number of available CPU.
const numCPUs = require('os').cpus().length;
const app = express();
const PORT = 3000;
// For Master process
if (cluster.isMaster) {
console.log(`Master ${process.pid} is running`);
// Fork workers.
for (let i = 0; i < numCPUs; i++) {
cluster.fork();
}
// This event is first when worker died
cluster.on('exit', (worker, code, signal) => {
console.log(`worker ${worker.process.pid} died`);
});
}
// For Worker
else {
// Workers can share any TCP connection
// In this case it is an HTTP server
app.listen(PORT, err => {
err ?
console.log("Error in server setup") :
console.log(`Worker ${process.pid} started`);
});
// API endpoint
// Send public key
app.get('/key', (req, res) => {
generateKeyPair('rsa', {
modulusLength: 2048,
publicKeyEncoding: {
type: 'spki',
format: 'pem'
},
privateKeyEncoding: {
type: 'pkcs8',
format: 'pem',
cipher: 'aes-256-cbc',
passphrase: 'top secret'
}
}, (err, publicKey, privateKey) => {
// Handle errors and use the
// generated key pair.
res.send(publicKey);
})
})
}
Step to Run Application:
Run the application using the following command from the root directory of the project
node index.js
Output: We will see the following output on terminal screen:
Master 16916 is running
Worker 6504 started
Worker 14824 started
Worker 20868 started
Worker 12312 started
Worker 9968 started
Worker 16544 started
Worker 8676 started
Worker 11064 started
Now open your browser and go to http://localhost:3000/key, you will see the following output:
—–BEGIN PUBLIC KEY—– MIIBIjANBgkqhkiG9w0BAQEFAAOCAQ8AMIIBCgKCAQEAzxMQp9y9MblP9dXWuQhf sdlEVnrgmCIyP7CAveYEkI6ua5PJFLRStKHTe3O8rxu+h6I2exXn92F/4RE9Yo8EOnrUCSlqy9bl9qY8D7uBMWir0I65xMZu3rM9Yxi+6gP8H4CMDiJhLoIEap+d9Czr OastDPwI+HF+6nmLkHvuq9X5aORvdiOBwMooIoiRpHbgcHovSerJIfQipGs74IiR 107GbpznSUxMIuwV1fgc6mAULuGZl+Daj0SDxfAjk8KiHyXbfHe5stkPNOCWIsbAtCbGN0bCTR8ZJCLdZ4/VGr+eE0NOvOrElXdXLTDVVzO5dKadoEAtzZzzuQId2P/z JwIDAQAB —–END PUBLIC KEY—–
The above NodeJS application is launched on each core of our system.
Where master process accepts the request and distributes across all worker.
The performed in this case is shown below:
The above image showed that the server can respond to 5000 requests when running 500 concurrent connections for 10 seconds.
The average request/second is 162.06 seconds.
So, using the cluster module you can handle more requests.
But, sometimes it is not enough, if this is your case then your option is horizontal scaling.
Using Nginx
If your system has more than one application server to respond to, and you need to distribute client requests across all servers then you can smartly use Nginx as a proxy server.
Nginx sits on the front of your server pool and distributes requests using some intelligent fashion.
In the following example, we have 4 instances of the same NodeJS application on different ports, also you can use another server.
Example: Implementation to show load balancing servers by using nginx.
const app = require('express')();
// API endpoint
app.get('/', (req,res)=>{
res.send("Welcome to GeeksforGeeks !");
})
// Launching application on several ports
app.listen(3000);
app.listen(3001);
app.listen(3002);
app.listen(3003);
Now install Nginx on your machine and create a new file in /etc/nginx/conf.d/ called your-domain.com.conf with the following code in it.
upstream my_http_servers {
# httpServer1 listens to port 3000
server 127.0.0.1:3000;
# httpServer2 listens to port 3001
server 127.0.0.1:3001;
# httpServer3 listens to port 3002
server 127.0.0.1:3002;
# httpServer4 listens to port 3003
server 127.0.0.1:3003;
}
server {
listen 80;
server_name your-domain.com www.your-domain.com;
location / {
proxy_set_header X-Real-IP $remote_addr;
proxy_set_header Host $http_host;
proxy_pass http://my_http_servers;
}
}
Using Express Web Server
There is a lot of advantage to an Express web server.
If you are comfortable with NodeJS, you can implement your own Express base load balancer as shown in the following example.
Step 1:
Create an empty NodeJS application.
mkdir LoadBalancer
cd LoadBalancer
npm init -y
Step 2:
Install required dependencies like ExpressJS, axios,and Concurrently using the following command.
npm i express axios
npm i concurrently -g
Step 3:
Create two file config.js forthe load balancer server and index.js forthe application server.
Example: Implementation to show load balancing servers by using nginx.
const express = require('express');
const path = require('path');
const app = express();
const axios = require('axios');
// Application servers
const servers = [
"http://localhost:3000",
"http://localhost:3001"
]
// Track the current application server to send request
let current = 0;
// Receive new request
// Forward to application server
const handler = async (req, res) =>{
// Destructure following properties from request object
const { method, url, headers, body } = req;
// Select the current server to forward the request
const server = servers[current];
// Update track to select next server
current === (servers.length-1)? current = 0 : current++
try{
// Requesting to underlying application server
const response = await axios({
url: `${server}${url}`,
method: method,
headers: headers,
data: body
});
// Send back the response data
// from application server to client
res.send(response.data)
}
catch(err){
// Send back the error message
res.status(500).send("Server error!")
}
}
// Serve favicon.ico image
app.get('/favicon.ico', (req, res
) => res.sendFile('/favicon.ico'));
// When receive new request
// Pass it to handler method
app.use((req,res)=>{handler(req, res)});
// Listen on PORT 8080
app.listen(8080, err =>{
err ?
console.log("Failed to listen on PORT 8080"):
console.log("Load Balancer Server "
+ "listening on PORT 8080");
});
Here, the filename is index.js
const express = require('express');
const app1 = express();
const app2 = express();
// Handler method
const handler = num => (req,res)=>{
const { method, url, headers, body } = req;
res.send('Response from server ' + num);
}
// Only handle GET and POST requests
// Receive request and pass to handler method
app1.get('*', handler(1)).post('*', handler(1));
app2.get('*', handler(2)).post('*', handler(2));
// Start server on PORT 3000
app1.listen(3000, err =>{
err ?
console.log("Failed to listen on PORT 3000"):
console.log("Application Server listening on PORT 3000");
});
// Start server on PORT 3001
app2.listen(3001, err =>{
err ?
console.log("Failed to listen on PORT 3001"):
console.log("Application Server listening on PORT 3001");
});
Explanation: The above code starts with 2 Express apps, one on port 3000 and another on port 3001.
The separate load balancer process should alternate between these two, sending one request to port 3000, the next request to port 3001, and the next one back to port 3000.
Step 4:
Open a command prompt on your project folder and run two scripts parallel using concurrently.
concurrently "node config.js" "node index.js"
Output:
We will see the following output on the console:
Now, open a browser and go to http://localhost:8080/ and make a few requests, we will see the following output:
There are some example client and server applications that implement various interoperability testing protocols in the "test/scripts" folder.
https://github.com/theturtle32/WebSocket-Node/tree/master/test/scripts
Installation
In your project root:
$ npm install websocket
Then in your code:
var WebSocketServer = require('websocket').server;
var WebSocketClient = require('websocket').client;
var WebSocketFrame = require('websocket').frame;
var WebSocketRouter = require('websocket').router;
var W3CWebSocket = require('websocket').w3cwebsocket;
Server Example
Here's a short example showing a server that echos back anything sent to it, whether utf-8 or binary.
#!/usr/bin/env node
var WebSocketServer = require('websocket').server;
var http = require('http');
var server = http.createServer(function(request, response) {
console.log((new Date()) + ' Received request for ' + request.url);
response.writeHead(404);
response.end();
});
server.listen(8080, function() {
console.log((new Date()) + ' Server is listening on port 8080');
});
wsServer = new WebSocketServer({
httpServer: server,
// You should not use autoAcceptConnections for production
// applications, as it defeats all standard cross-origin protection
// facilities built into the protocol and the browser. You should
// *always* verify the connection's origin and decide whether or not
// to accept it. autoAcceptConnections: false
});
function originIsAllowed(origin) {
// put logic here to detect whether the specified origin is allowed.
return true;
}
wsServer.on('request', function(request) {
if (!originIsAllowed(request.origin)) {
// Make sure we only accept requests from an allowed origin
request.reject();
console.log((new Date()) + ' Connection from origin ' + request.origin + ' rejected.');
return;
}
var connection = request.accept('echo-protocol', request.origin);
console.log((new Date()) + ' Connection accepted.');
connection.on('message', function(message) {
if (message.type === 'utf8') {
console.log('Received Message: ' + message.utf8Data);
connection.sendUTF(message.utf8Data);
}
else if (message.type === 'binary') {
console.log('Received Binary Message of ' + message.binaryData.length + ' bytes');
connection.sendBytes(message.binaryData);
}
});
connection.on('close', function(reasonCode, description) {
console.log((new Date()) + ' Peer ' + connection.remoteAddress + ' disconnected.');
});
});
Client Example
This is a simple example client that will print out any utf-8 messages it receives on the console, and periodically sends a random number.
This code demonstrates a client in Node.js, not in the browser
#!/usr/bin/env node
var WebSocketClient = require('websocket').client;
var client = new WebSocketClient();
client.on('connectFailed', function(error) {
console.log('Connect Error: ' + error.toString());
});
client.on('connect', function(connection) {
console.log('WebSocket Client Connected');
connection.on('error', function(error) {
console.log("Connection Error: " + error.toString());
});
connection.on('close', function() {
console.log('echo-protocol Connection Closed');
});
connection.on('message', function(message) {
if (message.type === 'utf8') {
console.log("Received: '" + message.utf8Data + "'");
}
});
function sendNumber() {
if (connection.connected) {
var number = Math.round(Math.random() * 0xFFFFFF);
connection.sendUTF(number.toString());
setTimeout(sendNumber, 1000);
}
}
sendNumber();
});
client.connect('ws://localhost:8080/', 'echo-protocol');
Client Example using the W3C WebSocket API
Same example as above but using the W3C WebSocket API.
var W3CWebSocket = require('websocket').w3cwebsocket;
var client = new W3CWebSocket('ws://localhost:8080/', 'echo-protocol');
client.onerror = function() {
console.log('Connection Error');
};
client.onopen = function() {
console.log('WebSocket Client Connected');
function sendNumber() {
if (client.readyState === client.OPEN) {
var number = Math.round(Math.random() * 0xFFFFFF);
client.send(number.toString());
setTimeout(sendNumber, 1000);
}
}
sendNumber();
};
client.onclose = function() {
console.log('echo-protocol Client Closed');
};
client.onmessage = function(e) {
if (typeof e.data === 'string') {
console.log("Received: '" + e.data + "'");
}
};
Request Router Example
For an example of using the request router, see libwebsockets-test-server.js in the test folder.
I add an example with a possible solution for 2 servers using node.
First, you need to create a project:
mkdir simulate4servers
cd simulate4servers
npm init (entry point: index.js)
const express = require("express");
const server1 = express();
const server2 = express();
const server3 = express();
server1.listen(8000, () => {
console.log("Server 1 is up and running on port 8000");
})
server2.listen(8010, () => {
console.log("Server 2 is up and running on port 8010");
})
server3.listen(8020, () => {
console.log("Server 3 is up and running on port 8020");
})
express() creates and returns an instance of a server.
call it multiple times to create multiple instances.
listen on different ports. that's all.
include server.use(cors())
This answer is correct.
But it should also include server.use(cors()) else it may give error cors policy no 'access-control-allow-origin'.
Code to make multiple servers:
const express = require('express')
const cors = require('cors')
server=express()
server2=express()
server.use(cors())
server2.use(cors())
server.get('/',(req,res)=>res.send({"server":"3001","name":"aakash4dev","data":"data 1"}))
server2.get('/',(req,res)=>res.send({"server":"3002","name":"aakash4dev","data":"data 2"}))
server.listen(3001)
server2.listen(3002)
%j placeholder
In the node.js source, the %j placeholder results in a call to JSON.stringify() on the passed argument.
In passing your json variable, you are not passing an valid JSON object.
You are passing a node.js module which among other things has exported functions.
> JSON.stringify({name: "Bob"})
> "{"name":"Bob"}"
> JSON.stringify({func: function(){}})
> "{}"
node.js: read a text file into an array
Synchronous:
var fs = require('fs');
var array = fs.readFileSync('file.txt').toString().split("\n");
for(i in array) {
console.log(array[i]);
}
Asynchronous:
var fs = require('fs');
fs.readFile('file.txt', function(err, data) {
if(err) throw err;
var array = data.toString().split("\n");
for(i in array) {
console.log(array[i]);
}
});
Using the Node.js readline module.
var fs = require('fs');
var readline = require('readline');
var filename = process.argv[2];
readline.createInterface({
input: fs.createReadStream(filename),
terminal: false
}).on('line', function(line) {
console.log('Line: ' + line);
});
WebSocket send data to server on initial request
Call the websocket onopen method.
Then in the callback use the websocket send method to send data
websocket.onopen = function() {
websocket.send(your data)
}
To accept the incoming message server side just accept the request.
This is assuming you are using websocket-node
ws.on('request', (request) => {
const conn = request.accept('echo-protocol', request.origin)
conn.on('message', (message) => {
console.log(message)
})
})
If you are using this package then just listen for the 'message' event.
ws.on('message', (message) => {
console.log(message)
})
example:
// Create WebSocket connection.
const socket = new WebSocket("ws://localhost:8080");
// Connection opened
socket.addEventListener("open", (event) => {
socket.send("Hello Server!");
});
// Listen for messages
socket.addEventListener("message", (event) => {
console.log("Message from server ", event.data);
});
WebSocket
Constructor
WebSocket(): Returns a newly created WebSocket object.
Instance properties
WebSocket.binaryType: The binary data type used by the connection.
WebSocket.bufferedAmount: The number of bytes of queued data.
WebSocket.extensions: The extensions selected by the server.
WebSocket.protocol: The sub-protocol selected by the server.
WebSocket.readyState: The current state of the connection.
WebSocket.url: The absolute URL of the WebSocket.
Instance methods
WebSocket.close(): Closes the connection.
WebSocket.send(): Enqueues data to be transmitted.
Events
Listen to these events using addEventListener() or by assigning an event listener to the oneventname property of this interface.
close: Fired when a connection with a WebSocket is closed.
Also available via the onclose property
error: Fired when a connection with a WebSocket has been closed because of an error, such as when some data couldn't be sent.
Also available via the onerror property.
message: Fired when data is received through a WebSocket.
Also available via the onmessage property.
open: Fired when a connection with a WebSocket is opened.
Also available via the onopen property.
Examples
// Create WebSocket connection.
const ws = new WebSocket("ws://localhost:8080");
// Connection opened
ws.addEventListener("open", (event) => {
ws.send("Hello Server!");
});
// Listen for messages
ws.addEventListener("message", (event) => {
console.log("Message from server ", event.data);
});
In your project root:
$ npm install websocket
Then in your code:
var WebSocketServer = require('websocket').server;
var WebSocketClient = require('websocket').client;
var WebSocketFrame = require('websocket').frame;
var WebSocketRouter = require('websocket').router;
var W3CWebSocket = require('websocket').w3cwebsocket;
Server Example
Here's a short example showing a server that echos back anything sent to it, whether utf-8 or binary.
var WebSocketServer = require('websocket').server;
var http = require('http');
var server = http.createServer(function(request, response) {
console.log((new Date()) + ' Received request for ' + request.url);
response.writeHead(404);
response.end();
});
server.listen(8080, function() {
console.log((new Date()) + ' Server is listening on port 8080');
});
wsServer = new WebSocketServer({
httpServer: server,
// You should not use autoAcceptConnections for production
// applications, as it defeats all standard cross-origin protection
// facilities built into the protocol and the browser. You should
// *always* verify the connection's origin and decide whether or not
// to accept it.
autoAcceptConnections: false
});
function originIsAllowed(origin) {
// put logic here to detect whether the specified origin is allowed.
return true;
}
wsServer.on('request', function(request) {
if (!originIsAllowed(request.origin)) {
// Make sure we only accept requests from an allowed origin
request.reject();
console.log((new Date()) + ' Connection from origin ' + request.origin + ' rejected.');
return;
}
var connection = request.accept('echo-protocol', request.origin);
console.log((new Date()) + ' Connection accepted.');
connection.on('message', function(message) {
if (message.type === 'utf8') {
console.log('Received Message: ' + message.utf8Data);
connection.sendUTF(message.utf8Data);
}
else if (message.type === 'binary') {
console.log('Received Binary Message of ' + message.binaryData.length + ' bytes');
connection.sendBytes(message.binaryData);
}
});
connection.on('close', function(reasonCode, description) {
console.log((new Date()) + ' Peer ' + connection.remoteAddress + ' disconnected.');
});
});
Client Example
This is a simple example client that will print out any utf-8 messages it receives on the console, and periodically sends a random number.
This code demonstrates a client in Node.js, not in the browser
var WebSocketClient = require('websocket').client;
var client = new WebSocketClient();
client.on('connectFailed', function(error) {
console.log('Connect Error: ' + error.toString());
});
client.on('connect', function(connection) {
console.log('WebSocket Client Connected');
connection.on('error', function(error) {
console.log("Connection Error: " + error.toString());
});
connection.on('close', function() {
console.log('echo-protocol Connection Closed');
});
connection.on('message', function(message) {
if (message.type === 'utf8') {
console.log("Received: '" + message.utf8Data + "'");
}
});
function sendNumber() {
if (connection.connected) {
var number = Math.round(Math.random() * 0xFFFFFF);
connection.sendUTF(number.toString());
setTimeout(sendNumber, 1000);
}
}
sendNumber();
});
client.connect('ws://localhost:8080/', 'echo-protocol');
Client Example using the W3C WebSocket API
Same example as above but using the W3C WebSocket API.
var W3CWebSocket = require('websocket').w3cwebsocket;
var client = new W3CWebSocket('ws://localhost:8080/', 'echo-protocol');
client.onerror = function() {
console.log('Connection Error');
};
client.onopen = function() {
console.log('WebSocket Client Connected');
function sendNumber() {
if (client.readyState === client.OPEN) {
var number = Math.round(Math.random() * 0xFFFFFF);
client.send(number.toString());
setTimeout(sendNumber, 1000);
}
}
sendNumber();
};
client.onclose = function() {
console.log('echo-protocol Client Closed');
};
client.onmessage = function(e) {
if (typeof e.data === 'string') {
console.log("Received: '" + e.data + "'");
}
};
Request Router Example
For an example of using the request router, see libwebsockets-test-server.js in the test folder.
Sending messages with Websockets
html/javascript code that uses websockets to communicate with a server:
// var ws = new WebSocket('ws://' + document.domain + ':' + location.port + '/feed')
var ws = new WebSocket("ws://localhost:57252/");
messages = document.createElement('ul');
ws.onmessage = function (event) {
var messages = document.getElementsByTagName('ul')[0],
message = document.createElement('li'),
content = document.createTextNode('Received: ' + event.data);
message.appendChild(content);
messages.appendChild(message);
};
In this tutorial we'll create a simple chat app using Deno.
Our chat app will allow multiple chat clients connected to the same backend to send group messages through web sockets.
After a client chooses a username, they can then start sending group messages to other online clients.
Each client also displays the list of currently active users.
Building the View
We can build the simple UI shown above with the following as our index.html.
Note that the app.js script is our chat client (which will be discussed in detail later)
<!-- index.html -->
<html>
<head>
<title>Chat App</title>
<script src="/public/app.js"></script>
</head>
<body>
<div style="text-align: center">
<div>
<b>Users</b>
<hr />
<div id="users"></div>
<hr class="visible-xs visible-sm" />
</div>
<div>
<input id="data" placeholder="send message" />
<hr />
<div id="conversation"></div>
</div>
</div>
</body>
</html>
WebSocket Primer
We will rely on Deno's native support for web sockets when building our client and server.
A
web socket is a bidirectional communication channel that allows the both the client and server to send messages to each other at any time.
Web sockets are frequently used in realtime applications where low latency is critical.
Each of our clients will keep a web socket connection open to our server so they can receive the latest messages and user logins without constantly polling.
Chat Client
The chat client app.js runs in the browser and listens for updates from our server and then manipulates the DOM.
Specifically our client is listening for new messages and the list of currently active users.
We need to add event handlers to our client's web socket to specify what happens when our clients receives a new message or event.
// app.js
const myUsername = prompt("Please enter your name") || "Anonymous";
const socket = new WebSocket(
`ws://localhost:8080/start_web_socket?username=${myUsername}`,
);
socket.onmessage = (m) => {
const data = JSON.parse(m.data);
switch (data.event) {
case "update-users":
// refresh displayed user list
let userListHtml = "";
for (const username of data.usernames) {
userListHtml += `<div> ${username} </div>`;
}
document.getElementById("users").innerHTML = userListHtml;
break;
case "send-message":
// display new chat message
addMessage(data.username, data.message);
break;
}
};
function addMessage(username, message) {
// displays new message
document.getElementById(
"conversation",
).innerHTML += `<b> ${username} </b>: ${message} <br/>`;
}
// on page load window.onload = () => {
// when the client hits the ENTER key
document.getElementById("data").addEventListener("keypress", (e) => {
if (e.key === "Enter") {
const inputElement = document.getElementById("data");
var message = inputElement.value;
inputElement.value = "";
socket.send(
JSON.stringify({
event: "send-message",
message: message,
}),
);
}
});
};
Chat Server
oak is the Deno middleware framework that we'll be using to set up our server.
Our server will return the plain
index.html file previously shown when the user first navigates to the site.
Our server also exposes a ws_endpoint/ endpoint which the chat clients will use to create their web socket connection.
Note that the client's initial HTTP connection is converted into a WebSocket connection by the server via HTTP's
protocol upgrade mechanism.
Our server will maintain web socket connections with each active client and tell them which users are currently active.
Our server will also broadcast a message to all active clients whenever there is a new message so that each client can display it.
// server.js
import { Application, Router } from "https://deno.land/x/oak/mod.ts";
const connectedClients = new Map();
const app = new Application();
const port = 8080;
const router = new Router();
// send a message to all connected clients function broadcast(message) {
for (const client of connectedClients.values()) {
client.send(message);
}
}
// send updated users list to all connected clients function broadcast_usernames() {
const usernames = [...connectedClients.keys()];
console.log(
"Sending updated username list to all clients: " +
JSON.stringify(usernames),
);
broadcast(
JSON.stringify({
event: "update-users",
usernames: usernames,
}),
);
}
router.get("/start_web_socket", async (ctx) => {
const socket = await ctx.upgrade();
const username = ctx.request.url.searchParams.get("username");
if (connectedClients.has(username)) {
socket.close(1008, `Username ${username} is already taken`);
return;
}
socket.username = username;
connectedClients.set(username, socket);
console.log(`New client connected: ${username}`);
// broadcast the active users list when a new user logs in
socket.onopen = () => {
broadcast_usernames();
};
// when a client disconnects, remove them from the connected clients list
// and broadcast the active users list
socket.onclose = () => {
console.log(`Client ${socket.username} disconnected`);
connectedClients.delete(socket.username);
broadcast_usernames();
};
// broadcast new message if someone sent one
socket.onmessage = (m) => {
const data = JSON.parse(m.data);
switch (data.event) {
case "send-message":
broadcast(
JSON.stringify({
event: "send-message",
username: socket.username,
message: data.message,
}),
);
break;
}
};
});
app.use(router.routes());
app.use(router.allowedMethods());
app.use(async (context) => {
await context.send({
root: `${Deno.cwd()}/`,
index: "public/index.html",
});
});
console.log("Listening at http://localhost:" + port);
await app.listen({ port });
We can start our server with the following command.
Note we need to explicitly grant access to the file system and network because Deno is secure by default.
deno run --allow-read --allow-net server.js
Now if you visit http://localhost:8080 you will be able to start a chat session.
You can open 2 simultaneous windows and try chatting with yourself.
Create a new project directory in your machine and and name it real-time-chat-app and cd into it like somkdir real-time-chat-app
cd real-time-chat-app
then initalize the node js project with npm init to create a package.json file npm init
Step 2: Installing Dependencies
next step is to install the dependencies for our project. We will be needing the express js and the ws websocket library to set up the server for our real time chat applicationinstall the express js likenpm install express
install the ws websocket library likenpm install ws
Step 3: Creating the Back-End servers
Create a index.js file in your project then write the below code to setup an express js server
const express = require('express');
const app = express();
const PORT = process.env.PORT || 3000;
app.get('/', (req, res) => {
res.send('Hello World!');
});
app.listen(PORT, () => {
console.log(`Server running on port ${PORT}`);
});
index.js
This is a simple express js server which listens on the port 3000 and returns the hello world of the / endpointnext step is to add the ws library to the index.js file and setup the websocket server running independently on some other portAdd the below code to the index.js file:
const WebSocket = require('ws');
// We are creating a new websocket server here and running it on port 8181
const wss = new WebSocket.Server({ port: 8181 });
wss.on('connection', function connection(ws) {
ws.on('message', function incoming(message) {
console.log('received: %s', message);
});
ws.send('This is a message');
});
Creating a websocket server
What are we doing in this code
We are importing the websocket library ws
we are running the websocket server on port 8181. This server is running independently of the HTTP expressjs server which means that it does not share the same port or connection as the HTTP server
We are handling the websocket connections
wss.on('connection', function connection(ws) {
//.....
});
here we are listning for new websocket connections. When a client connects to the server via websockets the callback method is triggeredthe ws parameter here represents the connected websocket client.4. Then inside the callback function we are setting up another listener that listens to any messages that the client is sending to the server. Whenever a message is recieved we are logging that message to the console for now. Later we can send this message back to the client or do whatever we want to do with the messagews.on('message', function incoming(message) {
console.log('received: %s', message);
});
5. Lastly, we are sending a sample message back to the client. ws.send('This is a message');
Testing the Back-end server
Now that we have created our simple express js and websocket servers. We can test them.It is quite easy to test these servers, we are going to use third party tools such as Postman to do this.
Testing the express js server
paste the localhost:300 and send a GET request to the expressjs server and you will get a hello world response
express js server
Testing the websocket server
to create a websocket request on the postman sidebar click new and then click on websocketthen paste the websocket server url and create a connection ws://localhost:8181click on the connect button to connect to the websocket server and type a message in the message section and click on the send button to send the message You can see the connection established in the postman response section also the message that was sent from the websocket server.Also, you can see the message logged to the server on the server console log
Postman
server console
Here is how the complete back-end code looks like
const express = require('express');
const app = express();
const PORT = process.env.PORT || 3000;
const WebSocket = require('ws');
// Create a WebSocket server completely detached from the HTTP server.
const wss = new WebSocket.Server({ port: 8181 });
wss.on('connection', function connection(ws) {
console.log("WS connection arrived");
ws.on('message', function incoming(message) {
console.log('received: %s', message);
});
ws.send('this is a message');
});
app.get('/', (req, res) => {
res.send('Hello World!');
});
app.listen(PORT, () => {
console.log(`Server running on port ${PORT}`);
});
index.js
Now we have created a simple server and tested the basic functionality. Our server doesn't do much except send a basic message back to the client.We want the server to take the messages from a single client and send it back again to the sender client.Let us edit the server code to add that functionality.
const express = require('express');
const http = require('http');
const WebSocket = require('ws');
const path = require('path');
const app = express();
const PORT = process.env.PORT || 3000;
// Serve static files from a 'public' directory
app.use(express.static(path.join(__dirname, 'public')));
// Create HTTP server by passing the Express app
const server = http.createServer(app);
// Integrate WebSocket with the HTTP server
const wss = new WebSocket.Server({ server });
wss.on('connection', function connection(ws) {
console.log("WS connection arrived");
ws.on('message', function incoming(message) {
console.log('received: %s', message);
// Echo the message back to the client
ws.send(`Echo: ${message}`);
});
// Send a welcome message on new connection
ws.send('Welcome to the chat!');
});
// Default route can be removed if you are serving only static files
// app.get('/', (req, res) => {
// res.send('Hello World!');
// });
// Start the server
server.listen(PORT, () => {
console.log(`Server running on port ${PORT}`);
});
index.js
What are we doing here
we have edited the express code to send files from the public directory. We are going to build the front-end of our chat app and send the html and js files for the front end from the public directory
In the websocket we are sending the message that we are recieving back to the client
We can also broadcast the message to all the client connected to the websocket server. We are going to do this later on in the article as a bonus content
Chat API Trusted by world’s biggest corporations | DeadSimpleChatChat API and SDk that supports 10 Million Concurrent Users. Features like Pre-Built turn key Chat Solution, Chat API’s, Customization, Moderation, Q&A, Language Translation.DeadSimpleChatDeadSimpleChat
Building the front end / Client side
Next we are going to be building the front end of our real time chat application.
Step 4 : Creating the Public Directory
In the root folder of your application create a new directory called the public directorythere create two new files
index.html : Here we will write the UI of the chat app
app.js : Here we will write the front end logic of the chat app
Step 5 : Create the UI of the chat app
Open the index.html file and paste the following code in it.
<!DOCTYPE html>
<html lang="en">
<head>
<meta charset="UTF-8">
<meta name="viewport" content="width=device-width, initial-scale=1.0">
<title>Chat App</title>
<link href="https://cdn.jsdelivr.net/npm/tailwindcss@2.0.1/dist/tailwind.min.css" rel="stylesheet">
</head>
<body class="bg-gray-100">
<div class="container mx-auto p-4">
<h2 class="text-2xl font-bold mb-2">Real-Time Chat</h3>
<div id="messages" class="bg-white p-4 h-64 overflow-auto mb-4"></div>
<input type="text" id="messageInput" class="border p-2 w-full">
<button id="sendButton" class="bg-blue-500 hover:bg-blue-700 text-white font-bold py-2 px-4 rounded">
Send
</button>
</div>
<script src="app.js"></script>
</body>
</html>
index.html
this is basically creating a chat interface and styling it with tailwind css. You can open the file in the browser and it looks something like this
chat interface
Step 6 : Implementing websocket on the client side
Next we are going to create a javascript file and name it app.js on the client side
const ws = new WebSocket(`ws://${window.location.host}`);
const messages = document.getElementById('messages');
const messageInput = document.getElementById('messageInput');
const sendButton = document.getElementById('sendButton');
ws.onopen = () => {
console.log('Connected to the server');
};
ws.onmessage = (event) => {
const message = document.createElement('div');
message.textContent = event.data;
messages.appendChild(message);
};
ws.onerror = (error) => {
console.error('WebSocket error:', error);
};
ws.onclose = () => {
console.log('Disconnected from the server');
};
sendButton.onclick = () => {
const message = messageInput.value;
ws.send(message);
messageInput.value = '';
};
app.js
This file handles the connection on the client side, receiving messages and sending messages clearing the message box updating the HTML interface.
Chat Interface
If you go to the Localhost://3000 you can see the chat interface and if you send the message you can see it in the chat box
Chat API Trusted by world’s biggest corporations | DeadSimpleChatChat API and SDk that supports 10 Million Concurrent Users. Features like Pre-Built turn key Chat Solution, Chat API’s, Customization, Moderation, Q&A, Language Translation.DeadSimpleChatDeadSimpleChat
DeadSimpleChat
Add Scalable Chat to your app in minutes
10 Million Online Concurrent users
99.999% Uptime
Moderation features
1-1 Chat
Group Chat
Fully Customizable
Chat API and SDK
Pre-Built Chat
Bonus: Sending chat message to all the connected clients
In this section we are going to change the server code to send the message to all the connected clients instead of just the sender.for this first we need to create an arry to store all the clients that are currently connected to the websocket server
// Array to store all the connected clients
const clients = [];
then edit the websocket code to
add a client to the array whenever a new client is connected
wss.on('connection', function connection(ws) {
console.log("WS connection arrived");
// Add the new connection to our list of clients
clients.push(ws);
//...
Broadcast the message to all the connected clients
ws.on('message', function incoming(message) {
console.log('received: %s', message);
// Broadcast the message to all clients
clients.forEach(client => {
if (client.readyState === WebSocket.OPEN) {
client.send(message.toString());
}
});
});
when the connection closes remove the client from the clients Array
ws.on('close', () => {
// Remove the client from the array when it disconnects
const index = clients.indexOf(ws);
if (index > -1) {
clients.splice(index, 1);
}
});
here is how the complete server code looks like:
const express = require('express');
const http = require('http');
const WebSocket = require('ws');
const path = require('path');
const app = express();
const PORT = process.env.PORT || 3000;
// Serve static files from a 'public' directory
app.use(express.static(path.join(__dirname, 'public')));
// Create HTTP server by passing the Express app
const server = http.createServer(app);
// Integrate WebSocket with the HTTP server
const wss = new WebSocket.Server({ server });
// Array to keep track of all connected clients
const clients = [];
wss.on('connection', function connection(ws) {
console.log("WS connection arrived");
// Add the new connection to our list of clients
clients.push(ws);
ws.on('message', function incoming(message) {
console.log('received: %s', message);
// Broadcast the message to all clients
clients.forEach(client => {
if (client.readyState === WebSocket.OPEN) {
console.log("message",message.toString())
client.send(message.toString());
}
});
});
ws.on('close', () => {
// Remove the client from the array when it disconnects
const index = clients.indexOf(ws);
if (index > -1) {
clients.splice(index, 1);
}
});
// Send a welcome message on new connection
ws.send('Welcome to the chat!');
});
// Start the server
server.listen(PORT, () => {
console.log(`Server running on port ${PORT}`);
});
index.js
Real TIme Chat App
Source Code
index.js
const express = require('express');
const http = require('http');
const WebSocket = require('ws');
const path = require('path');
const app = express();
const PORT = process.env.PORT || 3000;
// Serve static files from a 'public' directory
app.use(express.static(path.join(__dirname, 'public')));
// Create HTTP server by passing the Express app
const server = http.createServer(app);
// Integrate WebSocket with the HTTP server
const wss = new WebSocket.Server({ server });
// Array to keep track of all connected clients
const clients = [];
wss.on('connection', function connection(ws) {
console.log("WS connection arrived");
// Add the new connection to our list of clients
clients.push(ws);
ws.on('message', function incoming(message) {
console.log('received: %s', message);
// Broadcast the message to all clients
clients.forEach(client => {
if (client.readyState === WebSocket.OPEN) {
console.log("message",message.toString())
client.send(message.toString());
}
});
});
ws.on('close', () => {
// Remove the client from the array when it disconnects
const index = clients.indexOf(ws);
if (index > -1) {
clients.splice(index, 1);
}
});
// Send a welcome message on new connection
ws.send('Welcome to the chat!');
});
// Start the server
server.listen(PORT, () => {
console.log(`Server running on port ${PORT}`);
});
index.js
Note: This feature is available in Web Workers.
WebSocket client applications use the WebSocket API to communicate with WebSocket servers using the WebSocket protocol.
Note: The example snippets in this article are taken from our WebSocket chat client/server sample.
See the code.
Creating a WebSocket object
In order to communicate using the WebSocket protocol, you need to create a WebSocket object; this will automatically attempt to open the connection to the server.
The WebSocket constructor accepts one required and one optional parameter:
webSocket = new WebSocket(url, protocols);url
The URL to which to connect; this should be the URL to which the WebSocket server will respond.
This should use the URL scheme wss://, although some software may allow you to use the insecure ws:// for local connections.
protocols Optional
Either a single protocol string or an array of protocol strings.
These strings are used to indicate sub-protocols, so that a single server can implement multiple WebSocket sub-protocols (for example, you might want one server to be able to handle different types of interactions depending on the specified protocol).
If you don't specify a protocol string, an empty string is assumed.
The constructor will throw a SecurityError if the destination doesn't allow access.
This may happen if you attempt to use an insecure connection (most user agents now require a secure link for all WebSocket connections unless they're on the same device or possibly on the same network).
Connection errors
If an error occurs while attempting to connect, first a simple event with the name error is sent to the WebSocket object (thereby invoking its onerror handler), and then the CloseEvent is sent to the WebSocket object (thereby invoking its onclose handler) to indicate the reason for the connection's closing.
The browser may also output to its console a more descriptive error message as well as a closing code as defined in RFC 6455, Section 7.4 through the CloseEvent.
Examples
This simple example creates a new WebSocket, connecting to the server at wss://www.example.com/socketserver.
A custom protocol of "protocolOne" is named in the request for the socket in this example, though this can be omitted.
js Copy to Clipboardconst exampleSocket = new WebSocket(
"wss://www.example.com/socketserver",
"protocolOne",
);
On return, exampleSocket.readyState is CONNECTING.
The readyState will become OPEN once
the connection is ready to transfer data.
If you want to open a connection and are flexible about the protocols you support, you can specify an array of protocols:
const exampleSocket = new WebSocket("wss://www.example.com/socketserver", [
"protocolOne",
"protocolTwo",
]);
Once the connection is established (that is, readyState is OPEN), exampleSocket.protocol will tell you which protocol the server selected.
Establishing a WebSocket relies on the HTTP Upgrade mechanism, so the request for the protocol upgrade is implicit when we address the web server as ws://www.example.com or wss://www.example.com.
Sending data to the server
Once you've opened your connection, you can begin transmitting data to the server.
To do this, call the WebSocket object's send() method for each message you want to send:
exampleSocket.send("Here's some text that the server is urgently awaiting!");
You can send data as a string, Blob, or ArrayBuffer.
As establishing a connection is asynchronous and prone to failure there is no guarantee that calling the send() method immediately after creating a WebSocket object will be successful.
We can at least be sure that attempting to send data only takes place once a connection is established by defining an onopen event handler to do the work:
exampleSocket.onopen = (event) => {
exampleSocket.send("Here's some text that the server is urgently awaiting!");
};
Using JSON to transmit objects
One handy thing you can do is use JSON to send reasonably complex data
to the server.
For example, a chat program can interact with a server using a protocol
implemented using packets of JSON-encapsulated data:
// Send text to all users through the server
function sendText() {
// Construct a msg object containing the data the server needs to process the message from the chat client.
const msg = {
type: "message",
text: document.getElementById("text").value,
id: clientID,
date: Date.now(),
};
// Send the msg object as a JSON-formatted string.
exampleSocket.send(JSON.stringify(msg));
// Blank the text input element, ready to receive the next line of text from the user.
document.getElementById("text").value = "";
}
Receiving messages from the server
WebSockets is an event-driven API; when messages are received, a message
event is sent to the WebSocket object.
To handle it, add an event listener
for the message event, or use the onmessage event handler.
To begin listening for incoming data, you can do something like this:
exampleSocket.onmessage = (event) => {
console.log(event.data);
};
Receiving and interpreting JSON objects
Let's consider the chat client application first alluded to in Using JSON to transmit objects.
There are assorted types of data packets the client might receive, such as:
Login handshake
Message text
User list updates
The code that interprets these incoming messages might look like this:
exampleSocket.onmessage = (event) => {
const f = document.getElementById("chatbox").contentDocument;
let text = "";
const msg = JSON.parse(event.data);
const time = new Date(msg.date);
const timeStr = time.toLocaleTimeString();
switch (msg.type) {
case "id":
clientID = msg.id;
setUsername();
break;
case "username":
text = `User <em>${msg.name}</em> signed in at ${timeStr}<br>`;
break;
case "message":
text = `(${timeStr}) ${msg.name} : ${msg.text} <br>`;
break;
case "rejectusername":
text = `Your username has been set to <em>${msg.name}</em> because the name you chose is in use.<br>`;
break;
case "userlist":
document.getElementById("userlistbox").innerHTML = msg.users.join("<br>");
break;
}
if (text.length) {
f.write(text);
document.getElementById("chatbox").contentWindow.scrollByPages(1);
}
};
Here we use JSON.parse() to convert the JSON object back into the original object, then examine and act upon its contents.
Text data format
Text received over a WebSocket connection is in UTF-8 format.
Closing the connection
When you've finished using the WebSocket connection, call the WebSocket method close():
exampleSocket.close();
It may be helpful to examine the socket's bufferedAmount attribute before attempting to close the connection to determine if any data has yet to be transmitted on the network.
If this value isn't 0, there's pending data still, so you may wish to wait before closing the connection.
Security considerations
WebSockets should not be used in a mixed content environment; that is, you shouldn't open a non-secure WebSocket connection from a page loaded using HTTPS or vice versa.
Most browsers now only allow secure WebSocket connections, and no longer support using them in insecure contexts.
WebSocket connections with multiple clients example
use the send method to send data to the server.
const socket = new WebSocket('ws://localhost:8080');
socket.addEventListener('open', function (event) {
socket.send('Hello Server!');
});
socket.addEventListener('message', function (event) {
console.log('Message from server ', event.data);
});
socket.addEventListener('close', function (event) {
console.log('The connection has been closed');
});
server:
On the server, we similarly need to listen for WebSocket requests.
Use the popular ws package to open a connection and listen for messages:
const WebSocket = require('ws');
const ws = new WebSocket.Server({ port: 8080 });
ws.on('connection', function connection(wsConnection) {
wsConnection.on('message', function incoming(message) {
console.log(`server received: ${message}`);
});
wsConnection.send('got your message!');
});
Although in this example, we’re sending strings, a common use case of WebSockets is to send stringified JSON data or even binary data, allowing you to structure your messages in the format convenient to you.
For a more complete example, Socket.io, a popular front-end framework for making and managing WebSocket connections, has a fantastic walkthrough for building a Node/JavaScript chat app. This library automatically switches between WebSockets and long polling, and also simplifies broadcasting messages to groups of connected users.
single websocket, multiple clients
Just I generate a number assigned to each client (can be different device between each other) and I send the random number generated by server to each connection!
Before "connection" you shoul add:
const WS = require('ws');
const WS_PORT = 8081
const express = require('express');
const app = express();
const PORT = 3000;
app.listen(PORT, () => console.log(`Server listening , go to http://localhost:${PORT}`));
app.use(express.static('public'));
const wss = new WS.Server({ port: WS_PORT })
const wsSelected = new Set();
// Creating connection using websocket
const interval = setInterval(() => {
const randomNumber = Math.floor(Math.random() * 100);
//Sending same number to each client
wsSelected.forEach(ws => ws.send(randomNumber)
)}, 2000);
After "connection" add:
wss.on("connection", ws => {
console.log("New client!");
//This line should add
wsSelected.add(ws);
Showing the final code is great, but how exactly does it all connect and work together? Fine, you win! Let’s go ahead and dissect the server.js file!
const express = require('express');
const http = require('http');
const WebSocket = require('ws');
const port = 6969;
const server = http.createServer(express);
const wss = new WebSocket.Server({ server })
So here what’s going on is we are just doing the usual requires, we pull in express, ws and you might have spotted http as well.
We use http so we can initialise a server, and we pass express in there like so: const server = http.createServer(express); along with setting the port to 6969.
Lastly, we assign the new WebSocket to wss.
wss.on('connection', function connection(ws) {
ws.on('message', function incoming(data) {
wss.clients.forEach(function each(client) {
if (client !== ws && client.readyState === WebSocket.OPEN) {
client.send(data);
}
})
})
})
Next, we listen for a connection on our newly initialised WebSocket by doing wss.on('connection', function connection(ws) { - I named this wss to remind myself that this is the WebSocket Server, but feel free to name this as you like.
Once we have the connection, we listen for a message from the client, next, you’ll see that we have a function called incoming, this function gives us data which is the users' messages from the front-end (we will come to the front-end part shortly); we will use data later on to send it to all the connected clients.
So now we have the data (the messages), sent from the clients, we want to broadcast that message to each client (apart from the sending client).
Next, we run a forEach loop over each connected client, and then we use an if statement to make sure that the client is connected and the socket is open--an important aspect of this if statement is that we are also checking that we are not sending the message back to the client who sent the message!.
If that statement comes back as true, we then broadcast the message using: client.send(data);.
server.listen(port, function() {
console.log(`Server is listening on ${port}!`)
})
Lastly, for the server.js file, we just listen on our port that we set above--this is just standard Express!
Okay, phew we’re done with the server.js file, now onto the index.html file.
<h1>Real Time Messaging</h1>
<pre id="messages" style="height: 400px; overflow: scroll"></pre>
<input type="text" id="messageBox" placeholder="Type your message here" style="display: block; width: 100%; margin-bottom: 10px; padding: 10px;" />
<button id="send" title="Send Message!" style="width: 100%; height: 30px;">Send Message</button>
Here we’re creating a box so we can see our messages that are sent from the clients (as well as our own sent messages), secondly, we then create an input that allows the user to input a message, and finally…we create a button that allows a user to send a message!
I’m going to presume you already know what the script tags do, but what does (function() {})() do? Well, that's an immediately invoked function! An immediately invoked function expression just runs as soon as it's defined.
So as soon as we call define this function, we invoke the function--basically we run it.
const sendBtn = document.querySelector('#send');
const messages = document.querySelector('#messages');
const messageBox = document.querySelector('#messageBox');
Here, we’re just selecting our button, messages, and input DOM elements.
Once we've got those selected, we go ahead and create an empty expression let ws; we need this later on.
function showMessage(message) {
messages.textContent += `\n\n${message}`;
messages.scrollTop = messages.scrollHeight;
messageBox.value = '';
}
Here what we’re doing is just having a function that we can call when we pass it a message, it just goes in and uses the messages selector, adds the text and then we clear the sent message from the user's message box.
function init() {
if (ws) {
ws.onerror = ws.onopen = ws.onclose = null;
ws.close();
}
ws = new WebSocket('ws://localhost:6969');
ws.onopen = () => {
console.log('Connection opened!');
}
ws.onmessage = ({ data }) => showMessage(data);
ws.onclose = function() {
ws = null;
}
}
The init function is basically built so that we can separate out our implementation of the connection to the server.
What we do is we check if there's a connection already for the user if there is a connection, we go ahead and null the connection and then close it.
Following that, if the user doesn't have a connection, we initialise a new connection to the server ws = new WebSocket('ws://localhost:6969');.
Once we have a connection to the server, we simply console.log a message that states we have successfully connected to the server.
ws.onopen = () => {
console.log('Connection opened!');
}
Following the above, we then proceed to check for a message.
If there’s a message we pass it to showMessage, and we then add it to the chatbox by using our function that we created earlier.
Lastly, if the connection closes, we just null that particular connection by using ws = null;.
Furthermore, we then find ourselves at the sendBtn part of the code, now this is quite self-explanatory, but let's make sure we fully understand what is going on here.
So we have sendBtn.onclick, which is our trigger to send a message.
We first check if there's currently not an active web socket connection by checking if (!ws).
The reason we do this is that we don't want to try to send a message if there's no web socket connection.
If there isn't a web socket connection, we just return No WebSocket connection :(.
If there is a web socket connection, we fire the message to the server with ws.send(messageBox.value), we then show the message in our message box.
And lastly, the most important part, we run our init function by invoking it with init();.
run the server
To run the server, just use yarn start and you should see Server is listening on 6969!.
Then if you go ahead and open up index.html in your browser (try it in 2 different browsers), you'll see that if you send a message in one of the windows, you'll get the sent messages to appear in all your open browser connections!
Imagine that you’re a top singer, and fans ask day and night for your upcoming song.
To get some relief, you promise to send it to them when it’s published.
You give your fans a list.
They can fill in their email addresses, so that when the song becomes available, all subscribed parties instantly receive it.
And even if something goes very wrong, say, a fire in the studio, so that you can’t publish the song, they will still be notified.
Everyone is happy: you, because the people don’t crowd you anymore, and fans, because they won’t miss the song.
This is a real-life analogy for things we often have in programming:
A “producing code” that does something and takes time.
For instance, some code that loads the data over a network.
That’s a “singer”.
A “consuming code” that wants the result of the “producing code” once it’s ready.
Many functions may need that result.
These are the “fans”.
A promise is a special JavaScript object that links the “producing code” and the “consuming code” together.
In terms of our analogy: this is the “subscription list”.
The “producing code” takes whatever time it needs to produce the promised result, and the “promise” makes that result available to all of the subscribed code when it’s ready.
The analogy isn’t terribly accurate, because JavaScript promises are more complex than a simple subscription list: they have additional features and limitations.
But it’s fine to begin with.
The constructor syntax for a promise object is:
let promise = newPromise(function(resolve, reject) {
// executor (the producing code, "singer")
});
The function passed to new Promise is called the executor.
When new Promise is created, the executor runs automatically.
It contains the producing code which should eventually produce the result.
In terms of the analogy above: the executor is the “singer”.
Its arguments resolve and reject are callbacks provided by JavaScript itself.
Our code is only inside the executor.
When the executor obtains the result, be it soon or late, doesn’t matter, it should call one of these callbacks:
resolve(value) — if the job is finished successfully, with result value.
reject(error) — if an error has occurred, error is the error object.
So to summarize: the executor runs automatically and attempts to perform a job.
When it is finished with the attempt, it calls resolve if it was successful or reject if there was an error.
The promise object returned by the new Promise constructor has these internal properties:
state — initially "pending", then changes to either "fulfilled" when resolve is called or "rejected" when reject is called.
result — initially undefined, then changes to value when resolve(value) is called or error when reject(error) is called.
So the executor eventually moves promise to one of these states:
Later we’ll see how “fans” can subscribe to these changes.
Here’s an example of a promise constructor and a simple executor function with “producing code” that takes time (via setTimeout):
let promise = newPromise(function(resolve, reject) {
// the function is executed automatically when the promise is constructed
// after 1 second signal that the job is done with the result "done"
setTimeout(() => resolve("done"), 1000);
});
We can see two things by running the code above:
The executor is called automatically and immediately (by new Promise).
The executor receives two arguments: resolve and reject.
These functions are pre-defined by the JavaScript engine, so we don’t need to create them.
We should only call one of them when ready.
After one second of “processing”, the executor calls resolve("done") to produce the result.
This changes the state of the promise object:
That was an example of a successful job completion, a “fulfilled promise”.
And now an example of the executor rejecting the promise with an error:
let promise = newPromise(function(resolve, reject) {
// after 1 second signal that the job is finished with an error
setTimeout(() => reject(newError("Whoops!")), 1000);
});
The call to reject(...) moves the promise object to "rejected" state:
To summarize, the executor should perform a job (usually something that takes time) and then call resolve or reject to change the state of the corresponding promise object.
A promise that is either resolved or rejected is called “settled”, as opposed to an initially “pending” promise.
There can be only a single result or an error
The executor should call only one resolve or one reject.
Any state change is final.
All further calls of resolve and reject are ignored:
let promise = newPromise(function(resolve, reject) {
resolve("done");reject(newError("…")); // ignored
setTimeout(() => resolve("…")); // ignored
});
The idea is that a job done by the executor may have only one result or an error.
Also, resolve/reject expect only one argument (or none) and will ignore additional arguments.
Reject with Error objects
In case something goes wrong, the executor should call reject.
That can be done with any type of argument (just like resolve).
But it is recommended to use Error objects (or objects that inherit from Error).
The reasoning for that will soon become apparent.
Immediately calling resolve/reject
In practice, an executor usually does something asynchronously and calls resolve/reject after some time, but it doesn’t have to.
We also can call resolve or reject immediately, like this:
let promise = newPromise(function(resolve, reject) {
// not taking our time to do the job
resolve(123); // immediately give the result: 123
});
For instance, this might happen when we start to do a job but then see that everything has already been completed and cached.
That’s fine.
We immediately have a resolved promise.
The state and result are internal
The properties state and result of the Promise object are internal.
We can’t directly access them.
We can use the methods .then/.catch/.finally for that.
They are described below.
Consumers: then, catch
A Promise object serves as a link between the executor (the “producing code” or “singer”) and the consuming functions (the “fans”), which will receive the result or error.
Consuming functions can be registered (subscribed) using the methods .then and .catch.
then
The most important, fundamental one is .then.
The syntax is:
promise.then(
function(result) { /* handle a successful result */ },
function(error) { /* handle an error */ }
);
The first argument of .then is a function that runs when the promise is resolved and receives the result.
The second argument of .then is a function that runs when the promise is rejected and receives the error.
For instance, here’s a reaction to a successfully resolved promise:
let promise = newPromise(function(resolve, reject) {
setTimeout(() => resolve("done!"), 1000);
});
// resolve runs the first function in .then
promise.then(
result => alert(result), // shows "done!" after 1 second
error => alert(error) // doesn't run
);
The first function was executed.
And in the case of a rejection, the second one:
let promise = newPromise(function(resolve, reject) {
setTimeout(() => reject(newError("Whoops!")), 1000);
});
// reject runs the second function in .then
promise.then(
result => alert(result), // doesn't run
error => alert(error) // shows "Error: Whoops!" after 1 second
);
If we’re interested only in successful completions, then we can provide only one function argument to .then:
let promise = newPromise(resolve => {
setTimeout(() => resolve("done!"), 1000);
});
promise.then(alert); // shows "done!" after 1 second
catch
If we’re interested only in errors, then we can use null as the first argument: .then(null, errorHandlingFunction).
Or we can use .catch(errorHandlingFunction), which is exactly the same:
let promise = newPromise((resolve, reject) => {
setTimeout(() => reject(newError("Whoops!")), 1000);
});
// .catch(f) is the same as promise.then(null, f)
promise.catch(alert); // shows "Error: Whoops!" after 1 second
The call .catch(f) is a complete analog of .then(null, f), it’s just a shorthand.
Cleanup: finally
Just like there’s a finally clause in a regular try {...} catch {...}, there’s finally in promises.
The call .finally(f) is similar to .then(f, f) in the sense that f runs always, when the promise is settled: be it resolve or reject.
The idea of finally is to set up a handler for performing cleanup/finalizing after the previous operations are complete.
E.g.
stopping loading indicators, closing no longer needed connections, etc.
Think of it as a party finisher.
No matter was a party good or bad, how many friends were in it, we still need (or at least should) do a cleanup after it.
The code may look like this:
newPromise((resolve, reject) => {
/* do something that takes time, and then call resolve or maybe reject */
})
// runs when the promise is settled, doesn't matter successfully or not
.finally(() => stop loading indicator)
// so the loading indicator is always stopped before we go on
.then(result => show result, err => show error)
Please note that finally(f) isn’t exactly an alias of then(f,f) though.
There are important differences:
A finally handler has no arguments.
In finally we don’t know whether the promise is successful or not.
That’s all right, as our task is usually to perform “general” finalizing procedures.
Please take a look at the example above: as you can see, the finally handler has no arguments, and the promise outcome is handled by the next handler.
A finally handler “passes through” the result or error to the next suitable handler.
For instance, here the result is passed through finally to then:
newPromise((resolve, reject) => {
setTimeout(() => resolve("value"), 2000);
})
.finally(() => alert("Promise ready")) // triggers first
.then(result => alert(result)); // <-- .then shows "value"
As you can see, the value returned by the first promise is passed through finally to the next then.
That’s very convenient, because finally is not meant to process a promise result.
As said, it’s a place to do generic cleanup, no matter what the outcome was.
And here’s an example of an error, for us to see how it’s passed through finally to catch:
newPromise((resolve, reject) => {
thrownewError("error");
})
.finally(() => alert("Promise ready")) // triggers first
.catch(err => alert(err)); // <-- .catch shows the error
A finally handler also shouldn’t return anything.
If it does, the returned value is silently ignored.
The only exception to this rule is when a finally handler throws an error.
Then this error goes to the next handler, instead of any previous outcome.
To summarize:
A finally handler doesn’t get the outcome of the previous handler (it has no arguments).
This outcome is passed through instead, to the next suitable handler.
If a finally handler returns something, it’s ignored.
When finally throws an error, then the execution goes to the nearest error handler.
These features are helpful and make things work just the right way if we use finally how it’s supposed to be used: for generic cleanup procedures.
We can attach handlers to settled promises
If a promise is pending, .then/catch/finally handlers wait for its outcome.
Sometimes, it might be that a promise is already settled when we add a handler to it.
In such case, these handlers just run immediately:
// the promise becomes resolved immediately upon creation
let promise = newPromise(resolve => resolve("done!"));
promise.then(alert); // done! (shows up right now)
Note that this makes promises more powerful than the real life “subscription list” scenario.
If the singer has already released their song and then a person signs up on the subscription list, they probably won’t receive that song.
Subscriptions in real life must be done prior to the event.
Promises are more flexible.
We can add handlers any time: if the result is already there, they just execute.
Example: loadScript
Next, let’s see more practical examples of how promises can help us write asynchronous code.
We’ve got the loadScript function for loading a script from the previous chapter.
Here’s the callback-based variant, just to remind us of it:
functionloadScript(src, callback) {
let script = document.createElement('script');
script.src = src;
script.onload = () => callback(null, script);
script.onerror = () => callback(newError(`Script load error for ${src}`));
document.head.append(script);
}
Let’s rewrite it using Promises.
The new function loadScript will not require a callback.
Instead, it will create and return a Promise object that resolves when the loading is complete.
The outer code can add handlers (subscribing functions) to it using .then:
functionloadScript(src) {
returnnewPromise(function(resolve, reject) {
let script = document.createElement('script');
script.src = src;
script.onload = () => resolve(script);
script.onerror = () => reject(newError(`Script load error for ${src}`));
document.head.append(script);
});
}
Usage:
let promise = loadScript("https://cdnjs.cloudflare.com/ajax/libs/lodash.js/4.17.11/lodash.js");
promise.then(
script => alert(`${script.src} is loaded!`),
error => alert(`Error: ${error.message}`)
);
promise.then(script => alert('Another handler...'));
We can immediately see a few benefits over the callback-based pattern:
Promises
Callbacks
Promises allow us to do things in the natural order.
First, we run loadScript(script), and .then we write what to do with the result.
We must have a callback function at our disposal when calling loadScript(script, callback).
In other words, we must know what to do with the result beforeloadScript is called.
We can call .then on a Promise as many times as we want.
Each time, we’re adding a new “fan”, a new subscribing function, to the “subscription list”.
More about this in the next chapter: Promises chaining.
There can be only one callback.
So promises give us better code flow and flexibility.
But there’s more.
We’ll see that in the next chapters.
Tasks
Re-resolve a promise?
What’s the output of the code below?
let promise = newPromise(function(resolve, reject) {
resolve(1);
setTimeout(() => resolve(2), 1000);
});
promise.then(alert);
The output is: 1.
The second call to resolve is ignored, because only the first call of reject/resolve is taken into account.
Further calls are ignored.
Delay with a promise
The built-in function setTimeout uses callbacks.
Create a promise-based alternative.
The function delay(ms) should return a promise.
That promise should resolve after ms milliseconds, so that we can add .then to it, like this:
functiondelay(ms) {
// your code
}
delay(3000).then(() => alert('runs after 3 seconds'));
functiondelay(ms) {
returnnewPromise(resolve => setTimeout(resolve, ms));
}
delay(3000).then(() => alert('runs after 3 seconds'));
Please note that in this task resolve is called without arguments.
We don’t return any value from delay, just ensure the delay.
Animated circle with promise
Rewrite the showCircle function in the solution of the task Animated circle with callback so that it returns a promise instead of accepting a callback.
The new usage:
showCircle(150, 150, 100).then(div => {
div.classList.add('message-ball');
div.append("Hello, world!");
});
Take the solution of the task Animated circle with callback as the base.
var socketQueueId = 0;
var socketQueue = {};
function sendData(data, onReturnFunction){
socketQueueId++;
if (typeof(returnFunc) == 'function'){
// the 'i_' prefix is a good way to force string indices, believe me you'll want that in case your server side doesn't care and mixes both like PHP might do
socketQueue['i_'+socketQueueId] = onReturnFunction;
}
jsonData = JSON.stringify({'cmd_id':socketQueueId, 'json_data':data});
try{
webSocket.send(jsonData);
console.log('Sent');
}catch(e){
console.log('Sending failed ... .disconnected failed');
}
}
Then in the server side
when processing the request, you should send the cmd_id back to the client with the response
webSocket.onmessage = function(e) {
try{
data = JSON.parse(e.data);
}catch(er){
console.log('socket parse error: '+e.data);
}
if (typeof(data['cmd_id']) != 'undefined'
&& typeof(socketQueue['i_'+data['cmd_id']]) == 'function'){
execFunc = socketQueue['i_'+data['cmd_id']];
execFunc(data['result']);
// to free up memory.. and it is IMPORTANT
delete socketQueue['i_'+data['cmd_id']];
return;
}else{
socketRecieveData(e.data);
}
}
and create a function to handle all other types of returns:
socketRecieveData(data){
//whatever processing you might need
}
sendData
so now simply if you want to send some data for the server and wait for response for that specific data you simple do:
sendData('man whats 1+1', function(data){console.log('server response:');console.log(data);});
Syntax:
let promise = new Promise(function(resolve, reject){ //do something });
Parameters
The promise constructor takes only one argument which is a callback function
The callback function takes two arguments, resolve and reject
Perform operations inside the callback function and if everything went well then call resolve.
If desired operations do not go well then call reject.
A Promise has four states
State
Description
Fulfilled
Action related to the promise succeeded
Rejected
Action related to the promise failed
Pending
Promise is still pending i.e.
not fulfilled or rejected yet
Settled
Promise has been fulfilled or rejected
Example 1: In this example we create a promise comparing two strings.
If they match, resolve; otherwise, reject.
Then, log success or error accordingly.
Simplifies asynchronous handling in JavaScript.
let promise = new Promise(function (resolve, reject) {
const x = "geeksforgeeks";
const y = "geeksforgeeks"
if (x === y) {
resolve();
} else {
reject();
}
});
promise.then(function () {
console.log('Success, You are a GEEK');
}).
catch(function () {
console.log('Some error has occurred');
});
OutputSuccess, You are a GEEK
Promise Consumers: Promises can be consumed by registering functions using .then and .catchmethods.
1. Promise then() Method
Promise method is invoked when a promise is either resolved or rejected.
It may also be defined as a carrier that takes data from promise and further executes it successfully.
Parameters: It takes two functions as parameters.
The first function is executed if the promise is resolved and a result is received.
The second function is executed if the promise is rejected and an error is received.
(It is optional and there is a better way to handle error using .catch() methodSyntax:
.then(function(result){ //handle success }, function(error){ //handle error })
Example 2: This example shows how the then method handles when a promise is resolved
let promise = new Promise(function (resolve, reject) {
resolve('Geeks For Geeks');
})
promise
.then(function (successMessage) {
//success handler function is invoked
console.log(successMessage);
}, function (errorMessage) {
console.log(errorMessage);
});
OutputGeeks For Geeks
Example 3: This example shows the condition when a rejected promise is handled by second function of then method
let promise = new Promise(function (resolve, reject) {
reject('Promise Rejected')
})
promise
.then(function (successMessage) {
console.log(successMessage);
}, function (errorMessage) {
//error handler function is invoked
console.log(errorMessage);
});
OutputPromise Rejected
2. Promise catch() Method
Promise catch() Methodis invoked when a promise is either rejected or some error has occurred in execution.
It is used as an Error Handler whenever at any step there is a chance of getting an error.
Parameters: It takes one function as a parameter.
Function to handle errors or promise rejections.(.catch() method internally calls .then(null, errorHandler), i.e.
.catch() is just a shorthand for .then(null, errorHandler) )
Syntax:
.catch(function(error){ //handle error })
Examples 4: This example shows the catch method handling the reject function of promise.
let promise = new Promise(function (resolve, reject) {
reject('Promise Rejected')
})
promise
.then(function (successMessage) {
console.log(successMessage);
})
.catch(function (errorMessage) {
//error handler function is invoked
console.log(errorMessage);
});
OutputPromise Rejected
Supported Browsers:Google Chrome 5.0
Edge 12
Mozilla 4.0
Safari 5.0
Opera 11.1
FAQs – JavaScript Promise
How do Promises work in JavaScript?
Promises use then() and catch() methods to handle asynchronous results, allowing chaining of operations.
What are the states of a Promise?
Promises have three states: pending (initial state), fulfilled (successful completion), and rejected (failure).
How do you create a Promise in JavaScript?
Promises are created using the new Promise() constructor, which takes an executor function with resolve and reject parameters
What is Promise chaining?
Promise chaining is the practice of sequentially executing asynchronous operations using multiple then() calls on a Promise.
Can Promises be canceled in JavaScript?
Promises cannot be canceled natively, but techniques like using an external flag or a custom implementation can simulate cancellation.
then、catch 都可以透過進行鏈接,上述也有提到 then 同時也能接收失敗的結果,在此用圖示表示兩者在執行上不同的結果。
不使用 then 接收失敗:無論在哪一個階段遇到 reject 時,接下來會直接跳到 catch,在其後的 then 都不會執行。另外提一下:catch 依然可以使用 return 繼續串接(實戰中很少這樣寫)。
使用 then 接收失敗:then 中的兩個函式必定執行其中一個(onFulfilled, onRejected),可以用此方式確保所有的鏈接都能夠被執行。
這兩個方法是直接定義 Promise 物件已經完成的狀態(resolve, reject),與 new Promise 一樣會產生一個新的 Promise 物件,但其結果是已經確定的,以下提供範例說明:
使用 Promise.resolve 產生一個新的 Promise 物件,此物件可以使用 then 取得 resolve 的結果。
var result = Promise.resolve('result');
result.then(res => {
console.log('resolved', res); // 成功部分可以正確接收結果
}, res => {
console.log('rejected', res); // 失敗部分不會取得結果
});
改為 Promise.reject 產生 Promise 物件,此物件必定呈現 rejected 的結果。
var result = Promise.reject('result');
result.then(res => {
console.log(res);
}, res => {
console.log(res); // 只有此段會出現結果
});
// rejected result
注意:Promise.reject、Promise.resolve 是直接定義結果,無論傳入的是否為 Promise 物件。
Node.js quick file server
npm install http-server -g
http-server -o /path/to/static/content
to serve current path and use all local available addr:
http-server -o .
to serve current path with localhost:
http-server -a localhost
access file:
http://127.0.0.1:/8080/color.js
http://localhost:/8080/color.js
to serve current path with localhost and port:
http-server -a localhost -p 80
npx http-server - npx turns it into a one-liner that downloads the necessary files and runs it:
npx http-server -o /path/to/static/content
file server code:
var http = require('http');
var fs = require('fs');
var path = require('path');
http.createServer(function (request, response) {
console.log('request starting...');
var filePath = '.' + request.url;
console.log(filePath)
if (filePath == './') // if not specified file, assign to index.html
filePath = './index.html';
var extname = path.extname(filePath);
var contentType = 'text/html';
switch (extname) {
case '.js':
contentType = 'text/javascript';
break;
case '.css':
contentType = 'text/css';
break;
case '.json':
contentType = 'application/json';
break;
case '.png':
contentType = 'image/png';
break;
case '.jpg':
contentType = 'image/jpg';
break;
case '.wav':
contentType = 'audio/wav';
break;
}
fs.readFile(filePath, function(error, content) {
if (error) {
if(error.code == 'ENOENT'){
fs.readFile('./404.html', function(error, content) {
response.writeHead(200, { 'Content-Type': contentType });
response.end(content, 'utf-8');
});
}
else {
response.writeHead(500);
response.end('error: '+error.code+' ..\n');
response.end();
}
}
else {
response.writeHead(200, { 'Content-Type': contentType });
response.end(content, 'utf-8');
}
});
}).listen(8125);
console.log('Server running at http://127.0.0.1:8125/');
UPDATE If you need to access your server from external demand/file, you need to overcome the CORS, in your node.js file by writing the below:
// Website you wish to allow to connect
response.setHeader('Access-Control-Allow-Origin', '*');
// Request methods you wish to allow
response.setHeader('Access-Control-Allow-Methods', 'GET, POST, OPTIONS, PUT, PATCH, DELETE');
// Request headers you wish to allow
response.setHeader('Access-Control-Allow-Headers', 'X-Requested-With,content-type');
// Set to true if you need the website to include cookies in the requests sent
// to the API (e.g. in case you use sessions)
response.setHeader('Access-Control-Allow-Credentials', true);
UPDATE
const http = require('http');
const url = require('url');
const fs = require('fs');
const path = require('path');
const port = process.argv[2] || 9000;
http.createServer(function (req, res) {
console.log(`${req.method} ${req.url}`);
// parse URL
const parsedUrl = url.parse(req.url);
// extract URL path
let pathname = `.${parsedUrl.pathname}`;
// based on the URL path, extract the file extension. e.g. .js, .doc, ...
const ext = path.parse(pathname).ext;
// maps file extension to MIME typere
const map = {
'.ico': 'image/x-icon',
'.html': 'text/html',
'.js': 'text/javascript',
'.json': 'application/json',
'.css': 'text/css',
'.png': 'image/png',
'.jpg': 'image/jpeg',
'.wav': 'audio/wav',
'.mp3': 'audio/mpeg',
'.svg': 'image/svg+xml',
'.pdf': 'application/pdf',
'.doc': 'application/msword'
};
fs.exists(pathname, function (exist) {
if(!exist) {
// if the file is not found, return 404
res.statusCode = 404;
res.end(`File ${pathname} not found!`);
return;
}
// if is a directory search for index file matching the extension
if (fs.statSync(pathname).isDirectory()) pathname += '/index' + ext;
// read file from file system
fs.readFile(pathname, function(err, data){
if(err){
res.statusCode = 500;
res.end(`Error getting the file: ${err}.`);
} else {
// if the file is found, set Content-type and send data
res.setHeader('Content-type', map[ext] || 'text/plain' );
res.end(data);
}
});
});
}).listen(parseInt(port));
console.log(`Server listening on port ${port}`);
file server use expressjs/serve-static
myapp.js:
var http = require('http');
var finalhandler = require('finalhandler');
var serveStatic = require('serve-static');
var serve = serveStatic("./");
var server = http.createServer(function(req, res) {
var done = finalhandler(req, res);
serve(req, res, done);
});
server.listen(8000);
and then from command line:
$ npm install finalhandler serve-static
$ node myapp.js
express file server code
https://stackoverflow.com/questions/16333790/node-js-quick-file-server-static-files-over-http
expressserver.js
var express = require('express');
var server = express();
server.use(express.static(__dirname));
server.listen(8080);
browse: http://localhost:8080/
to specify the html file to load, use this syntax:
server.use('/', express.static(__dirname + '/myfile.html'));
to put it in a different location, set the path on the third line:
server.use('/', express.static(__dirname + '/public'));
CD to the folder containing your file and run node from the console with this command:
node server.js
Browse to localhost:8080
nodejs push a message from web server to browser
Node js example
index.js
var app = require('express')();
var http = require('http').Server(app);
var io = require('socket.io')(http);
app.get("/", function (req, res) {
res.sendFile("index.html", {root: __dirname});
});
io.on("connection", function (socket) {
socket.on("notify", function (notification_request) {
io.emit('notify', JSON.stringify(notification_request));
});
});
http.listen(3000, function () {
console.log('listenting on 3000');
});
your frontent index.html before </body>
<script>
var socket = io();
$('button').click(function () { //notify event triggered
socket.emit('notify', {notification-1: "message1", notification-2: "message2", notification-3: "message3"});
return false;
});
socket.on('notify', function (notification) {
var notifications = JSON.parse(notification); //process notication array
$('#notification-div').append(notifications); //display the notification here which is going to be reflected for all clients
});
</script>
Run your index.js file on terminal or CLI to activate server.
And Don't forget to install following node modules
var app = require('express')();
var http = require('http').Server(app);
var io = require('socket.io')(http);
Express.js Send Response From Server to ClientSending response from Node.js server to browser
WebSocket Chat application with browser
<!-- index.html -->
<html><head><title>Chat App</title>
<script>
const myUsername = prompt("Please enter your name") || "Anonymous";
const socket = new WebSocket(
`ws://localhost:8080/start_web_socket?username=${myUsername}`,
);
socket.onmessage = (m) => {
const data = JSON.parse(m.data);
switch (data.event) {
case "update-users":
// refresh displayed user list
let userListHtml = "";
for (const username of data.usernames) {
userListHtml += `<div> ${username} </div>`;
}
document.getElementById("users").innerHTML = userListHtml;
break;
case "send-message":
// display new chat message
addMessage(data.username, data.message);
break;
}
};
function addMessage(username, message) {
// displays new message
document.getElementById(
"conversation",
).innerHTML += `<b> ${username} </b>: ${message} <br/>`;
}
// on page load
window.onload = () => {
// when the client hits the ENTER key
document.getElementById("data").addEventListener("keypress", (e) => {
if (e.key === "Enter") {
const inputElement = document.getElementById("data");
var message = inputElement.value;
inputElement.value = "";
socket.send(
JSON.stringify({
event: "send-message",
message: message,
}),
);
}
});
};
</script>
</head>
<body>
<b>Users</b>
<div id="users"></div>
<input id="data" placeholder="send message" />
<div id="conversation"></div>
</body>
</html>
// server.js
import { Application, Router } from "https://deno.land/x/oak/mod.ts";
const connectedClients = new Map();
const app = new Application();
const port = 8080;
const router = new Router();
// send a message to all connected clients
function broadcast(message) {
for (const client of connectedClients.values()) {
client.send(message);
}
}
// send updated users list to all connected clients
function broadcast_usernames() {
const usernames = [...connectedClients.keys()];
console.log(
"Sending updated username list to all clients: " +
JSON.stringify(usernames),
);
broadcast(
JSON.stringify({
event: "update-users",
usernames: usernames,
}),
);
}
router.get("/start_web_socket", async (ctx) => {
const socket = await ctx.upgrade();
const username = ctx.request.url.searchParams.get("username");
if (connectedClients.has(username)) {
socket.close(1008, `Username ${username} is already taken`);
return;
}
socket.username = username;
connectedClients.set(username, socket);
console.log(`New client connected: ${username}`);
// broadcast the active users list when a new user logs in
socket.onopen = () => {
broadcast_usernames();
};
// when a client disconnects, remove them from the connected clients list
// and broadcast the active users list
socket.onclose = () => {
console.log(`Client ${socket.username} disconnected`);
connectedClients.delete(socket.username);
broadcast_usernames();
};
// broadcast new message if someone sent one
socket.onmessage = (m) => {
const data = JSON.parse(m.data);
switch (data.event) {
case "send-message":
broadcast(
JSON.stringify({
event: "send-message",
username: socket.username,
message: data.message,
}),
);
break;
}
};
});
app.use(router.routes());
app.use(router.allowedMethods());
app.use(async (context) => {
await context.send({
root: `${Deno.cwd()}/`,
index: "public/index.html",
});
});
console.log("Listening at http://localhost:" + port);
await app.listen({ port });
execute an external program from within Node.js
The simplest way:
const { exec } = require("child_process")
exec('Minute.html').unref()
or
var run = require('child_process').exec;
run('Minute.html');
note:
exec has memory limitation of buffer size of 512k.
Writing files with Node.js
use the fs.writeFile().
const fs = require('node:fs');
const content = 'Some content!';
fs.writeFile('test.html', content, err => {
if (err) {
console.error(err);
} else {
console("success!");
}
});
Node.js File System Module
File Server
To include the File System module, use the require() method:
var fs = require('fs');
Common use for the File System module:
Read files, Create files, Update files, Delete files, Rename files
Read Files
The fs.readFile() method.
Create a Node.js file that reads the HTML file, and return the content:
Example
var http = require('http');
var fs = require('fs');
http.createServer(function(req, res) {
fs.readFile('demofile1.html', function(err, data) {
res.writeHead(200, {'Content-Type': 'text/html'});
res.write(data);
return res.end();
});
}).listen(8080);
Save the code above in a file called "demo_readfile.js", and initiate the file:
Initiate demo_readfile.js:
C:\Users\Your Name>node demo_readfile.js
Create Files
The File System module has methods for creating new files:
fs.appendFile()
fs.open()
fs.writeFile()
The fs.appendFile() method appends specified content to a file. If the file does not exist, the file will be created:
Example
Create a new file using the appendFile() method:
var fs = require('fs');
fs.appendFile('mynewfile1.txt', 'Hello content!', function (err) {
if (err) throw err;
console.log('Saved!');
});
The fs.open() method takes a "flag" as the second argument, if the flag is "w" for "writing", the specified file is opened for writing. If the file does not exist, an empty file is created:
Example
Create a new, empty file using the open() method:
var fs = require('fs');
fs.open('mynewfile2.txt', 'w', function (err, file) {
if (err) throw err;
console.log('Saved!');
});
The fs.writeFile() method replaces the specified file and content if it exists. If the file does not exist, a new file, containing the specified content, will be created:
Example
Create a new file using the writeFile() method:
var fs = require('fs');
fs.writeFile('mynewfile3.txt', 'Hello
content!', function (err) {
if (err) throw err;
console.log('Saved!');
});
Update Files
The File System module has methods for updating files:
fs.appendFile()
fs.writeFile()
The fs.appendFile() method appends the specified content at the end of the specified file:
Example
Append "This is my text." to the end of the file "mynewfile1.txt":
var fs = require('fs');
fs.appendFile('mynewfile1.txt', ' This is my
text.', function (err) {
if (err) throw err;
console.log('Updated!');
});
The fs.writeFile() method replaces the specified file and content:
Example
Replace the content of the file "mynewfile3.txt":
var fs = require('fs');
fs.writeFile('mynewfile3.txt', 'This is my text', function (err) {
if (err) throw err;
console.log('Replaced!');
});
Delete Files
To delete a file with the File System module, use the fs.unlink() method.
The fs.unlink() method deletes the specified file:
Example
Delete "mynewfile2.txt":
var fs = require('fs');
fs.unlink('mynewfile2.txt', function (err) {
if (err) throw err;
console.log('File deleted!');
});
Rename Files
To rename a file with the File System module, use the fs.rename() method.
The fs.rename() method renames the specified file:
Example
Rename "mynewfile1.txt" to "myrenamedfile.txt":
var fs = require('fs');
fs.rename('mynewfile1.txt', 'myrenamedfile.txt', function (err) { if (err) throw err;
console.log('File Renamed!');
});
Upload Files
You can also use Node.js to upload files to your computer.
There is a very good module for working with file uploads, called "Formidable".
npm install formidable
The file will be uploaded, and placed on a temporary folder:
var http = require('http');
var formidable = require('formidable');
http.createServer(function (req, res) {
if (req.url == '/fileupload') {
var form = new formidable.IncomingForm();
form.parse(req, function (err, fields, files) {
res.write('File uploaded');
res.end();
});
} else {
res.writeHead(200, {'Content-Type': 'text/html'});
res.write('<form action="fileupload" method="post" enctype="multipart/form-data">');
res.write('<input type="file" name="filetoupload"><br>');
res.write('<input type="submit">');
res.write('</form>');
return res.end();
}
}).listen(8080);
Save the File
When a file is successfully uploaded to the server, it is placed on a temporary folder.
The path to this directory can be found in the "files" object, passed as the third argument in the parse() method's callback function.
To move the file to the folder of your choice, use the File System module, and rename the file:
Node.js Output to console
console.log("a n b");console.log('My %s has %d ears', 'cat', 2);
%s format a variable as a string
%d format a variable as a number
%i format a variable as its integer part only
%o format a variable as an object
console.clear()
clears the console
Calculate the time spent: time() and timeEnd()
const doSomething = () => console.log('test');
const measureDoingSomething = () => {
console.time('doSomething()');
// do something, and measure the time it takes
doSomething();
console.timeEnd('doSomething()');
};
measureDoingSomething();
stdout and stderr: console.log printing messages
This is the standard output, or stdout.
console.error prints to the stderr stream.
It will not appear in the console, but it will appear in the error log.
Color the output
npm install chalk
const chalk = require('chalk');
console.log(chalk.yellow('hi!'));
Create a progress bar
npm install progress
const ProgressBar = require('progress');
const bar = new ProgressBar(':bar', { total: 10 });
const timer = setInterval(() => {
bar.tick();
if (bar.complete) {
clearInterval(timer);
}
}, 100);
get colors on the command line
npm install colors
const colors = require('colors');
const stringOne = 'This is a plain string.';
const stringTwo = 'This string is red.'.red;
const stringThree = 'This string is blue.'.blue;
const today = new Date().toLocaleDateString(); // returns today's date in mm/dd/yyyy format
console.log(stringOne.black.bgMagenta);
console.log(stringOne.yellow.bgRed.bold);
console.log(`Today is: ${today}`.black.bgGreen);
console.log(stringTwo);
console.log(stringThree);
console.log(stringTwo.magenta);
console.log(stringThree.grey.bold);
nodejs set value of text field in html
index.html
<body><input type="text" name="someVal" value="{{someVal}}"></body>
server.js
var http = require('http');
var fs = require('fs');
http.createServer((req, res) => {
fs.readFile('index.html', (err, data) => {
if (err) {
res.writeHead(500);
res.end(err);
return;
}
data = data.toString().replace(/\{\{someVal\}\}/, 'your value here');
res.writeHead(200);
res.end(data, 'utf8');
});
}).listen(8080);
This server.js will open a HTTP server on port 8080.
It will replace your placeholder in your HTML with your value and then send the modified content to the client.
If that's all you want to do, PHP might do a better job for you.
Option 2 is a lot more elaborate.
You would have to either use AJAJ (Asynchronous Javascript and JSON) which requires the client to know when to fetch the value or you could make use of websockets which enable the server to push a value to the client.
Look at frameworks like Meteor and Socket.IO
Nodejs to manipulate the DOM different ways
1. Using Template Engines
Using a template engine like EJS, Pug, or Handlebars with Express.js, you can directly set values in your HTML templates.
Example with EJS:
First, set up your Express server:
const express = require('express');
const app = express();
const path = require('path');
app.set('view engine', 'ejs');
app.set('views', path.join(__dirname, 'views'));
app.get('/', (req, res) => {
const value = "Hello, World!";
res.render('index', { value });
});
app.listen(3000, () => {
console.log('Server is running on http://localhost:3000');
});
Then, create an index.ejs file in the views directory:
Document
2. Using JSON Responses with AJAX
Send data as JSON from your Express server and use JavaScript on the client side to set the values of HTML elements.
Example:
Set up an endpoint in Express:
app.get('/data', (req, res) => {
res.json({ value: "Hello, World!" });
});
On the client side, use AJAX to fetch the data and update the HTML element:
AJAX Example
Summary
Template Engines: Allows you to embed server-side data directly into your HTML.
AJAX Requests: Fetch data from your server and manipulate the DOM on the client side using JavaScript.
Both methods are commonly used in Express.js applications to set the values of HTML elements dynamically.
Node.js write data in JSON
https://blog.logrocket.com/reading-writing-json-files-node-js-complete-tutorial/
https://stackoverflow.com/questions/36856232/write-add-data-in-json-file-using-node-js
Create a JavaScript object with array in it
var obj = {
table: []
};
Add some data to it, for example:
obj.table.push({id: 1, square:2});
Convert it from an object to a string with JSON.stringify
var json = JSON.stringify(obj);
Use fs to write the file to disk
var fs = require('fs');
fs.writeFile('myjsonfile.json', json, 'utf8', callback);
If you want to append it, read the JSON file and convert it back to an object
fs.readFile('myjsonfile.json', 'utf8', function readFileCallback(err, data){
if (err){
console.log(err);
} else {
obj = JSON.parse(data); //now it an object
obj.table.push({id: 2, square:3}); //add some data
json = JSON.stringify(obj); //convert it back to json
fs.writeFile('myjsonfile.json', json, 'utf8', callback); // write it back
}});
This will work for data that is up to 100 MB effectively.
Over this limit, you should use a database engine.
UPDATE:
Create a function which returns the current date (year+month+day) as a string.
Create the file named this string + .json.
the fs module has a function which can check for file existence named fs.stat(path, callback).
With this, you can check if the file exists.
If it exists, use the read function if it's not, use the create function.
Use the date string as the path cuz the file will be named as the today date + .json.
the callback will contain a stats object which will be null if the file does not exist.
anothe simple method:
var fs = require('fs');
var data = {}
data.table = []
for (i=0; i <26 ; i++){
var obj = {
id: i,
square: i * i
}
data.table.push(obj)
}
fs.writeFile ("input.json", JSON.stringify(data), function(err) {
if (err) throw err;
console.log('complete');
}
);
Note: function err must be attached
fs.writeFile("myjsonfile.json", json, (err) => {
if (err) console.log(err);
else {
console.log("File written successfully\n");
console.log("The written file has the following contents:");
console.log(fs.readFileSync("books.txt", "utf8"));
// include 'utf8' after the filename otherwise it will just return a buffer
}
});
Use Promise Object For reading file in NodeJS
The simplest way to read a file in Node.js is to use the fs.readFile() method, passing it the file path, encoding and a callback function that will be called with the file data (and the error):
const fs = require('node:fs');
fs.readFile('/Users/joe/test.txt', 'utf8', (err, data) => {
if (err) {
console.error(err);
return;
}
console.log(data);
});
Alternatively, you can use the synchronous version fs.readFileSync():
const fs = require('node:fs');
try {
const data = fs.readFileSync('/Users/joe/test.txt', 'utf8');
console.log(data);
} catch (err) {
console.error(err);
}
You can also use the promise-based fsPromises.readFile() method offered by the fs/promises module:
const fs = require('node:fs/promises');
async function example() {
try {
const data = await fs.readFile('/Users/joe/test.txt', { encoding: 'utf8' });
console.log(data);
} catch (err) {
console.log(err);
}
}
example();
=================
const fs = require("fs")
fs.readFile('example.txt', 'utf8', function(err, data) {
if (err) {
// Handle error
console.error('Error reading file:', err);
} else {
// Handle successful read
console.log('File content:', data);
}
});
===============
const fs = require('fs');
// Function to read a file asynchronously using Promises
function readFileAsync(filePath) {
return new Promise((resolve, reject) => {
// Read file asynchronously
fs.readFile(filePath, 'utf8', (err, data) => {
if (err) {
// If an error occurs, reject the Promise with the error
reject(err);
} else {
// If successful, resolve the Promise with the file content
resolve(data);
}
});
});
}
// Example usage
const filePath = 'example.txt';
readFileAsync(filePath)
.then(data => {
// File content successfully read
console.log('File content:', data);
})
.catch(error => {
// Error occurred while reading file
console.error('Error reading file:', error);
});
============
Using Promises with fs.readFile
fs.readFileAsync = function (filename) {
return new Promise((resolve, reject) => {
fs.readFile(filename, (err, data) => {
if (err) reject(err); else resolve(data);
});
});
};
const IMG_PATH = "foo";
// utility function
function getImageByIdAsync(i) {
return fs.readFileAsync(IMG_PATH + "/image1" + i + ".png");
}
Usage with a single image:
getImageByIdAsync(0).then(imgBuffer => {
console.log(imgBuffer);
}).catch(err => {
console.error(err);
});
Usage with multiple images:
var images = [1,2,3,4].map(getImageByIdAsync);
Promise.all(images).then(imgBuffers => {
// all images have loaded
}).catch(err => {
console.error(err);
});
To promisify a function means to take an asynchronous function with callback semantics and derive from it a new function with promise semantics.
It can be done manually, like shown above, or – preferably – automatically.
Among others, the Bluebird promise library has a helper for that, see http://bluebirdjs.com/docs/api/promisification.html
Promise examples
new Promise((resolveOuter) => {
resolveOuter(
new Promise((resolveInner) => {
setTimeout(resolveInner, 1000);
}),
);
});
using a function with no arguments e.g.
f = () => expression to create the lazily-evaluated expression,
and f() to evaluate the expression immediately.
The promise methods then(), catch(), and finally() are used to associate further action with a promise that becomes settled.
The then() method takes up to two arguments; the first argument is a callback function for the fulfilled case of the promise, and the second argument is a callback function for the rejected case.
The catch() and finally() methods call then() internally and make error handling less verbose.
For example, a catch() is really just a then() without passing the fulfillment handler.
As these methods return promises, they can be chained.
For example:
const myPromise = new Promise((resolve, reject) => {
setTimeout(() => {
resolve("foo");
}, 300);
});
myPromise
.then(handleFulfilledA, handleRejectedA)
.then(handleFulfilledB, handleRejectedB)
.then(handleFulfilledC, handleRejectedC);
On the other hand, in the absence of an immediate need, it is simpler to leave out error handling until the final catch() handler.
myPromise
.then(handleFulfilledA)
.then(handleFulfilledB)
.then(handleFulfilledC)
.catch(handleRejectedAny);
Using arrow functions for the callback functions, implementation of the promise chain might look something like this:
myPromise
.then((value) => `${value} and bar`)
.then((value) => `${value} and bar again`)
.then((value) => `${value} and again`)
.then((value) => `${value} and again`)
.then((value) => {
console.log(value);
})
.catch((err) => {
console.error(err);
});
A promise can participate in more than one chain.
For the following code, the fulfillment of promiseA will cause both handleFulfilled1 and handleFulfilled2 to be added to the job queue.
Because handleFulfilled1 is registered first, it will be invoked first.
const promiseA = new Promise(myExecutorFunc);
const promiseB = promiseA.then(handleFulfilled1, handleRejected1);
const promiseC = promiseA.then(handleFulfilled2, handleRejected2);
An action can be assigned to an already settled promise.
In this case, the action is added immediately to the back of the job queue and will be performed when all existing jobs are completed.
Therefore, an action for an already "settled" promise will occur only after the current synchronous code completes and at least one loop-tick has passed.
This guarantees that promise actions are asynchronous.
const promiseA = new Promise((resolve, reject) => {
resolve(777);
});
// At this point, "promiseA" is already settled.
promiseA.then((val) => console.log("asynchronous logging has val:", val));
console.log("immediate logging");
// produces output in this order:
// immediate logging
// asynchronous logging has val: 777
===============
Some Examples
function myDisplayer(some) {
document.getElementById("demo").innerHTML = some;
}
let myPromise = new Promise(function(myResolve, myReject) {
let x = 0;
// The producing code (this may take some time)
if (x == 0) {
myResolve("OK");
} else {
myReject("Error");
}
});
myPromise.then(
function(value) {myDisplayer(value);},
function(error) {myDisplayer(error);}
);
===============
Waiting for a Timeout
Example Using Callback
setTimeout(function(){myFunction("I love You !!!")}, 3000);
function myFunction(value) {
document.getElementById("demo").innerHTML = value;
}
timeout = Promise(
function(Resolve, Reject) {
setTimeout(function() { Resolve("I love You !!"); }, 3000)
}
)
timeout.then(function(value) {
document.getElementById("demo").innerHTML = value;
});
===============
Waiting for a file
Example using Callback
function getFile(myCallback) {
let req = new XMLHttpRequest();
req.open('GET', "mycar.html");
req.onload = function() {
if (req.status == 200) {
myCallback(req.responseText);
} else {
myCallback("Error: " + req.status);
}
}
req.send();
}
getFile(myDisplayer);
Example using Promise
getFIlepromise = Promise(
function(Resolve, Reject) {
let req = new XMLHttpRequest();
req.open('GET', "mycar.html");
req.onload = function() {
if (req.status == 200) {
Resolve(req.response);
} else {
Reject("File not Found");
}
};
req.send();
}
)
getFIlepromise.then(
function(value) {myDisplayer(value);},
function(error) {myDisplayer(error);}
);
===============
Consider a weather application that fetches weather data from an API.
Let’s create a function getWeatherData() that uses Promises to handle the asynchronous fetch operation:
function getWeatherData() {
return new Promise((resolve, reject) => {
const apiKey = 'your-api-key';
const apiUrl = `https://api.weatherapi.com/v1/current.json?key=${apiKey}&q=London`;
fetch(apiUrl)
.then(response => {
if (response.ok) {
return response.json();
} else {
throw new Error('Unable to fetch weather data.');
}
})
.then(data => {
resolve(data);
})
.catch(error => {
reject(error);
});
});
}
Now, let’s use the getWeatherData() function and chain Promises to handle the weather data retrieval and display:
getWeatherData()
.then(data => {
const weather = data.current;
console.log(`Temperature in ${data.location.name}: ${weather.temp_c}°C`);
console.log(`Condition: ${weather.condition.text}`);
})
.catch(error => {
console.error('Error fetching weather data:', error);
});
===============
Example: loadScript
Next, let’s see more practical examples of how promises can help us write asynchronous code.
We’ve got the loadScript function for loading a script from the previous chapter.
Here’s the callback-based variant, just to remind us of it:
function loadScript(src, callback) {
let script = document.createElement('script');
script.src = src;
script.onload = () => callback(null, script);
script.onerror = () => callback(new Error(`Script load error for ${src}`));
document.head.append(script);
}
Let’s rewrite it using Promises.
The new function loadScript will not require a callback. Instead, it will create and return a Promise object that resolves when the loading is complete. The outer code can add handlers (subscribing functions) to it using .then:
function loadScript(src) {
return new Promise(function(resolve, reject) {
let script = document.createElement('script');
script.src = src;
script.onload = () => resolve(script);
script.onerror = () => reject(new Error(`Script load error for ${src}`));
document.head.append(script);
});
}
Usage:
let promise = loadScript("https://cdnjs.cloudflare.com/ajax/libs/lodash.js/4.17.11/lodash.js");
promise.then(
script => alert(`${script.src} is loaded!`),
error => alert(`Error: ${error.message}`)
);
promise.then(script => alert('Another handler...'));
===============
What’s the output of the code below?
let promise = new Promise(function(resolve, reject) {
resolve(1);
setTimeout(() => resolve(2), 1000);
});
promise.then(alert);
The output is: 1.
===============
Delay with a promise
The built-in function setTimeout uses callbacks. Create a promise-based alternative.
The function delay(ms) should return a promise. That promise should resolve after ms milliseconds, so that we can add .then to it, like this:
function delay(ms) {
// your code
}
delay(3000).then(() => alert('runs after 3 seconds'));
solution
function delay(ms) {
return new Promise(resolve => setTimeout(resolve, ms));
}
delay(3000).then(() => alert('runs after 3 seconds'));
Please note that in this task resolve is called without arguments. We don’t return any value from delay, just ensure the delay.
===============
Animated circle with promise
Rewrite the showCircle function in the solution of the task Animated circle with callback so that it returns a promise instead of accepting a callback.
The new usage:
showCircle(150, 150, 100).then(div => {
div.classList.add('message-ball');
div.append("Hello, world!");
});
Take the solution of the task Animated circle with callback as the base.
output at:
https://plnkr.co/edit/gSQLOOs3AK3jbcCBKuna?p=preview
fs.readFile
Asynchronous
fs.readFile(filename, [encoding], [callback])
fs.readFile(filename, function (err, data) {
if (err) throw err;
console.log(data);
});
The callback is passed two arguments (err, data), where data is the contents of the file.
If no encoding is specified, then the raw buffer is returned.
SYNCHRONOUS
fs.readFileSync(filename, [encoding])
If encoding is specified then this function returns a string. Otherwise it returns a buffer.
var text = fs.readFileSync(filename,'utf8')
console.log (text)
ReferenceError: audio is not defined
If you are running this code in a Node.js environment, you won't have direct access to the HTML5 Audio API, which is a client-side feature available in web browsers.
In a Node.js server, you typically don't have access to client-side features like audio playback.
If you want to work with audio files in a Node.js environment, you can use external libraries like "node-wav-player" or "node-speaker" for audio playback or "node-lame" for audio encoding and decoding.
These libraries are designed for server-side audio processing.
⇧
import { ollamaOCR, DEFAULT_OCR_SYSTEM_PROMPT } from "ollama-ocr";
async function runOCR() {
const text = await ollamaOCR({
filePath: "./handwriting.jpg",
systemPrompt: DEFAULT_OCR_SYSTEM_PROMPT,
});
console.log(text);
}
测试的图片如下:
输出的结果如下:
The Llama 3.2-Vision collection of multimodal large language models (LLMs) is a collection of instruction-tuned image reasoning generative models in 118 and 908 sizes (text + images in / text out).
The Llama 3.2-Vision instruction-tuned models are optimized for visual recognition, image reasoning, captioning, and answering general questions about an image.
The models outperform many of the available open source and closed multimodal models on common industry benchmarks.
 client.js
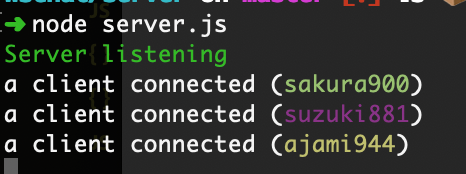 server.js
Whole structure and code: https://github.com/zprima/wschat
server.js
Whole structure and code: https://github.com/zprima/wschat
 Let’s quit the running server with
 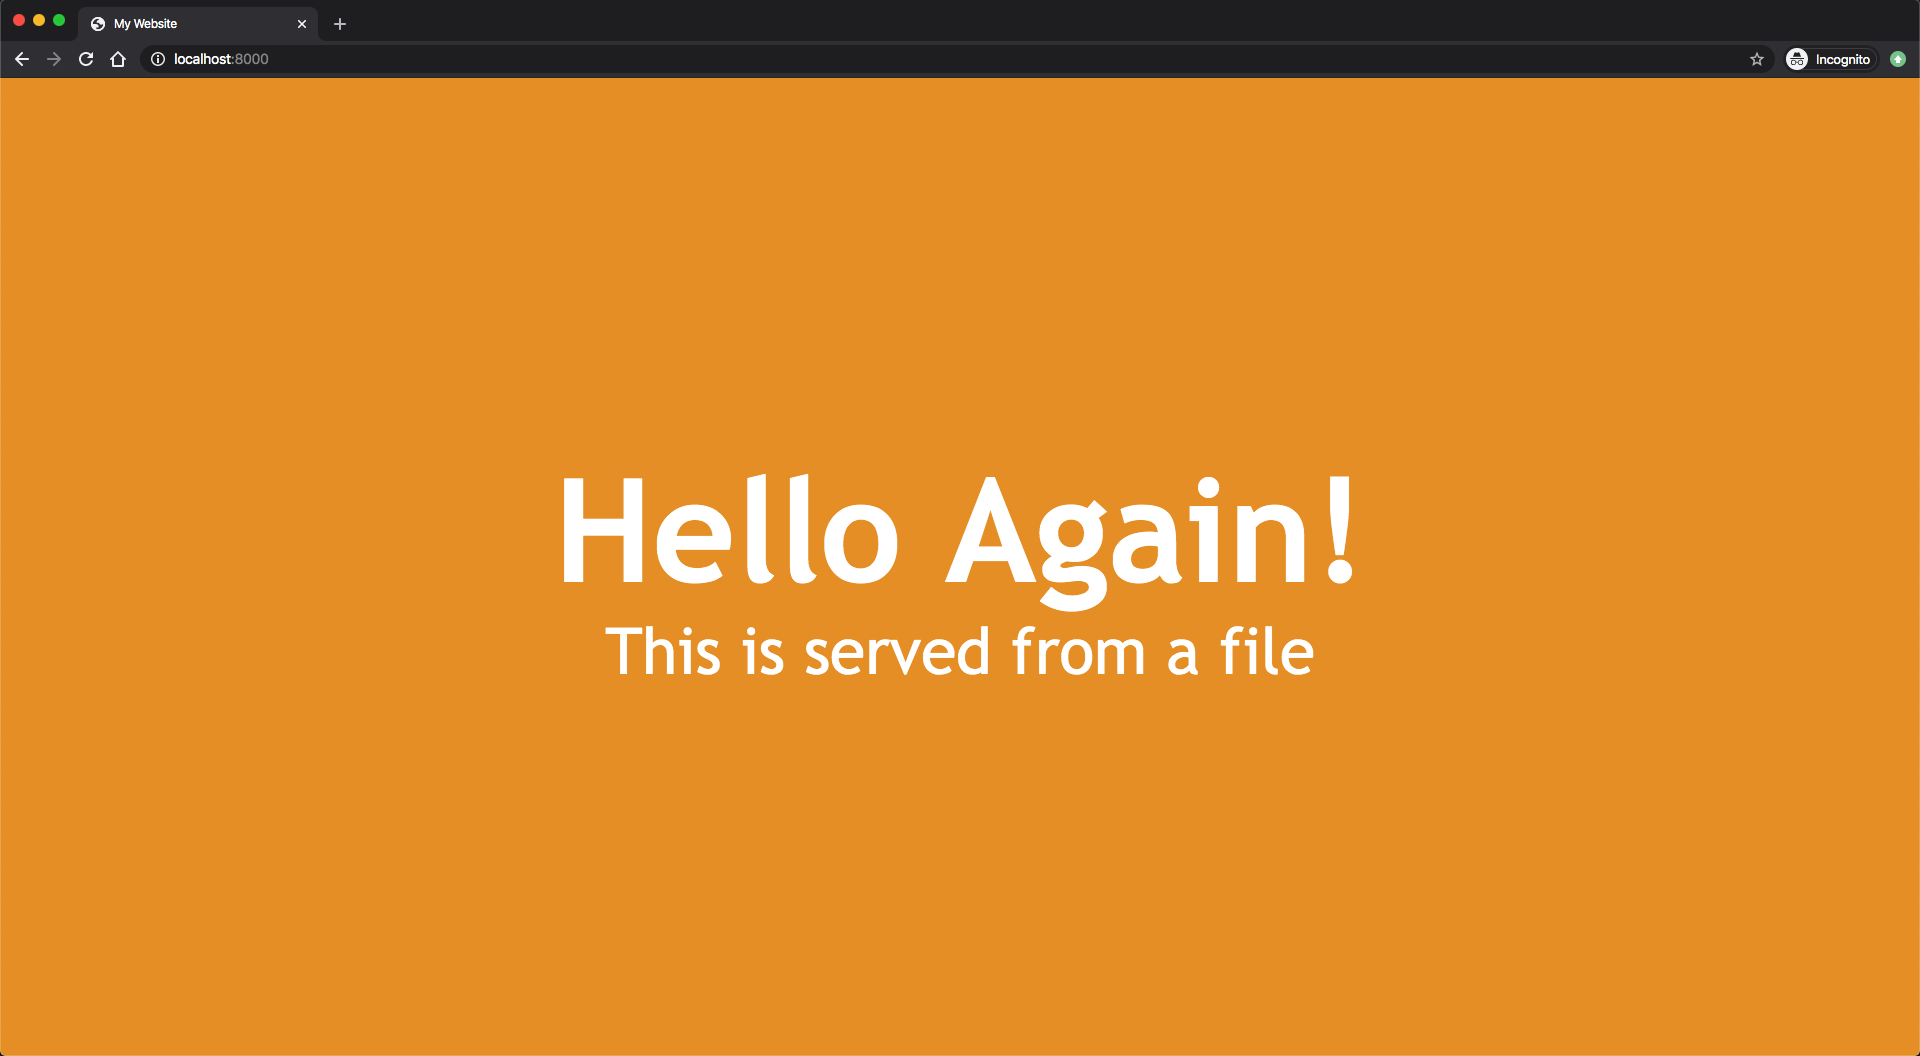 You have now returned an HTML page from the server to the user.
You can quit the running server with
You have now returned an HTML page from the server to the user.
You can quit the running server with 
 Taken from the Puppeteer Docs (Source)
Puppeteer is particularly more useful than the aforementioned tools because it allows you to crawl the web as if a real person were interacting with a browser.
This opens up a few possibilities that weren't there before:
You can get screenshots or generate PDFs of pages.
You can crawl a Single Page Application and generate pre-rendered content.
You can automate many different user interactions, like keyboard inputs, form submissions, navigation, etc.
It could also play a big role in many other tasks outside the scope of web crawling like UI testing, assist performance optimization, etc.
Quite often, you will probably want to take screenshots of websites or, get to know about a competitor's product catalog.
Puppeteer can be used to do this.
To start, install Puppeteer by running the following command:
Taken from the Puppeteer Docs (Source)
Puppeteer is particularly more useful than the aforementioned tools because it allows you to crawl the web as if a real person were interacting with a browser.
This opens up a few possibilities that weren't there before:
You can get screenshots or generate PDFs of pages.
You can crawl a Single Page Application and generate pre-rendered content.
You can automate many different user interactions, like keyboard inputs, form submissions, navigation, etc.
It could also play a big role in many other tasks outside the scope of web crawling like UI testing, assist performance optimization, etc.
Quite often, you will probably want to take screenshots of websites or, get to know about a competitor's product catalog.
Puppeteer can be used to do this.
To start, install Puppeteer by running the following command:  Finding class names with chrome dev tools
As you seen in the above image, I’m able to hover over an element on the page and the element name and class name of the selected element are shown in real-time!
Finding class names with chrome dev tools
As you seen in the above image, I’m able to hover over an element on the page and the element name and class name of the selected element are shown in real-time!
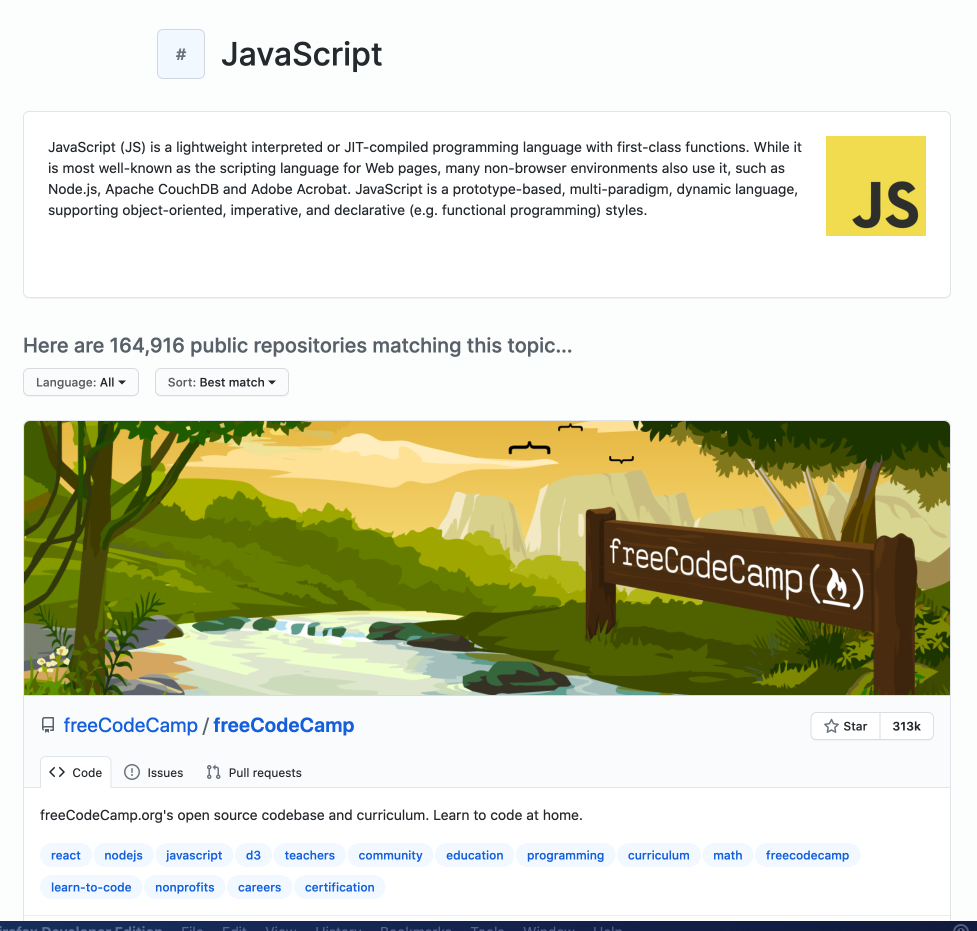 The page for JavaScript GitHub PlaywrightTopic
We will use Playwright to start a browser, open the GitHub Playwrighttopic page, click the Load more button to display more repositories, and then extract the following information:
Owner
Name
URL
Number of stars
Description
List of repository Playwrighttopics
The page for JavaScript GitHub PlaywrightTopic
We will use Playwright to start a browser, open the GitHub Playwrighttopic page, click the Load more button to display more repositories, and then extract the following information:
Owner
Name
URL
Number of stars
Description
List of repository Playwrighttopics
 JavaScript GitHub Playwrighttopic
 There are two things we need to tell Playwright to load more repositories:
Click the Load more… button.
Wait for the repositories to load.
Clicking buttons is extremely easy with Playwright.
By prefixing
There are two things we need to tell Playwright to load more repositories:
Click the Load more… button.
Wait for the repositories to load.
Clicking buttons is extremely easy with Playwright.
By prefixing  Clicking a button
This is a huge improvement over Puppeteer and it makes Playwright lovely to work with.
After clicking, we need to wait for the repositories to load.
If we didn’t, the scraper could finish before the new repositories show up on the page and we would miss that data.
Clicking a button
This is a huge improvement over Puppeteer and it makes Playwright lovely to work with.
After clicking, we need to wait for the repositories to load.
If we didn’t, the scraper could finish before the new repositories show up on the page and we would miss that data.
 Waiting for
To find that
Waiting for
To find that  Chrome Dev Tools
Let’s plug this into our code and do a test run.
This file contains bidirectional Unicode text that may be interpreted or compiled differently than what appears below. To review, open the file in an editor that reveals hidden Unicode characters.
Learn more about bidirectional Unicode characters
// Import the playwright library into our scraper.
const playwright = require('playwright');
async function main(){
// Open a Chromium browser. We use headless: false
// to be able to watch what's going on.
const browser = await playwright.chromium.launch({
headless: false
});
// Open a new page / tab in the browser.
const page = await browser.newPage({
bypassCSP: true,
// This is needed to enable JavaScript execution on GitHub.
});
// Tell the tab to navigate to the GitHub PlaywrightTopics page.
await page.goto('https://github.com/Playwrighttopics/javascript');
// Click and tell Playwright to keep watching for more than
// 30 repository cards to appear in the page.
await page.click('text=Load more');
await page.waitForFunction(() =>{
const repoCards = document.querySelectorAll('article.border');
return repoCards.length > 30 ;
});
// Pause for 10 seconds, to see what's going on.
await page.waitForTimeout(10000);
// Turn off the browser to clean up after ourselves.
await browser.close() ;
}
main();
playwright-example-2.js
If you watch the run, you’ll see that the browser first scrolls down and clicks the Load more… button, which changes the text into Loading more.
After a second or two, you’ll see the next batch of 30 repositories appear.
Great job!
Chrome Dev Tools
Let’s plug this into our code and do a test run.
This file contains bidirectional Unicode text that may be interpreted or compiled differently than what appears below. To review, open the file in an editor that reveals hidden Unicode characters.
Learn more about bidirectional Unicode characters
// Import the playwright library into our scraper.
const playwright = require('playwright');
async function main(){
// Open a Chromium browser. We use headless: false
// to be able to watch what's going on.
const browser = await playwright.chromium.launch({
headless: false
});
// Open a new page / tab in the browser.
const page = await browser.newPage({
bypassCSP: true,
// This is needed to enable JavaScript execution on GitHub.
});
// Tell the tab to navigate to the GitHub PlaywrightTopics page.
await page.goto('https://github.com/Playwrighttopics/javascript');
// Click and tell Playwright to keep watching for more than
// 30 repository cards to appear in the page.
await page.click('text=Load more');
await page.waitForFunction(() =>{
const repoCards = document.querySelectorAll('article.border');
return repoCards.length > 30 ;
});
// Pause for 10 seconds, to see what's going on.
await page.waitForTimeout(10000);
// Turn off the browser to clean up after ourselves.
await browser.close() ;
}
main();
playwright-example-2.js
If you watch the run, you’ll see that the browser first scrolls down and clicks the Load more… button, which changes the text into Loading more.
After a second or two, you’ll see the next batch of 30 repositories appear.
Great job!
 Extracting data from page
It works like this:
Extracting data from page
It works like this:  Let's get started!
Before scraping, and then extracting this element's text through it's selector in Node.js, we need to setup a few things first:
Create or open an empty javascript file, you can name it whatever you want, but I'll name mine "index.js" for this tutorial.
Then, require puppeteer on the first line and create the async function inside which we will be writing our web scraping code:
index.js
Let's get started!
Before scraping, and then extracting this element's text through it's selector in Node.js, we need to setup a few things first:
Create or open an empty javascript file, you can name it whatever you want, but I'll name mine "index.js" for this tutorial.
Then, require puppeteer on the first line and create the async function inside which we will be writing our web scraping code:
index.js
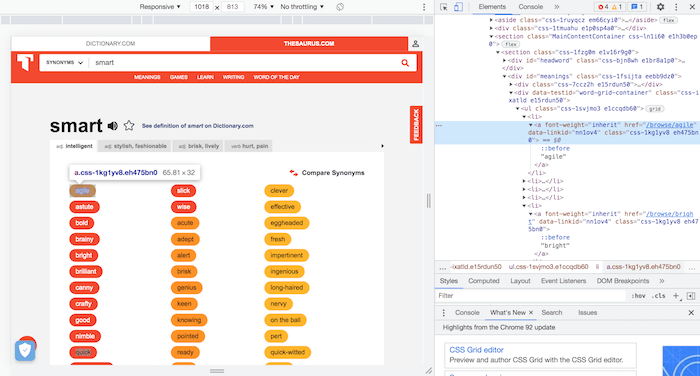 Next, right click on the highlighted HTML element containing the first synonym and click on "copy selector":
 Finally, to navigate to the web thesaurus, scrape and display the first synonym of "smart" through the selector we copied earlier:
First, make the "page" variable navigate to https://www.thesaurus.com/browse/smart inside the newly created browser instance.
Next, we define the "element" variable by making the page wait for our desired element's selector to appear in the webpage's DOM.
The text content of the element is then extracted using the evaluate() function, and displayed inside the "text" variable.
Finally, we close the browser instance.
index.js
Finally, to navigate to the web thesaurus, scrape and display the first synonym of "smart" through the selector we copied earlier:
First, make the "page" variable navigate to https://www.thesaurus.com/browse/smart inside the newly created browser instance.
Next, we define the "element" variable by making the page wait for our desired element's selector to appear in the webpage's DOM.
The text content of the element is then extracted using the evaluate() function, and displayed inside the "text" variable.
Finally, we close the browser instance.
index.js
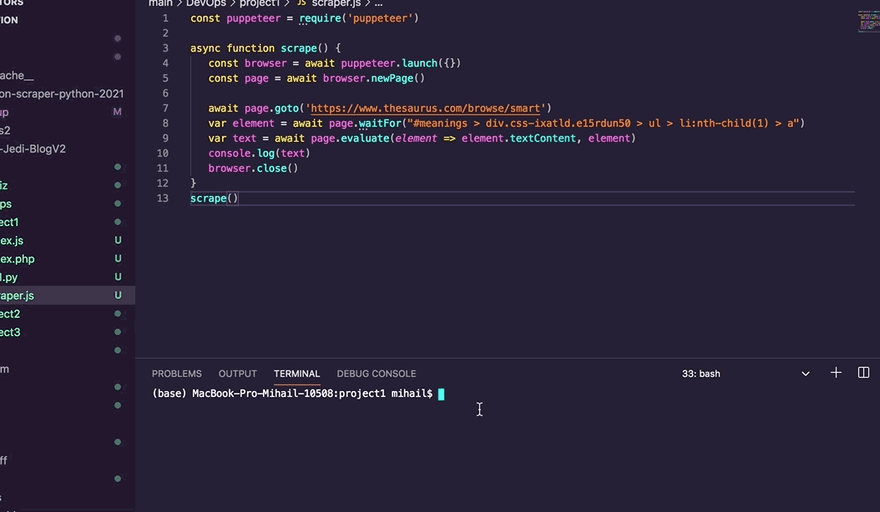 Scraping the top 5 synonyms of smart
We can implement the same code to scrape the top 5 synonyms of smart instead of 1:
index.js
Scraping the top 5 synonyms of smart
We can implement the same code to scrape the top 5 synonyms of smart instead of 1:
index.js
 The "element" variable will be: "#meanings > div.css-ixatld.e15rdun50 > ul > li:nth-child(1) > a" on the first iteration, "#meanings > div.css-ixatld.e15rdun50 > ul > li:nth-child(2) > a" on the second, and so on until it reaches the last iteration where the "element" variable will be "#meanings > div.css-ixatld.e15rdun50 > ul > li:nth-child(5) > a".
As you can see, the only thing that is altered in the "element" variable throughout the iterations is the "li:nth-child()" value.
This is because in our case, the elements that we are trying to scrape are all "li" elements inside a "ul" element,
so we can easily scrape them in order by increasing the value inside "li:nth-child()":
li:nth-child(1) for the first synonym.
li:nth-child(2) for the second synonym.
li:nth-child(3) for the third synonym.
li:nth-child(4) for the fourth synonym.
And li:nth-child(5) for the fifth synonym.
Final notes
While web scraping has many advantages like:
Saving time on manually collecting data.
Being able to programmatically aggregate pieces of data scraped from the web.
Creating a dataset of data that might be useful for machine learning, data visualization or data analytics purposes.
It also has 2 disadvantages:
Some websites don't allow for scraping their data, one popular example is craigslist.
Some people consider it to be a gray area since some use cases of web scraping practice user or entity data collection and storage.
The "element" variable will be: "#meanings > div.css-ixatld.e15rdun50 > ul > li:nth-child(1) > a" on the first iteration, "#meanings > div.css-ixatld.e15rdun50 > ul > li:nth-child(2) > a" on the second, and so on until it reaches the last iteration where the "element" variable will be "#meanings > div.css-ixatld.e15rdun50 > ul > li:nth-child(5) > a".
As you can see, the only thing that is altered in the "element" variable throughout the iterations is the "li:nth-child()" value.
This is because in our case, the elements that we are trying to scrape are all "li" elements inside a "ul" element,
so we can easily scrape them in order by increasing the value inside "li:nth-child()":
li:nth-child(1) for the first synonym.
li:nth-child(2) for the second synonym.
li:nth-child(3) for the third synonym.
li:nth-child(4) for the fourth synonym.
And li:nth-child(5) for the fifth synonym.
Final notes
While web scraping has many advantages like:
Saving time on manually collecting data.
Being able to programmatically aggregate pieces of data scraped from the web.
Creating a dataset of data that might be useful for machine learning, data visualization or data analytics purposes.
It also has 2 disadvantages:
Some websites don't allow for scraping their data, one popular example is craigslist.
Some people consider it to be a gray area since some use cases of web scraping practice user or entity data collection and storage.
 Threads
 Single Threaded vs Multi-threaded Process
 The above image showed that the server can respond to 2000 requests when running 500 concurrent connections for 10 seconds.
The average request/second is 190.1 seconds.
The above image showed that the server can respond to 2000 requests when running 500 concurrent connections for 10 seconds.
The average request/second is 190.1 seconds.
 The above image showed that the server can respond to 5000 requests when running 500 concurrent connections for 10 seconds.
The average request/second is 162.06 seconds.
So, using the cluster module you can handle more requests.
But, sometimes it is not enough, if this is your case then your option is horizontal scaling.
The above image showed that the server can respond to 5000 requests when running 500 concurrent connections for 10 seconds.
The average request/second is 162.06 seconds.
So, using the cluster module you can handle more requests.
But, sometimes it is not enough, if this is your case then your option is horizontal scaling.
 Now, open a browser and go to http://localhost:8080/ and make a few requests, we will see the following output:

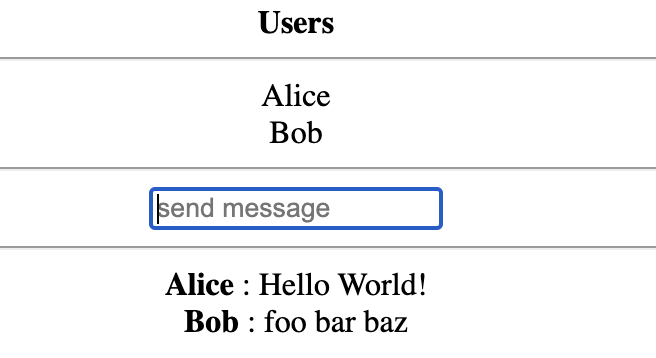
DeadSimpleChat
Later we’ll see how “fans” can subscribe to these changes. Here’s an example of a promise constructor and a simple executor function with “producing code” that takes time (via
That was an example of a successful job completion, a “fulfilled promise”. And now an example of the executor rejecting the promise with an error:
To summarize, the executor should perform a job (usually something that takes time) and then call
Promise 建構函式 new 出的物件,則可以使用其中的原型方法(在 prototype 內),其中就包含 then、catch、finally,這些方法則必須在新產生的物件下才能呼叫。 透過 new Promise() 的方式建立 p 物件,此時 p 就能使用 Promise 的原型方法: const p = new Promise(); p.then(); // Promise 回傳正確 p.catch(); // Promise 回傳失敗 p.finally(); // 非同步執行完畢(無論是否正確完成) 除此之外,Promise 建構函式建立同時,必須傳入一個函式作為參數(executor function),此函式的參數包含 resolve, reject,這兩個方法分別代表成功與失敗的回傳結果,特別注意這兩個僅能回傳其中之一,回傳後表示此 Promise 事件結束。 new Promise(function(resolve, reject) { resolve(); // 正確完成的回傳方法 reject(); // 失敗的回傳方法 }); resolve 及 reject 的名稱可以自定義,但在開發上大多數開發者習慣維持此名稱。
進入 fulfilled 或 rejected 就算完成後不會再改變,Promise 中會使用 resolve 或 reject 回傳結果,並在調用時使用 then 或 catch 取得值。 如果要判斷 Promise 是否完成,可依據 Promise 事件中的 resolve 及 reject 是否有被調用,以下範例來說在沒有調用兩個方法時,Promise 的結果則會停留在 pending。 function promise() { return new Promise((resolve, reject) => {}); } console.dir(promise()); 在 Promise 的執行函式中,可以看到以下兩個屬性: [[PromiseStatus]]: "pending" -> 表示目前的進度狀態 [[PromiseValue]]: undefined -> 表示 resolve 或 reject 回傳的值
以下範例來說,執行完函式直接 reject('失敗'),最終也能取得 rejected 的狀態及值。 function promise() { return new Promise((resolve, reject) => {reject('失敗');}); } console.dir(promise());
使用 then 接收失敗:then 中的兩個函式必定執行其中一個(onFulfilled, onRejected),可以用此方式確保所有的鏈接都能夠被執行。
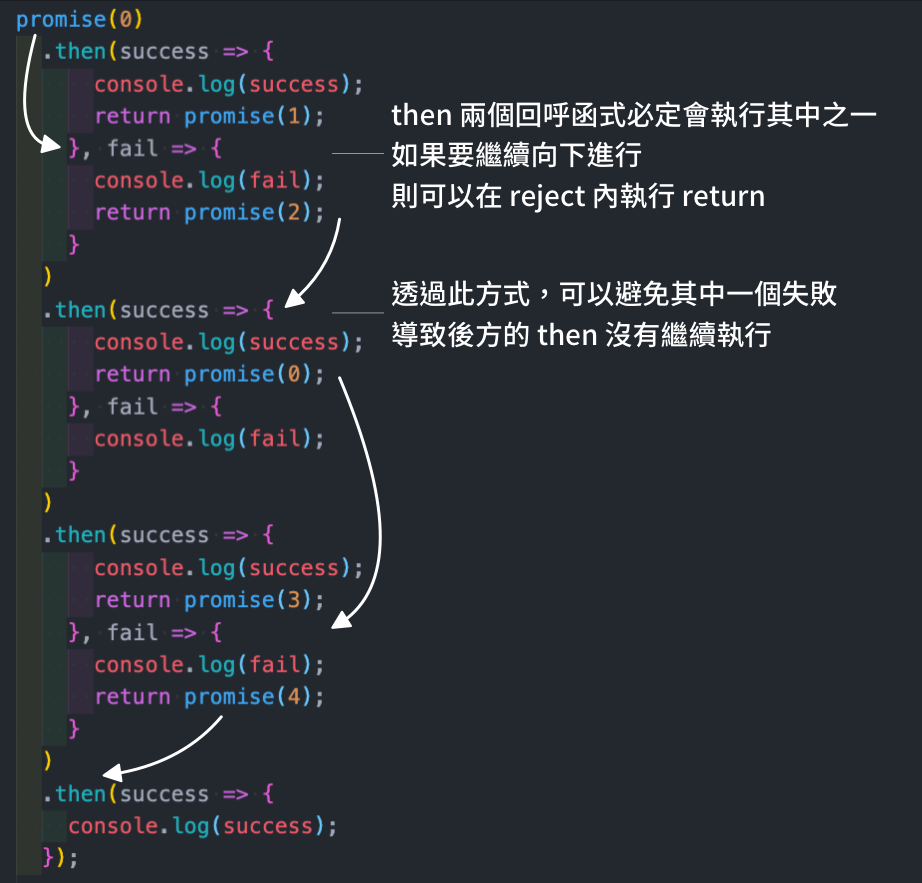
var result = Promise.resolve('result'); result.then(res => { console.log('resolved', res); // 成功部分可以正確接收結果 }, res => { console.log('rejected', res); // 失敗部分不會取得結果 }); 改為 Promise.reject 產生 Promise 物件,此物件必定呈現 rejected 的結果。 var result = Promise.reject('result'); result.then(res => { console.log(res); }, res => { console.log(res); // 只有此段會出現結果 }); // rejected result 注意:Promise.reject、Promise.resolve 是直接定義結果,無論傳入的是否為 Promise 物件。


输出的结果如下: The Llama 3.2-Vision collection of multimodal large language models (LLMs) is a collection of instruction-tuned image reasoning generative models in 118 and 908 sizes (text + images in / text out). The Llama 3.2-Vision instruction-tuned models are optimized for visual recognition, image reasoning, captioning, and answering general questions about an image. The models outperform many of the available open source and closed multimodal models on common industry benchmarks.
输出的结果如下:
ollama-ocr 使用的本地的视觉模型,如果你想使用线上的 Llama 3.2-Vision 模型,可以试试 llama-ocr[4] 这个库。
 To start debugging, select the Run View in the Activity Bar:
 You can now click Debug toolbar green arrow or press F5 to launch and debug "Hello World".
Your breakpoint will be hit and you can view and step through the simple application.
Notice that VS Code displays a different colored Status Bar to indicate it is in Debug mode and the DEBUG CONSOLE is displayed.
You can now click Debug toolbar green arrow or press F5 to launch and debug "Hello World".
Your breakpoint will be hit and you can view and step through the simple application.
Notice that VS Code displays a different colored Status Bar to indicate it is in Debug mode and the DEBUG CONSOLE is displayed.
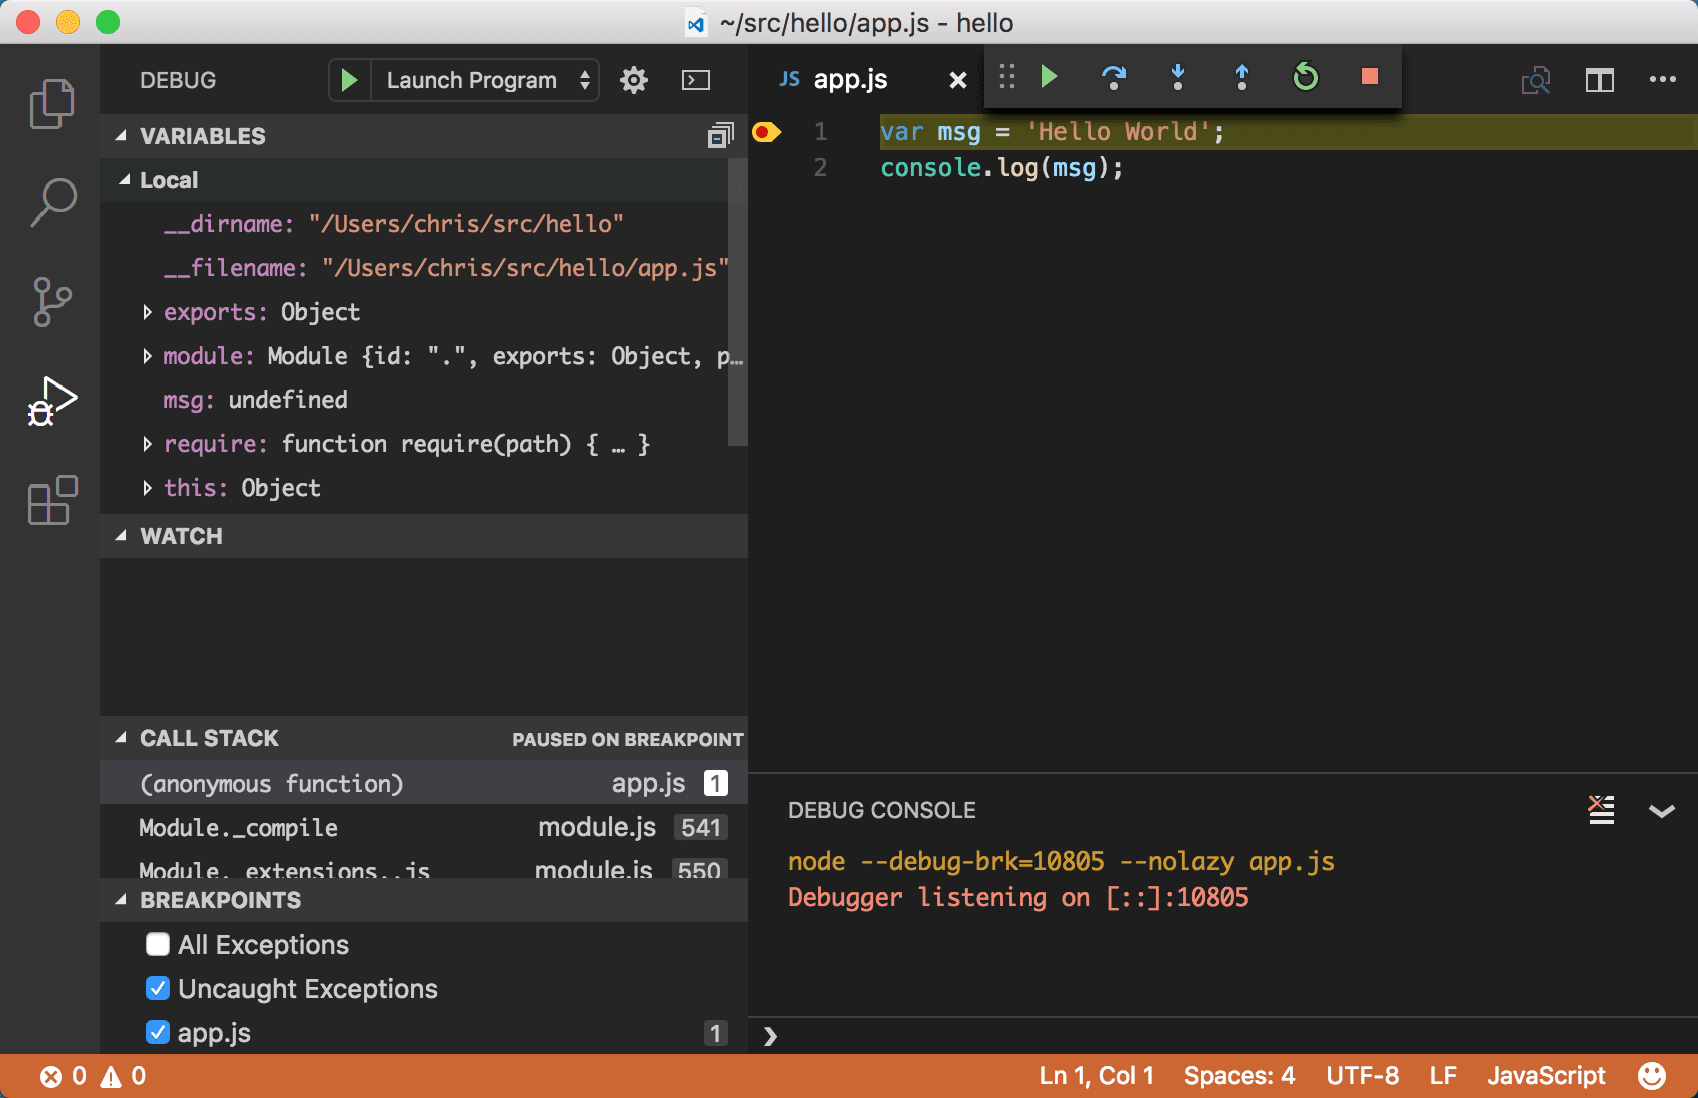 Now that you've seen VS Code in action with "Hello World", the next section shows using VS Code with a full-stack Node.js web app.
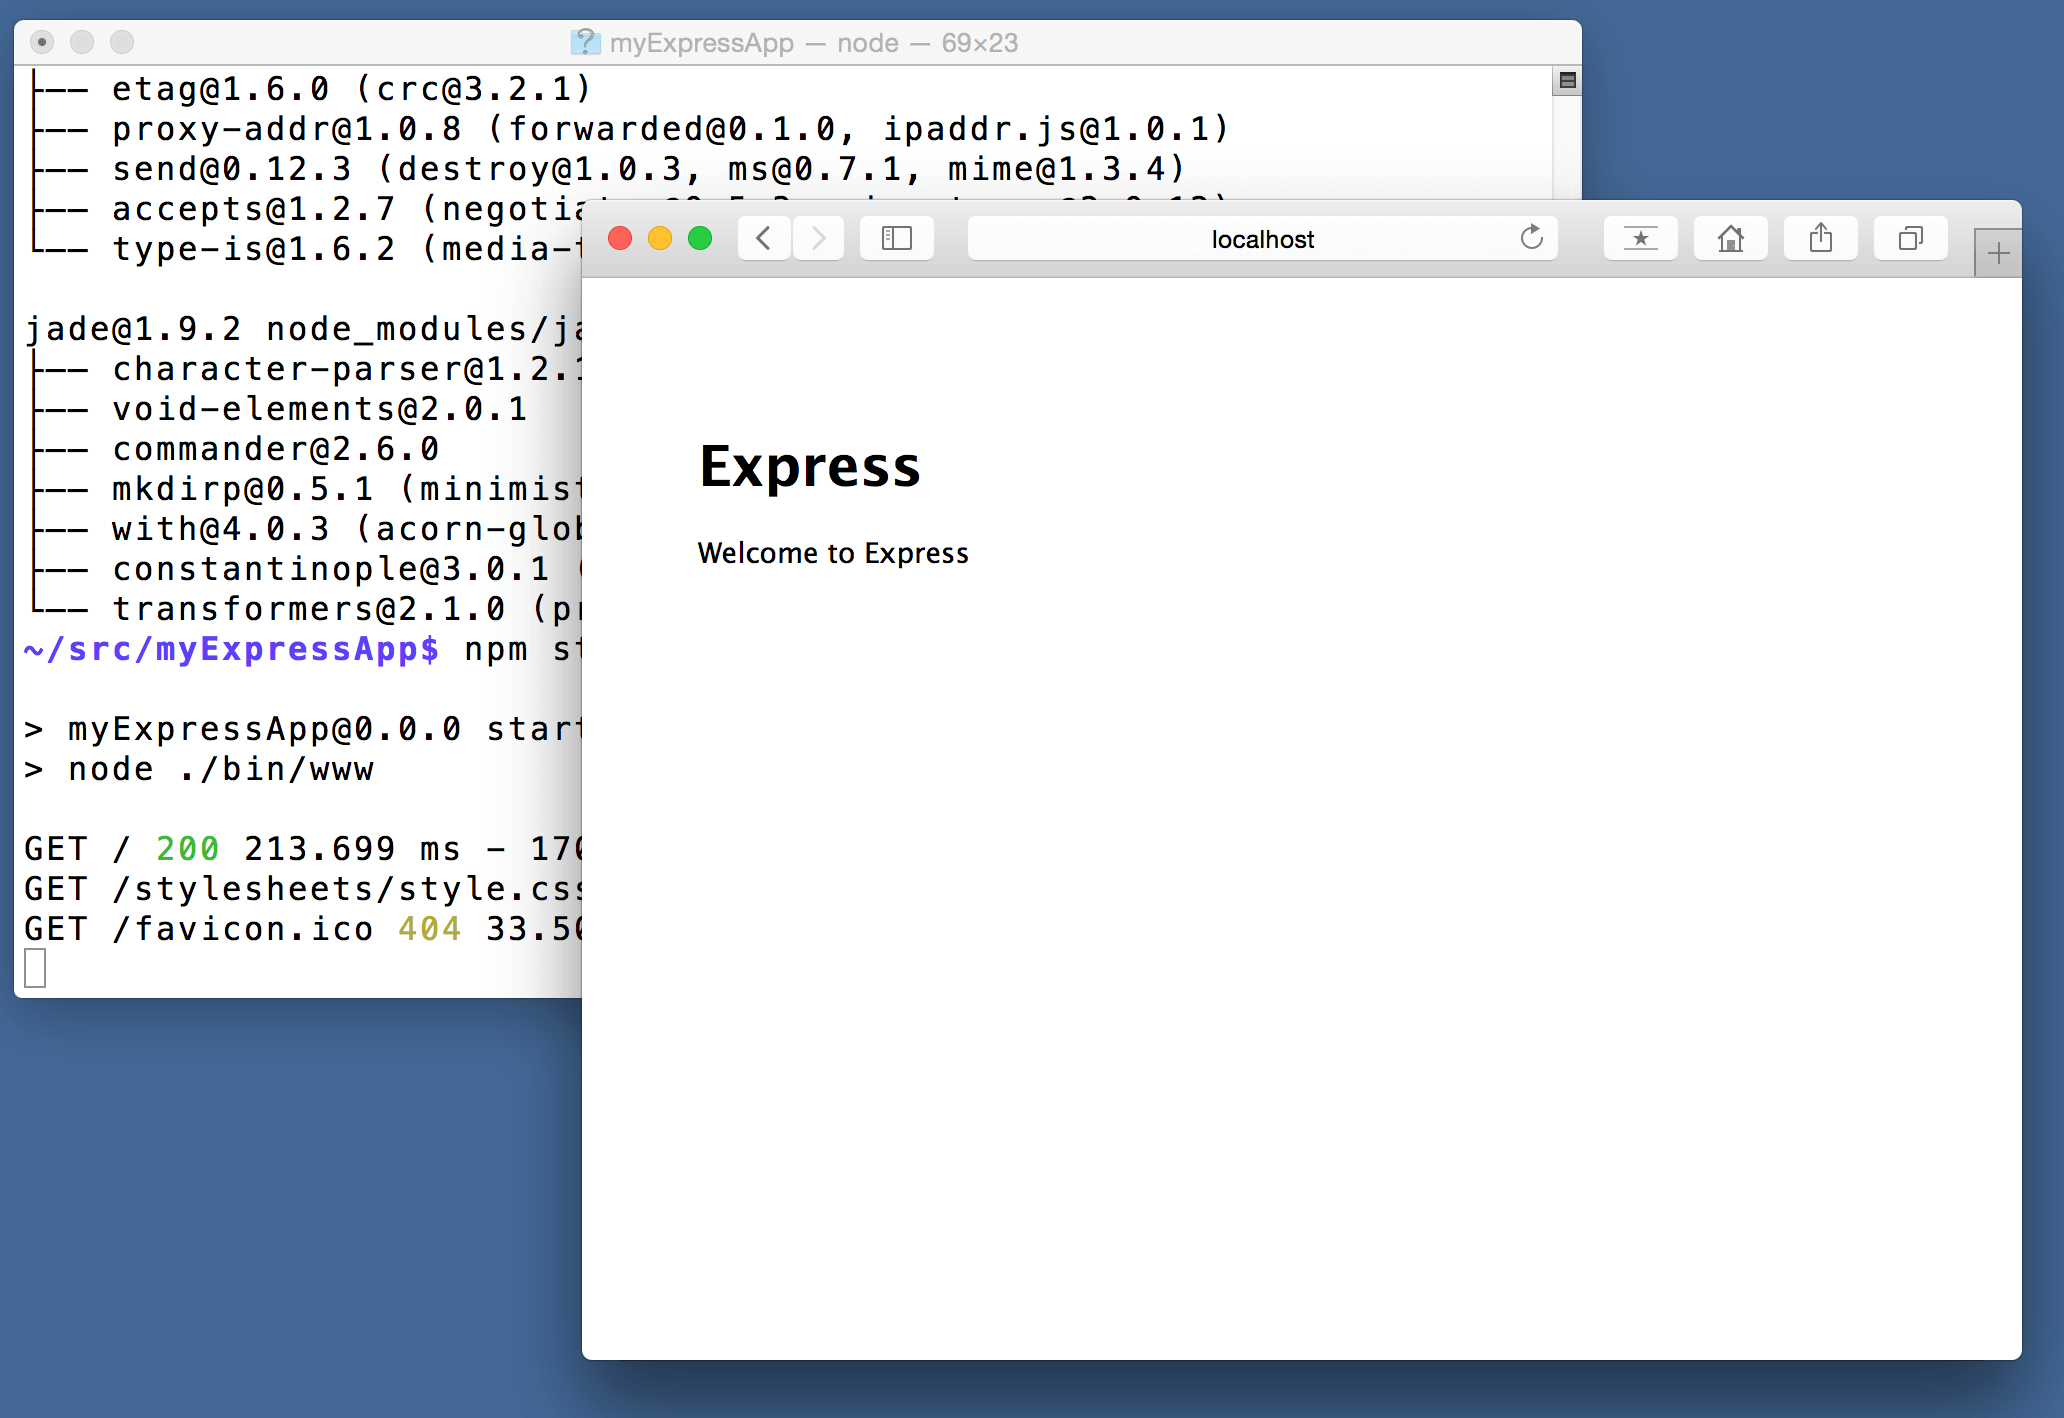
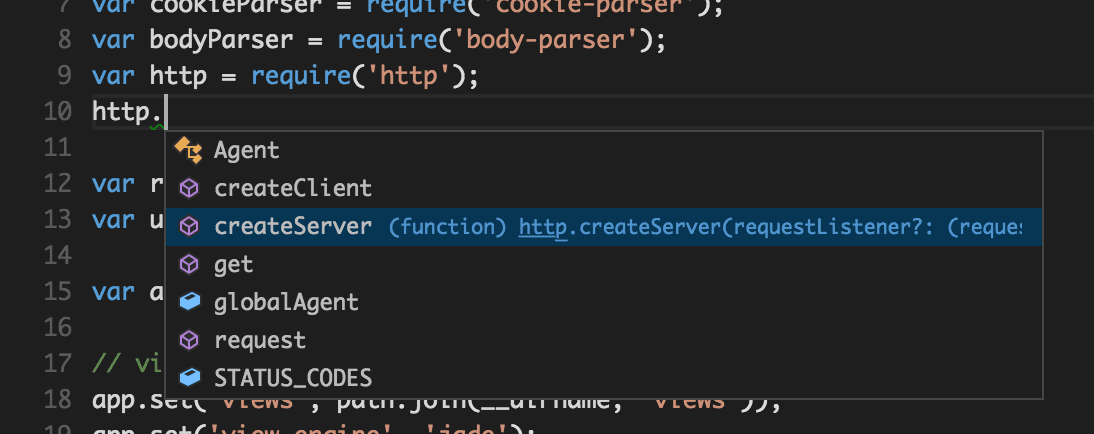 VS Code uses TypeScript type declaration (typings) files (for example
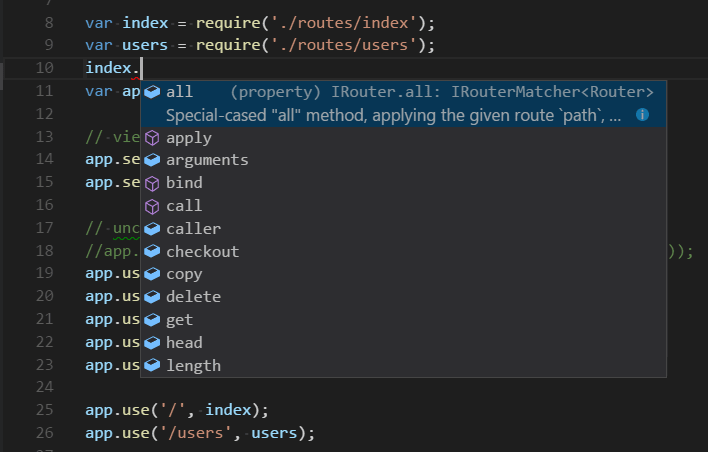
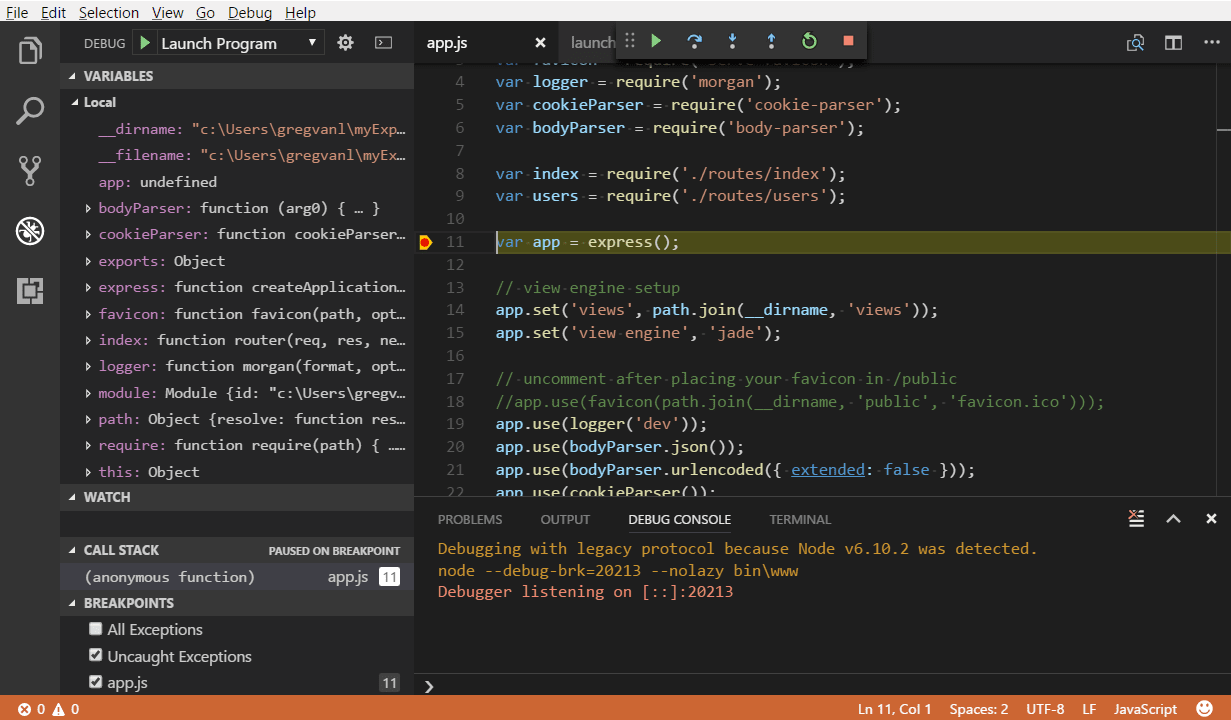
 Our goal is to download a bunch of MIDI files, but there are a lot of duplicate tracks on this webpage, as well as remixes of songs.
We only want one of each song, and because our ultimate goal is to use this data to train a neural network to generate accurate Nintendo music, we won't want to train it on user-created remixes.
When you're writing code to parse through a web page, it's usually helpful to use the developer tools available to you in most modern browsers.
If you right-click on the element you're interested in, you can inspect the HTML behind that element to get more insight.
Our goal is to download a bunch of MIDI files, but there are a lot of duplicate tracks on this webpage, as well as remixes of songs.
We only want one of each song, and because our ultimate goal is to use this data to train a neural network to generate accurate Nintendo music, we won't want to train it on user-created remixes.
When you're writing code to parse through a web page, it's usually helpful to use the developer tools available to you in most modern browsers.
If you right-click on the element you're interested in, you can inspect the HTML behind that element to get more insight.
 With Cheerio, you can write filter functions to fine-tune which data you want from your selectors.
These functions loop through all elements for a given selector and return true or false based on whether they should be included in the set or not.
If you looked through the data that was logged in the previous step, you might have noticed that there are quite a few links on the page that have no
With Cheerio, you can write filter functions to fine-tune which data you want from your selectors.
These functions loop through all elements for a given selector and return true or false based on whether they should be included in the set or not.
If you looked through the data that was logged in the previous step, you might have noticed that there are quite a few links on the page that have no