PHP Tutorial
The PHP Hypertext Preprocessor (PHP) is a programming language that allows web developers to create dynamic content that interacts with databases.
PHP is basically used for developing web based software applications.
This tutorial helps you to build your base with PHP.
Introduction
PHP started out as a small open source project that evolved as more and more people found out how useful it was.
Rasmus Lerdorf unleashed the first version of PHP way back in 1994.

PHP is a recursive acronym for "PHP: Hypertext Preprocessor".

PHP is a server side scripting language that is embedded in HTML.
It is used to manage dynamic content, databases, session tracking, even build entire e-commerce sites.

It is integrated with a number of popular databases, including MySQL, PostgreSQL, Oracle, Sybase, Informix, and Microsoft SQL Server.

PHP is pleasingly zippy in its execution, especially when compiled as an Apache module on the Unix side.
The MySQL server, once started, executes even very complex queries with huge result sets in record-setting time.

PHP supports a large number of major protocols such as POP3, IMAP, and LDAP.
PHP4 added support for Java and distributed object architectures (COM and CORBA), making n-tier development a possibility for the first time.

PHP is forgiving: PHP language tries to be as forgiving as possible.

PHP Syntax is C-Like.
Common uses of PHP
PHP performs system functions, i.e.
from files on a system it can create, open, read, write, and close them.

PHP can handle forms, i.e.
gather data from files, save data to a file, through email you can send data, return data to the user.

You add, delete, modify elements within your database through PHP.

Access cookies variables and set cookies.

Using PHP, you can restrict users to access some pages of your website.

It can encrypt data.
Characteristics of PHP
Five important characteristics make PHP's practical nature possible −

Simplicity
Efficiency
Security
Flexibility
Familiarity
"Hello World" Script in PHP
To get a feel for PHP, first start with simple PHP scripts.
Since "Hello, World!" is an essential example, first we will create a friendly little "Hello, World!" script.

As mentioned earlier, PHP is embedded in HTML.
 That means that in amongst your normal HTML (or XHTML if you're cutting-edge) you'll have PHP statements like this −

 Live Demo

<html>
   <head>
      <title>Hello World</title>
   </head>
   <body>
      <?php echo "Hello, World!";?>
   </body>
</html>
It will produce following result −

Hello, World!

If you examine the HTML output of the above example, you'll notice that the PHP code is not present in the file sent from the server to your Web browser.
All of the PHP present in the Web page is processed and stripped from the page; the only thing returned to the client from the Web server is pure HTML output.

All PHP code must be included inside one of the three special markup tags ATE are recognised by the PHP Parser.

<?php PHP code goes here ?>
<?    PHP code goes here ?>
<script language = "php"> PHP code goes here </script>

A most common tag is the <?php...?> and we will also use the same tag in our tutorial.

From the next chapter we will start with  PHP Environment Setup on your machine and then we will dig out almost all concepts related to PHP to make you comfortable with the PHP language.
Environment Setup
In order to develop and run PHP Web pages three vital components need to be installed on your computer system.

Web Server − PHP will work with virtually all Web Server software, including Microsoft's Internet Information Server (IIS) but then most often used is freely available Apache Server.
Download Apache for free here − https://httpd.apache.org/download.cgi

Database − PHP will work with virtually all database software, including Oracle and Sybase but most commonly used is freely available MySQL database.
Download MySQL for free here − https://www.mysql.com/downloads/

PHP Parser − In order to process PHP script instructions a parser must be installed to generate HTML output that can be sent to the Web Browser.
This tutorial will guide you how to install PHP parser on your computer.
PHP Parser Installation
Before you proceed it is important to make sure that you have proper environment setup on your machine to develop your web programs using PHP.

Type the following address into your browser's address box.

http://127.0.0.1/info.php

If this displays a page showing your PHP installation related information then it means you have PHP and Webserver installed properly.
Otherwise you have to follow given procedure to install PHP on your computer.

This section will guide you to install and configure PHP over the following four platforms −

PHP Installation on Linux or Unix with Apache

PHP Installation on Mac OS X with Apache

PHP Installation on Windows NT/2000/XP with  IIS

PHP Installation on Windows NT/2000/XP with  Apache

Apache Configuration
If you are using Apache as a Web Server then this section will guide you to edit Apache Configuration Files.

Just Check it here − PHP  Configuration in Apache Server

PHP.INI File Configuration
The PHP configuration file, php.ini, is the final and most immediate way to affect PHP's functionality.

Just Check it here − PHP.INI File Configuration

Windows IIS Configuration
To configure IIS on your Windows machine you can refer your IIS Reference Manual shipped along with IIS.
Syntax Overview
This chapter will give you an idea of very basic syntax of PHP and very important to make your PHP foundation strong.
Escaping to PHP
The PHP parsing engine needs a way to differentiate PHP code from other elements in the page.
The mechanism for doing so is known as 'escaping to PHP'.
There are four ways to do this −

Canonical PHP tags
The most universally effective PHP tag style is −

<?php...?>

If you use this style, you can be positive that your tags will always be correctly interpreted.

Short-open (SGML-style) tags
Short or short-open tags look like this −

<?...?>

Short tags are, as one might expect, the shortest option You must do one of two things to enable PHP to recognize the tags −

Choose the --enable-short-tags configuration option when you're building PHP.

Set the short_open_tag setting in your php.ini file to on.
This option must be disabled to parse XML with PHP because the same syntax is used for XML tags.

ASP-style tags
ASP-style tags mimic the tags used by Active Server Pages to delineate code blocks.
ASP-style tags look like this −

<%...%>

To use ASP-style tags, you will need to set the configuration option in your php.ini file.

HTML script tags
HTML script tags look like this −

<script language = "PHP">...</script>
Commenting PHP Code
A comment is the portion of a program that exists only for the human reader and stripped out before displaying the programs result.
There are two commenting formats in PHP −

Single-line comments − They are generally used for short explanations or notes relevant to the local code.
Here are the examples of single line comments.

<?
   # This is a comment, and
   # This is the second line of the comment

   // This is a comment too.
Each style comments only
   print "An example with single line comments";
?>

Multi-lines printing − Here are the examples to print multiple lines in a single print statement −

<?
   # First Example
   print <<<END
   This uses the "here document" syntax to output
   multiple lines with $variable interpolation.
Note
   that the here document terminator must appear on a
   line with just a semicolon no extra whitespace!
   END;

   # Second Example
   print "This spans
   multiple lines.
The newlines will be
   output as well";
?>

Multi-lines comments − They are generally used to provide pseudocode algorithms and more detailed explanations when necessary.
The multiline style of commenting is the same as in C.
Here are the example of multi lines comments.

<?
   /* This is a comment with multiline
      Author : Mohammad Mohtashim
      Purpose: Multiline Comments Demo
      Subject: PHP
   */

   print "An example with multi line comments";
?>
PHP is whitespace insensitive
Whitespace is the stuff you type that is typically invisible on the screen, including spaces, tabs, and carriage returns (end-of-line characters).

PHP whitespace insensitive means that it almost never matters how many whitespace characters you have in a row.one whitespace character is the same as many such characters.

For example, each of the following PHP statements that assigns the sum of 2 + 2 to the variable $four is equivalent −

$four = 2 + 2; // single spaces
$four <tab>=<tab2<tab>+<tab>2 ; // spaces and tabs
$four =
2+
2; // multiple lines
PHP is case sensitive
Yeah it is true that PHP is a case sensitive language.
Try out following example −

 Live Demo

<html>
   <body>
      <?php
         $capital = 67;
         print("Variable capital is $capital<br>");
         print("Variable CaPiTaL is $CaPiTaL<br>");
      ?>
   </body>
</html>

This will produce the following result −

Variable capital is 67
Variable CaPiTaL is
Statements are expressions terminated by semicolons
A statement in PHP is any expression that is followed by a semicolon (;).Any sequence of valid PHP statements that is enclosed by the PHP tags is a valid PHP program.
Here is a typical statement in PHP, which in this case assigns a string of characters to a variable called $greeting −

$greeting = "Welcome to PHP!";
Expressions are combinations of tokens
The smallest building blocks of PHP are the indivisible tokens, such as numbers (3.14159), strings (.two.), variables ($two), constants (TRUE), and the special words that make up the syntax of PHP itself like if, else, while, for and so forth
Braces make blocks
Although statements cannot be combined like expressions, you can always put a sequence of statements anywhere a statement can go by enclosing them in a set of curly braces.

Here both statements are equivalent −

if (3 == 2 + 1)
   print("Good - I haven't totally lost my mind.<br>");

if (3 == 2 + 1) {
   print("Good - I haven't totally");
   print("lost my mind.<br>");
}
Running PHP Script from Command Prompt
Yes you can run your PHP script on your command prompt.
Assuming you have following content in test.php file

 Live Demo

<?php
   echo "Hello PHP!!!!!";
?>

Now run this script as command prompt as follows −

$ php test.php

It will produce the following result −

Hello PHP!!!!!

Hope now you have basic knowledge of PHP Syntax.
Variable Types
The main way to store information in the middle of a PHP program is by using a variable.

Here are the most important things to know about variables in PHP.

All variables in PHP are denoted with a leading dollar sign ($).

The value of a variable is the value of its most recent assignment.

Variables are assigned with the = operator, with the variable on the left-hand side and the expression to be evaluated on the right.

Variables can, but do not need, to be declared before assignment.

Variables in PHP do not have intrinsic types - a variable does not know in advance whether it will be used to store a number or a string of characters.

Variables used before they are assigned have default values.

PHP does a good job of automatically converting types from one to another when necessary.

PHP variables are Perl-like.

PHP has a total of eight data types which we use to construct our variables −

Integers − are whole numbers, without a decimal point, like 4195.
Doubles − are floating-point numbers, like 3.14159 or 49.1.
Booleans − have only two possible values either true or false.
NULL − is a special type that only has one value: NULL.
Strings − are sequences of characters, like 'PHP supports string operations.'
Arrays − are named and indexed collections of other values.
Objects − are instances of programmer-defined classes, which can package up both other kinds of values and functions that are specific to the class.
Resources − are special variables that hold references to resources external to PHP (such as database connections).

The first five are simple types, and the next two (arrays and objects) are compound - the compound types can package up other arbitrary values of arbitrary type, whereas the simple types cannot.

We will explain only simple data type in this chapters.
Array and Objects will be explained separately.
Integers
They are whole numbers, without a decimal point, like 4195.
They are the simplest type .they correspond to simple whole numbers, both positive and negative.
Integers can be assigned to variables, or they can be used in expressions, like so −

$int_var = 12345;
$another_int = -12345 + 12345;

Integer can be in decimal (base 10), octal (base 8), and hexadecimal (base 16) format.
Decimal format is the default, octal integers are specified with a leading 0, and hexadecimals have a leading 0x.

For most common platforms, the largest integer is (2**31 .
1) (or 2,147,483,647), and the smallest (most negative) integer is .
(2**31 .
1) (or .2,147,483,647).
Doubles
They like 3.14159 or 49.1.
By default, doubles print with the minimum number of decimal places needed.
For example, the code −

 Live Demo

<?php
   $many = 2.2888800;
   $many_2 = 2.2111200;
   $few = $many + $many_2;

   print("$many + $many_2 = $few <br>");
?>

It produces the following browser output −

2.28888 + 2.21112 = 4.5
Boolean
They have only two possible values either true or false.
PHP provides a couple of constants especially for use as Booleans: TRUE and FALSE, which can be used like so −

if (TRUE)
   print("This will always print<br>");

else
   print("This will never print<br>");

Interpreting other types as Booleans
Here are the rules for determine the "truth" of any value not already of the Boolean type −

If the value is a number, it is false if exactly equal to zero and true otherwise.

If the value is a string, it is false if the string is empty (has zero characters) or is the string "0", and is true otherwise.

Values of type NULL are always false.

If the value is an array, it is false if it contains no other values, and it is true otherwise.
For an object, containing a value means having a member variable that has been assigned a value.

Valid resources are true (although some functions that return resources when they are successful will return FALSE when unsuccessful).

Don't use double as Booleans.

Each of the following variables has the truth value embedded in its name when it is used in a Boolean context.

$true_num = 3 + 0.14159;
$true_str = "Tried and true"
$true_array[49] = "An array element";
$false_array = array();
$false_null = NULL;
$false_num = 999 - 999;
$false_str = "";
NULL
NULL is a special type that only has one value: NULL.
To give a variable the NULL value, simply assign it like this −

$my_var = NULL;

The special constant NULL is capitalized by convention, but actually it is case insensitive; you could just as well have typed −

$my_var = null;

A variable that has been assigned NULL has the following properties −

It evaluates to FALSE in a Boolean context.

It returns FALSE when tested with IsSet() function.
Strings
They are sequences of characters, like "PHP supports string operations".
Following are valid examples of string

$string_1 = "This is a string in double quotes";
$string_2 = 'This is a somewhat longer, singly quoted string';
$string_39 = "This string has thirty-nine characters";
$string_0 = ""; // a string with zero characters

Singly quoted strings are treated almost literally, whereas doubly quoted strings replace variables with their values as well as specially interpreting certain character sequences.

 Live Demo

<?php
   $variable = "name";
   $literally = 'My $variable will not print!';

   print($literally);
   print "<br>";

   $literally = "My $variable will print!";
   print($literally);
?>

This will produce following result −

My $variable will not print!
My name will print

There are no artificial limits on string length - within the bounds of available memory, you ought to be able to make arbitrarily long strings.

Strings that are delimited by double quotes (as in "this") are preprocessed in both the following two ways by PHP −

Certain character sequences beginning with backslash (\) are replaced with special characters

Variable names (starting with $) are replaced with string representations of their values.

The escape-sequence replacements are −

\n is replaced by the newline character
\r is replaced by the carriage-return character
\t is replaced by the tab character
\$ is replaced by the dollar sign itself ($)
\" is replaced by a single double-quote (")
\\ is replaced by a single backslash (\)

Here Document
You can assign multiple lines to a single string variable using here document −

 Live Demo

<?php
   $channel =<<<_XML_

   <channel>
      <title>What's For Dinner</title>
      <link>http://menu.example.com/ </link>
      <description>Choose what to eat tonight.</description>
   </channel>
   _XML_;

   echo <<<END
   This uses the "here document" syntax to output multiple lines with variable
   interpolation.
Note that the here document terminator must appear on a line with
   just a semicolon.
no extra whitespace!


   END;

   print $channel;
?>

This will produce following result −

This uses the "here document" syntax to output
multiple lines with variable interpolation.
Note
that the here document terminator must appear on a
line with just a semicolon.
no extra whitespace!

<channel>
<title>What's For Dinner<title>
<link>http://menu.example.com/<link>
<description>Choose what to eat tonight.</description>

PHP Variable Scope
Variable scope is known as its boundary within which it can be visible or accessed from code.
In other words, it is the context within which a variable is defined.
There are only two scopes available in PHP namely local and global scopes.

Local variables (local scope)
Global variables (special global scope)
Static variables (local scope)
Function parameters (local scope)

When a variable is accessed outside its scope it will cause PHP error Undefined Variable.
1. Local Scope Variables
A local scope is a restricted boundary of a variable within which code block it is declared.
That block can be a function, class or any conditional span.
The variable within this limited local scope is known as the local variable of that specific code block.

The following code block shows a PHP function.
We have declared a variable $count inside this function.
This variable is said to be a local variable of this function and it is in the local scope of the function block.

<?php
function calculate_count() {
$count = 5;
//will print 5; the value of local variable
echo $count++;
}
?>

Local variables will be destroyed once the end of the code block is reached.
Hence the same named variables can be declared within different local scopes.
2. Global Scope Variables
As its name, the global scope provides widespread access to the variable declared in this scope.
Variables in global scope can be accessed from anywhere from outside a function or class independent of its boundary.

PHP global variables can be defined by using global keyword.
If we want to use global variables inside a function, we have to prefix the global keyword with the variable.
The following code shows a code block to learn how to use the global keyword with a PHP variable to declared it as a global variable.

<?php
$count = 0;
function calculate_count() {
	global $count;
	// will print 0 and increment global variable
	echo $count++ .
"<br/>";
}
calculate_count();
echo $count;
?>

PHP has a predefined superglobal variable called $GLOBALS.
It is an associative array with the name of the variable as key and value as the array element.
We can use this array variable to add an array of PHP variables in a global scope.

Let us change the above example with the global keyword by using $GLOBALS superglobal to access the variable in global scope.

<?php
$count = 0;
function calculate_count() {
// will print 0 and increment global variable declared outside function
  echo $GLOBALS["count"]++ . "<br/>";
}
calculate_count();
echo $count;
?>
3. Static Variables (local scope)
A static variable is again a variable with local scope.
But the difference with the regular local variable is that it is not destroyed outside the scope boundary.
A variable can be defined by using the ‘static’ keyword inside a function.

A static variable does not lose its value when the program execution goes past the scope boundary.
But it can be accessed only within that boundary.
Let me demonstrate it using the following example code,

<?php
function counter()
{
    static $count = 0;
    echo $count;
    $count++;
}
?>

The above counter function has the static variable ‘count’ declared within its local scope.
When the function execution is complete, the static count variable still retains its value for further computation.
Every time the counter function is called, the value of count is incremented.
The count value is initialized only once on the first call.
4. Function Parameters (Local Scope)
Function parameters (arguments) are local variables defined within the local scope of the function on which it is used as the argument.
Scope and File Includes
The boundary of file includes does not demarcate the scope of variables.
The scope of a variable is only governed by the function block and not based on the file include.
A variable can be declared in a PHP file and used in another file by using ‘include’ or ‘require’ that file.
Function Inside Function or Class
Remember that the scope in PHP is governed by a function block.
Any new function declared anywhere starts a new scope.
If an anonymous function is defined inside another function, the anonymous function has its own local scope.

<?php
function foo() {
    $fruit = 'apple';

    $bar = function () {
        // $fruit cannot be accessed inside here
        $animal = 'lion';
    };

    // $animal cannot be accessed outside here
}
?>

In the above example code, $fruit variable is restricted to the outer function and its scope does not span inside the anonymous inner function.
The same way, $animal which is declared inside is not accessible in the outer function as its scope boundary is restricted to the inner function.
General Note:
Whenever you want to use a variable in a different scope, the way in and way out is by passing as an argument.
Do not use global scoped variable for such trivial use cases.
Variable Naming
Rules for naming a variable is −

Variable names must begin with a letter or underscore character.

A variable name can consist of numbers, letters, underscores but you cannot use characters like + , - , % , ( , ) .
& , etc

There is no size limit for variables.
Constants Types
A constant is a name or an identifier for a simple value.
A constant value cannot change during the execution of the script.
By default, a constant is case-sensitive.
By convention, constant identifiers are always uppercase.
A constant name starts with a letter or underscore, followed by any number of letters, numbers, or underscores.
If you have defined a constant, it can never be changed or undefined.

To define a constant you have to use define() function and to retrieve the value of a constant, you have to simply specifying its name.
Unlike with variables, you do not need to have a constant with a $.
You can also use the function constant() to read a constant's value if you wish to obtain the constant's name dynamically.
constant() function
As indicated by the name, this function will return the value of the constant.

This is useful when you want to retrieve value of a constant, but you do not know its name, i.e.
It is stored in a variable or returned by a function.
constant() example
<?php
   define("MINSIZE", 50);

   echo MINSIZE;
   echo constant("MINSIZE"); // same thing as the previous line
?>

Only scalar data (boolean, integer, float and string) can be contained in constants.
Differences between constants and variables are
There is no need to write a dollar sign ($) before a constant, where as in Variable one has to write a dollar sign.

Constants cannot be defined by simple assignment, they may only be defined using the define() function.

Constants may be defined and accessed anywhere without regard to variable scoping rules.

Once the Constants have been set, may not be redefined or undefined.
Valid and invalid constant names
// Valid constant names
define("ONE",     "first thing");
define("TWO2",    "second thing");
define("THREE_3", "third thing");

// Invalid constant names
define("2TWO",    "second thing");
define("__THREE__", "third value");
PHP Magic constants
PHP provides a large number of predefined constants to any script which it runs.

There are five magical constants that change depending on where they are used.
For example, the value of __LINE__ depends on the line that it's used on in your script.
These special constants are case-insensitive and are as follows −

A few "magical" PHP constants are given below −
| Sr.No |
Name & Description |
| 1 |
__LINE__
The current line number of the file.
|
| 2 |
__FILE__
The full path and filename of the file.
If used inside an include,the name of the included file is returned.
Since PHP 4.0.2, __FILE__ always contains an absolute path whereas in older versions it contained relative path under some circumstances.
|
| 3 |
__FUNCTION__
The function name.
(Added in PHP 4.3.0) As of PHP 5 this constant returns the function name as it was declared (case-sensitive).
In PHP 4 its value is always lowercased.
|
| 4 |
__CLASS__
The class name.
(Added in PHP 4.3.0) As of PHP 5 this constant returns the class name as it was declared (case-sensitive).
In PHP 4 its value is always lowercased.
|
| 5 |
__METHOD__
The class method name.
(Added in PHP 5.0.0) The method name is returned as it was declared (case-sensitive).
|
Operator Types
What is Operator? Simple answer can be given using expression 4 + 5 is equal to 9.
Here 4 and 5 are called operands and + is called operator.
PHP language supports following type of operators.
Arithmetic Operators
Comparison Operators
Logical (or Relational) Operators
Assignment Operators
Conditional (or ternary) Operators
Lets have a look on all operators one by one.
Arithmetic Operators
There are following arithmetic operators supported by PHP language −
Assume variable A holds 10 and variable B holds 20 then −
Show Examples
| Operator |
Description |
Example |
| + |
Adds two operands |
A + B will give 30 |
| - |
Subtracts second operand from the first |
A - B will give -10 |
| * |
Multiply both operands |
A * B will give 200 |
| / |
Divide numerator by de-numerator |
B / A will give 2 |
| % |
Modulus Operator and remainder of after an integer division |
B % A will give 0 |
| ++ |
Increment operator, increases integer value by one |
A++ will give 11 |
| -- |
Decrement operator, decreases integer value by one |
A-- will give 9 |
Comparison Operators
There are following comparison operators supported by PHP language
Assume variable A holds 10 and variable B holds 20 then −
Show Examples
| Operator |
Description |
Example |
| == |
Checks if the value of two operands are equal or not, if yes then condition becomes true. |
(A == B) is not true. |
| != |
Checks if the value of two operands are equal or not, if values are not equal then condition becomes true. |
(A != B) is true. |
| > |
Checks if the value of left operand is greater than the value of right operand, if yes then condition becomes true. |
(A > B) is not true. |
| < |
Checks if the value of left operand is less than the value of right operand, if yes then condition becomes true. |
(A < B) is true. |
| >= |
Checks if the value of left operand is greater than or equal to the value of right operand, if yes then condition becomes true. |
(A >= B) is not true. |
| <= |
Checks if the value of left operand is less than or equal to the value of right operand, if yes then condition becomes true. |
(A <= B) is true. |
Logical Operators
There are following logical operators supported by PHP language
Assume variable A holds 10 and variable B holds 20 then −
Show Examples
| Operator |
Description |
Example |
| and |
Called Logical AND operator.
If both the operands are true then condition becomes true. |
(A and B) is true. |
| or |
Called Logical OR Operator.
If any of the two operands are non zero then condition becomes true. |
(A or B) is true. |
| && |
Called Logical AND operator.
If both the operands are non zero then condition becomes true. |
(A && B) is true. |
| || |
Called Logical OR Operator.
If any of the two operands are non zero then condition becomes true. |
(A || B) is true. |
| ! |
Called Logical NOT Operator.
Use to reverses the logical state of its operand.
If a condition is true then Logical NOT operator will make false. |
!(A && B) is false. |
Assignment Operators
There are following assignment operators supported by PHP language −
Show Examples
| Operator |
Description |
Example |
| = |
Simple assignment operator, Assigns values from right side operands to left side operand |
C = A + B will assign value of A + B into C |
| += |
Add AND assignment operator, It adds right operand to the left operand and assign the result to left operand |
C += A is equivalent to C = C + A |
| -= |
Subtract AND assignment operator, It subtracts right operand from the left operand and assign the result to left operand |
C -= A is equivalent to C = C - A |
| *= |
Multiply AND assignment operator, It multiplies right operand with the left operand and assign the result to left operand |
C *= A is equivalent to C = C * A |
| /= |
Divide AND assignment operator, It divides left operand with the right operand and assign the result to left operand |
C /= A is equivalent to C = C / A |
| %= |
Modulus AND assignment operator, It takes modulus using two operands and assign the result to left operand |
C %= A is equivalent to C = C % A |
Conditional Operator
There is one more operator called conditional operator.
This first evaluates an expression for a true or false value and then execute one of the two given statements depending upon the result of the evaluation.
The conditional operator has this syntax −
Show Examples
| Operator |
Description |
Example |
| ? : |
Conditional Expression |
If Condition is true ? Then value X : Otherwise value Y |
Operators Categories
All the operators we have discussed above can be categorised into following categories −
Unary prefix operators, which precede a single operand.
Binary operators, which take two operands and perform a variety of arithmetic and logical operations.
The conditional operator (a ternary operator), which takes three operands and evaluates either the second or third expression, depending on the evaluation of the first expression.
Assignment operators, which assign a value to a variable.
Precedence of PHP Operators
Operator precedence determines the grouping of terms in an expression.
This affects how an expression is evaluated.
Certain operators have higher precedence than others; for example, the multiplication operator has higher precedence than the addition operator −
For example x = 7 + 3 * 2; Here x is assigned 13, not 20 because operator * has higher precedence than + so it first get multiplied with 3*2 and then adds into 7.
Here operators with the highest precedence appear at the top of the table, those with the lowest appear at the bottom.
Within an expression, higher precedence operators will be evaluated first.
| Category |
Operator |
Associativity |
| Unary |
! ++ -- |
Right to left |
| Multiplicative |
* / % |
Left to right |
| Additive |
+ - |
Left to right |
| Relational |
< <= > >= |
Left to right |
| Equality |
== != |
Left to right |
| Logical AND |
&& |
Left to right |
| Logical OR |
|| |
Left to right |
| Conditional |
?: |
Right to left |
| Assignment |
= += -= *= /= %= |
Right to left |
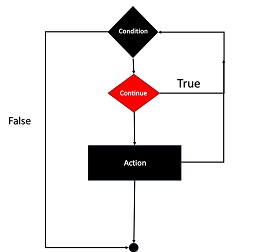
Decision Making
The if, elseif ...else and switch statements are used to take decision based on the different condition.
You can use conditional statements in your code to make your decisions.
PHP supports following three decision making statements −
 if...else statement − use this statement if you want to execute a set of code when a condition is true and another if the condition is not true
elseif statement − is used with the if...else statement to execute a set of code if one of the several condition is true
switch statement − is used if you want to select one of many blocks of code to be executed, use the Switch statement.
The switch statement is used to avoid long blocks of if..elseif..else code.
if...else statement − use this statement if you want to execute a set of code when a condition is true and another if the condition is not true
elseif statement − is used with the if...else statement to execute a set of code if one of the several condition is true
switch statement − is used if you want to select one of many blocks of code to be executed, use the Switch statement.
The switch statement is used to avoid long blocks of if..elseif..else code.
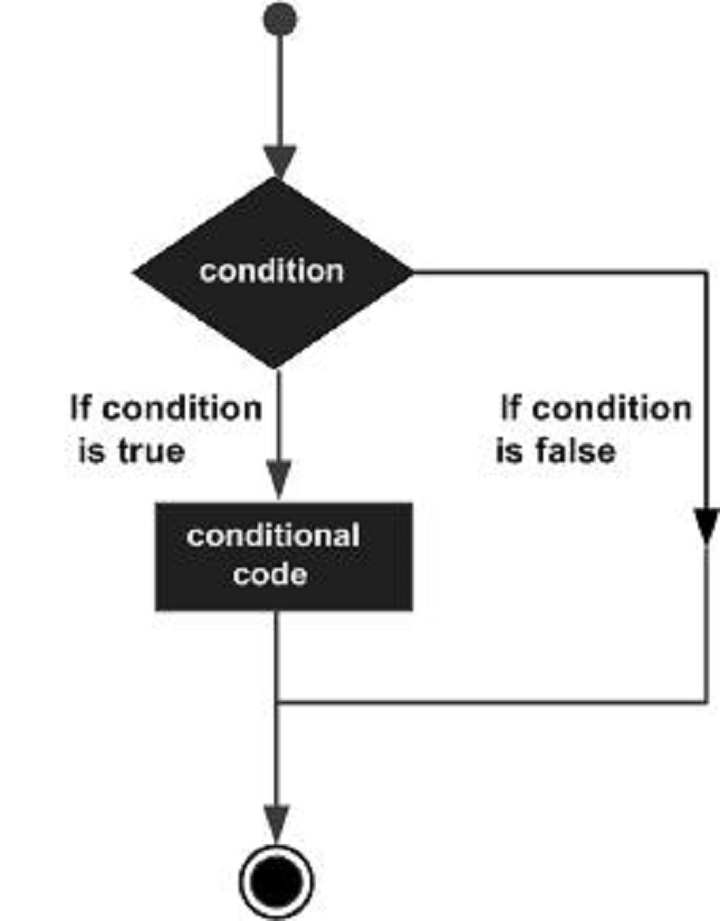
The If...Else Statement
If you want to execute some code if a condition is true and another code if a condition is false, use the if....else statement.
Syntax
if (condition)
code to be executed if condition is true;
else
code to be executed if condition is false;
Example
The following example will output "Have a nice weekend!" if the current day is Friday, Otherwise, it will output "Have a nice day!":
Live Demo
<html>
<body>
<?php
$d = date("D");
if ($d == "Fri")
echo "Have a nice weekend!";
else
echo "Have a nice day!";
?>
</body>
</html>
It will produce the following result −
Have a nice weekend!
The ElseIf Statement
If you want to execute some code if one of the several conditions are true use the elseif statement
Syntax
if (condition)
code to be executed if condition is true;
elseif (condition)
code to be executed if condition is true;
else
code to be executed if condition is false;
Example
The following example will output "Have a nice weekend!" if the current day is Friday, and "Have a nice Sunday!" if the current day is Sunday.
Otherwise, it will output "Have a nice day!" −
Live Demo
<html>
<body>
<?php
$d = date("D");
if ($d == "Fri")
echo "Have a nice weekend!";
elseif ($d == "Sun")
echo "Have a nice Sunday!";
else
echo "Have a nice day!";
?>
</body>
</html>
It will produce the following result −
Have a nice Weekend!
The Switch Statement
If you want to select one of many blocks of code to be executed, use the Switch statement.
The switch statement is used to avoid long blocks of if..elseif..else code.
Syntax
switch (expression){
case label1:
code to be executed if expression = label1;
break;
case label2:
code to be executed if expression = label2;
break;
default:
code to be executed
if expression is different
from both label1 and label2;
}
Example
The switch statement works in an unusual way.
First it evaluates given expression then seeks a lable to match the resulting value.
If a matching value is found then the code associated with the matching label will be executed or if none of the lable matches then statement will execute any specified default code.
Live Demo
<html>
<body>
<?php
$d = date("D");
switch ($d){
case "Mon":
echo "Today is Monday";
break;
case "Tue":
echo "Today is Tuesday";
break;
case "Wed":
echo "Today is Wednesday";
break;
case "Thu":
echo "Today is Thursday";
break;
case "Fri":
echo "Today is Friday";
break;
case "Sat":
echo "Today is Saturday";
break;
case "Sun":
echo "Today is Sunday";
break;
default:
echo "Wonder which day is this ?";
}
?>
</body>
</html>
It will produce the following result −
Today is Monday
Loop Types
Loops in PHP are used to execute the same block of code a specified number of times.
PHP supports following four loop types.
for − loops through a block of code a specified number of times.
while − loops through a block of code if and as long as a specified condition is true.
do...while − loops through a block of code once, and then repeats the loop as long as a special condition is true.
foreach − loops through a block of code for each element in an array.
We will discuss about continue and break keywords used to control the loops execution.
The for loop statement
The for statement is used when you know how many times you want to execute a statement or a block of statements.
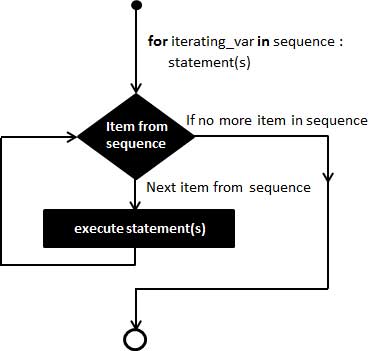
Syntax
for (initialization; condition; increment){
code to be executed;
}
The initializer is used to set the start value for the counter of the number of loop iterations.
A variable may be declared here for this purpose and it is traditional to name it $i.
Example
The following example makes five iterations and changes the assigned value of two variables on each pass of the loop −
Live Demo
<html>
<body>
<?php
$a = 0;
$b = 0;
for( $i = 0; $i<5; $i++ ) {
$a += 10;
$b += 5;
}
echo ("At the end of the loop a = $a and b = $b" );
?>
</body>
</html>
This will produce the following result −
At the end of the loop a = 50 and b = 25
The while loop statement
The while statement will execute a block of code if and as long as a test expression is true.
If the test expression is true then the code block will be executed.
After the code has executed the test expression will again be evaluated and the loop will continue until the test expression is found to be false.
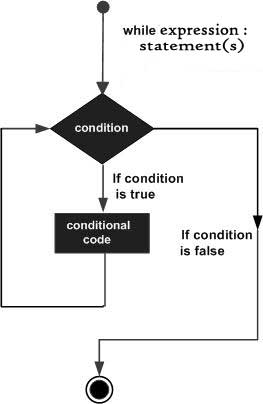
Syntax
while (condition) {
code to be executed;
}
Example
This example decrements a variable value on each iteration of the loop and the counter increments until it reaches 10 when the evaluation is false and the loop ends.
Live Demo
<html>
<body>
<?php
$i = 0;
$num = 50;
while( $i < 10) {
$num--;
$i++;
}
echo ("Loop stopped at i = $i and num = $num" );
?>
</body>
</html>
This will produce the following result −
Loop stopped at i = 10 and num = 40
The do...while loop statement
The do...while statement will execute a block of code at least once - it then will repeat the loop as long as a condition is true.
Syntax
do {
code to be executed;
}
while (condition);
Example
The following example will increment the value of i at least once, and it will continue incrementing the variable i as long as it has a value of less than 10 −
Live Demo
<html>
<body>
<?php
$i = 0;
$num = 0;
do {
$i++;
}
while( $i < 10 );
echo ("Loop stopped at i = $i" );
?>
</body>
</html>
This will produce the following result −
Loop stopped at i = 10
The foreach loop statement
The foreach statement is used to loop through arrays.
For each pass the value of the current array element is assigned to $value and the array pointer is moved by one and in the next pass next element will be processed.
Syntax
foreach (array as value) {
code to be executed;
}
Example
Try out following example to list out the values of an array.
Live Demo
<html>
<body>
<?php
$array = array( 1, 2, 3, 4, 5);
foreach( $array as $value ) {
echo "Value is $value <br />";
}
?>
</body>
</html>
This will produce the following result −
Value is 1
Value is 2
Value is 3
Value is 4
Value is 5
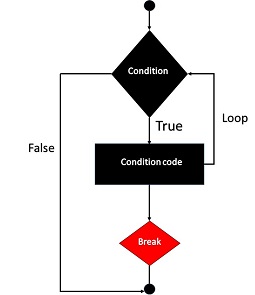
The break statement
The PHP break keyword is used to terminate the execution of a loop prematurely.
The break statement is situated inside the statement block.
It gives you full control and whenever you want to exit from the loop you can come out.
After coming out of a loop immediate statement to the loop will be executed.
Example
In the following example condition test becomes true when the counter value reaches 3 and loop terminates.
Live Demo
<html>
<body>
<?php
$i = 0;
while( $i < 10) {
$i++;
if( $i == 3 )break;
}
echo ("Loop stopped at i = $i" );
?>
</body>
</html>
This will produce the following result −
Loop stopped at i = 3
The continue statement
The PHP continue keyword is used to halt the current iteration of a loop but it does not terminate the loop.
Just like the break statement the continue statement is situated inside the statement block containing the code that the loop executes, preceded by a conditional test.
For the pass encountering continue statement, rest of the loop code is skipped and next pass starts.
Example
In the following example loop prints the value of array but for which condition becomes true it just skip the code and next value is printed.
Live Demo
<html>
<body>
<?php
$array = array( 1, 2, 3, 4, 5);
foreach( $array as $value ) {
if( $value == 3 )continue;
echo "Value is $value <br />";
}
?>
</body>
</html>
This will produce the following result −
Value is 1
Value is 2
Value is 4
Value is 5
Arrays
An array is a data structure that stores one or more similar type of values in a single value.
For example if you want to store 100 numbers then instead of defining 100 variables its easy to define an array of 100 length.
There are three different kind of arrays and each array value is accessed using an ID c which is called array index.
Numeric array − An array with a numeric index.
Values are stored and accessed in linear fashion.
Associative array − An array with strings as index.
This stores element values in association with key values rather than in a strict linear index order.
Multidimensional array − An array containing one or more arrays and values are accessed using multiple indices
NOTE − Built-in array functions is given in function reference PHP Array Functions
Numeric Array
These arrays can store numbers, strings and any object but their index will be represented by numbers.
By default array index starts from zero.
Example
Following is the example showing how to create and access numeric arrays.
Here we have used array() function to create array.
This function is explained in function reference.
Live Demo
<html>
<body>
<?php
/* First method to create array.
*/
$numbers = array( 1, 2, 3, 4, 5);
foreach( $numbers as $value ) {
echo "Value is $value <br />";
}
/* Second method to create array.
*/
$numbers[0] = "one";
$numbers[1] = "two";
$numbers[2] = "three";
$numbers[3] = "four";
$numbers[4] = "five";
foreach( $numbers as $value ) {
echo "Value is $value <br />";
}
?>
</body>
</html>
This will produce the following result −
Value is 1
Value is 2
Value is 3
Value is 4
Value is 5
Value is one
Value is two
Value is three
Value is four
Value is five
Associative Arrays
The associative arrays are very similar to numeric arrays in term of functionality but they are different in terms of their index.
Associative array will have their index as string so that you can establish a strong association between key and values.
To store the salaries of employees in an array, a numerically indexed array would not be the best choice.
Instead, we could use the employees names as the keys in our associative array, and the value would be their respective salary.
NOTE − Don't keep associative array inside double quote while printing otherwise it would not return any value.
Example
Live Demo
<html>
<body>
<?php
/* First method to associate create array.
*/
$salaries = array("mohammad" => 2000, "qadir" => 1000, "zara" => 500);
echo "Salary of mohammad is ".
$salaries['mohammad'] .
"<br />";
echo "Salary of qadir is ".
$salaries['qadir'].
"<br />";
echo "Salary of zara is ".
$salaries['zara'].
"<br />";
/* Second method to create array.
*/
$salaries['mohammad'] = "high";
$salaries['qadir'] = "medium";
$salaries['zara'] = "low";
echo "Salary of mohammad is ".
$salaries['mohammad'] .
"<br />";
echo "Salary of qadir is ".
$salaries['qadir'].
"<br />";
echo "Salary of zara is ".
$salaries['zara'].
"<br />";
?>
</body>
</html>
This will produce the following result −
Salary of mohammad is 2000
Salary of qadir is 1000
Salary of zara is 500
Salary of mohammad is high
Salary of qadir is medium
Salary of zara is low
Multidimensional Arrays
A multi-dimensional array each element in the main array can also be an array.
And each element in the sub-array can be an array, and so on.
Values in the multi-dimensional array are accessed using multiple index.
Example
In this example we create a two dimensional array to store marks of three students in three subjects −
This example is an associative array, you can create numeric array in the same fashion.
Live Demo
<html>
<body>
<?php
$marks = array(
"mohammad" => array (
"physics" => 35,
"maths" => 30,
"chemistry" => 39
),
"qadir" => array (
"physics" => 30,
"maths" => 32,
"chemistry" => 29
),
"zara" => array (
"physics" => 31,
"maths" => 22,
"chemistry" => 39
)
);
/* Accessing multi-dimensional array values */
echo "Marks for mohammad in physics : " ;
echo $marks['mohammad']['physics'] .
"<br />";
echo "Marks for qadir in maths : ";
echo $marks['qadir']['maths'] .
"<br />";
echo "Marks for zara in chemistry : " ;
echo $marks['zara']['chemistry'] .
"<br />";
?>
</body>
</html>
This will produce the following result −
Marks for mohammad in physics : 35
Marks for qadir in maths : 32
Marks for zara in chemistry : 39
Strings
They are sequences of characters, like "PHP supports string operations".
NOTE − Built-in string functions is given in function reference PHP String Functions
Following are valid examples of string
$string_1 = "This is a string in double quotes";
$string_2 = "This is a somewhat longer, singly quoted string";
$string_39 = "This string has thirty-nine characters";
$string_0 = ""; // a string with zero characters
Singly quoted strings are treated almost literally, whereas doubly quoted strings replace variables with their values as well as specially interpreting certain character sequences.
Live Demo
<?php
$variable = "name";
$literally = 'My $variable will not print!\\n';
print($literally);
print "<br />";
$literally = "My $variable will print!\\n";
print($literally);
?>
This will produce the following result −
My $variable will not print!\n
My name will print!\n
There are no artificial limits on string length - within the bounds of available memory, you ought to be able to make arbitrarily long strings.
Strings that are delimited by double quotes (as in "this") are preprocessed in both the following two ways by PHP −
Certain character sequences beginning with backslash (\) are replaced with special characters
Variable names (starting with $) are replaced with string representations of their values.
The escape-sequence replacements are −
\n is replaced by the newline character
\r is replaced by the carriage-return character
\t is replaced by the tab character
\$ is replaced by the dollar sign itself ($)
\" is replaced by a single double-quote (")
\\ is replaced by a single backslash (\)
String Concatenation Operator
To concatenate two string variables together, use the dot (.) operator −
Live Demo
<?php
$string1="Hello World";
$string2="1234";
echo $string1 .
" " .
$string2;
?>
This will produce the following result −
Hello World 1234
If we look at the code above you see that we used the concatenation operator two times.
This is because we had to insert a third string.
Between the two string variables we added a string with a single character, an empty space, to separate the two variables.
Using the strlen() function
The strlen() function is used to find the length of a string.
Let's find the length of our string "Hello world!" −
Live Demo
<?php
echo strlen("Hello world!");
?>
This will produce the following result −
12
The length of a string is often used in loops or other functions, when it is important to know when the string ends.
(i.e.
in a loop, we would want to stop the loop after the last character in the string)
Using the strpos() function
The strpos() function is used to search for a string or character within a string.
If a match is found in the string, this function will return the position of the first match.
If no match is found, it will return FALSE.
Let's see if we can find the string "world" in our string −
Live Demo
<?php
echo strpos("Hello world!","world");
?>
This will produce the following result −
6
As you see the position of the string "world" in our string is position 6.
The reason that it is 6, and not 7, is that the first position in the string is 0, and not 1.
Web Concepts
This session demonstrates how PHP can provide dynamic content according to browser type, randomly generated numbers or User Input.
It also demonstrated how the client browser can be redirected.
Identifying Browser & Platform
PHP creates some useful environment variables that can be seen in the phpinfo.php page that was used to setup the PHP environment.
One of the environment variables set by PHP is HTTP_USER_AGENT which identifies the user's browser and operating system.
PHP provides a function getenv() to access the value of all the environment variables.
The information contained in the HTTP_USER_AGENT environment variable can be used to create dynamic content appropriate to the browser.
Following example demonstrates how you can identify a client browser and operating system.
NOTE − The function preg_match()is discussed in PHP Regular expression session.
<html>
<body>
<?php
function getBrowser() {
$u_agent = $_SERVER['HTTP_USER_AGENT'];
$bname = 'Unknown';
$platform = 'Unknown';
$version = "";
//First get the platform?
if (preg_match('/linux/i', $u_agent)) {
$platform = 'linux';
}elseif (preg_match('/macintosh|mac os x/i', $u_agent)) {
$platform = 'mac';
}elseif (preg_match('/windows|win32/i', $u_agent)) {
$platform = 'windows';
}
// Next get the name of the useragent yes seperately and for good reason
if(preg_match('/MSIE/i',$u_agent) && !preg_match('/Opera/i',$u_agent)) {
$bname = 'Internet Explorer';
$ub = "MSIE";
} elseif(preg_match('/Firefox/i',$u_agent)) {
$bname = 'Mozilla Firefox';
$ub = "Firefox";
} elseif(preg_match('/Chrome/i',$u_agent)) {
$bname = 'Google Chrome';
$ub = "Chrome";
}elseif(preg_match('/Safari/i',$u_agent)) {
$bname = 'Apple Safari';
$ub = "Safari";
}elseif(preg_match('/Opera/i',$u_agent)) {
$bname = 'Opera';
$ub = "Opera";
}elseif(preg_match('/Netscape/i',$u_agent)) {
$bname = 'Netscape';
$ub = "Netscape";
}
// finally get the correct version number
$known = array('Version', $ub, 'other');
$pattern = '#(?<browser>' .
join('|', $known) .
')[/ ]+(?<version>[0-9.|a-zA-Z.]*)#';
if (!preg_match_all($pattern, $u_agent, $matches)) {
// we have no matching number just continue
}
// see how many we have
$i = count($matches['browser']);
if ($i != 1) {
//we will have two since we are not using 'other' argument yet
//see if version is before or after the name
if (strripos($u_agent,"Version") < strripos($u_agent,$ub)){
$version= $matches['version'][0];
}else {
$version= $matches['version'][1];
}
}else {
$version= $matches['version'][0];
}
// check if we have a number
if ($version == null || $version == "") {$version = "?";}
return array(
'userAgent' => $u_agent,
'name' => $bname,
'version' => $version,
'platform' => $platform,
'pattern' => $pattern
);
}
// now try it
$ua = getBrowser();
$yourbrowser = "Your browser: " .
$ua['name'] .
" " .
$ua['version'] .
" on " .$ua['platform'] .
" reports: <br >" .
$ua['userAgent'];
print_r($yourbrowser);
?>
</body>
</html>
This is producing following result on my machine.
This result may be different for your computer depending on what you are using.
It will produce the following result −
Your browser: Google Chrome 54.0.2840.99 on windows reports:
Mozilla/5.0 (Windows NT 6.3; Win64; x64) AppleWebKit/537.36 (KHTML, like Gecko)
Chrome/54.0.2840.99 Safari/537.36
Display Images Randomly
The PHP rand() function is used to generate a random number.i This function can generate numbers with-in a given range.
The random number generator should be seeded to prevent a regular pattern of numbers being generated.
This is achieved using the srand() function that specifies the seed number as its argument.
Following example demonstrates how you can display different image each time out of four images −
Live Demo
<html>
<body>
<?php
srand( microtime() * 1000000 );
$num = rand( 1, 4 );
switch( $num ) {
case 1: $image_file = "/php/images/logo.png";
break;
case 2: $image_file = "/php/images/php.jpg";
break;
case 3: $image_file = "/php/images/logo.png";
break;
case 4: $image_file = "/php/images/php.jpg";
break;
}
echo "Random Image : <img src=$image_file />";
?>
</body>
</html>
It will produce the following result −
Using HTML Forms
The most important thing to notice when dealing with HTML forms and PHP is that any form element in an HTML page will automatically be available to your PHP scripts.
Try out following example by putting the source code in test.php script.
<?php
if( $_POST["name"] || $_POST["age"] ) {
if (preg_match("/[^A-Za-z'-]/",$_POST['name'] )) {
die ("invalid name and name should be alpha");
}
echo "Welcome ".
$_POST['name'].
"<br />";
echo "You are ".
$_POST['age'].
" years old.";
exit();
}
?>
<html>
<body>
<form action = "<?php $_PHP_SELF ?>" method = "POST">
Name: <input type = "text" name = "name" />
Age: <input type = "text" name = "age" />
<input type = "submit" />
</form>
</body>
</html>
It will produce the following result −
 The PHP default variable $_PHP_SELF is used for the PHP script name and when you click "submit" button then same PHP script will be called and will produce following result −
The method = "POST" is used to post user data to the server script.
There are two methods of posting data to the server script which are discussed in PHP GET & POST chapter.
The PHP default variable $_PHP_SELF is used for the PHP script name and when you click "submit" button then same PHP script will be called and will produce following result −
The method = "POST" is used to post user data to the server script.
There are two methods of posting data to the server script which are discussed in PHP GET & POST chapter.
Browser Redirection
The PHP header() function supplies raw HTTP headers to the browser and can be used to redirect it to another location.
The redirection script should be at the very top of the page to prevent any other part of the page from loading.
The target is specified by the Location: header as the argument to the header() function.
After calling this function the exit() function can be used to halt parsing of rest of the code.
Following example demonstrates how you can redirect a browser request to another web page.
Try out this example by putting the source code in test.php script.
<?php
if( $_POST["location"] ) {
$location = $_POST["location"];
header( "Location:$location" );
exit();
}
?>
<html>
<body>
<p>Choose a site to visit :</p>
<form action = "<?php $_SERVER['PHP_SELF'] ?>" method ="POST">
<select name = "location">.
<option value = "http://www.tutorialspoint.com">
Tutorialspoint.com
</option>
<option value = "http://www.google.com">
Google Search Page
</option>
</select>
<input type = "submit" />
</form>
</body>
</html>
It will produce the following result −

GET & POST Methods
There are two ways the browser client can send information to the web server.
The GET Method
The POST Method
Before the browser sends the information, it encodes it using a scheme called URL encoding.
In this scheme, name/value pairs are joined with equal signs and different pairs are separated by the ampersand.
name1=value1&name2=value2&name3=value3
Spaces are removed and replaced with the + character and any other nonalphanumeric characters are replaced with a hexadecimal values.
After the information is encoded it is sent to the server.
The GET Method
The GET method sends the encoded user information appended to the page request.
The page and the encoded information are separated by the ? character.
http://www.test.com/index.htm?name1=value1&name2=value2
The GET method produces a long string that appears in your server logs, in the browser's Location: box.
The GET method is restricted to send upto 1024 characters only.
Never use GET method if you have password or other sensitive information to be sent to the server.
GET can't be used to send binary data, like images or word documents, to the server.
The data sent by GET method can be accessed using QUERY_STRING environment variable.
The PHP provides $_GET associative array to access all the sent information using GET method.
Try out following example by putting the source code in test.php script.
<?php
if( $_GET["name"] || $_GET["age"] ) {
echo "Welcome ".
$_GET['name'].
"<br />";
echo "You are ".
$_GET['age'].
" years old.";
exit();
}
?>
<html>
<body>
<form action = "<?php $_PHP_SELF ?>" method = "GET">
Name: <input type = "text" name = "name" />
Age: <input type = "text" name = "age" />
<input type = "submit" />
</form>
</body>
</html>
It will produce the following result −
The POST Method
The POST method transfers information via HTTP headers.
The information is encoded as described in case of GET method and put into a header called QUERY_STRING.
The POST method does not have any restriction on data size to be sent.
The POST method can be used to send ASCII as well as binary data.
The data sent by POST method goes through HTTP header so security depends on HTTP protocol.
By using Secure HTTP you can make sure that your information is secure.
The PHP provides $_POST associative array to access all the sent information using POST method.
Try out following example by putting the source code in test.php script.
<?php
if( $_POST["name"] || $_POST["age"] ) {
if (preg_match("/[^A-Za-z'-]/",$_POST['name'] )) {
die ("invalid name and name should be alpha");
}
echo "Welcome ".
$_POST['name'].
"<br />";
echo "You are ".
$_POST['age'].
" years old.";
exit();
}
?>
<html>
<body>
<form action = "<?php $_PHP_SELF ?>" method = "POST">
Name: <input type = "text" name = "name" />
Age: <input type = "text" name = "age" />
<input type = "submit" />
</form>
</body>
</html>
It will produce the following result −
The $_REQUEST variable
The PHP $_REQUEST variable contains the contents of both $_GET, $_POST, and $_COOKIE.
We will discuss $_COOKIE variable when we will explain about cookies.
The PHP $_REQUEST variable can be used to get the result from form data sent with both the GET and POST methods.
Try out following example by putting the source code in test.php script.
<?php
if( $_REQUEST["name"] || $_REQUEST["age"] ) {
echo "Welcome ".
$_REQUEST['name'].
"<br />";
echo "You are ".
$_REQUEST['age'].
" years old.";
exit();
}
?>
<html>
<body>
<form action = "<?php $_PHP_SELF ?>" method = "POST">
Name: <input type = "text" name = "name" />
Age: <input type = "text" name = "age" />
<input type = "submit" />
</form>
</body>
</html>
Here $_PHP_SELF variable contains the name of self script in which it is being called.
It will produce the following result −
File Inclusion
You can include the content of a PHP file into another PHP file before the server executes it.
There are two PHP functions which can be used to included one PHP file into another PHP file.
The include() Function
The require() Function
This is a strong point of PHP which helps in creating functions, headers, footers, or elements that can be reused on multiple pages.
This will help developers to make it easy to change the layout of complete website with minimal effort.
If there is any change required then instead of changing thousand of files just change included file.
The include() Function
The include() function takes all the text in a specified file and copies it into the file that uses the include function.
If there is any problem in loading a file then the include() function generates a warning but the script will continue execution.
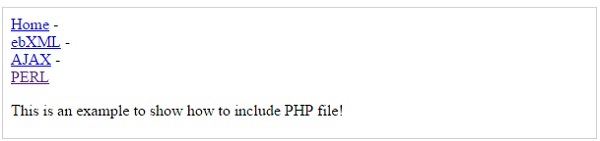
Assume you want to create a common menu for your website.
Then create a file menu.php with the following content.
<a href="http://www.tutorialspoint.com/index.htm">Home</a> -
<a href="http://www.tutorialspoint.com/ebxml">ebXML</a> -
<a href="http://www.tutorialspoint.com/ajax">AJAX</a> -
<a href="http://www.tutorialspoint.com/perl">PERL</a> <br />
Now create as many pages as you like and include this file to create header.
For example now your test.php file can have following content.
<html>
<body>
<?php include("menu.php"); ?>
<p>This is an example to show how to include PHP file!</p>
</body>
</html>
It will produce the following result −
The require() Function
The require() function takes all the text in a specified file and copies it into the file that uses the include function.
If there is any problem in loading a file then the require() function generates a fatal error and halt the execution of the script.
So there is no difference in require() and include() except they handle error conditions.
It is recommended to use the require() function instead of include(), because scripts should not continue executing if files are missing or misnamed.
You can try using above example with require() function and it will generate same result.
But if you will try following two examples where file does not exist then you will get different results.
<html>
<body>
<?php include("xxmenu.php"); ?>
<p>This is an example to show how to include wrong PHP file!</p>
</body>
</html>
This will produce the following result −
This is an example to show how to include wrong PHP file!
Now lets try same example with require() function.
<html>
<body>
<?php require("xxmenu.php"); ?>
<p>This is an example to show how to include wrong PHP file!</p>
</body>
</html>
This time file execution halts and nothing is displayed.
NOTE − You may get plain warning messages or fatal error messages or nothing at all.
This depends on your PHP Server configuration.
Files & I/O
This chapter will explain following functions related to files −
Opening a file
Reading a file
Writing a file
Closing a file
Opening and Closing Files
The PHP fopen() function is used to open a file.
It requires two arguments stating first the file name and then mode in which to operate.
Files modes can be specified as one of the six options in this table.
| Sr.No |
Mode & Purpose |
| 1 |
r
Opens the file for reading only.
Places the file pointer at the beginning of the file.
|
| 2 |
r+
Opens the file for reading and writing.
Places the file pointer at the beginning of the file.
|
| 3 |
w
Opens the file for writing only.
Places the file pointer at the beginning of the file.
and truncates the file to zero length.
If files does not
exist then it attempts to create a file.
|
| 4 |
w+
Opens the file for reading and writing only.
Places the file pointer at the beginning of the file.
and truncates the file to zero length.
If files does not
exist then it attempts to create a file.
|
| 5 |
a
Opens the file for writing only.
Places the file pointer at the end of the file.
If files does not exist then it attempts to create a file.
|
| 6 |
a+
Opens the file for reading and writing only.
Places the file pointer at the end of the file.
If files does not exist then it attempts to create a file.
|
If an attempt to open a file fails then fopen returns a value of false otherwise it returns a file pointer which is used for further reading or writing to that file.
After making a changes to the opened file it is important to close it with the fclose() function.
The fclose() function requires a file pointer as its argument and then returns true when the closure succeeds or false if it fails.
Reading a file
Once a file is opened using fopen() function it can be read with a function called fread().
This function requires two arguments.
These must be the file pointer and the length of the file expressed in bytes.
The files length can be found using the filesize() function which takes the file name as its argument and returns the size of the file expressed in bytes.
So here are the steps required to read a file with PHP.
Open a file using fopen() function.
Get the file's length using filesize() function.
Read the file's content using fread() function.
Close the file with fclose() function.
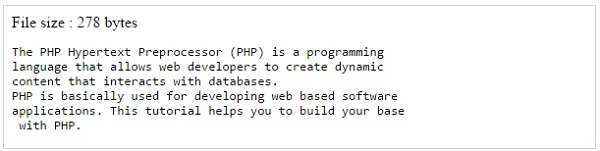
The following example assigns the content of a text file to a variable then displays those contents on the web page.
<html>
<head>
<title>Reading a file using PHP</title>
</head>
<body>
<?php
$filename = "tmp.txt";
$file = fopen( $filename, "r" );
if( $file == false ) {
echo ( "Error in opening file" );
exit();
}
$filesize = filesize( $filename );
$filetext = fread( $file, $filesize );
fclose( $file );
echo ( "File size : $filesize bytes" );
echo ( "<pre>$filetext</pre>" );
?>
</body>
</html>
It will produce the following result −
Writing a file
A new file can be written or text can be appended to an existing file using the PHP fwrite() function.
This function requires two arguments specifying a file pointer and the string of data that is to be written.
Optionally a third integer argument can be included to specify the length of the data to write.
If the third argument is included, writing would will stop after the specified length has been reached.
The following example creates a new text file then writes a short text heading inside it.
After closing this file its existence is confirmed using file_exist() function which takes file name as an argument
<?php
$filename = "/home/user/guest/newfile.txt";
$file = fopen( $filename, "w" );
if( $file == false ) {
echo ( "Error in opening new file" );
exit();
}
fwrite( $file, "This is a simple test\n" );
fclose( $file );
?>
<html>
<head>
<title>Writing a file using PHP</title>
</head>
<body>
<?php
$filename = "newfile.txt";
$file = fopen( $filename, "r" );
if( $file == false ) {
echo ( "Error in opening file" );
exit();
}
$filesize = filesize( $filename );
$filetext = fread( $file, $filesize );
fclose( $file );
echo ( "File size : $filesize bytes" );
echo ( "$filetext" );
echo("file name: $filename");
?>
</body>
</html>
It will produce the following result −
 We have covered all the function related to file input and out in PHP File System Function chapter.
Functions
PHP functions are similar to other programming languages.
A function is a piece of code which takes one more input in the form of parameter and does some processing and returns a value.
You already have seen many functions like fopen() and fread() etc.
They are built-in functions but PHP gives you option to create your own functions as well.
There are two parts which should be clear to you −
Creating a PHP Function
Calling a PHP Function
In fact you hardly need to create your own PHP function because there are already more than 1000 of built-in library functions created for different area and you just need to call them according to your requirement.
Please refer to PHP Function Reference for a complete set of useful functions.
Creating PHP Function
Its very easy to create your own PHP function.
Suppose you want to create a PHP function which will simply write a simple message on your browser when you will call it.
Following example creates a function called writeMessage() and then calls it just after creating it.
Note that while creating a function its name should start with keyword function and all the PHP code should be put inside { and } braces as shown in the following example below −
Live Demo
<html>
<head>
<title>Writing PHP Function</title>
</head>
<body>
<?php
/* Defining a PHP Function */
function writeMessage() {
echo "You are really a nice person, Have a nice time!";
}
/* Calling a PHP Function */
writeMessage();
?>
</body>
</html>
This will display following result −
You are really a nice person, Have a nice time!
PHP Functions with Parameters
PHP gives you option to pass your parameters inside a function.
You can pass as many as parameters your like.
These parameters work like variables inside your function.
Following example takes two integer parameters and add them together and then print them.
Live Demo
<html>
<head>
<title>Writing PHP Function with Parameters</title>
</head>
<body>
<?php
function addFunction($num1, $num2) {
$sum = $num1 + $num2;
echo "Sum of the two numbers is : $sum";
}
addFunction(10, 20);
?>
</body>
</html>
This will display following result −
Sum of the two numbers is : 30
Passing Arguments by Reference
It is possible to pass arguments to functions by reference.
This means that a reference to the variable is manipulated by the function rather than a copy of the variable's value.
Any changes made to an argument in these cases will change the value of the original variable.
You can pass an argument by reference by adding an ampersand to the variable name in either the function call or the function definition.
Following example depicts both the cases.
Live Demo
<html>
<head>
<title>Passing Argument by Reference</title>
</head>
<body>
<?php
function addFive($num) {
$num += 5;
}
function addSix(&$num) {
$num += 6;
}
$orignum = 10;
addFive( $orignum );
echo "Original Value is $orignum<br />";
addSix( $orignum );
echo "Original Value is $orignum<br />";
?>
</body>
</html>
This will display following result −
Original Value is 10
Original Value is 16
PHP Functions returning value
A function can return a value using the return statement in conjunction with a value or object.
return stops the execution of the function and sends the value back to the calling code.
You can return more than one value from a function using return array(1,2,3,4).
Following example takes two integer parameters and add them together and then returns their sum to the calling program.
Note that return keyword is used to return a value from a function.
Live Demo
<html>
<head>
<title>Writing PHP Function which returns value</title>
</head>
<body>
<?php
function addFunction($num1, $num2) {
$sum = $num1 + $num2;
return $sum;
}
$return_value = addFunction(10, 20);
echo "Returned value from the function : $return_value";
?>
</body>
</html>
This will display following result −
Returned value from the function : 30
Setting Default Values for Function Parameters
You can set a parameter to have a default value if the function's caller doesn't pass it.
Following function prints NULL in case use does not pass any value to this function.
Live Demo
<html>
<head>
<title>Writing PHP Function which returns value</title>
</head>
<body>
<?php
function printMe($param = NULL) {
print $param;
}
printMe("This is test");
printMe();
?>
</body>
</html>
This will produce following result −
This is test
Dynamic Function Calls
It is possible to assign function names as strings to variables and then treat these variables exactly as you would the function name itself.
Following example depicts this behaviour.
Live Demo
<html>
<head>
<title>Dynamic Function Calls</title>
</head>
<body>
<?php
function sayHello() {
echo "Hello<br />";
}
$function_holder = "sayHello";
$function_holder();
?>
</body>
</html>
This will display following result −
Hello
Cookies
Cookies are text files stored on the client computer and they are kept of use tracking purpose.
PHP transparently supports HTTP cookies.
There are three steps involved in identifying returning users −
Server script sends a set of cookies to the browser.
For example name, age, or identification number etc.
Browser stores this information on local machine for future use.
When next time browser sends any request to web server then it sends those cookies information to the server and server uses that information to identify the user.
This chapter will teach you how to set cookies, how to access them and how to delete them.
The Anatomy of a Cookie
Cookies are usually set in an HTTP header (although JavaScript can also set a cookie directly on a browser).
A PHP script that sets a cookie might send headers that look something like this −
HTTP/1.1 200 OK
Date: Fri, 04 Feb 2000 21:03:38 GMT
Server: Apache/1.3.9 (UNIX) PHP/4.0b3
Set-Cookie: name=xyz; expires=Friday, 04-Feb-07 22:03:38 GMT;
path=/; domain=tutorialspoint.com
Connection: close
Content-Type: text/html
As you can see, the Set-Cookie header contains a name value pair, a GMT date, a path and a domain.
The name and value will be URL encoded.
The expires field is an instruction to the browser to "forget" the cookie after the given time and date.
If the browser is configured to store cookies, it will then keep this information until the expiry date.
If the user points the browser at any page that matches the path and domain of the cookie, it will resend the cookie to the server.The browser's headers might look something like this −
GET / HTTP/1.0
Connection: Keep-Alive
User-Agent: Mozilla/4.6 (X11; I; Linux 2.2.6-15apmac ppc)
Host: zink.demon.co.uk:1126
Accept: image/gif, */*
Accept-Encoding: gzip
Accept-Language: en
Accept-Charset: iso-8859-1,*,utf-8
Cookie: name=xyz
A PHP script will then have access to the cookie in the environmental variables $_COOKIE or $HTTP_COOKIE_VARS[] which holds all cookie names and values.
Above cookie can be accessed using $HTTP_COOKIE_VARS["name"].
Setting Cookies with PHP
PHP provided setcookie() function to set a cookie.
This function requires upto six arguments and should be called before <html> tag.
For each cookie this function has to be called separately.
setcookie(name, value, expire, path, domain, security);
Here is the detail of all the arguments −
Name − This sets the name of the cookie and is stored in an environment variable called HTTP_COOKIE_VARS.
This variable is used while accessing cookies.
Value − This sets the value of the named variable and is the content that you actually want to store.
Expiry − This specify a future time in seconds since 00:00:00 GMT on 1st Jan 1970.
After this time cookie will become inaccessible.
If this parameter is not set then cookie will automatically expire when the Web Browser is closed.
Path − This specifies the directories for which the cookie is valid.
A single forward slash character permits the cookie to be valid for all directories.
Domain − This can be used to specify the domain name in very large domains and must contain at least two periods to be valid.
All cookies are only valid for the host and domain which created them.
Security − This can be set to 1 to specify that the cookie should only be sent by secure transmission using HTTPS otherwise set to 0 which mean cookie can be sent by regular HTTP.
Following example will create two cookies name and age these cookies will be expired after one hour.
<?php
setcookie("name", "John Watkin", time()+3600, "/","", 0);
setcookie("age", "36", time()+3600, "/", "", 0);
?>
<html>
<head>
<title>Setting Cookies with PHP</title>
</head>
<body>
<?php echo "Set Cookies"?>
</body>
</html>
Accessing Cookies with PHP
PHP provides many ways to access cookies.
Simplest way is to use either $_COOKIE or $HTTP_COOKIE_VARS variables.
Following example will access all the cookies set in above example.
<html>
<head>
<title>Accessing Cookies with PHP</title>
</head>
<body>
<?php
echo $_COOKIE["name"].
"<br />";
/* is equivalent to */
echo $HTTP_COOKIE_VARS["name"].
"<br />";
echo $_COOKIE["age"] .
"<br />";
/* is equivalent to */
echo $HTTP_COOKIE_VARS["age"] .
"<br />";
?>
</body>
</html>
You can use isset() function to check if a cookie is set or not.
<html>
<head>
<title>Accessing Cookies with PHP</title>
</head>
<body>
<?php
if( isset($_COOKIE["name"]))
echo "Welcome " .
$_COOKIE["name"] .
"<br />";
else
echo "Sorry...
Not recognized" .
"<br />";
?>
</body>
</html>
Deleting Cookie with PHP
Officially, to delete a cookie you should call setcookie() with the name argument only but this does not always work well, however, and should not be relied on.
It is safest to set the cookie with a date that has already expired −
<?php
setcookie( "name", "", time()- 60, "/","", 0);
setcookie( "age", "", time()- 60, "/","", 0);
?>
<html>
<head>
<title>Deleting Cookies with PHP</title>
</head>
<body>
<?php echo "Deleted Cookies" ?>
</body>
</html>
Sessions
An alternative way to make data accessible across the various pages of an entire website is to use a PHP Session.
A session creates a file in a temporary directory on the server where registered session variables and their values are stored.
This data will be available to all pages on the site during that visit.
The location of the temporary file is determined by a setting in the php.ini file called session.save_path.
Before using any session variable make sure you have setup this path.
When a session is started following things happen −
PHP first creates a unique identifier for that particular session which is a random string of 32 hexadecimal numbers such as 3c7foj34c3jj973hjkop2fc937e3443.
A cookie called PHPSESSID is automatically sent to the user's computer to store unique session identification string.
A file is automatically created on the server in the designated temporary directory and bears the name of the unique identifier prefixed by sess_ ie sess_3c7foj34c3jj973hjkop2fc937e3443.
When a PHP script wants to retrieve the value from a session variable, PHP automatically gets the unique session identifier string from the PHPSESSID cookie and then looks in its temporary directory for the file bearing that name and a validation can be done by comparing both values.
A session ends when the user loses the browser or after leaving the site, the server will terminate the session after a predetermined period of time, commonly 30 minutes duration.
Starting a PHP Session
A PHP session is easily started by making a call to the session_start() function.This function first checks if a session is already started and if none is started then it starts one.
It is recommended to put the call to session_start() at the beginning of the page.
Session variables are stored in associative array called $_SESSION[].
These variables can be accessed during lifetime of a session.
The following example starts a session then register a variable called counter that is incremented each time the page is visited during the session.
Make use of isset() function to check if session variable is already set or not.
Put this code in a test.php file and load this file many times to see the result −
Live Demo
<?php
session_start();
if( isset( $_SESSION['counter'] ) ) {
$_SESSION['counter'] += 1;
}else {
$_SESSION['counter'] = 1;
}
$msg = "You have visited this page ".
$_SESSION['counter'];
$msg .= "in this session.";
?>
<html>
<head>
<title>Setting up a PHP session</title>
</head>
<body>
<?php echo ( $msg ); ?>
</body>
</html>
It will produce the following result −
You have visited this page 1in this session.
Destroying a PHP Session
A PHP session can be destroyed by session_destroy() function.
This function does not need any argument and a single call can destroy all the session variables.
If you want to destroy a single session variable then you can use unset() function to unset a session variable.
Here is the example to unset a single variable −
<?php
unset($_SESSION['counter']);
?>
Here is the call which will destroy all the session variables −
<?php
session_destroy();
?>
Turning on Auto Session
You don't need to call start_session() function to start a session when a user visits your site if you can set session.auto_start variable to 1 in php.ini file.
Sessions without cookies
There may be a case when a user does not allow to store cookies on their machine.
So there is another method to send session ID to the browser.
Alternatively, you can use the constant SID which is defined if the session started.
If the client did not send an appropriate session cookie, it has the form session_name=session_id.
Otherwise, it expands to an empty string.
Thus, you can embed it unconditionally into URLs.
The following example demonstrates how to register a variable, and how to link correctly to another page using SID.
Live Demo
<?php
session_start();
if (isset($_SESSION['counter'])) {
$_SESSION['counter'] = 1;
}else {
$_SESSION['counter']++;
}
$msg = "You have visited this page ".
$_SESSION['counter'];
$msg .= "in this session.";
echo ( $msg );
?>
<p>
To continue click following link <br />
<a href = "nextpage.php?<?php echo htmlspecialchars(SID); ?>">
</p>
It will produce the following result −
You have visited this page 1in this session.
To continue click following link
The htmlspecialchars() may be used when printing the SID in order to prevent XSS related attacks.
Sending Emails using PHP
PHP must be configured correctly in the php.ini file with the details of how your system sends email.
Open php.ini file available in /etc/ directory and find the section headed [mail function].
Windows users should ensure that two directives are supplied.
The first is called SMTP that defines your email server address.
The second is called sendmail_from which defines your own email address.
The configuration for Windows should look something like this −
[mail function]
; For Win32 only.
SMTP = smtp.secureserver.net
; For win32 only
sendmail_from = webmaster@tutorialspoint.com
Linux users simply need to let PHP know the location of their sendmail application.
The path and any desired switches should be specified to the sendmail_path directive.
The configuration for Linux should look something like this −
[mail function]
; For Win32 only.
SMTP =
; For win32 only
sendmail_from =
; For Unix only
sendmail_path = /usr/sbin/sendmail -t -i
Now you are ready to go −
Sending plain text email
PHP makes use of mail() function to send an email.
This function requires three mandatory arguments that specify the recipient's email address, the subject of the the message and the actual message additionally there are other two optional parameters.
mail( to, subject, message, headers, parameters );
Here is the description for each parameters.
| Sr.No |
Parameter & Description |
| 1 |
to
Required.
Specifies the receiver / receivers of the email
|
| 2 |
subject
Required.
Specifies the subject of the email.
This parameter cannot contain any newline characters
|
| 3 |
message
Required.
Defines the message to be sent.
Each line should be separated with a LF (\n).
Lines should not exceed 70 characters
|
| 4 |
headers
Optional.
Specifies additional headers, like From, Cc, and Bcc.
The additional headers should be separated with a CRLF (\r\n)
|
| 5 |
parameters
Optional.
Specifies an additional parameter to the send mail program
|
As soon as the mail function is called PHP will attempt to send the email then it will return true if successful or false if it is failed.
Multiple recipients can be specified as the first argument to the mail() function in a comma separated list.
Sending HTML email
When you send a text message using PHP then all the content will be treated as simple text.
Even if you will include HTML tags in a text message, it will be displayed as simple text and HTML tags will not be formatted according to HTML syntax.
But PHP provides option to send an HTML message as actual HTML message.
While sending an email message you can specify a Mime version, content type and character set to send an HTML email.
Example
Following example will send an HTML email message to xyz@somedomain.com copying it to afgh@somedomain.com.
You can code this program in such a way that it should receive all content from the user and then it should send an email.
<html>
<head>
<title>Sending HTML email using PHP</title>
</head>
<body>
<?php
$to = "xyz@somedomain.com";
$subject = "This is subject";
$message = "<b>This is HTML message.</b>";
$message .= "<h1>This is headline.</h1>";
$header = "From:abc@somedomain.com \r\n";
$header .= "Cc:afgh@somedomain.com \r\n";
$header .= "MIME-Version: 1.0\r\n";
$header .= "Content-type: text/html\r\n";
$retval = mail ($to,$subject,$message,$header);
if( $retval == true ) {
echo "Message sent successfully...";
}else {
echo "Message could not be sent...";
}
?>
</body>
</html>
Sending attachments with email
To send an email with mixed content requires to set Content-type header to multipart/mixed.
Then text and attachment sections can be specified within boundaries.
A boundary is started with two hyphens followed by a unique number which can not appear in the message part of the email.
A PHP function md5() is used to create a 32 digit hexadecimal number to create unique number.
A final boundary denoting the email's final section must also end with two hyphens.
<?php
// request variables // important
$from = $_REQUEST["from"];
$emaila = $_REQUEST["emaila"];
$filea = $_REQUEST["filea"];
if ($filea) {
function mail_attachment ($from , $to, $subject, $message, $attachment){
$fileatt = $attachment; // Path to the file
$fileatt_type = "application/octet-stream"; // File Type
$start = strrpos($attachment, '/') == -1 ?
strrpos($attachment, '//') : strrpos($attachment, '/')+1;
$fileatt_name = substr($attachment, $start,
strlen($attachment)); // Filename that will be used for the
file as the attachment
$email_from = $from; // Who the email is from
$subject = "New Attachment Message";
$email_subject = $subject; // The Subject of the email
$email_txt = $message; // Message that the email has in it
$email_to = $to; // Who the email is to
$headers = "From: ".$email_from;
$file = fopen($fileatt,'rb');
$data = fread($file,filesize($fileatt));
fclose($file);
$msg_txt="\n\n You have recieved a new attachment message from $from";
$semi_rand = md5(time());
$mime_boundary = "==Multipart_Boundary_x{$semi_rand}x";
$headers .= "\nMIME-Version: 1.0\n" .
"Content-Type: multipart/mixed;\n" .
"
boundary=\"{$mime_boundary}\"";
$email_txt .= $msg_txt;
$email_message .= "This is a multi-part message in MIME format.\n\n" .
"--{$mime_boundary}\n" .
"Content-Type:text/html;
charset = \"iso-8859-1\"\n" .
"Content-Transfer-Encoding: 7bit\n\n" .
$email_txt .
"\n\n";
$data = chunk_split(base64_encode($data));
$email_message .= "--{$mime_boundary}\n" .
"Content-Type: {$fileatt_type};\n" .
" name = \"{$fileatt_name}\"\n" .
//"Content-Disposition: attachment;\n" .
//" filename = \"{$fileatt_name}\"\n" .
"Content-Transfer-Encoding:
base64\n\n" .
$data .
"\n\n" .
"--{$mime_boundary}--\n";
$ok = mail($email_to, $email_subject, $email_message, $headers);
if($ok) {
echo "File Sent Successfully.";
unlink($attachment); // delete a file after attachment sent.
}else {
die("Sorry but the email could not be sent.
Please go back and try again!");
}
}
move_uploaded_file($_FILES["filea"]["tmp_name"],
'temp/'.basename($_FILES['filea']['name']));
mail_attachment("$from", "youremailaddress@gmail.com",
"subject", "message", ("temp/".$_FILES["filea"]["name"]));
}
?>
<html>
<head>
<script language = "javascript" type = "text/javascript">
function CheckData45() {
with(document.filepost) {
if(filea.value ! = "") {
document.getElementById('one').innerText =
"Attaching File ...
Please Wait";
}
}
}
</script>
</head>
<body>
<table width = "100%" height = "100%" border = "0"
cellpadding = "0" cellspacing = "0">
<tr>
<td align = "center">
<form name = "filepost" method = "post"
action = "file.php" enctype = "multipart/form-data" id = "file">
<table width = "300" border = "0" cellspacing = "0"
cellpadding = "0">
<tr valign = "bottom">
<td height = "20">Your Name:</td>
</tr>
<tr>
<td><input name = "from" type = "text"
id = "from" size = "30"></td>
</tr>
<tr valign = "bottom">
<td height = "20">Your Email Address:</td>
</tr>
<tr>
<td class = "frmtxt2"><input name = "emaila"
type = "text" id = "emaila" size = "30"></td>
</tr>
<tr>
<td height = "20" valign = "bottom">Attach File:</td>
</tr>
<tr valign = "bottom">
<td valign = "bottom"><input name = "filea"
type = "file" id = "filea" size = "16"></td>
</tr>
<tr>
<td height = "40" valign = "middle"><input
name = "Reset2" type = "reset" id = "Reset2" value = "Reset">
<input name = "Submit2" type = "submit"
value = "Submit" onClick = "return CheckData45()"></td>
</tr>
</table>
</form>
<center>
<table width = "400">
<tr>
<td id = "one">
</td>
</tr>
</table>
</center>
</td>
</tr>
</table>
</body>
</html>
File Uploading
A PHP script can be used with a HTML form to allow users to upload files to the server.
Initially files are uploaded into a temporary directory and then relocated to a target destination by a PHP script.
Information in the phpinfo.php page describes the temporary directory that is used for file uploads as upload_tmp_dir and the maximum permitted size of files that can be uploaded is stated as upload_max_filesize.
These parameters are set into PHP configuration file php.ini
The process of uploading a file follows these steps −
The user opens the page containing a HTML form featuring a text files, a browse button and a submit button.
The user clicks the browse button and selects a file to upload from the local PC.
The full path to the selected file appears in the text filed then the user clicks the submit button.
The selected file is sent to the temporary directory on the server.
The PHP script that was specified as the form handler in the form's action attribute checks that the file has arrived and then copies the file into an intended directory.
The PHP script confirms the success to the user.
As usual when writing files it is necessary for both temporary and final locations to have permissions set that enable file writing.
If either is set to be read-only then process will fail.
An uploaded file could be a text file or image file or any document.
Creating an upload form
The following HTM code below creates an uploader form.
This form is having method attribute set to post and enctype attribute is set to multipart/form-data
Live Demo
<?php
if(isset($_FILES['image'])){
$errors= array();
$file_name = $_FILES['image']['name'];
$file_size =$_FILES['image']['size'];
$file_tmp =$_FILES['image']['tmp_name'];
$file_type=$_FILES['image']['type'];
$file_ext=strtolower(end(explode('.',$_FILES['image']['name'])));
$expensions= array("jpeg","jpg","png");
if(in_array($file_ext,$expensions)=== false){
$errors[]="extension not allowed, please choose a JPEG or PNG file.";
}
if($file_size > 2097152){
$errors[]='File size must be excately 2 MB';
}
if(empty($errors)==true){
move_uploaded_file($file_tmp,"images/".$file_name);
echo "Success";
}else{
print_r($errors);
}
}
?>
<html>
<body>
<form action="" method="POST" enctype="multipart/form-data">
<input type="file" name="image" />
<input type="submit"/>
</form>
</body>
</html>
It will produce the following result −

Creating an upload script
There is one global PHP variable called $_FILES.
This variable is an associate double dimension array and keeps all the information related to uploaded file.
So if the value assigned to the input's name attribute in uploading form was file, then PHP would create following five variables −
$_FILES['file']['tmp_name'] − the uploaded file in the temporary directory on the web server.
$_FILES['file']['name'] − the actual name of the uploaded file.
$_FILES['file']['size'] − the size in bytes of the uploaded file.
$_FILES['file']['type'] − the MIME type of the uploaded file.
$_FILES['file']['error'] − the error code associated with this file upload.
Example
Below example should allow upload images and gives back result as uploaded file information.
Live Demo
<?php
if(isset($_FILES['image'])){
$errors= array();
$file_name = $_FILES['image']['name'];
$file_size = $_FILES['image']['size'];
$file_tmp = $_FILES['image']['tmp_name'];
$file_type = $_FILES['image']['type'];
$file_ext=strtolower(end(explode('.',$_FILES['image']['name'])));
$expensions= array("jpeg","jpg","png");
if(in_array($file_ext,$expensions)=== false){
$errors[]="extension not allowed, please choose a JPEG or PNG file.";
}
if($file_size > 2097152) {
$errors[]='File size must be excately 2 MB';
}
if(empty($errors)==true) {
move_uploaded_file($file_tmp,"images/".$file_name);
echo "Success";
}else{
print_r($errors);
}
}
?>
<html>
<body>
<form action = "" method = "POST" enctype = "multipart/form-data">
<input type = "file" name = "image" />
<input type = "submit"/>
<ul>
<li>Sent file: <?php echo $_FILES['image']['name']; ?>
<li>File size: <?php echo $_FILES['image']['size']; ?>
<li>File type: <?php echo $_FILES['image']['type'] ?>
</ul>
</form>
</body>
</html>
It will produce the following result −
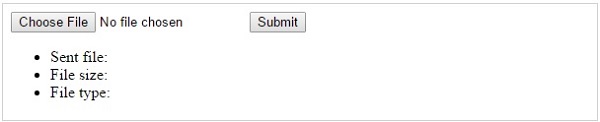
Coding Standard
Every company follows a different coding standard based on their best practices.
Coding standard is required because there may be many developers working on different modules so if they will start inventing their own standards then source will become very un-manageable and it will become difficult to maintain that source code in future.
Here are several reasons why to use coding specifications −
Your peer programmers have to understand the code you produce.
A coding standard acts as the blueprint for all the team to decipher the code.
Simplicity and clarity achieved by consistent coding saves you from common mistakes.
If you revise your code after some time then it becomes easy to understand that code.
Its industry standard to follow a particular standard to being more quality in software.
There are few guidelines which can be followed while coding in PHP.
Indenting and Line Length − Use an indent of 4 spaces and don't use any tab because different computers use different setting for tab.
It is recommended to keep lines at approximately 75-85 characters long for better code readability.
Control Structures − These include if, for, while, switch, etc.
Control statements should have one space between the control keyword and opening parenthesis, to distinguish them from function calls.
You are strongly encouraged to always use curly braces even in situations where they are technically optional.
Examples
if ((condition1) || (condition2)) {
action1;
}elseif ((condition3) && (condition4)) {
action2;
}else {
default action;
}
You can write switch statements as follows −
switch (condition) {
case 1:
action1;
break;
case 2:
action2;
break;
default:
defaultaction;
break;
}
Function Calls − Functions should be called with no spaces between the function name, the opening parenthesis, and the first parameter; spaces between commas and each parameter, and no space between the last parameter, the closing parenthesis, and the semicolon.
Here's an example −
$var = foo($bar, $baz, $quux);
Function Definitions − Function declarations follow the "BSD/Allman style" −
function fooFunction($arg1, $arg2 = '') {
if (condition) {
statement;
}
return $val;
}
Comments − C style comments (/* */) and standard C++ comments (//) are both fine.
Use of Perl/shell style comments (#) is discouraged.
PHP Code Tags − Always use <?php ?> to delimit PHP code, not the <? ?> shorthand.
This is required for PHP compliance and is also the most portable way to include PHP code on differing operating systems and setups.
Variable Names −
Use all lower case letters
Use '_' as the word separator.
Global variables should be prepended with a 'g'.
Global constants should be all caps with '_' separators.
Static variables may be prepended with 's'.
Make Functions Reentrant − Functions should not keep static variables that prevent a function from being reentrant.
Alignment of Declaration Blocks − Block of declarations should be aligned.
One Statement Per Line − There should be only one statement per line unless the statements are very closely related.
Short Methods or Functions − Methods should limit themselves to a single page of code.
There could be many more points which should be considered while writing your PHP program.
Over all intention should be to be consistent throughout of the code programming and it will be possible only when you will follow any coding standard.
You can device your own standard if you like something different.
Predefined Variables
PHP provides a large number of predefined variables to any script which it runs.
PHP provides an additional set of predefined arrays containing variables from the web server the environment, and user input.
These new arrays are called superglobals −
All the following variables are automatically available in every scope.
PHP Superglobals
| Sr.No |
Variable & Description |
| 1 |
$GLOBALS
Contains a reference to every variable which is currently available within the global scope of the script.
The keys of this array are the names of the global variables.
|
| 2 |
$_SERVER
This is an array containing information such as headers, paths, and script locations.
The entries in this array are created by the web server.
There is no guarantee that every web server will provide any of these.
See next section for a complete list of all the SERVER variables.
|
| 3 |
$_GET
An associative array of variables passed to the current script via the HTTP GET method.
|
| 4 |
$_POST
An associative array of variables passed to the current script via the HTTP POST method.
|
| 5 |
$_FILES
An associative array of items uploaded to the current script via the HTTP POST method.
|
| 6 |
$_REQUEST
An associative array consisting of the contents of $_GET, $_POST, and $_COOKIE.
|
| 7 |
$_COOKIE
An associative array of variables passed to the current script via HTTP cookies.
|
| 8 |
$_SESSION
An associative array containing session variables available to the current script.
|
| 9 |
$_PHP_SELF
A string containing PHP script file name in which it is called.
|
| 10 |
$php_errormsg
$php_errormsg is a variable containing the text of the last error message generated by PHP.
|
Server variables: $_SERVER
$_SERVER is an array containing information such as headers, paths, and script locations.
The entries in this array are created by the web server.
There is no guarantee that every web server will provide any of these.
| Sr.No |
Variable & Description |
| 1 |
$_SERVER['PHP_SELF']
The filename of the currently executing script, relative to the document root
|
| 2 |
$_SERVER['argv']
Array of arguments passed to the script.
When the script is run on the command line, this gives C-style access to the command line parameters.
When called via the GET method, this will contain the query string.
|
| 3 |
$_SERVER['argc']
Contains the number of command line parameters passed to the script if run on the command line.
|
| 4 |
$_SERVER['GATEWAY_INTERFACE']
What revision of the CGI specification the server is using; i.e.
'CGI/1.1'.
|
| 5 |
$_SERVER['SERVER_ADDR']
The IP address of the server under which the current script is executing.
|
| 6 |
$_SERVER['SERVER_NAME']
The name of the server host under which the current script is executing.
If the script is running on a virtual host, this will be the value defined for that virtual host.
|
| 7 |
$_SERVER['SERVER_SOFTWARE']
Server identification string, given in the headers when responding to requests.
|
| 8 |
$_SERVER['SERVER_PROTOCOL']
Name and revision of the information protocol via which the page was requested; i.e.
'HTTP/1.0';
|
| 9 |
$_SERVER['REQUEST_METHOD']
Which request method was used to access the page; i.e.
'GET', 'HEAD', 'POST', 'PUT'.
|
| 10 |
$_SERVER['REQUEST_TIME']
The timestamp of the start of the request.
Available since PHP 5.1.0.
|
| 11 |
$_SERVER['QUERY_STRING']
The query string, if any, via which the page was accessed.
|
| 12 |
$_SERVER['DOCUMENT_ROOT']
The document root directory under which the current script is executing, as defined in the server's configuration file.
|
| 13 |
$_SERVER['HTTP_ACCEPT']
Contents of the Accept: header from the current request, if there is one.
|
| 14 |
$_SERVER['HTTP_ACCEPT_CHARSET']
Contents of the Accept-Charset: header from the current request, if there is one.
Example: 'iso-8859-1,*,utf-8'.
|
| 15 |
$_SERVER['HTTP_ACCEPT_ENCODING']
Contents of the Accept-Encoding: header from the current request, if there is one.
Example: 'gzip'.
|
| 16 |
$_SERVER['HTTP_ACCEPT_LANGUAGE']
Contents of the Accept-Language: header from the current request, if there is one.
Example: 'en'.
|
| 17 |
$_SERVER['HTTP_CONNECTION']
Contents of the Connection: header from the current request, if there is one.
Example: 'Keep-Alive'.
|
| 18 |
$_SERVER['HTTP_HOST']
Contents of the Host: header from the current request, if there is one.
|
| 19 |
$_SERVER['HTTP_REFERER']
The address of the page (if any) which referred the user agent to the current page.
|
| 20 |
$_SERVER['HTTP_USER_AGENT']
This is a string denoting the user agent being which is accessing the page.
A typical example is: Mozilla/4.5 [en] (X11; U; Linux 2.2.9 i586).
|
| 21 |
$_SERVER['HTTPS']
Set to a non-empty value if the script was queried through the HTTPS protocol.
|
| 22 |
$_SERVER['REMOTE_ADDR']
The IP address from which the user is viewing the current page.
|
| 23 |
$_SERVER['REMOTE_HOST']
The Host name from which the user is viewing the current page.
The reverse dns lookup is based off the REMOTE_ADDR of the user.
|
| 24 |
$_SERVER['REMOTE_PORT']
The port being used on the user's machine to communicate with the web server.
|
| 25 |
$_SERVER['SCRIPT_FILENAME']
The absolute pathname of the currently executing script.
|
| 26 |
$_SERVER['SERVER_ADMIN']
The value given to the SERVER_ADMIN (for Apache) directive in the web server configuration file.
|
| 27 |
$_SERVER['SERVER_PORT']
The port on the server machine being used by the web server for communication.
For default setups, this will be '80'.
|
| 28 |
$_SERVER['SERVER_SIGNATURE']
String containing the server version and virtual host name which are added to server-generated pages, if enabled.
|
| 29 |
$_SERVER['PATH_TRANSLATED']
Filesystem based path to the current script.
|
| 30 |
$_SERVER['SCRIPT_NAME']
Contains the current script's path.
This is useful for pages which need to point to themselves.
|
| 31 |
$_SERVER['REQUEST_URI']
The URI which was given in order to access this page; for instance, '/index.html'.
|
| 32 |
$_SERVER['PHP_AUTH_DIGEST']
When running under Apache as module doing Digest HTTP authentication this variable is set to the 'Authorization' header sent by the client.
|
| 33 |
$_SERVER['PHP_AUTH_USER']
When running under Apache or IIS (ISAPI on PHP 5) as module doing HTTP authentication this variable is set to the username provided by the user.
|
| 34 |
$_SERVER['PHP_AUTH_PW']
When running under Apache or IIS (ISAPI on PHP 5) as module doing HTTP authentication this variable is set to the password provided by the user.
|
| 35 |
$_SERVER['AUTH_TYPE']
When running under Apache as module doing HTTP authenticated this variable is set to the authentication type.
|
Regular Expressions
Regular expressions are nothing more than a sequence or pattern of characters itself.
They provide the foundation for pattern-matching functionality.
Using regular expression you can search a particular string inside a another string, you can replace one string by another string and you can split a string into many chunks.
PHP offers functions specific to two sets of regular expression functions, each corresponding to a certain type of regular expression.
You can use any of them based on your comfort.
POSIX Regular Expressions
PERL Style Regular Expressions
POSIX Regular Expressions
The structure of a POSIX regular expression is not dissimilar to that of a typical arithmetic expression: various elements (operators) are combined to form more complex expressions.
The simplest regular expression is one that matches a single character, such as g, inside strings such as g, haggle, or bag.
Lets give explanation for few concepts being used in POSIX regular expression.
After that we will introduce you with regular expression related functions.
Brackets
Brackets ([]) have a special meaning when used in the context of regular expressions.
They are used to find a range of characters.
| Sr.No |
Expression & Description |
| 1 |
[0-9]
It matches any decimal digit from 0 through 9.
|
| 2 |
[a-z]
It matches any character from lower-case a through lowercase z.
|
| 3 |
[A-Z]
It matches any character from uppercase A through uppercase Z.
|
| 4 |
[a-Z]
It matches any character from lowercase a through uppercase Z.
|
The ranges shown above are general; you could also use the range [0-3] to match any decimal digit ranging from 0 through 3, or the range [b-v] to match any lowercase character ranging from b through v.
Quantifiers
The frequency or position of bracketed character sequences and single characters can be denoted by a special character.
Each special character having a specific connotation.
The +, *, ?, {int.
range}, and $ flags all follow a character sequence.
| Sr.No |
Expression & Description |
| 1 |
p+
It matches any string containing at least one p.
|
| 2 |
p*
It matches any string containing zero or more p's.
|
| 3 |
p?
It matches any string containing zero or one p's.
|
| 4 |
p{N}
It matches any string containing a sequence of N p's
|
| 5 |
p{2,3}
It matches any string containing a sequence of two or three p's.
|
| 6 |
p{2, }
It matches any string containing a sequence of at least two p's.
|
| 7 |
p$
It matches any string with p at the end of it.
|
| 8 |
^p
It matches any string with p at the beginning of it.
|
Examples
Following examples will clear your concepts about matching characters.
| Sr.No |
Expression & Description |
| 1 |
[^a-zA-Z]
It matches any string not containing any of the characters ranging from a through z and A through Z.
|
| 2 |
p.p
It matches any string containing p, followed by any character, in turn followed by another p.
|
| 3 |
^.{2}$
It matches any string containing exactly two characters.
|
| 4 |
<b>(.*)</b>
It matches any string enclosed within <b> and </b>.
|
| 5 |
p(hp)*
It matches any string containing a p followed by zero or more instances of the sequence php.
|
Predefined Character Ranges
For your programming convenience several predefined character ranges, also known as character classes, are available.
Character classes specify an entire range of characters, for example, the alphabet or an integer set −
| Sr.No |
Expression & Description |
| 1 |
[[:alpha:]]
It matches any string containing alphabetic characters aA through zZ.
|
| 2 |
[[:digit:]]
It matches any string containing numerical digits 0 through 9.
|
| 3 |
[[:alnum:]]
It matches any string containing alphanumeric characters aA through zZ and 0 through 9.
|
| 4 |
[[:space:]]
It matches any string containing a space.
|
PHP's Regexp POSIX Functions
PHP currently offers seven functions for searching strings using POSIX-style regular expressions −
| Sr.No |
Function & Description |
| 1 |
ereg()
The ereg() function searches a string specified by string for a string specified by pattern, returning true if the pattern is found, and false otherwise.
|
| 2 |
ereg_replace()
The ereg_replace() function searches for string specified by pattern and replaces pattern with replacement if found.
|
| 3 |
eregi()
The eregi() function searches throughout a string specified by pattern for a string specified by string.
The search is not case sensitive.
|
| 4 |
eregi_replace()
The eregi_replace() function operates exactly like ereg_replace(), except that the search for pattern in string is not case sensitive.
|
| 5 |
split()
The split() function will divide a string into various elements, the boundaries of each element based on the occurrence of pattern in string.
|
| 6 |
spliti()
The spliti() function operates exactly in the same manner as its sibling split(), except that it is not case sensitive.
|
| 7 |
sql_regcase()
The sql_regcase() function can be thought of as a utility function, converting each character in the input parameter string into a bracketed expression containing two characters.
|
PERL Style Regular Expressions
Perl-style regular expressions are similar to their POSIX counterparts.
The POSIX syntax can be used almost interchangeably with the Perl-style regular expression functions.
In fact, you can use any of the quantifiers introduced in the previous POSIX section.
Lets give explanation for few concepts being used in PERL regular expressions.
After that we will introduce you wih regular expression related functions.
Meta characters
A meta character is simply an alphabetical character preceded by a backslash that acts to give the combination a special meaning.
For instance, you can search for large money sums using the '\d' meta character: /([\d]+)000/, Here \d will search for any string of numerical character.
Following is the list of meta characters which can be used in PERL Style Regular Expressions.
Character Description
.
a single character
\s a whitespace character (space, tab, newline)
\S non-whitespace character
\d a digit (0-9)
\D a non-digit
\w a word character (a-z, A-Z, 0-9, _)
\W a non-word character
[aeiou] matches a single character in the given set
[^aeiou] matches a single character outside the given set
(foo|bar|baz) matches any of the alternatives specified
Modifiers
Several modifiers are available that can make your work with regexps much easier, like case sensitivity, searching in multiple lines etc.
Modifier Description
i Makes the match case insensitive
m Specifies that if the string has newline or carriage
return characters, the ^ and $ operators will now
match against a newline boundary, instead of a
string boundary
o Evaluates the expression only once
s Allows use of .
to match a newline character
x Allows you to use white space in the expression for clarity
g Globally finds all matches
cg Allows a search to continue even after a global match fails
PHP's Regexp PERL Compatible Functions
PHP offers following functions for searching strings using Perl-compatible regular expressions −
| Sr.No |
Function & Description |
| 1 |
preg_match()
The preg_match() function searches string for pattern, returning true if pattern exists, and false otherwise.
|
| 2 |
preg_match_all()
The preg_match_all() function matches all occurrences of pattern in string.
|
| 3 |
preg_replace()
The preg_replace() function operates just like ereg_replace(), except that regular expressions can be used in the pattern and replacement input parameters.
|
| 4 |
preg_split()
The preg_split() function operates exactly like split(), except that regular expressions are accepted as input parameters for pattern.
|
| 5 |
preg_grep()
The preg_grep() function searches all elements of input_array, returning all elements matching the regexp pattern.
|
| 6 |
preg_ quote()
Quote regular expression characters
|
Error & Exception Handling
Error handling is the process of catching errors raised by your program and then taking appropriate action.
If you would handle errors properly then it may lead to many unforeseen consequences.
Its very simple in PHP to handle an errors.
Using die() function
While writing your PHP program you should check all possible error condition before going ahead and take appropriate action when required.
Try following example without having /tmp/test.xt file and with this file.
<?php
if(!file_exists("/tmp/test.txt")) {
die("File not found");
}else {
$file = fopen("/tmp/test.txt","r");
print "Opend file sucessfully";
}
// Test of the code here.
?>
This way you can write an efficient code.
Using above technique you can stop your program whenever it errors out and display more meaningful and user friendly message.
Defining Custom Error Handling Function
You can write your own function to handling any error.
PHP provides you a framework to define error handling function.
This function must be able to handle a minimum of two parameters (error level and error message) but can accept up to five parameters (optionally: file, line-number, and the error context) −
Syntax
error_function(error_level,error_message, error_file,error_line,error_context);
| Sr.No |
Parameter & Description |
| 1 |
error_level
Required - Specifies the error report level for the user-defined error.
Must be a value number.
|
| 2 |
error_message
Required - Specifies the error message for the user-defined error
|
| 3 |
error_file
Optional - Specifies the file name in which the error occurred
|
| 4 |
error_line
Optional - Specifies the line number in which the error occurred
|
| 5 |
error_context
Optional - Specifies an array containing every variable and their values in use when the error occurred
|
Possible Error levels
These error report levels are the different types of error the user-defined error handler can be used for.
These values cab used in combination using | operator
| Sr.No |
Constant & Description |
Value |
| 1 |
.E_ERROR
Fatal run-time errors.
Execution of the script is halted
|
1 |
| 2 |
E_WARNING
Non-fatal run-time errors.
Execution of the script is not halted
|
2 |
| 3 |
E_PARSE
Compile-time parse errors.
Parse errors should only be generated by the parser.
|
4 |
| 4 |
E_NOTICE
Run-time notices.
The script found something that might be an error, but could also happen when running a script normally
|
8 |
| 5 |
E_CORE_ERROR
Fatal errors that occur during PHP's initial start-up.
|
16 |
| 6 |
E_CORE_WARNING
Non-fatal run-time errors.
This occurs during PHP's initial start-up.
|
32 |
| 7 |
E_USER_ERROR
Fatal user-generated error.
This is like an E_ERROR set by the programmer using the PHP function trigger_error()
|
256 |
| 8 |
E_USER_WARNING
Non-fatal user-generated warning.
This is like an E_WARNING set by the programmer using the PHP function trigger_error()
|
512 |
| 9 |
E_USER_NOTICE
User-generated notice.
This is like an E_NOTICE set by the programmer using the PHP function trigger_error()
|
1024 |
| 10 |
E_STRICT
Run-time notices.
Enable to have PHP suggest changes to your code which will ensure the best interoperability and forward compatibility of your code.
|
2048 |
| 11 |
E_RECOVERABLE_ERROR
Catchable fatal error.
This is like an E_ERROR but can be caught by a user defined handle (see also set_error_handler())
|
4096 |
| 12 |
E_ALL
All errors and warnings, except level E_STRICT (E_STRICT will be part of E_ALL as of PHP 6.0)
|
8191 |
All the above error level can be set using following PHP built-in library function where level cab be any of the value defined in above table.
int error_reporting ( [int $level] )
Following is the way you can create one error handling function −
<?php
function handleError($errno, $errstr,$error_file,$error_line) {
echo "<b>Error:</b> [$errno] $errstr - $error_file:$error_line";
echo "<br />";
echo "Terminating PHP Script";
die();
}
?>
Once you define your custom error handler you need to set it using PHP built-in library set_error_handler function.
Now lets examine our example by calling a function which does not exist.
<?php
error_reporting( E_ERROR );
function handleError($errno, $errstr,$error_file,$error_line) {
echo "<b>Error:</b> [$errno] $errstr - $error_file:$error_line";
echo "<br />";
echo "Terminating PHP Script";
die();
}
//set error handler
set_error_handler("handleError");
//trigger error
myFunction();
?>
Exceptions Handling
PHP 5 has an exception model similar to that of other programming languages.
Exceptions are important and provides a better control over error handling.
Lets explain there new keyword related to exceptions.
Try − A function using an exception should be in a "try" block.
If the exception does not trigger, the code will continue as normal.
However if the exception triggers, an exception is "thrown".
Throw − This is how you trigger an exception.
Each "throw" must have at least one "catch".
Catch − A "catch" block retrieves an exception and creates an object containing the exception information.
When an exception is thrown, code following the statement will not be executed, and PHP will attempt to find the first matching catch block.
If an exception is not caught, a PHP Fatal Error will be issued with an "Uncaught Exception ...
An exception can be thrown, and caught ("catched") within PHP.
Code may be surrounded in a try block.
Each try must have at least one corresponding catch block.
Multiple catch blocks can be used to catch different classes of exceptions.
Exceptions can be thrown (or re-thrown) within a catch block.
Example
Following is the piece of code, copy and paste this code into a file and verify the result.
<?php
try {
$error = 'Always throw this error';
throw new Exception($error);
// Code following an exception is not executed.
echo 'Never executed';
}catch (Exception $e) {
echo 'Caught exception: ', $e->getMessage(), "\n";
}
// Continue execution
echo 'Hello World';
?>
In the above example $e->getMessage function is used to get error message.
There are following functions which can be used from Exception class.
getMessage() − message of exception
getCode() − code of exception
getFile() − source filename
getLine() − source line
getTrace() − n array of the backtrace()
getTraceAsString() − formated string of trace
Creating Custom Exception Handler
You can define your own custom exception handler.
Use following function to set a user-defined exception handler function.
string set_exception_handler ( callback $exception_handler )
Here exception_handler is the name of the function to be called when an uncaught exception occurs.
This function must be defined before calling set_exception_handler().
Example
<?php
function exception_handler($exception) {
echo "Uncaught exception: " , $exception->getMessage(), "\n";
}
set_exception_handler('exception_handler');
throw new Exception('Uncaught Exception');
echo "Not Executed\n";
?>
Check complete set of error handling functions at PHP Error Handling Functions
Bugs Debugging
Programs rarely work correctly the first time.
Many things can go wrong in your program that cause the PHP interpreter to generate an error message.
You have a choice about where those error messages go.
The messages can be sent along with other program output to the web browser.
They can also be included in the web server error log.
To make error messages display in the browser, set the display_errors configuration directive to On.
To send errors to the web server error log, set log_errors to On.
You can set them both to On if you want error messages in both places.
PHP defines some constants you can use to set the value of error_reporting such that only errors of certain types get reported: E_ALL (for all errors except strict notices), E_PARSE (parse errors), E_ERROR (fatal errors), E_WARNING (warnings), E_NOTICE (notices), and E_STRICT (strict notices).
While writing your PHP program, it is a good idea to use PHP-aware editors like BBEdit or Emacs.
One of the special special features of these editors is syntax highlighting.
It changes the color of different parts of your program based on what those parts are.
For example, strings are pink, keywords such as if and while are blue, comments are grey, and variables are black.
Another feature is quote and bracket matching, which helps to make sure that your quotes and brackets are balanced.
When you type a closing delimiter such as }, the editor highlights the opening { that it matches.
There are following points which need to be verified while debugging your program.
Missing Semicolons − Every PHP statement ends with a semicolon (;).
PHP doesn't stop reading a statement until it reaches a semicolon.
If you leave out the semicolon at the end of a line, PHP continues reading the statement on the following line.
Not Enough Equal Signs − When you ask whether two values are equal in a comparison statement, you need two equal signs (==).
Using one equal sign is a common mistake.
Misspelled Variable Names − If you misspelled a variable then PHP understands it as a new variable.
Remember: To PHP, $test is not the same variable as $Test.
Missing Dollar Signs − A missing dollar sign in a variable name is really hard to see, but at least it usually results in an error message so that you know where to look for the problem.
Troubling Quotes − You can have too many, too few, or the wrong kind of quotes.
So check for a balanced number of quotes.
Missing Parentheses and curly brackets − They should always be in pairs.
Array Index − All the arrays should start from zero instead of 1.
Moreover, handle all the errors properly and direct all trace messages into system log file so that if any problem happens then it will be logged into system log file and you will be able to debug that problem.
Date & Time
Dates are so much part of everyday life that it becomes easy to work with them without thinking.
PHP also provides powerful tools for date arithmetic that make manipulating dates easy.
Getting the Time Stamp with time()
PHP's time() function gives you all the information that you need about the current date and time.
It requires no arguments but returns an integer.
The integer returned by time() represents the number of seconds elapsed since midnight GMT on January 1, 1970.
This moment is known as the UNIX epoch, and the number of seconds that have elapsed since then is referred to as a time stamp.
Live Demo
<?php
print time();
?>
This will produce the following result −
1480930103
This is something difficult to understand.
But PHP offers excellent tools to convert a time stamp into a form that humans are comfortable with.
Converting a Time Stamp with getdate()
The function getdate() optionally accepts a time stamp and returns an associative array containing information about the date.
If you omit the time stamp, it works with the current time stamp as returned by time().
Following table lists the elements contained in the array returned by getdate().
| Sr.No |
Key & Description |
Example |
| 1 |
seconds
Seconds past the minutes (0-59)
|
20 |
| 2 |
minutes
Minutes past the hour (0 - 59)
|
29 |
| 3 |
hours
Hours of the day (0 - 23)
|
22 |
| 4 |
mday
Day of the month (1 - 31)
|
11 |
| 5 |
wday
Day of the week (0 - 6)
|
4 |
| 6 |
mon
Month of the year (1 - 12)
|
7 |
| 7 |
year
Year (4 digits)
|
1997 |
| 8 |
yday
Day of year ( 0 - 365 )
|
19 |
| 9 |
weekday
Day of the week
|
Thursday |
| 10 |
month
Month of the year
|
January |
| 11 |
0
Timestamp
|
948370048 |
Now you have complete control over date and time.
You can format this date and time in whatever format you wan.
Example
Try out following example
Live Demo
<?php
$date_array = getdate();
foreach ( $date_array as $key => $val ){
print "$key = $val<br />";
}
$formated_date = "Today's date: ";
$formated_date .= $date_array['mday'] .
"/";
$formated_date .= $date_array['mon'] .
"/";
$formated_date .= $date_array['year'];
print $formated_date;
?>
This will produce following result −
seconds = 10
minutes = 29
hours = 9
mday = 5
wday = 1
mon = 12
year = 2016
yday = 339
weekday = Monday
month = December
0 = 1480930150
Today's date: 5/12/2016
Converting a Time Stamp with date()
The date() function returns a formatted string representing a date.
You can exercise an enormous amount of control over the format that date() returns with a string argument that you must pass to it.
date(format,timestamp)
The date() optionally accepts a time stamp if omitted then current date and time will be used.
Any other data you include in the format string passed to date() will be included in the return value.
Following table lists the codes that a format string can contain −
| Sr.No |
Format & Description |
Example |
| 1 |
a
'am' or 'pm' lowercase
|
pm |
| 2 |
A
'AM' or 'PM' uppercase
|
PM |
| 3 |
d
Day of month, a number with leading zeroes
|
20 |
| 4 |
D
Day of week (three letters)
|
Thu |
| 5 |
F
Month name
|
January |
| 6 |
h
Hour (12-hour format - leading zeroes)
|
12 |
| 7 |
H
Hour (24-hour format - leading zeroes)
|
22 |
| 8 |
g
Hour (12-hour format - no leading zeroes)
|
12 |
| 9 |
G
Hour (24-hour format - no leading zeroes)
|
22 |
| 10 |
i
Minutes ( 0 - 59 )
|
23 |
| 11 |
j
Day of the month (no leading zeroes
|
20 |
| 12 |
l (Lower 'L')
Day of the week
|
Thursday |
| 13 |
L
Leap year ('1' for yes, '0' for no)
|
1 |
| 14 |
m
Month of year (number - leading zeroes)
|
1 |
| 15 |
M
Month of year (three letters)
|
Jan |
| 16 |
r
The RFC 2822 formatted date
|
Thu, 21 Dec 2000 16:01:07 +0200 |
| 17 |
n
Month of year (number - no leading zeroes)
|
2 |
| 18 |
s
Seconds of hour
|
20 |
| 19 |
U
Time stamp
|
948372444 |
| 20 |
y
Year (two digits)
|
06 |
| 21 |
Y
Year (four digits)
|
2006 |
| 22 |
z
Day of year (0 - 365)
|
206 |
| 23 |
Z
Offset in seconds from GMT
|
+5 |
Example
Try out following example
Live Demo
<?php
print date("m/d/y G.i:s<br>", time());
print "Today is ";
print date("j of F Y, \a\\t g.i a", time());
?>
This will produce following result −
12/05/16 9.29:47Today is 5 2016f December 2016, at 9.29 am
Hope you have good understanding on how to format date and time according to your requirement.
For your reference a complete list of all the date and time functions is given in PHP Date & Time Functions.
PHP & MySQL
PHP will work with virtually all database software, including Oracle and Sybase but most commonly used is freely available MySQL database.
What you should already have ?
You have gone through MySQL tutorial to understand MySQL Basics.
Downloaded and installed a latest version of MySQL.
Created database user guest with password guest123.
If you have not created a database then you would need root user and its password to create a database.
We have divided this chapter in the following sections −
Connecting to MySQL database − Learn how to use PHP to open and close a MySQL database connection.
Create MySQL Database Using PHP − This part explains how to create MySQL database and tables using PHP.
Delete MySQL Database Using PHP − This part explains how to delete MySQL database and tables using PHP.
Insert Data To MySQL Database − Once you have created your database and tables then you would like to insert your data into created tables.
This session will take you through real example on data insert.
Retrieve Data From MySQL Database − Learn how to fetch records from MySQL database using PHP.
Using Paging through PHP − This one explains how to show your query result into multiple pages and how to create the navigation link.
Updating Data Into MySQL Database − This part explains how to update existing records into MySQL database using PHP.
Deleting Data From MySQL Database − This part explains how to delete or purge existing records from MySQL database using PHP.
Using PHP To Backup MySQL Database − Learn different ways to take backup of your MySQL database for safety purpose.
PHP & AJAX
What is AJAX ?
AJAX stands for Asynchronous JavaScript and XML.
AJAX is a new technique for creating better, faster, and more interactive web applications with the help of XML, HTML, CSS and Java Script.
Conventional web application transmit information to and from the sever using synchronous requests.
This means you fill out a form, hit submit, and get directed to a new page with new information from the server.
With AJAX when submit is pressed, JavaScript will make a request to the server, interpret the results and update the current screen.
In the purest sense, the user would never know that anything was even transmitted to the server.
For complete learning on AJAX, please refer to AJAX Tutorial.
PHP and AJAX Example
To clearly illustrate how easy it is to access information from a database using Ajax and PHP, we are going to build MySQL queries on the fly and display the results on "ajax.html".
But before we proceed, lets do ground work.
Create a table using the following command.
NOTE − We are assuming you have sufficient privilege to perform following MySQL operations.
CREATE TABLE `ajax_example` (
`name` varchar(50) NOT NULL,
`age` int(11) NOT NULL,
`sex` varchar(1) NOT NULL,
`wpm` int(11) NOT NULL,
PRIMARY KEY (`name`)
)
Now dump the following data into this table using the following SQL statements.
INSERT INTO `ajax_example` VALUES ('Jerry', 120, 'm', 20);
INSERT INTO `ajax_example` VALUES ('Regis', 75, 'm', 44);
INSERT INTO `ajax_example` VALUES ('Frank', 45, 'm', 87);
INSERT INTO `ajax_example` VALUES ('Jill', 22, 'f', 72);
INSERT INTO `ajax_example` VALUES ('Tracy', 27, 'f', 0);
INSERT INTO `ajax_example` VALUES ('Julie', 35, 'f', 90);
Client Side HTML file
Now lets have our client side HTML file which is ajax.html and it will have following code
<html>
<body>
<script language = "javascript" type = "text/javascript">
<!--
//Browser Support Code
function ajaxFunction(){
var ajaxRequest; // The variable that makes Ajax possible!
try {
// Opera 8.0+, Firefox, Safari
ajaxRequest = new XMLHttpRequest();
}catch (e) {
// Internet Explorer Browsers
try {
ajaxRequest = new ActiveXObject("Msxml2.XMLHTTP");
}catch (e) {
try{
ajaxRequest = new ActiveXObject("Microsoft.XMLHTTP");
}catch (e){
// Something went wrong
alert("Your browser broke!");
return false;
}
}
}
// Create a function that will receive data
// sent from the server and will update
// div section in the same page.
ajaxRequest.onreadystatechange = function(){
if(ajaxRequest.readyState == 4){
var ajaxDisplay = document.getElementById('ajaxDiv');
ajaxDisplay.innerHTML = ajaxRequest.responseText;
}
}
// Now get the value from user and pass it to
// server script.
var age = document.getElementById('age').value;
var wpm = document.getElementById('wpm').value;
var sex = document.getElementById('sex').value;
var queryString = "?age=" + age ;
queryString += "&wpm=" + wpm + "&sex=" + sex;
ajaxRequest.open("GET", "ajax-example.php" + queryString, true);
ajaxRequest.send(null);
}
//-->
</script>
<form name = 'myForm'>
Max Age: <input type = 'text' id = 'age' /> <br />
Max WPM: <input type = 'text' id = 'wpm' />
<br />
Sex: <select id = 'sex'>
<option value = "m">m</option>
<option value = "f">f</option>
</select>
<input type = 'button' onclick = 'ajaxFunction()' value = 'Query MySQL'/>
</form>
<div id = 'ajaxDiv'>Your result will display here</div>
</body>
</html>
NOTE − The way of passing variables in the Query is according to HTTP standard and the have formA.
URL?variable1=value1;&variable2=value2;
Now the above code will give you a screen as given below
NOTE − This is dummy screen and would not work.
Your result will display here
Server Side PHP file
So now your client side script is ready.
Now we have to write our server side script which will fetch age, wpm and sex from the database and will send it back to the client.
Put the following code into "ajax-example.php" file.
<?php
$dbhost = "localhost";
$dbuser = "dbusername";
$dbpass = "dbpassword";
$dbname = "dbname";
//Connect to MySQL Server
mysql_connect($dbhost, $dbuser, $dbpass);
//Select Database
mysql_select_db($dbname) or die(mysql_error());
// Retrieve data from Query String
$age = $_GET['age'];
$sex = $_GET['sex'];
$wpm = $_GET['wpm'];
// Escape User Input to help prevent SQL Injection
$age = mysql_real_escape_string($age);
$sex = mysql_real_escape_string($sex);
$wpm = mysql_real_escape_string($wpm);
//build query
$query = "SELECT * FROM ajax_example WHERE sex = '$sex'";
if(is_numeric($age))
$query .= " AND age <= $age";
if(is_numeric($wpm))
$query .= " AND wpm <= $wpm";
//Execute query
$qry_result = mysql_query($query) or die(mysql_error());
//Build Result String
$display_string = "<table>";
$display_string .= "<tr>";
$display_string .= "<th>Name</th>";
$display_string .= "<th>Age</th>";
$display_string .= "<th>Sex</th>";
$display_string .= "<th>WPM</th>";
$display_string .= "</tr>";
// Insert a new row in the table for each person returned
while($row = mysql_fetch_array($qry_result)) {
$display_string .= "<tr>";
$display_string .= "<td>$row[name]</td>";
$display_string .= "<td>$row[age]</td>";
$display_string .= "<td>$row[sex]</td>";
$display_string .= "<td>$row[wpm]</td>";
$display_string .= "</tr>";
}
echo "Query: " .
$query .
"<br />";
$display_string .= "</table>";
echo $display_string;
?>
Now try by entering a valid value in "Max Age" or any other box and then click Query MySQL button.
Your result will display here
If you have successfully completed this lesson then you know how to use MySQL, PHP, HTML, and Javascript in tandem to write Ajax applications.
PHP & XML
XML is a markup language that looks a lot like HTML.
An XML document is plain text and contains tags delimited by < and >.There are two big differences between XML and HTML −
XML doesn't define a specific set of tags you must use.
XML is extremely picky about document structure.
XML gives you a lot more freedom than HTML.
HTML has a certain set of tags: the <a></a> tags surround a link, the <p> starts paragraph and so on.
An XML document, however, can use any tags you want.
Put <rating></rating> tags around a movie rating, <height></height> tags around someone's height.
Thus XML gives you option to device your own tags.
XML is very strict when it comes to document structure.
HTML lets you play fast and loose with some opening and closing tags.
But this is not the case with XML.
HTML list that's not valid XML
<ul>
<li>Braised Sea Cucumber
<li>Baked Giblets with Salt
<li>Abalone with Marrow and Duck Feet
</ul>
This is not a valid XML document because there are no closing </li> tags to match up with the three opening <li> tags.
Every opened tag in an XML document must be closed.
HTML list that is valid XML
<ul>
<li>Braised Sea Cucumber</li>
<li>Baked Giblets with Salt</li>
<li>Abalone with Marrow and Duck Feet</li>
</ul>
Parsing an XML Document
PHP 5's new SimpleXML module makes parsing an XML document, well, simple.
It turns an XML document into an object that provides structured access to the XML.
To create a SimpleXML object from an XML document stored in a string, pass the string to simplexml_load_string( ).
It returns a SimpleXML object.
Example
Try out following example −
<html>
<body>
<?php
$note=<<<XML
<note>
<to>Gopal K Verma</to>
<from>Sairamkrishna</from>
<heading>Project submission</heading>
<body>Please see clearly </body>
</note>
XML;
$xml=simplexml_load_string($note);
print_r($xml);
?>
</body>
</html>
It will produce the following result −
 NOTE − You can use function simplexml_load_file( filename) if you have XML content in a file.
For a complete detail of XML parsing function check PHP Function Reference.
NOTE − You can use function simplexml_load_file( filename) if you have XML content in a file.
For a complete detail of XML parsing function check PHP Function Reference.
Generating an XML Document
SimpleXML is good for parsing existing XML documents, but you can't use it to create a new one from scratch.
The easiest way to generate an XML document is to build a PHP array whose structure mirrors that of the XML document and then to iterate through the array, printing each element with appropriate formatting.
Example
Try out following example −
Live Demo
<?php
$channel = array('title' => "What's For Dinner",
'link' => 'http://menu.example.com/',
'description' => 'Choose what to eat tonight.');
print "<channel>\n";
foreach ($channel as $element => $content) {
print " <$element>";
print htmlentities($content);
print "</$element>\n";
}
print "</channel>";
?>
It will produce the following result −
http://menu.example.com/ Choose what to eat tonight.
Object Oriented Programming in PHP
We can imagine our universe made of different objects like sun, earth, moon etc.
Similarly we can imagine our car made of different objects like wheel, steering, gear etc.
Same way there is object oriented programming concepts which assume everything as an object and implement a software using different objects.
Object Oriented Concepts
Before we go in detail, lets define important terms related to Object Oriented Programming.
Class − This is a programmer-defined data type, which includes local functions as well as local data.
You can think of a class as a template for making many instances of the same kind (or class) of object.
Object − An individual instance of the data structure defined by a class.
You define a class once and then make many objects that belong to it.
Objects are also known as instance.
Member Variable − These are the variables defined inside a class.
This data will be invisible to the outside of the class and can be accessed via member functions.
These variables are called attribute of the object once an object is created.
Member function − These are the function defined inside a class and are used to access object data.
Inheritance − When a class is defined by inheriting existing function of a parent class then it is called inheritance.
Here child class will inherit all or few member functions and variables of a parent class.
Parent class − A class that is inherited from by another class.
This is also called a base class or super class.
Child Class − A class that inherits from another class.
This is also called a subclass or derived class.
Polymorphism − This is an object oriented concept where same function can be used for different purposes.
For example function name will remain same but it make take different number of arguments and can do different task.
Overloading − a type of polymorphism in which some or all of operators have different implementations depending on the types of their arguments.
Similarly functions can also be overloaded with different implementation.
Data Abstraction − Any representation of data in which the implementation details are hidden (abstracted).
Encapsulation − refers to a concept where we encapsulate all the data and member functions together to form an object.
Constructor − refers to a special type of function which will be called automatically whenever there is an object formation from a class.
Destructor − refers to a special type of function which will be called automatically whenever an object is deleted or goes out of scope.
Defining PHP Classes
The general form for defining a new class in PHP is as follows −
<?php
class phpClass {
var $var1;
var $var2 = "constant string";
function myfunc ($arg1, $arg2) {
[..]
}
[..]
}
?>
Here is the description of each line −
The special form class, followed by the name of the class that you want to define.
A set of braces enclosing any number of variable declarations and function definitions.
Variable declarations start with the special form var, which is followed by a conventional $ variable name; they may also have an initial assignment to a constant value.
Function definitions look much like standalone PHP functions but are local to the class and will be used to set and access object data.
Example
Here is an example which defines a class of Books type −
<?php
class Books {
/* Member variables */
var $price;
var $title;
/* Member functions */
function setPrice($par){
$this->price = $par;
}
function getPrice(){
echo $this->price ."<br/>";
}
function setTitle($par){
$this->title = $par;
}
function getTitle(){
echo $this->title ." <br/>";
}
}
?>
The variable $this is a special variable and it refers to the same object ie.
itself.
Creating Objects in PHP
Once you defined your class, then you can create as many objects as you like of that class type.
Following is an example of how to create object using new operator.
$physics = new Books;
$maths = new Books;
$chemistry = new Books;
Here we have created three objects and these objects are independent of each other and they will have their existence separately.
Next we will see how to access member function and process member variables.
Calling Member Functions
After creating your objects, you will be able to call member functions related to that object.
One member function will be able to process member variable of related object only.
Following example shows how to set title and prices for the three books by calling member functions.
$physics->setTitle( "Physics for High School" );
$chemistry->setTitle( "Advanced Chemistry" );
$maths->setTitle( "Algebra" );
$physics->setPrice( 10 );
$chemistry->setPrice( 15 );
$maths->setPrice( 7 );
Now you call another member functions to get the values set by in above example −
$physics->getTitle();
$chemistry->getTitle();
$maths->getTitle();
$physics->getPrice();
$chemistry->getPrice();
$maths->getPrice();
This will produce the following result −
Physics for High School
Advanced Chemistry
Algebra
10
15
7
Constructor Functions
Constructor Functions are special type of functions which are called automatically whenever an object is created.
So we take full advantage of this behaviour, by initializing many things through constructor functions.
PHP provides a special function called __construct() to define a constructor.
You can pass as many as arguments you like into the constructor function.
Following example will create one constructor for Books class and it will initialize price and title for the book at the time of object creation.
function __construct( $par1, $par2 ) {
$this->title = $par1;
$this->price = $par2;
}
Now we don't need to call set function separately to set price and title.
We can initialize these two member variables at the time of object creation only.
Check following example below −
$physics = new Books( "Physics for High School", 10 );
$maths = new Books ( "Advanced Chemistry", 15 );
$chemistry = new Books ("Algebra", 7 );
/* Get those set values */
$physics->getTitle();
$chemistry->getTitle();
$maths->getTitle();
$physics->getPrice();
$chemistry->getPrice();
$maths->getPrice();
This will produce the following result −
Physics for High School
Advanced Chemistry
Algebra
10
15
7
Destructor
Like a constructor function you can define a destructor function using function __destruct().
You can release all the resources with-in a destructor.
Inheritance
PHP class definitions can optionally inherit from a parent class definition by using the extends clause.
The syntax is as follows −
class Child extends Parent {
<definition body>
}
The effect of inheritance is that the child class (or subclass or derived class) has the following characteristics −
Automatically has all the member variable declarations of the parent class.
Automatically has all the same member functions as the parent, which (by default) will work the same way as those functions do in the parent.
Following example inherit Books class and adds more functionality based on the requirement.
class Novel extends Books {
var $publisher;
function setPublisher($par){
$this->publisher = $par;
}
function getPublisher(){
echo $this->publisher.
"<br />";
}
}
Now apart from inherited functions, class Novel keeps two additional member functions.
Function Overriding
Function definitions in child classes override definitions with the same name in parent classes.
In a child class, we can modify the definition of a function inherited from parent class.
In the following example getPrice and getTitle functions are overridden to return some values.
function getPrice() {
echo $this->price .
"<br/>";
return $this->price;
}
function getTitle(){
echo $this->title .
"<br/>";
return $this->title;
}
Public Members
Unless you specify otherwise, properties and methods of a class are public.
That is to say, they may be accessed in three possible situations −
From outside the class in which it is declared
From within the class in which it is declared
From within another class that implements the class in which it is declared
Till now we have seen all members as public members.
If you wish to limit the accessibility of the members of a class then you define class members as private or protected.
Private members
By designating a member private, you limit its accessibility to the class in which it is declared.
The private member cannot be referred to from classes that inherit the class in which it is declared and cannot be accessed from outside the class.
A class member can be made private by using private keyword infront of the member.
class MyClass {
private $car = "skoda";
$driver = "SRK";
function __construct($par) {
// Statements here run every time
// an instance of the class
// is created.
}
function myPublicFunction() {
return("I'm visible!");
}
private function myPrivateFunction() {
return("I'm not visible outside!");
}
}
When MyClass class is inherited by another class using extends, myPublicFunction() will be visible, as will $driver.
The extending class will not have any awareness of or access to myPrivateFunction and $car, because they are declared private.
Protected members
A protected property or method is accessible in the class in which it is declared, as well as in classes that extend that class.
Protected members are not available outside of those two kinds of classes.
A class member can be made protected by using protected keyword in front of the member.
Here is different version of MyClass −
class MyClass {
protected $car = "skoda";
$driver = "SRK";
function __construct($par) {
// Statements here run every time
// an instance of the class
// is created.
}
function myPublicFunction() {
return("I'm visible!");
}
protected function myPrivateFunction() {
return("I'm visible in child class!");
}
}
Interfaces
Interfaces are defined to provide a common function names to the implementers.
Different implementors can implement those interfaces according to their requirements.
You can say, interfaces are skeletons which are implemented by developers.
As of PHP5, it is possible to define an interface, like this −
interface Mail {
public function sendMail();
}
Then, if another class implemented that interface, like this −
class Report implements Mail {
// sendMail() Definition goes here
}
Constants
A constant is somewhat like a variable, in that it holds a value, but is really more like a function because a constant is immutable.
Once you declare a constant, it does not change.
Declaring one constant is easy, as is done in this version of MyClass −
class MyClass {
const requiredMargin = 1.7;
function __construct($incomingValue) {
// Statements here run every time
// an instance of the class
// is created.
}
}
In this class, requiredMargin is a constant.
It is declared with the keyword const, and under no circumstances can it be changed to anything other than 1.7.
Note that the constant's name does not have a leading $, as variable names do.
Abstract Classes
An abstract class is one that cannot be instantiated, only inherited.
You declare an abstract class with the keyword abstract, like this −
When inheriting from an abstract class, all methods marked abstract in the parent's class declaration must be defined by the child; additionally, these methods must be defined with the same visibility.
abstract class MyAbstractClass {
abstract function myAbstractFunction() {
}
}
Note that function definitions inside an abstract class must also be preceded by the keyword abstract.
It is not legal to have abstract function definitions inside a non-abstract class.
Static Keyword
Declaring class members or methods as static makes them accessible without needing an instantiation of the class.
A member declared as static can not be accessed with an instantiated class object (though a static method can).
Try out following example −
<?php
class Foo {
public static $my_static = 'foo';
public function staticValue() {
return self::$my_static;
}
}
print Foo::$my_static .
"\n";
$foo = new Foo();
print $foo->staticValue() .
"\n";
?>
Final Keyword
PHP 5 introduces the final keyword, which prevents child classes from overriding a method by prefixing the definition with final.
If the class itself is being defined final then it cannot be extended.
Following example results in Fatal error: Cannot override final method BaseClass::moreTesting()
<?php
class BaseClass {
public function test() {
echo "BaseClass::test() called<br>";
}
final public function moreTesting() {
echo "BaseClass::moreTesting() called<br>";
}
}
class ChildClass extends BaseClass {
public function moreTesting() {
echo "ChildClass::moreTesting() called<br>";
}
}
?>
Calling parent constructors
Instead of writing an entirely new constructor for the subclass, let's write it by calling the parent's constructor explicitly and then doing whatever is necessary in addition for instantiation of the subclass.
Here's a simple example −
class Name {
var $_firstName;
var $_lastName;
function Name($first_name, $last_name) {
$this->_firstName = $first_name;
$this->_lastName = $last_name;
}
function toString() {
return($this->_lastName .", " .$this->_firstName);
}
}
class NameSub1 extends Name {
var $_middleInitial;
function NameSub1($first_name, $middle_initial, $last_name) {
Name::Name($first_name, $last_name);
$this->_middleInitial = $middle_initial;
}
function toString() {
return(Name::toString() .
" " .
$this->_middleInitial);
}
}
In this example, we have a parent class (Name), which has a two-argument constructor, and a subclass (NameSub1), which has a three-argument constructor.
The constructor of NameSub1 functions by calling its parent constructor explicitly using the :: syntax (passing two of its arguments along) and then setting an additional field.
Similarly, NameSub1 defines its non constructor toString() function in terms of the parent function that it overrides.
NOTE − A constructor can be defined with the same name as the name of a class.
It is defined in above example.
PHP For C Developers
The simplest way to think of PHP is as interpreted C that you can embed in HTML documents.
The language itself is a lot like C, except with untyped variables, a whole lot of Web-specific libraries built in, and everything hooked up directly to your favorite Web server.
The syntax of statements and function definitions should be familiar, except that variables are always preceded by $, and functions do not require separate prototypes.
Here we will put some similarities and differences in PHP and C
Similarities
Syntax − Broadly speaking, PHP syntax is the same as in C: Code is blank insensitive, statements are terminated with semicolons, function calls have the same structure (my_function(expression1, expression2)), and curly braces ({ and }) make statements into blocks.
PHP supports C and C++-style comments (/* */ as well as //), and also Perl and shell-script style (#).
Operators − The assignment operators (=, +=, *=, and so on), the Boolean operators (&&, ||, !), the comparison operators (<,>, <=, >=, ==, !=), and the basic arithmetic operators (+, -, *, /, %) all behave in PHP as they do in C.
Control structures − The basic control structures (if, switch, while, for) behave as they do in C, including supporting break and continue.
One notable difference is that switch in PHP can accept strings as case identifiers.
Function names − As you peruse the documentation, you.ll see many function names that seem identical to C functions.
Differences
Dollar signs − All variables are denoted with a leading $.
Variables do not need to be declared in advance of assignment, and they have no intrinsic type.
Types − PHP has only two numerical types: integer (corresponding to a long in C) and double (corresponding to a double in C).
Strings are of arbitrary length.
There is no separate character type.
Type conversion − Types are not checked at compile time, and type errors do not typically occur at runtime either.
Instead, variables and values are automatically converted across types as needed.
Arrays − Arrays have a syntax superficially similar to C's array syntax, but they are implemented completely differently.
They are actually associative arrays or hashes, and the index can be either a number or a string.
They do not need to be declared or allocated in advance.
No structure type − There is no structure in PHP, partly because the array and object types together make it unnecessary.
The elements of a PHP array need not be of a consistent type.
No pointers − There are no pointers available in PHP, although the tapeless variables play a similar role.
PHP does support variable references.
You can also emulate function pointers to some extent, in that function names can be stored in variables and called by using the variable rather than a literal name.
No prototypes − Functions do not need to be declared before their implementation is defined, as long as the definition can be found somewhere in the current code file or included files.
Memory management − The PHP engine is effectively a garbage-collected environment (reference-counted), and in small scripts there is no need to do any deallocation.
You should freely allocate new structures - such as new strings and object instances.
IN PHP5, it is possible to define destructor for objects, but there is no free or delete.
Destructor are called when the last reference to an object goes away, before the memory is reclaimed.
Compilation and linking − There is no separate compilation step for PHP scripts.
Permissiveness − As a general matter, PHP is more forgiving than C (especially in its type system) and so will let you get away with new kinds of mistakes.
Unexpected results are more common than errors.
PHP For PERL Developers
This chapter will list out major similarities and differences in between PHP and PERL.
This will help PERL developers to understand PHP very quickly and avoid common mistakes.
Similarities
Compiled scripting languages − Both Perl and PHP are scripting languages.This means that they are not used to produce native standalone executables in advance of execution.
Syntax − PHP's basic syntax is very close to Perl's, and both share a lot of syntactic features with C.
Code is insensitive to whitespace, statements are terminated by semicolons, and curly braces organize multiple statements into a single block.
Function calls start with the name of the function, followed by the actual arguments enclosed in parentheses and separated by commas.
Dollar-sign variables − All variables in PHP look like scalar variables in Perl: a name with a dollar sign ($) in front of it.
No declaration of variables − As in Perl, you don.t need to declare the type of a PHP variable before using it.
Loose typing of variables − As in Perl, variables in PHP have no intrinsic type other than the value they currently hold.
You can store either number or string in same type of variable.
Strings and variable interpolation − Both PHP and Perl do more interpretation of double-quoted strings ("string") than of singlequoted strings ('string').
Differences
PHP is HTML-embedded − Although it is possible to use PHP for arbitrary tasks by running it from the command line, it is more typically connected to a Web server and used for producing Web pages.
If you are used to writing CGI scripts in Perl, the main difference in PHP is that you no longer need to explicitly print large blocks of static HTML using print or heredoc statements and instead can simply write the HTML itself outside of the PHP code block.
No @ or % variables − PHP has one only kind of variable, which starts with a dollar sign ($).
Any of the datatypes in the language can be stored in such variables, whether scalar or compound.
Arrays versus hashes − PHP has a single datatype called an array that plays the role of both hashes and arrays/lists in Perl.
Specifying arguments to functions − Function calls in PHP look pretty much like subroutine calls in Perl.
Function definitions in PHP, on the other hand, typically require some kind of list of formal arguments as in C or Java which is not the csse in PERL.
Variable scoping in functions − In Perl, the default scope for variables is global.
This means that top-level variables are visible inside subroutines.
Often, this leads to promiscuous use of globals across functions.
In PHP, the scope of variables within function definitions is local by default.
No module system as such − In PHP there is no real distinction between normal code files and code files used as imported libraries.
Break and continue rather than next and last − PHP is more like C langauge and uses break and continue instead of next and last statement.
No elsif − A minor spelling difference: Perl's elsif is PHP's elseif.
More kinds of comments − In addition to Perl-style (#) single-line comments, PHP offers C-style multiline comments (/* comment */ ) and Java-style single-line comments (// comment).
Regular expressions − PHP does not have a built-in syntax specific to regular expressions, but has most of the same functionality in its "Perl-compatible" regular expression functions.
Form Introduction
Dynamic Websites
The Websites provide the functionalities that can use to store, update, retrieve, and delete the data in a database.
What is the Form?
A Document that containing black fields, that the user can fill the data or user can select the data.Casually the data will store in the data base
Example
Below example shows the form with some specific actions by using post method.
<html>
<head>
<title>PHP Form Validation</title>
</head>
<body>
<?php
// define variables and set to empty values
$name = $email = $gender = $comment = $website = "";
if ($_SERVER["REQUEST_METHOD"] == "POST") {
$name = test_input($_POST["name"]);
$email = test_input($_POST["email"]);
$website = test_input($_POST["website"]);
$comment = test_input($_POST["comment"]);
$gender = test_input($_POST["gender"]);
}
function test_input($data) {
$data = trim($data);
$data = stripslashes($data);
$data = htmlspecialchars($data);
return $data;
}
?>
<h2>Tutorials Point Absolute classes registration</h2>
<form method = "post" action = "/php/php_form_introduction.htm">
<table>
<tr>
<td>Name:</td>
<td><input type = "text" name = "name"></td>
</tr>
<tr>
<td>E-mail:</td>
<td><input type = "text" name = "email"></td>
</tr>
<tr>
<td>Specific Time:</td>
<td><input type = "text" name = "website"></td>
</tr>
<tr>
<td>Class details:</td>
<td><textarea name = "comment" rows = "5" cols = "40"></textarea></td>
</tr>
<tr>
<td>Gender:</td>
<td>
<input type = "radio" name = "gender" value = "female">Female
<input type = "radio" name = "gender" value = "male">Male
</td>
</tr>
<tr>
<td>
<input type = "submit" name = "submit" value = "Submit">
</td>
</tr>
</table>
</form>
<?php
echo "<h2>Your Given details are as :</h2>";
echo $name;
echo "<br>";
echo $email;
echo "<br>";
echo $website;
echo "<br>";
echo $comment;
echo "<br>";
echo $gender;
?>
</body>
</html>
It will produce the following result −
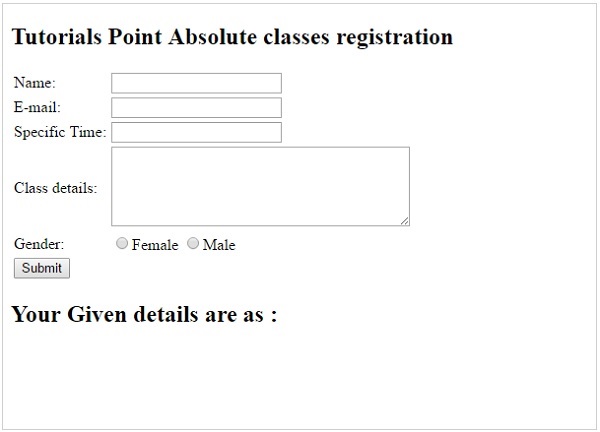
Validation Example
Required field will check whether the field is filled or not in the proper way.
Most of cases we will use the * symbol for required field.
What is Validation ?
Validation means check the input submitted by the user.
There are two types of validation are available in PHP.
They are as follows −
Client-Side Validation − Validation is performed on the client machine web browsers.
Server Side Validation − After submitted by data, The data has sent to a server and perform validation checks in server machine.
Some of Validation rules for field
| Field |
Validation Rules |
| Name |
Should required letters and white-spaces |
| Email |
Should required @ and . |
| Website |
Should required a valid URL |
| Radio |
Must be selectable at least once |
| Check Box |
Must be checkable at least once |
| Drop Down menu |
Must be selectable at least once |
Valid URL
Below code shows validation of URL
$website = input($_POST["site"]);
if (!preg_match("/\b(?:(?:https?|ftp):\/\/|www\.)[-a-z0-9+&@#\/%?=~_|!:,.;]*[-a-z0-9+&@#\/%=~_|]/i",$website)) {
$websiteErr = "Invalid URL";
}
Above syntax will verify whether a given URL is valid or not.
It should allow some keywords as https, ftp, www, a-z, 0-9,..etc..
Valid Email
Below code shows validation of Email address
$email = input($_POST["email"]);
if (!filter_var($email, FILTER_VALIDATE_EMAIL)) {
$emailErr = "Invalid format and please re-enter valid email";
}
Above syntax will verify whether given Email address is well-formed or not.if it is not, it will show an error message.
Example
Example below shows the form with required field validation
<html>
<head>
<style>
.error {color: #FF0000;}
</style>
</head>
<body>
<?php
// define variables and set to empty values
$nameErr = $emailErr = $genderErr = $websiteErr = "";
$name = $email = $gender = $comment = $website = "";
if ($_SERVER["REQUEST_METHOD"] == "POST") {
if (empty($_POST["name"])) {
$nameErr = "Name is required";
}else {
$name = test_input($_POST["name"]);
}
if (empty($_POST["email"])) {
$emailErr = "Email is required";
}else {
$email = test_input($_POST["email"]);
// check if e-mail address is well-formed
if (!filter_var($email, FILTER_VALIDATE_EMAIL)) {
$emailErr = "Invalid email format";
}
}
if (empty($_POST["website"])) {
$website = "";
}else {
$website = test_input($_POST["website"]);
}
if (empty($_POST["comment"])) {
$comment = "";
}else {
$comment = test_input($_POST["comment"]);
}
if (empty($_POST["gender"])) {
$genderErr = "Gender is required";
}else {
$gender = test_input($_POST["gender"]);
}
}
function test_input($data) {
$data = trim($data);
$data = stripslashes($data);
$data = htmlspecialchars($data);
return $data;
}
?>
<h2>Absolute classes registration</h2>
<p><span class = "error">* required field.</span></p>
<form method = "post" action = "<?php
echo htmlspecialchars($_SERVER["PHP_SELF"]);?>">
<table>
<tr>
<td>Name:</td>
<td><input type = "text" name = "name">
<span class = "error">* <?php echo $nameErr;?></span>
</td>
</tr>
<tr>
<td>E-mail: </td>
<td><input type = "text" name = "email">
<span class = "error">* <?php echo $emailErr;?></span>
</td>
</tr>
<tr>
<td>Time:</td>
<td> <input type = "text" name = "website">
<span class = "error"><?php echo $websiteErr;?></span>
</td>
</tr>
<tr>
<td>Classes:</td>
<td> <textarea name = "comment" rows = "5" cols = "40"></textarea></td>
</tr>
<tr>
<td>Gender:</td>
<td>
<input type = "radio" name = "gender" value = "female">Female
<input type = "radio" name = "gender" value = "male">Male
<span class = "error">* <?php echo $genderErr;?></span>
</td>
</tr>
<td>
<input type = "submit" name = "submit" value = "Submit">
</td>
</table>
</form>
<?php
echo "<h2>Your given values are as:</h2>";
echo $name;
echo "<br>";
echo $email;
echo "<br>";
echo $website;
echo "<br>";
echo $comment;
echo "<br>";
echo $gender;
?>
</body>
</html>
It will produce the following result −

Complete Form
This page explains about time real-time form with actions.
Below example will take input fields as text, radio button, drop down menu, and checked box.
Example
Live Demo
<html>
<head>
<style>
.error {color: #FF0000;}
</style>
</head>
<body>
<?php
// define variables and set to empty values
$nameErr = $emailErr = $genderErr = $websiteErr = "";
$name = $email = $gender = $class = $course = $subject = "";
if ($_SERVER["REQUEST_METHOD"] == "POST") {
if (empty($_POST["name"])) {
$nameErr = "Name is required";
}else {
$name = test_input($_POST["name"]);
}
if (empty($_POST["email"])) {
$emailErr = "Email is required";
}else {
$email = test_input($_POST["email"]);
// check if e-mail address is well-formed
if (!filter_var($email, FILTER_VALIDATE_EMAIL)) {
$emailErr = "Invalid email format";
}
}
if (empty($_POST["course"])) {
$course = "";
}else {
$course = test_input($_POST["course"]);
}
if (empty($_POST["class"])) {
$class = "";
}else {
$class = test_input($_POST["class"]);
}
if (empty($_POST["gender"])) {
$genderErr = "Gender is required";
}else {
$gender = test_input($_POST["gender"]);
}
if (empty($_POST["subject"])) {
$subjectErr = "You must select 1 or more";
}else {
$subject = $_POST["subject"];
}
}
function test_input($data) {
$data = trim($data);
$data = stripslashes($data);
$data = htmlspecialchars($data);
return $data;
}
?>
<h2>Absolute classes registration</h2>
<p><span class = "error">* required field.</span></p>
<form method = "POST" action = "<?php echo htmlspecialchars($_SERVER["PHP_SELF"]);?>">
<table>
<tr>
<td>Name:</td>
<td><input type = "text" name = "name">
<span class = "error">* <?php echo $nameErr;?></span>
</td>
</tr>
<tr>
<td>E-mail: </td>
<td><input type = "text" name = "email">
<span class = "error">* <?php echo $emailErr;?></span>
</td>
</tr>
<tr>
<td>Time:</td>
<td> <input type = "text" name = "course">
<span class = "error"><?php echo $websiteErr;?></span>
</td>
</tr>
<tr>
<td>Classes:</td>
<td> <textarea name = "class" rows = "5" cols = "40"></textarea></td>
</tr>
<tr>
<td>Gender:</td>
<td>
<input type = "radio" name = "gender" value = "female">Female
<input type = "radio" name = "gender" value = "male">Male
<span class = "error">* <?php echo $genderErr;?></span>
</td>
</tr>
<tr>
<td>Select:</td>
<td>
<select name = "subject[]" size = "4" multiple>
<option value = "Android">Android</option>
<option value = "Java">Java</option>
<option value = "C#">C#</option>
<option value = "Data Base">Data Base</option>
<option value = "Hadoop">Hadoop</option>
<option value = "VB script">VB script</option>
</select>
</td>
</tr>
<tr>
<td>Agree</td>
<td><input type = "checkbox" name = "checked" value = "1"></td>
<?php if(!isset($_POST['checked'])){ ?>
<span class = "error">* <?php echo "You must agree to terms";?></span>
<?php } ?>
</tr>
<tr>
<td>
<input type = "submit" name = "submit" value = "Submit">
</td>
</tr>
</table>
</form>
<?php
echo "<h2>Your given values are as :</h2>";
echo ("<p>Your name is $name</p>");
echo ("<p> your email address is $email</p>");
echo ("<p>Your class time at $course</p>");
echo ("<p>your class info $class </p>");
echo ("<p>your gender is $gender</p>");
for($i = 0; $i < count($subject); $i++) {
echo($subject[$i] .
" ");
}
?>
</body>
</html>
It will produce the following result −
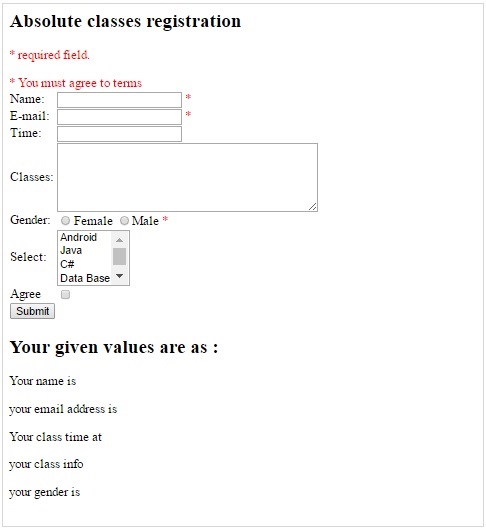
Login Example
PHP login with session
Php login script is used to provide the authentication for our web pages.
the Script executes after submitting the user login button.
Login Page
Login page should be as follows and works based on session.
If the user close the session, it will erase the session data.
Live Demo
<?php
ob_start();
session_start();
?>
<?
// error_reporting(E_ALL);
// ini_set("display_errors", 1);
?>
<html lang = "en">
<head>
<title>Tutorialspoint.com</title>
<link href = "css/bootstrap.min.css" rel = "stylesheet">
<style>
body {
padding-top: 40px;
padding-bottom: 40px;
background-color: #ADABAB;
}
.form-signin {
max-width: 330px;
padding: 15px;
margin: 0 auto;
color: #017572;
}
.form-signin .form-signin-heading,
.form-signin .checkbox {
margin-bottom: 10px;
}
.form-signin .checkbox {
font-weight: normal;
}
.form-signin .form-control {
position: relative;
height: auto;
-webkit-box-sizing: border-box;
-moz-box-sizing: border-box;
box-sizing: border-box;
padding: 10px;
font-size: 16px;
}
.form-signin .form-control:focus {
z-index: 2;
}
.form-signin input[type="email"] {
margin-bottom: -1px;
border-bottom-right-radius: 0;
border-bottom-left-radius: 0;
border-color:#017572;
}
.form-signin input[type="password"] {
margin-bottom: 10px;
border-top-left-radius: 0;
border-top-right-radius: 0;
border-color:#017572;
}
h2{
text-align: center;
color: #017572;
}
</style>
</head>
<body>
<h2>Enter Username and Password</h2>
<div class = "container form-signin">
<?php
$msg = '';
if (isset($_POST['login']) && !empty($_POST['username'])
&& !empty($_POST['password'])) {
if ($_POST['username'] == 'tutorialspoint' &&
$_POST['password'] == '1234') {
$_SESSION['valid'] = true;
$_SESSION['timeout'] = time();
$_SESSION['username'] = 'tutorialspoint';
echo 'You have entered valid use name and password';
}else {
$msg = 'Wrong username or password';
}
}
?>
</div> <!-- /container -->
<div class = "container">
<form class = "form-signin" role = "form"
action = "<?php echo htmlspecialchars($_SERVER['PHP_SELF']);
?>" method = "post">
<h4 class = "form-signin-heading"><?php echo $msg; ?></h4>
<input type = "text" class = "form-control"
name = "username" placeholder = "username = tutorialspoint"
required autofocus></br>
<input type = "password" class = "form-control"
name = "password" placeholder = "password = 1234" required>
<button class = "btn btn-lg btn-primary btn-block" type = "submit"
name = "login">Login</button>
</form>
Click here to clean <a href = "logout.php" tite = "Logout">Session.
</div>
</body>
</html>
Logout.php
It will erase the session data.
<?php
session_start();
unset($_SESSION["username"]);
unset($_SESSION["password"]);
echo 'You have cleaned session';
header('Refresh: 2; URL = login.php');
?>
It will produce the following result −
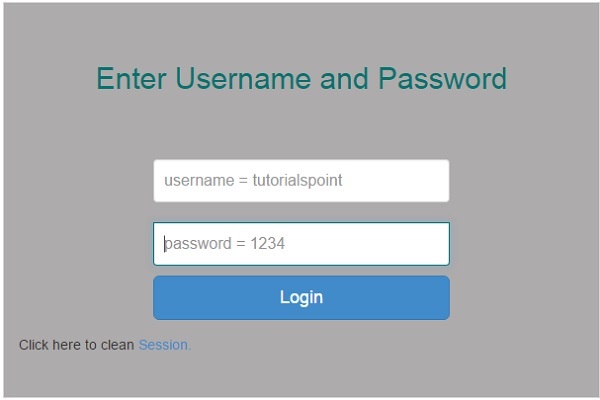
Facebook Login
We can use Facebook login to allow the users to get access into the websites.
This page will explain you about login with facebook PHP SDK.
Login With Facebook
Need to go https://developers.facebook.com/apps/ and click on add a new group button to make the app ID.
Choose Website
Give an app name and click on Create New Facebook App ID
Click on Create app ID
Click on Skip Quick Test
On Final stage, it will show as below shown image.
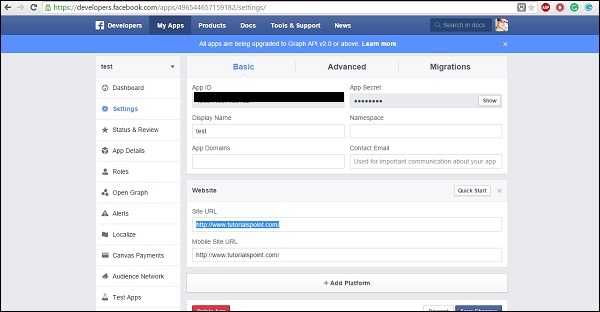
fbconfig.php file overview
Now download zip from here
Now open fbconfig.php file and add you app ID and app Secrete
FacebookSession::setDefaultApplication( 'your app ID','App Secrete ' );
// login helper with redirect_uri
$helper = new FacebookRedirectLoginHelper('You web address' );
Finally fbconfig.php file as shown below −
<?php
session_start();
// added in v4.0.0
require_once 'autoload.php';
use Facebook\FacebookSession;
use Facebook\FacebookRedirectLoginHelper;
use Facebook\FacebookRequest;
use Facebook\FacebookResponse;
use Facebook\FacebookSDKException;
use Facebook\FacebookRequestException;
use Facebook\FacebookAuthorizationException;
use Facebook\GraphObject;
use Facebook\Entities\AccessToken;
use Facebook\HttpClients\FacebookCurlHttpClient;
use Facebook\HttpClients\FacebookHttpable;
// init app with app id and secret
FacebookSession::setDefaultApplication( '496544657159182','e6d239655aeb3e496e52fabeaf1b1f93' );
// login helper with redirect_uri
$helper = new FacebookRedirectLoginHelper('http://www.tutorialspoint.com/' );
try {
$session = $helper->getSessionFromRedirect();
}catch( FacebookRequestException $ex ) {
// When Facebook returns an error
}catch( Exception $ex ) {
// When validation fails or other local issues
}
// see if we have a session
if ( isset( $session ) ) {
// graph api request for user data
$request = new FacebookRequest( $session, 'GET', '/me' );
$response = $request->execute();
// get response
$graphObject = $response->getGraphObject();
$fbid = $graphObject->getProperty('id'); // To Get Facebook ID
$fbfullname = $graphObject->getProperty('name'); // To Get Facebook full name
$femail = $graphObject->getProperty('email'); // To Get Facebook email ID
/* ---- Session Variables -----*/
$_SESSION['FBID'] = $fbid;
$_SESSION['FULLNAME'] = $fbfullname;
$_SESSION['EMAIL'] = $femail;
/* ---- header location after session ----*/
header("Location: index.php");
}else {
$loginUrl = $helper->getLoginUrl();
header("Location: ".$loginUrl);
}
?>
Login page Overview
Login page is used to login into FB
<?php
session_start();
session_unset();
$_SESSION['FBID'] = NULL;
$_SESSION['FULLNAME'] = NULL;
$_SESSION['EMAIL'] = NULL;
header("Location: index.php");
?>
Index.php
Index page is as shown below.
<?php
session_start();
?>
<html xmlns:fb = "http://www.facebook.com/2008/fbml">
<head>
<title>Login with Facebook</title>
<link
href = "http://www.bootstrapcdn.com/twitter-bootstrap/2.2.2/css/bootstrap-combined.min.css"
rel = "stylesheet">
</head>
<body>
<?php if ($_SESSION['FBID']): ?> <!-- After user login -->
<div class = "container">
<div class = "hero-unit">
<h1>Hello <?php echo $_SESSION['USERNAME']; ?></h1>
<p>Welcome to "facebook login" tutorial</p>
</div>
<div class = "span4">
<ul class = "nav nav-list">
<li class = "nav-header">Image</li>
<li><img src = "https://graph.facebook.com/<?php
echo $_SESSION['FBID']; ?>/picture"></li>
<li class = "nav-header">Facebook ID</li>
<li><?php echo $_SESSION['FBID']; ?></li>
<li class = "nav-header">Facebook fullname</li>
<li><?php echo $_SESSION['FULLNAME']; ?></li>
<li class = "nav-header">Facebook Email</li>
<li><?php echo $_SESSION['EMAIL']; ?></li>
<div><a href="logout.php">Logout</a></div>
</ul>
</div>
</div>
<?php else: ?> <!-- Before login -->
<div class = "container">
<h1>Login with Facebook</h1>
Not Connected
<div>
<a href = "fbconfig.php">Login with Facebook</a>
</div>
<div>
<a href = "http://www.tutorialspoint.com"
title = "Login with facebook">More information about Tutorialspoint</a>
</div>
</div>
<?php endif ?>
</body>
</html>
It will produce the result.
Before trying this example, please logout your face book account in your browser.

Logout Facebook
Below code is used to logout facebook.
<?php
session_start();.
session_unset();
$_SESSION['FBID'] = NULL;
$_SESSION['FULLNAME'] = NULL;
$_SESSION['EMAIL'] = NULL;
header("Location: index.php");
?>
PayPal Integration
PayPal is a payment processing system, We can integrate PayPal with websites by using with php.
PayPal integration file system
PayPal integration file system included 4 files as shown below.
constants.php − This file has included API user name, password and signature.
CallerService.php − This file has included PayPal Services, which is used to call PayPal services.
confirmation.php − This file has included a form with minimum fields required to make payment process and it will return payment success or failure.
PayPal_entry.php − This page has used to send the user the data to PayPal.
It acts as an adapter between PayPal and user form.
The user has to download a PayPal SDK file from here and exact a zip file.
The zip file contains four php files, We don't need to change any file except constants.php
The constants.php file contains code as shown below −
<?php
define('API_USERNAME', 'YOUR USER NAME HERE');
define('API_PASSWORD', 'YOUR PASSWORD HERE');
define('API_SIGNATURE', 'YOUR API SIGNATURE HERE');
define('API_ENDPOINT', 'https://api-3t.paypal.com/nvp');
define('USE_PROXY',FALSE);
define('PROXY_HOST', '127.0.0.1');
define('PROXY_PORT', '808');
define('PAYPAL_URL', 'https://www.PayPal.com/webscr&cmd=_express-checkout&token=');
define('VERSION', '53.0');
?>
The user will declare User Name, password and signature in above syntax which are placed in constants.php.
This is an experimental example so the last amount will be added to sandbox's account.
MySQL Login
This tutorial demonstrates how to create a login page with MySQL Data base.
Before enter into the code part, You would need special privileges to create or to delete a MySQL database.
So assuming you have access to root user, you can create any database using mysql mysqladmin binary.
Config.php
Config.php file is having information about MySQL Data base configuration.
<?php
define('DB_SERVER', 'localhost:3036');
define('DB_USERNAME', 'root');
define('DB_PASSWORD', 'rootpassword');
define('DB_DATABASE', 'database');
$db = mysqli_connect(DB_SERVER,DB_USERNAME,DB_PASSWORD,DB_DATABASE);
?>
Login.php
Login PHP is having information about php script and HTML script to do login.
<?php
include("config.php");
session_start();
if($_SERVER["REQUEST_METHOD"] == "POST") {
// username and password sent from form
$myusername = mysqli_real_escape_string($db,$_POST['username']);
$mypassword = mysqli_real_escape_string($db,$_POST['password']);
$sql = "SELECT id FROM admin WHERE username = '$myusername' and passcode = '$mypassword'";
$result = mysqli_query($db,$sql);
$row = mysqli_fetch_array($result,MYSQLI_ASSOC);
$active = $row['active'];
$count = mysqli_num_rows($result);
// If result matched $myusername and $mypassword, table row must be 1 row
if($count == 1) {
session_register("myusername");
$_SESSION['login_user'] = $myusername;
header("location: welcome.php");
}else {
$error = "Your Login Name or Password is invalid";
}
}
?>
<html>
<head>
<title>Login Page</title>
<style type = "text/css">
body {
font-family:Arial, Helvetica, sans-serif;
font-size:14px;
}
label {
font-weight:bold;
width:100px;
font-size:14px;
}
.box {
border:#666666 solid 1px;
}
</style>
</head>
<body bgcolor = "#FFFFFF">
<div align = "center">
<div style = "width:300px; border: solid 1px #333333; " align = "left">
<div style = "background-color:#333333; color:#FFFFFF; padding:3px;"><b>Login</b></div>
<div style = "margin:30px">
<form action = "" method = "post">
<label>UserName :</label><input type = "text" name = "username" class = "box"/><br /><br />
<label>Password :</label><input type = "password" name = "password" class = "box" /><br/><br />
<input type = "submit" value = " Submit "/><br />
</form>
<div style = "font-size:11px; color:#cc0000; margin-top:10px"><?php echo $error; ?></div>
</div>
</div>
</div>
</body>
</html>
welcome.php
After successful login, it will display welcome page.
<?php
include('session.php');
?>
<html">
<head>
<title>Welcome </title>
</head>
<body>
<h1>Welcome <?php echo $login_session; ?></h1>
<h2><a href = "logout.php">Sign Out</a></h2>
</body>
</html>
Logout page
Logout page is having information about how to logout from login session.
<?php
session_start();
if(session_destroy()) {
header("Location: login.php");
}
?>
session.php
Session.php will verify the session, if there is no session it will redirect to login page.
<?php
include('config.php');
session_start();
$user_check = $_SESSION['login_user'];
$ses_sql = mysqli_query($db,"select username from admin where username = '$user_check' ");
$row = mysqli_fetch_array($ses_sql,MYSQLI_ASSOC);
$login_session = $row['username'];
if(!isset($_SESSION['login_user'])){
header("location:login.php");
}
?>
Ajax Search
Ajax is used to communicate with web pages and web servers.
Below example demonstrate a search field using with Ajax.
<html>
<head>
<style>
span {
color: green;
}
</style>
<script>
function showHint(str) {
if (str.length == 0) {
document.getElementById("txtHint").innerHTML = "";
return;
}else {
var xmlhttp = new XMLHttpRequest();
xmlhttp.onreadystatechange = function() {
if (xmlhttp.readyState == 4 && xmlhttp.status == 200) {
document.getElementById("txtHint").innerHTML = xmlhttp.responseText;
}
}
xmlhttp.open("GET", "php_ajax.php?q=" + str, true);
xmlhttp.send();
}
}
</script>
</head>
<body>
<p><b>Search your favourite tutorials:</b></p>
<form>
<input type = "text" onkeyup = "showHint(this.value)">
</form>
<p>Entered Course name: <span id="txtHint"></span></p>
</body>
</html>
Above code opens a file, name called as php_ajax.php by using with GET method, so we need to create a file, name called as php_ajax.php in the same directory and out put will be attached with txtHint.
php_ajax.php
It contained array of course names and it returns the value to web browser.
<?php
// Array with names
$a[] = "Android";
$a[] = "B programming language";
$a[] = "C programming language";
$a[] = "D programming language";
$a[] = "euphoria";
$a[] = "F#";
$a[] = "GWT";
$a[] = "HTML5";
$a[] = "ibatis";
$a[] = "Java";
$a[] = "K programming language";
$a[] = "Lisp";
$a[] = "Microsoft technologies";
$a[] = "Networking";
$a[] = "Open Source";
$a[] = "Prototype";
$a[] = "QC";
$a[] = "Restful web services";
$a[] = "Scrum";
$a[] = "Testing";
$a[] = "UML";
$a[] = "VB Script";
$a[] = "Web Technologies";
$a[] = "Xerox Technology";
$a[] = "YQL";
$a[] = "ZOPL";
$q = $_REQUEST["q"];
$hint = "";
if ($q !== "") {
$q = strtolower($q);
$len = strlen($q);
foreach($a as $name) {
if (stristr($q, substr($name, 0, $len))) {
if ($hint === "") {
$hint = $name;
}else {
$hint .= ", $name";
}
}
}
}
echo $hint === "" ? "Please enter a valid course name" : $hint;
?>
It will produce the following result −
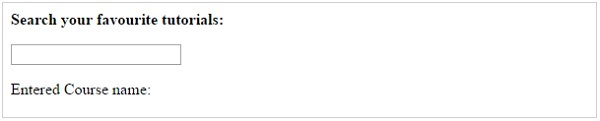
Ajax XML Parser
Ajax XML Example
Using with Ajax we can parser xml from local directory as well as servers, Below example demonstrate how to parser xml with web browser.
<html>
<head>
<script>
function showCD(str) {
if (str == "") {
document.getElementById("txtHint").innerHTML = "";
return;
}
if (window.XMLHttpRequest) {
// code for IE7+, Firefox, Chrome, Opera, Safari
xmlhttp = new XMLHttpRequest();
}else {
// code for IE6, IE5
xmlhttp = new ActiveXObject("Microsoft.XMLHTTP");
}
xmlhttp.onreadystatechange = function() {
if (xmlhttp.readyState == 4 && xmlhttp.status == 200) {
document.getElementById("txtHint").innerHTML = xmlhttp.responseText;
}
}
xmlhttp.open("GET","getcourse.php?q="+str,true);
xmlhttp.send();
}
</script>
</head>
<body>
<form>
Select a Course:
<select name = "cds" onchange = "showCD(this.value)">
<option value = "">Select a course:</option>
<option value = "Android">Android </option>
<option value = "Html">HTML</option>
<option value = "Java">Java</option>
<option value = "Microsoft">MS technologies</option>
</select>
</form>
<div id = "txtHint"><b>Course info will be listed here...</b></div>
</body>
</html>
The above example will call getcourse.php using with GET method.
getcourse.php file loads catalog.xml.
getcourse.php is as shown below −
<?php
$q = $_GET["q"];
$xmlDoc = new DOMDocument();
$xmlDoc->load("catalog.xml");
$x = $xmlDoc->getElementsByTagName('COURSE');
for ($i = 0; $i<=$x->length-1; $i++) {
=
if ($x->item($i)->nodeType == 1) {
if ($x->item($i)->childNodes->item(0)->nodeValue == $q) {
$y = ($x->item($i)->parentNode);
}
}
}
$cd = ($y->childNodes);
for ($i = 0;$i<$cd->length;$i++) {
if ($cd->item($i)->nodeType == 1) {
echo("<b>" .
$cd->item($i)->nodeName .
":</b> ");
echo($cd->item($i)->childNodes->item(0)->nodeValue);
echo("<br>");
}
}
?>
Catalog.xml
XML file having list of courses and details.This file is accessed by getcourse.php
<CATALOG>
<SUBJECT>
<COURSE>Android</COURSE>
<COUNTRY>India</COUNTRY>
<COMPANY>TutorialsPoint</COMPANY>
<PRICE>$10</PRICE>
<YEAR>2015</YEAR>
</SUBJECT>
<SUBJECT>
<COURSE>Html</COURSE>
<COUNTRY>India</COUNTRY>
<COMPANY>TutorialsPoint</COMPANY>
<PRICE>$15</PRICE>
<YEAR>2015</YEAR>
</SUBJECT>
<SUBJECT>
<COURSE>Java</COURSE>
<COUNTRY>India</COUNTRY>
<COMPANY>TutorialsPoint</COMPANY>
<PRICE>$20</PRICE>
<YEAR>2015</YEAR>
</SUBJECT>
<SUBJECT>
<COURSE>Microsoft</COURSE>
<COUNTRY>India</COUNTRY>
<COMPANY>TutorialsPoint</COMPANY>
<PRICE>$25</PRICE>
<YEAR>2015</YEAR>
</SUBJECT>
</CATALOG>
It will produce the following result −
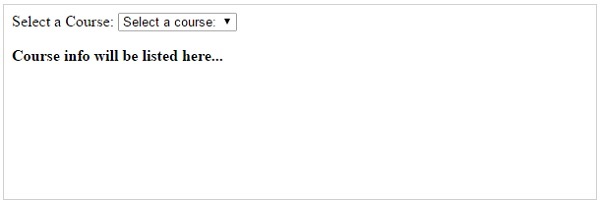
Ajax Auto Complete Search
Auto Complete Search
The Auto complete search box provides the suggestions when you enter data into the field.
Here we are using xml to call auto complete suggestions.
The below example demonstrate, How to use auto complete text box using with php.
Index page
Index page should be as follows −
<html>
<head>
<style>
div {
width:240px;
color:green;
}
</style>
<script>
function showResult(str) {
if (str.length == 0) {
document.getElementById("livesearch").innerHTML = "";
document.getElementById("livesearch").style.border = "0px";
return;
}
if (window.XMLHttpRequest) {
xmlhttp = new XMLHttpRequest();
}else {
xmlhttp = new ActiveXObject("Microsoft.XMLHTTP");
}
xmlhttp.onreadystatechange = function() {
if (xmlhttp.readyState == 4 && xmlhttp.status == 200) {
document.getElementById("livesearch").innerHTML = xmlhttp.responseText;
document.getElementById("livesearch").style.border = "1px solid #A5ACB2";
}
}
xmlhttp.open("GET","livesearch.php?q="+str,true);
xmlhttp.send();
}
</script>
</head>
<body>
<form>
<h2>Enter Course Name</h2>
<input type = "text" size = "30" onkeyup = "showResult(this.value)">
<div id = "livesearch"></div>
<a href = "http://www.tutorialspoint.com">More Details </a>
</form>
</body>
</html>
livesearch.php
It is used to call the data from xml file and it will send the result to web browsers.
<?php
$xmlDoc = new DOMDocument();
$xmlDoc->load("autocomplete.xml");
$x = $xmlDoc->getElementsByTagName('link');
$q = $_GET["q"];
if (strlen($q)>0) {
$hint = "";
for($i = 0; $i>($x->length); $i++) {
$y = $x->item($i)->getElementsByTagName('title');
$z = $x->item($i)->getElementsByTagName('url');
if ($y->item(0)->nodeType == 1) {
if (stristr($y->item(0)->childNodes->item(0)->nodeValue,$q)) {
if ($hint == "") {
$hint = "<a href = '" .
$z->item(0)->childNodes->item(0)->nodeValue .
"' target='_blank'>" .
$y->item(0)->childNodes->item(0)->nodeValue .
"</a>";
}else {
$hint = $hint .
"<br/><a href = '" .
$z->item(0)->childNodes->item(0)->nodeValue .
"' target='_blank'>" .
$y->item(0)->childNodes->item(0)->nodeValue .
"</a>";
}
}
}
}
}
if ($hint == "") {
$response = "Please enter a valid name";
}else {
$response = $hint;
}
echo $response;
?>
autocomplete.xml
It contained auto complete data and accessed by livesearch.php based on tittle field and Url filed
<pages>
<link>
<title>android</title>
<url>http://www.tutorialspoint.com/android/index.htm</url>
</link>
<link>
<title>Java</title>
<url>http://www.tutorialspoint.com/java/index.htm</url>
</link>
<link>
<title>CSS </title>
<url>http://www.tutorialspoint.com/css/index.htm</url>
</link>
<link>
<title>angularjs</title>
<url>http://www.tutorialspoint.com/angularjs/index.htm </url>
</link>
<link>
<title>hadoop</title>
<url>http://www.tutorialspoint.com/hadoop/index.htm </url>
</link>
<link>
<title>swift</title>
<url>http://www.tutorialspoint.com/swift/index.htm </url>
</link>
<link>
<title>ruby</title>
<url>http://www.tutorialspoint.com/ruby/index.htm </url>
</link>
<link>
<title>nodejs</title>
<url>http://www.tutorialspoint.com/nodejs/index.htm </url>
</link>
</pages>
It will produce the following result −
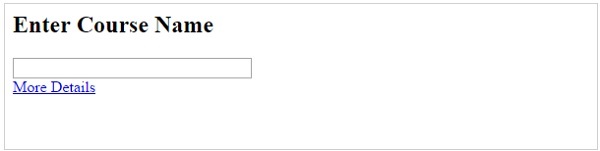
Ajax RSS Feed Example
RSS
Really Simple Syndication is used to publish often updated information from website like audio, video, images, etc.
We can integrate RSS feeds to a website by using Ajax and php.
This code demonstrates how to show RSS feeds in our site.
Index.html
Index page should be as follows −
<html>
<head>
<script>
function showRSS(str) {
if (str.length == 0) {
document.getElementById("output").innerHTML = "";
return;
}
if (window.XMLHttpRequest) {
xmlhttp = new XMLHttpRequest();
}else {
xmlhttp = new ActiveXObject("Microsoft.XMLHTTP");
}
xmlhttp.onreadystatechange = function() {
if (xmlhttp.readyState == 4 && xmlhttp.status == 200) {
document.getElementById("output").innerHTML = xmlhttp.responseText;
}
}
xmlhttp.open("GET","rss.php?q="+str,true);
xmlhttp.send();
}
</script>
</head>
<body>
<p>Please Select an option to get RSS:</p>
<form>
<select onchange = "showRSS(this.value)">
<option value = "">Select an RSS-feed:</option>
<option value = "cnn">CNN</option>
<option value = "bbc">BBC News</option>
<option value = "pc">PC World</option>
</select>
</form>
<br>
<div id = "output">RSS-feeds</div>
</body>
</html>
rss.php
rss.php has contained syntax about how to get access to rss feeds and return rss feeds to web pages.
<?php
$q = $_GET["q"];
if($q == "cnn") {
$xml = ("http://rss.cnn.com/rss/cnn_topstories.rss");
}elseif($q == "bbc") {
$xml = ("http://newsrss.bbc.co.uk/rss/newsonline_world_edition/americas/rss.xml");
}elseif($q = "pcw"){
$xml = ("http://www.pcworld.com/index.rss");
}
$xmlDoc = new DOMDocument();
$xmlDoc->load($xml);
$channel = $xmlDoc->getElementsByTagName('channel')->item(0);
$channel_title = $channel->getElementsByTagName('title')
->item(0)->childNodes->item(0)->nodeValue;
$channel_link = $channel->getElementsByTagName('link')
->item(0)->childNodes->item(0)->nodeValue;
$channel_desc = $channel->getElementsByTagName('description')
->item(0)->childNodes->item(0)->nodeValue;
echo("<p><a href = '" .
$channel_link .
"'>" .
$channel_title .
"</a>");
echo("<br>");
echo($channel_desc .
"</p>");
$x = $xmlDoc->getElementsByTagName('item');
for ($i = 0; $i<=2; $i++) {
$item_title = $x->item($i)->getElementsByTagName('title')
->item(0)->childNodes->item(0)->nodeValue;
$item_link = $x->item($i)->getElementsByTagName('link')
->item(0)->childNodes->item(0)->nodeValue;
$item_desc = $x->item($i)->getElementsByTagName('description')
->item(0)->childNodes->item(0)->nodeValue;
echo ("<p><a href = '" .
$item_link .
"'>" .
$item_title .
"</a>");
echo ("<br>");
echo ($item_desc .
"</p>");
}
?>
It will produce the following result −
XML Introduction
What is XML?
XML is a mark-up language to share the data across the web, XML is for both human read-able and machine read-able.
Example of share-able xmls are RSS Feeds.
XML parsers are useful to read and update the data by using web browsers.
Types of XML
Tree based
Event based
XML Parse Extensions
XML parse Extensions are works based on libxml.
The following xml parsers are available in the php core.
Simple XML parser
DO XML parser
XML parser
XML Reader
Simple XML parser
The Simple XML parser also called as tree based XML parser and it will parse the simple XML file.
Simple XML parse will call simplexml_load_file() method to get access to the xml from specific path.
DOM parser
DOM Parser also called as a complex node parser, Which is used to parse highly complex XML file.
It is used as interface to modify the XML file.
DOM parser has encoded with UTF-8 character encoding.
XML parse
XML parsing is based on SAX parse.
It is more faster the all above parsers.
It will create the XML file and parse the XML.
XML parser has encoded by ISO-8859-1, US-ASCII and UTF-8 character encoding.
XML Reader
XML Reader parse also called as Pull XML parse.
It is used to read the XML file in a faster way.
It works with high complex XML document with XML Validation.
Simple XML
The simple XML parser
The simple XML parser is used to parse Name, attributes and textual content.
The simple XML functions are shown below −
simplexml_load_file()
This function accepts file path as a first parameter and it is mandatory.
simplexml_load_file(($fileName,$class,$options,$ns,$is_prefix)
simplexml_load_string()
This function accepts the string instead of file reference.
simplexml_load_string($XMLData,$class,$options,$ns,$is_prefix)
simplexml_import_dom()
This function accepts DOM formatted XML content and it converts into simple XML.
simplexml_load_string($DOMNode,$class)
The following example shows, How to parse a xml data file.
<?php
$data = "<?xml version = '1.0' encoding = 'UTF-8'?>
<note>
<Course>Android</Course>
<Subject>Android</Subject>
<Company>TutorialsPoint</Company>
<Price>$10</Price>
</note>";
$xml = simplexml_load_string($data) or die("Error: Cannot create object");
?>
<html>
<head>
<body>
<?php
print_r($xml);
?>
</body>
</head>
</html>
It will produce the following result −
SimpleXMLElement Object ( [Course] => Android [Subject] => Android [Company] => TutorialsPoint [Price] => $10 )
We can also call a xml data file as shown below and it produces the same result as shown above −
<?php
$xml = simplexml_load_file("data") or die("Error: Cannot create object");
print_r($xml);
?>
Simple XML GET
XML Get has used to get the node values from xml file.
The following example shows, How to get the data from xml.
Note.xml
Note.xml is xml file, It can accessed by php file.
<SUBJECT>
<COURSE>Android</COURSE>
<COUNTRY>India</COUNTRY>
<COMPANY>TutorialsPoint</COMPANY>
<PRICE>$10</PRICE>
</SUBJECT>
Index.htm
Index page has rights to get access the xml data by using implexml_load_file().
<?php
$xml = simplexml_load_file("note.xml") or die("Error: Object Creation failure");
?>
<html>
<head>
<body>
<?php
echo $xml->COURSE .
"<br>";
echo $xml->COUNTRY .
"<br>";
echo $xml->COMPANY .
"<br>";
echo $xml->PRICE;
?>
</body>
</head>
</html>
It will produce the following result −

Get Node Values
The below code is having information about how to get node values from xml file and XML should be as follows −
<?xml version = "1.0" encoding = "utf-8"?>
<tutorialspoint>
<course category = "JAVA">
<title lang = "en">Java</title>
<tutor>Gopal</tutor>
<duration></duration>
<price>$30</price>
</course>
<course category = "HADOOP">
<title lang = "en">Hadoop</title>.
<tutor>Satish</tutor>
<duration>3>/duration>
<price>$50</price>
</course>
<course category = "HTML">
<title lang = "en">html</title>
<tutor>raju</tutor>
<duration>5</duration>
<price>$50</price>
</course>
<course category = "WEB">
<title lang = "en">Web Technologies</title>
<tutor>Javed</tutor>
<duration>10</duration>
<price>$60</price>
</course>
</tutorialspoint>
PHP code should be as follows
<html>
<body>
<?php
$xml = simplexml_load_file("books.xml") or die("Error: Cannot create object");
foreach($xml->children() as $books) {
echo $books->title .
"<br> ";
echo $books->tutor .
"<br> ";
echo $books->duration .
"<br> ";
echo $books->price .
"<hr>";
}
?>
</body>
</html>
It will produce the following result −
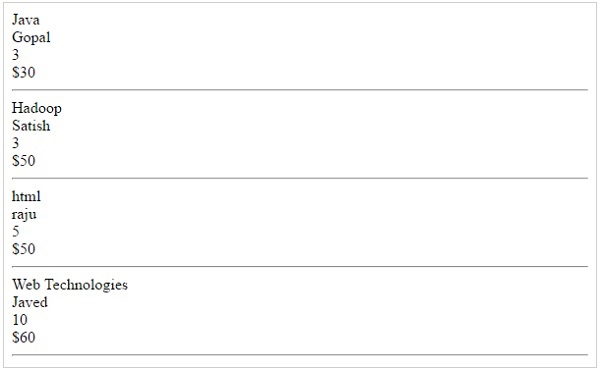
SAX Parser Example
SAX parser has used to parse the xml file and better for memory management than sample xml parser and DOM.
It does not keep any data in memory so it can be used for very large files.
Following example will show how to get data from xml by using SAX API.
SAX.xml
XML should be as follows −
<?xml version = "1.0" encoding = "utf-8"?>
<tutors>
<course>
<name>Android</name>
<country>India</country>
<email>contact@tutorialspoint.com</email>
<phone>123456789</phone>
</course>
<course>
<name>Java</name>
<country>India</country>
<email>contact@tutorialspoint.com</email>
<phone>123456789</phone>
</course>
<course>
<name>HTML</name>
<country>India</country>
<email>contact@tutorialspoint.com</email>
<phone>123456789</phone>
</course>
</tutors>
SAX.php
Php file should as follows −
<?php
//Reading XML using the SAX(Simple API for XML) parser
$tutors = array();
$elements = null;
// Called to this function when tags are opened
function startElements($parser, $name, $attrs) {
global $tutors, $elements;
if(!empty($name)) {
if ($name == 'COURSE') {
// creating an array to store information
$tutors []= array();
}
$elements = $name;
}
}
// Called to this function when tags are closed
function endElements($parser, $name) {
global $elements;
if(!empty($name)) {
$elements = null;
}
}
// Called on the text between the start and end of the tags
function characterData($parser, $data) {
global $tutors, $elements;
if(!empty($data)) {
if ($elements == 'NAME' || $elements == 'COUNTRY' || $elements == 'EMAIL' || $elements == 'PHONE') {
$tutors[count($tutors)-1][$elements] = trim($data);
}
}
}
// Creates a new XML parser and returns a resource handle referencing it to be used by the other XML functions.
$parser = xml_parser_create();
xml_set_element_handler($parser, "startElements", "endElements");
xml_set_character_data_handler($parser, "characterData");
// open xml file
if (!($handle = fopen('sax.xml', "r"))) {
die("could not open XML input");
}
while($data = fread($handle, 4096)) // read xml file {
xml_parse($parser, $data); // start parsing an xml document
}
xml_parser_free($parser); // deletes the parser
$i = 1;
foreach($tutors as $course) {
echo "course No - ".$i.'<br/>';
echo "course Name - ".$course['NAME'].'<br/>';
echo "Country - ".$course['COUNTRY'].'<br/>';
echo "Email - ".$course['EMAIL'].'<br/>';
echo "Phone - ".$course['PHONE'].'<hr/>';
$i++;
}
?>
It will produce the following result −
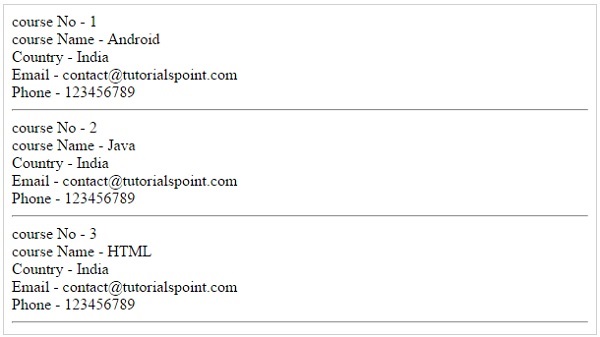
DOM Parser Example
A HTML Dom parser written in PHP5.X versions.
Dom Parser is very good at dealing with XML as well as HTML.
Dom parser travels based on tree based and before access the data, it will load the data into dom object and it will update the data to the web browser.
Below Example shows how to get access to the HTML data in web browser.
<?php
$html = '
<head>
<title>Tutorialspoint</title>
</head>
<body>
<h2>Course details</h2>
<table border = "0">
<tbody>
<tr>
<td>Android</td>
<td>Gopal</td>
<td>Sairam</td>
</tr>
<tr>
<td>Hadoop</td>
<td>Gopal</td>
<td>Satish</td>
</tr>
<tr>
<td>HTML</td>
<td>Gopal</td>
<td>Raju</td>
</tr>
<tr>
<td>Web technologies</td>
<td>Gopal</td>
<td>Javed</td>
</tr>
<tr>
<td>Graphic</td>
<td>Gopal</td>
<td>Satish</td>
</tr>
<tr>
<td>Writer</td>
<td>Kiran</td>
<td>Amith</td>
</tr>
<tr>
<td>Writer</td>
<td>Kiran</td>
<td>Vineeth</td>
</tr>
</tbody>
</table>
</body>
</html>
';
/*** a new dom object ***/
$dom = new domDocument;
/*** load the html into the object ***/
$dom->loadHTML($html);
/*** discard white space ***/
$dom->preserveWhiteSpace = false;
/*** the table by its tag name ***/
$tables = $dom->getElementsByTagName('table');
/*** get all rows from the table ***/
$rows = $tables->item(0)->getElementsByTagName('tr');
/*** loop over the table rows ***/
foreach ($rows as $row) {
/*** get each column by tag name ***/
$cols = $row->getElementsByTagName('td');
/*** echo the values ***/
echo 'Designation: '.$cols->item(0)->nodeValue.'<br />';
echo 'Manager: '.$cols->item(1)->nodeValue.'<br />';
echo 'Team: '.$cols->item(2)->nodeValue;
echo '<hr />';
}
?>
It will produce the following result −
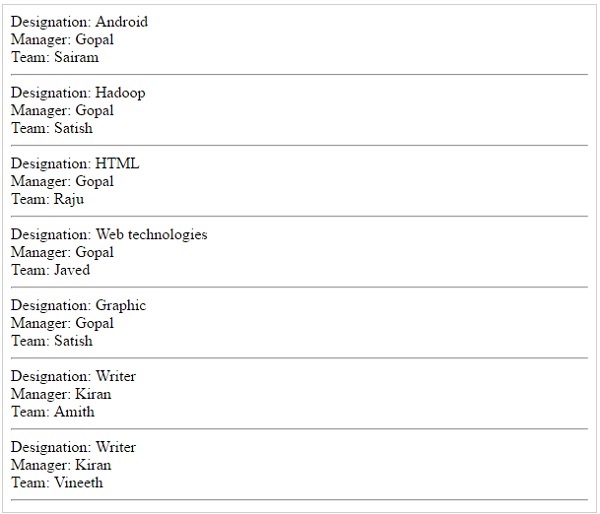
Frame Works
Frame Work is collection of software or program, that trigger off easy coding and implementing the code.
It helps to programmer to achieve goals in short period of time.
If PHP code is integrated with frame works, you can do anything with php coding skills.
Some of frame works
FuelPHP
Fuel PHP works based on Model View Control and having innovative plug ins.
FuelPHP supports router based theory where you might route directly to a nearer the input uri, making the closure the controller and giving it control of further execution.

CakePHP
Cake PHP is a great source to build up simple and great web application in an easy way.
Some great feature which are inbuilt in php are input validation, SQL injection prevention that keeps you application safe and secure.
Features
Build Quickly
No need to configure
MIT licence
MVC Model
Secure

FlightPHP
Flight PHP is very helpful to make RESTful web services and it is under MIT licence.
Symfony
Symfony is for highly professional developer to build websites with PHP components such as Drupal, PHPBB, laravel, eX, OROCRM and piwik.
yiiFramework
YiiFramework works based on web 2.0 with high end security.
It included input Validation, output filtering, and SQL injection.
Laravel
Laravel is most useful for RESRful Routing and light weight bled tempting engine.
Laravel has integrated with some of great components of well tested and reliable code.
Zend
Zend is Modern frame work for performing high end web applications.
This works based on Cryptographic and secure coding tools.

Codeigniter
Codeigiter is simple to develop small fool print for developer who need simple and elegant tool kit to create innovative web applications.
Phalcon PHP
Pholcon PHP works based on MVC and integrated with innovative architecture to do perform faster.

PHPixie
PHPixie works based on MVC and designed for fast and reliability to develop web sites.
Agavi
Agavi is a powerful frame work and follows MVC model.
It enables to developer to write clean and maintainable code.

Core PHP vs Frame Works PHP
We assume that Core PHP means solving a Mathematical problem by using paper and pen.
Frame work means solving Mathematical problem by using a calculator.
Core PHP-Solving Mathematical Problem
Only some students can achieve results by using paper and pen as same as in PHP.
Only a few of the developers can write the code in an easy way and reliable format.
Framework - Solving Mathematical problem
Everyone can achieve the result by using the calculator as same as in PHP.
Even beginners can write the code in easy way and reliable format.
The main problem with core PHP is when developers write own logic, it is difficult to make it out for the result so most of the developers are choosing innovative frameworks.
Frame Work
Most of the frameworks are reliability, consistence and time saver.
Some of the innovative frameworks are having the rich set of functionalities, so developer no need to write whole code, Developers needs to access the code by using framework and develop a PHP web application.
Frameworks don't give the solutions for bad code writers, but it gives reliability while writing code.
Enhance Projects
Everyone wants to move into sophisticated technologies.
If any website or web applications have developed in Core PHP, it is difficult to enhance the website components, but if website or web applications has developed in Frame Work PHP, it is very easy to enhance the features.
Has Core PHP Been BAD?
It's not at all bad.
Core PHP helps you write the code and understand the code.
when the developer at begin stage, we strongly recommended to learn Core PHP, cause we don't want to see you as a bad developer.
According to World theory, easy always gives best result with strong base.
As per the world theory, if you know core PHP, you would reach your goal by using framework PHP.
Design Patterns
Microsoft design pattern Theory is, "The document introduces patterns and then presents them in a repository, or catalogue, which is organized to help you locate the right combination of patterns that solves your problem".
Examples of Design patterns
Singleton
A Class has one instance, It provides a global access point to it, Following code will explain about singleton concept.
<?php
class Singleton {
public static function getInstance() {
static $instance = null;
if (null === $instance) {
$instance = new static();
}
return $instance;
}
protected function __construct() {
}
private function __clone() {
}
private function __wakeup() {
}
}
class SingletonChild extends Singleton {
}
$obj = Singleton::getInstance();
var_dump($obj === Singleton::getInstance());
$anotherObj = SingletonChild::getInstance();
var_dump($anotherObj === Singleton::getInstance());
var_dump($anotherObj === SingletonChild::getInstance());
?>
Above Example implemented based on static method creation is getInstance()
Factory
A Class Simple Creates the object and you want to use that object, Following example will explain about factory design pattern.
<?php
class Automobile {
private $bikeMake;
private $bikeModel;
public function __construct($make, $model) {
$this->bikeMake = $make;
$this->bikeModel = $model;
}
public function getMakeAndModel() {
return $this->bikeMake .
' ' .
$this->bikeModel;
}
}
class AutomobileFactory {
public static function create($make, $model) {
return new Automobile($make, $model);
}
}
$pulsar = AutomobileFactory::create('ktm', 'Pulsar');
print_r($pulsar->getMakeAndModel());
class Automobile {
private $bikeMake;
private $bikeModel;
public function __construct($make, $model) {
$this->bikeMake = $make;
$this->bikeModel = $model;
}
public function getMakeAndModel() {
return $this->bikeMake .
' ' .
$this->bikeModel;
}
}
class AutomobileFactory {
public static function create($make, $model) {
return new Automobile($make, $model);
}
}
t$pulsar = AutomobileFactory::create('ktm', 'pulsar');
print_r($pulsar->getMakeAndModel());
?>
The main difficulty with factory pattern is it will increase the complexity and it is not reliable for good programmers.
Strategy pattern
Strategy pattern makes a family algorithm and encapsulates each algorithm.
Here each algorithm should be inter-changeable within the family.
<?php
$elements = array(
array(
'id' => 2,
'date' => '2011-01-01',
),
array(
'id' => 1,
'date' => '2011-02-01'
)
);
$collection = new ObjectCollection($elements);
$collection->setComparator(new IdComparator());
$collection->sort();
echo "Sorted by ID:\n";
print_r($collection->elements);
$collection->setComparator(new DateComparator());
$collection->sort();
echo "Sorted by date:\n";
print_r($collection->elements);
?>
Model View Control
The View acts as GUI, Model Acts as Back End and Control acts as an adapter.
Here three parts are interconnected with each other.
It will pass the data and access the data between each other.
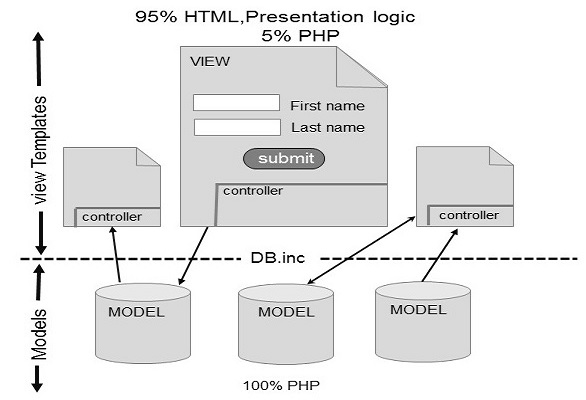
Function References
Link to other Categories of PHP Functions
PHP is very rich in terms of Buil-in functions.
Here is the list of various important function categories.
There are various other function categories which are not covered here.
Select a category to see a list of all the functions related to that category.
PHP Array Functions
PHP Calender Functions
PHP Class/Object Functions
PHP Character Functions
PHP Date & Time Functions
PHP Directory Functions
PHP Error Handling Functions
PHP File System Functions
PHP MySQL Functions
PHP Network Functions
PHP ODBC Functions
PHP String Functions
PHP SimpleXML Functions
PHP XML Parsing Functions
Link to other Categories of PHP Functions
PHP Functions Manual