Windows Notes
Must Watch!
Windows CMD commands
Windows CMD commands
Windows PowerShell commands
Windows PowerShell commands
task schedule
%windir%\system32\taskschd.msc /s
开始菜单位置
C:\Users\Administrator\AppData\Roaming\Microsoft\Windows\Start Menu\Programs\Startup
进程和线程
前言
先来看看一则小故事
我们写好的一行行代码,为了让其工作起来,我们还得把它送进城(进程)里,那既然进了城里,那肯定不能胡作非为了。
城里人有城里人的规矩,城中有个专门管辖你们的城管(操作系统),人家让你休息就休息,让你工作就工作,毕竟摊位(CPU)就一个,每个人都要占这个摊位来工作,城里要工作的人多着去了。
所以城管为了公平起见,它使用一种策略(调度)方式,给每个人一个固定的工作时间(时间片),时间到了就会通知你去休息而换另外一个人上场工作。
另外,在休息时候你也不能偷懒,要记住工作到哪了,不然下次到你工作了,你忘记工作到哪了,那还怎么继续?
有的人,可能还进入了县城(线程)工作,这里相对轻松一些,在休息的时候,要记住的东西相对较少,而且还能共享城里的资源。
“哎哟,难道本文内容是进程和线程?”
可以,聪明的你猜出来了,也不枉费我瞎编乱造的故事了。
进程和线程对于写代码的我们,真的天天见、日日见了,但见的多不代表你就熟悉它们,比如简单问你一句,你知道它们的工作原理和区别吗?
不知道没关系,今天就要跟大家讨论操作系统的进程和线程。
![]() 提纲
提纲
正文
进程
我们编写的代码只是一个存储在硬盘的静态文件,通过编译后就会生成二进制可执行文件,当我们运行这个可执行文件后,它会被装载到内存中,接着 CPU 会执行程序中的每一条指令,那么这个运行中的程序,就被称为「进程」。
现在我们考虑有一个会读取硬盘文件数据的程序被执行了,那么当运行到读取文件的指令时,就会去从硬盘读取数据,但是硬盘的读写速度是非常慢的,那么在这个时候,如果 CPU 傻傻的等硬盘返回数据的话,那 CPU 的利用率是非常低的。
做个类比,你去煮开水时,你会傻傻的等水壶烧开吗?很明显,小孩也不会傻等。
我们可以在水壶烧开之前去做其他事情。
当水壶烧开了,我们自然就会听到“嘀嘀嘀”的声音,于是再把烧开的水倒入到水杯里就好了。
所以,当进程要从硬盘读取数据时,CPU 不需要阻塞等待数据的返回,而是去执行另外的进程。
当硬盘数据返回时,CPU 会收到个中断,于是 CPU 再继续运行这个进程。
![]() 进程 1 与进程 2 切换
这种多个程序、交替执行的思想,就有 CPU 管理多个进程的初步想法。
对于一个支持多进程的系统,CPU 会从一个进程快速切换至另一个进程,其间每个进程各运行几十或几百个毫秒。
虽然单核的 CPU 在某一个瞬间,只能运行一个进程。
但在 1 秒钟期间,它可能会运行多个进程,这样就产生并行的错觉,实际上这是并发。
并发和并行有什么区别?
一图胜千言。
进程 1 与进程 2 切换
这种多个程序、交替执行的思想,就有 CPU 管理多个进程的初步想法。
对于一个支持多进程的系统,CPU 会从一个进程快速切换至另一个进程,其间每个进程各运行几十或几百个毫秒。
虽然单核的 CPU 在某一个瞬间,只能运行一个进程。
但在 1 秒钟期间,它可能会运行多个进程,这样就产生并行的错觉,实际上这是并发。
并发和并行有什么区别?
一图胜千言。
![]() 并发与并行
进程与程序的关系的类比
到了晚饭时间,一对小情侣肚子都咕咕叫了,于是男生见机行事,就想给女生做晚饭,所以他就在网上找了辣子鸡的菜谱,接着买了一些鸡肉、辣椒、香料等材料,然后边看边学边做这道菜。
并发与并行
进程与程序的关系的类比
到了晚饭时间,一对小情侣肚子都咕咕叫了,于是男生见机行事,就想给女生做晚饭,所以他就在网上找了辣子鸡的菜谱,接着买了一些鸡肉、辣椒、香料等材料,然后边看边学边做这道菜。
![]() 突然,女生说她想喝可乐,那么男生只好把做菜的事情暂停一下,并在手机菜谱标记做到哪一个步骤,把状态信息记录了下来。
然后男生听从女生的指令,跑去下楼买了一瓶冰可乐后,又回到厨房继续做菜。
这体现了,CPU 可以从一个进程(做菜)切换到另外一个进程(买可乐),在切换前必须要记录当前进程中运行的状态信息,以备下次切换回来的时候可以恢复执行。
所以,可以发现进程有着「运行 - 暂停 - 运行」的活动规律。
突然,女生说她想喝可乐,那么男生只好把做菜的事情暂停一下,并在手机菜谱标记做到哪一个步骤,把状态信息记录了下来。
然后男生听从女生的指令,跑去下楼买了一瓶冰可乐后,又回到厨房继续做菜。
这体现了,CPU 可以从一个进程(做菜)切换到另外一个进程(买可乐),在切换前必须要记录当前进程中运行的状态信息,以备下次切换回来的时候可以恢复执行。
所以,可以发现进程有着「运行 - 暂停 - 运行」的活动规律。
进程的状态
在上面,我们知道了进程有着「运行 - 暂停 - 运行」的活动规律。
一般说来,一个进程并不是自始至终连续不停地运行的,它与并发执行中的其他进程的执行是相互制约的。
它有时处于运行状态,有时又由于某种原因而暂停运行处于等待状态,当使它暂停的原因消失后,它又进入准备运行状态。
所以,在一个进程的活动期间至少具备三种基本状态,即运行状态、就绪状态、阻塞状态。
![]() 进程的三种基本状态
上图中各个状态的意义:
运行状态(Runing):该时刻进程占用 CPU;
就绪状态(Ready):可运行,但因为其他进程正在运行而暂停停止;
阻塞状态(Blocked):该进程正在等待某一事件发生(如等待输入/输出操作的完成)而暂时停止运行,这时,即使给它CPU控制权,它也无法运行;
当然,进程另外两个基本状态:
创建状态(new):进程正在被创建时的状态;
结束状态(Exit):进程正在从系统中消失时的状态;
于是,一个完整的进程状态的变迁如下图:
进程的三种基本状态
上图中各个状态的意义:
运行状态(Runing):该时刻进程占用 CPU;
就绪状态(Ready):可运行,但因为其他进程正在运行而暂停停止;
阻塞状态(Blocked):该进程正在等待某一事件发生(如等待输入/输出操作的完成)而暂时停止运行,这时,即使给它CPU控制权,它也无法运行;
当然,进程另外两个基本状态:
创建状态(new):进程正在被创建时的状态;
结束状态(Exit):进程正在从系统中消失时的状态;
于是,一个完整的进程状态的变迁如下图:
![]() 进程五种状态的变迁
再来详细说明一下进程的状态变迁:
NULL > 创建状态:一个新进程被创建时的第一个状态;
创建状态 > 就绪状态:当进程被创建完成并初始化后,一切就绪准备运行时,变为就绪状态,这个过程是很快的;
就绪态 > 运行状态:处于就绪状态的进程被操作系统的进程调度器选中后,就分配给 CPU 正式运行该进程;
运行状态 > 结束状态:当进程已经运行完成或出错时,会被操作系统作结束状态处理;
运行状态 > 就绪状态:处于运行状态的进程在运行过程中,由于分配给它的运行时间片用完,操作系统会把该进程变为就绪态,接着从就绪态选中另外一个进程运行;
运行状态 > 阻塞状态:当进程请求某个事件且必须等待时,例如请求 I/O 事件;
阻塞状态 > 就绪状态:当进程要等待的事件完成时,它从阻塞状态变到就绪状态;
另外,还有一个状态叫挂起状态,它表示进程没有占有物理内存空间。
这跟阻塞状态是不一样,阻塞状态是等待某个事件的返回。
由于虚拟内存管理原因,进程的所使用的空间可能并没有映射到物理内存,而是在硬盘上,这时进程就会出现挂起状态,另外调用 sleep 也会被挂起。
进程五种状态的变迁
再来详细说明一下进程的状态变迁:
NULL > 创建状态:一个新进程被创建时的第一个状态;
创建状态 > 就绪状态:当进程被创建完成并初始化后,一切就绪准备运行时,变为就绪状态,这个过程是很快的;
就绪态 > 运行状态:处于就绪状态的进程被操作系统的进程调度器选中后,就分配给 CPU 正式运行该进程;
运行状态 > 结束状态:当进程已经运行完成或出错时,会被操作系统作结束状态处理;
运行状态 > 就绪状态:处于运行状态的进程在运行过程中,由于分配给它的运行时间片用完,操作系统会把该进程变为就绪态,接着从就绪态选中另外一个进程运行;
运行状态 > 阻塞状态:当进程请求某个事件且必须等待时,例如请求 I/O 事件;
阻塞状态 > 就绪状态:当进程要等待的事件完成时,它从阻塞状态变到就绪状态;
另外,还有一个状态叫挂起状态,它表示进程没有占有物理内存空间。
这跟阻塞状态是不一样,阻塞状态是等待某个事件的返回。
由于虚拟内存管理原因,进程的所使用的空间可能并没有映射到物理内存,而是在硬盘上,这时进程就会出现挂起状态,另外调用 sleep 也会被挂起。
![]() 虚拟内存管理-换入换出
挂起状态可以分为两种:
阻塞挂起状态:进程在外存(硬盘)并等待某个事件的出现;
就绪挂起状态:进程在外存(硬盘),但只要进入内存,即刻立刻运行;
这两种挂起状态加上前面的五种状态,就变成了七种状态变迁(留给我的颜色不多了),见如下图:
虚拟内存管理-换入换出
挂起状态可以分为两种:
阻塞挂起状态:进程在外存(硬盘)并等待某个事件的出现;
就绪挂起状态:进程在外存(硬盘),但只要进入内存,即刻立刻运行;
这两种挂起状态加上前面的五种状态,就变成了七种状态变迁(留给我的颜色不多了),见如下图:
![]() 七种状态变迁
七种状态变迁
进程的控制结构
在操作系统中,是用进程控制块(process control block,PCB)数据结构来描述进程的。
那 PCB 是什么呢?打开知乎搜索你就会发现这个东西并不是那么简单。
![]() 知乎搜 PCB 的提示
打住打住,我们是个正经的人,怎么会去看那些问题呢?是吧,回来回来。
PCB 是进程存在的唯一标识,这意味着一个进程的存在,必然会有一个 PCB,如果进程消失了,那么 PCB 也会随之消失。
PCB 具体包含什么信息呢?
进程描述信息:
进程标识符:标识各个进程,每个进程都有一个并且唯一的标识符;
用户标识符:进程归属的用户,用户标识符主要为共享和保护服务;
进程控制和管理信息:
进程当前状态,如 new、ready、running、waiting 或 blocked 等;
进程优先级:进程抢占 CPU 时的优先级;
资源分配清单:
有关内存地址空间或虚拟地址空间的信息,所打开文件的列表和所使用的 I/O 设备信息。
CPU 相关信息:
CPU 中各个寄存器的值,当进程被切换时,CPU 的状态信息都会被保存在相应的 PCB 中,以便进程重新执行时,能从断点处继续执行。
可见,PCB 包含信息还是比较多的。
每个 PCB 是如何组织的呢?
通常是通过链表的方式进行组织,把具有相同状态的进程链在一起,组成各种队列。
比如:
将所有处于就绪状态的进程链在一起,称为就绪队列;
把所有因等待某事件而处于等待状态的进程链在一起就组成各种阻塞队列;
另外,对于运行队列在单核 CPU 系统中则只有一个运行指针了,因为单核 CPU 在某个时间,只能运行一个程序。
那么,就绪队列和阻塞队列链表的组织形式如下图:
知乎搜 PCB 的提示
打住打住,我们是个正经的人,怎么会去看那些问题呢?是吧,回来回来。
PCB 是进程存在的唯一标识,这意味着一个进程的存在,必然会有一个 PCB,如果进程消失了,那么 PCB 也会随之消失。
PCB 具体包含什么信息呢?
进程描述信息:
进程标识符:标识各个进程,每个进程都有一个并且唯一的标识符;
用户标识符:进程归属的用户,用户标识符主要为共享和保护服务;
进程控制和管理信息:
进程当前状态,如 new、ready、running、waiting 或 blocked 等;
进程优先级:进程抢占 CPU 时的优先级;
资源分配清单:
有关内存地址空间或虚拟地址空间的信息,所打开文件的列表和所使用的 I/O 设备信息。
CPU 相关信息:
CPU 中各个寄存器的值,当进程被切换时,CPU 的状态信息都会被保存在相应的 PCB 中,以便进程重新执行时,能从断点处继续执行。
可见,PCB 包含信息还是比较多的。
每个 PCB 是如何组织的呢?
通常是通过链表的方式进行组织,把具有相同状态的进程链在一起,组成各种队列。
比如:
将所有处于就绪状态的进程链在一起,称为就绪队列;
把所有因等待某事件而处于等待状态的进程链在一起就组成各种阻塞队列;
另外,对于运行队列在单核 CPU 系统中则只有一个运行指针了,因为单核 CPU 在某个时间,只能运行一个程序。
那么,就绪队列和阻塞队列链表的组织形式如下图:
![]() 就绪队列和阻塞队列
除了链接的组织方式,还有索引方式,它的工作原理:将同一状态的进程组织在一个索引表中,索引表项指向相应的 PCB,不同状态对应不同的索引表。
一般会选择链表,因为可能面临进程创建,销毁等调度导致进程状态发生变化,所以链表能够更加灵活的插入和删除。
就绪队列和阻塞队列
除了链接的组织方式,还有索引方式,它的工作原理:将同一状态的进程组织在一个索引表中,索引表项指向相应的 PCB,不同状态对应不同的索引表。
一般会选择链表,因为可能面临进程创建,销毁等调度导致进程状态发生变化,所以链表能够更加灵活的插入和删除。
进程的控制
我们熟知了进程的状态变迁和进程的数据结构 PCB 后,再来看看进程的创建、终止、阻塞、唤醒的过程,这些过程也就是进程的控制。
01 创建进程
操作系统允许一个进程创建另一个进程,而且允许子进程继承父进程所拥有的资源,当子进程被终止时,其在父进程处继承的资源应当还给父进程。
同时,终止父进程时同时也会终止其所有的子进程。
创建进程的过程如下:
为新进程分配一个唯一的进程标识号,并申请一个空白的 PCB,PCB 是有限的,若申请失败则创建失败;
为进程分配资源,此处如果资源不足,进程就会进入等待状态,以等待资源;
初始化 PCB;
如果进程的调度队列能够接纳新进程,那就将进程插入到就绪队列,等待被调度运行;
02 终止进程
进程可以有 3 种终止方式:正常结束、异常结束以及外界干预(信号 kill 掉)。
终止进程的过程如下:
查找需要终止的进程的 PCB;
如果处于执行状态,则立即终止该进程的执行,然后将 CPU 资源分配给其他进程;
如果其还有子进程,则应将其所有子进程终止;
将该进程所拥有的全部资源都归还给父进程或操作系统;
将其从 PCB 所在队列中删除;
03 阻塞进程
当进程需要等待某一事件完成时,它可以调用阻塞语句把自己阻塞等待。
而一旦被阻塞等待,它只能由另一个进程唤醒。
阻塞进程的过程如下:
找到将要被阻塞进程标识号对应的 PCB;
如果该进程为运行状态,则保护其现场,将其状态转为阻塞状态,停止运行;
将该 PCB 插入的阻塞队列中去;
04 唤醒进程
进程由「运行」转变为「阻塞」状态是由于进程必须等待某一事件的完成,所以处于阻塞状态的进程是绝对不可能叫醒自己的。
如果某进程正在等待 I/O 事件,需由别的进程发消息给它,则只有当该进程所期待的事件出现时,才由发现者进程用唤醒语句叫醒它。
唤醒进程的过程如下:
在该事件的阻塞队列中找到相应进程的 PCB;
将其从阻塞队列中移出,并置其状态为就绪状态;
把该 PCB 插入到就绪队列中,等待调度程序调度;
进程的阻塞和唤醒是一对功能相反的语句,如果某个进程调用了阻塞语句,则必有一个与之对应的唤醒语句。
进程的上下文切换
各个进程之间是共享 CPU 资源的,在不同的时候进程之间需要切换,让不同的进程可以在 CPU 执行,那么这个一个进程切换到另一个进程运行,称为进程的上下文切换。
在详细说进程上下文切换前,我们先来看看 CPU 上下文切换
大多数操作系统都是多任务,通常支持大于 CPU 数量的任务同时运行。
实际上,这些任务并不是同时运行的,只是因为系统在很短的时间内,让各个任务分别在 CPU 运行,于是就造成同时运行的错觉。
任务是交给 CPU 运行的,那么在每个任务运行前,CPU 需要知道任务从哪里加载,又从哪里开始运行。
所以,操作系统需要事先帮 CPU 设置好 CPU 寄存器和程序计数器。
CPU 寄存器是 CPU 内部一个容量小,但是速度极快的内存(缓存)。
我举个例子,寄存器像是你的口袋,内存像你的书包,硬盘则是你家里的柜子,如果你的东西存放到口袋,那肯定是比你从书包或家里柜子取出来要快的多。
再来,程序计数器则是用来存储 CPU 正在执行的指令位置、或者即将执行的下一条指令位置。
所以说,CPU 寄存器和程序计数是 CPU 在运行任何任务前,所必须依赖的环境,这些环境就叫做 CPU 上下文。
既然知道了什么是 CPU 上下文,那理解 CPU 上下文切换就不难了。
CPU 上下文切换就是先把前一个任务的 CPU 上下文(CPU 寄存器和程序计数器)保存起来,然后加载新任务的上下文到这些寄存器和程序计数器,最后再跳转到程序计数器所指的新位置,运行新任务。
系统内核会存储保持下来的上下文信息,当此任务再次被分配给 CPU 运行时,CPU 会重新加载这些上下文,这样就能保证任务原来的状态不受影响,让任务看起来还是连续运行。
上面说到所谓的「任务」,主要包含进程、线程和中断。
所以,可以根据任务的不同,把 CPU 上下文切换分成:进程上下文切换、线程上下文切换和中断上下文切换。
进程的上下文切换到底是切换什么呢?
进程是由内核管理和调度的,所以进程的切换只能发生在内核态。
所以,进程的上下文切换不仅包含了虚拟内存、栈、全局变量等用户空间的资源,还包括了内核堆栈、寄存器等内核空间的资源。
通常,会把交换的信息保存在进程的 PCB,当要运行另外一个进程的时候,我们需要从这个进程的 PCB 取出上下文,然后恢复到 CPU 中,这使得这个进程可以继续执行,如下图所示:
![]() 进程上下文切换
大家需要注意,进程的上下文开销是很关键的,我们希望它的开销越小越好,这样可以使得进程可以把更多时间花费在执行程序上,而不是耗费在上下文切换。
发生进程上下文切换有哪些场景?
为了保证所有进程可以得到公平调度,CPU 时间被划分为一段段的时间片,这些时间片再被轮流分配给各个进程。
这样,当某个进程的时间片耗尽了,就会被系统挂起,切换到其它正在等待 CPU 的进程运行;
进程在系统资源不足(比如内存不足)时,要等到资源满足后才可以运行,这个时候进程也会被挂起,并由系统调度其他进程运行;
当进程通过睡眠函数 sleep 这样的方法将自己主动挂起时,自然也会重新调度;
当有优先级更高的进程运行时,为了保证高优先级进程的运行,当前进程会被挂起,由高优先级进程来运行;
发生硬件中断时,CPU 上的进程会被中断挂起,转而执行内核中的中断服务程序;
以上,就是发生进程上下文切换的常见场景了。
进程上下文切换
大家需要注意,进程的上下文开销是很关键的,我们希望它的开销越小越好,这样可以使得进程可以把更多时间花费在执行程序上,而不是耗费在上下文切换。
发生进程上下文切换有哪些场景?
为了保证所有进程可以得到公平调度,CPU 时间被划分为一段段的时间片,这些时间片再被轮流分配给各个进程。
这样,当某个进程的时间片耗尽了,就会被系统挂起,切换到其它正在等待 CPU 的进程运行;
进程在系统资源不足(比如内存不足)时,要等到资源满足后才可以运行,这个时候进程也会被挂起,并由系统调度其他进程运行;
当进程通过睡眠函数 sleep 这样的方法将自己主动挂起时,自然也会重新调度;
当有优先级更高的进程运行时,为了保证高优先级进程的运行,当前进程会被挂起,由高优先级进程来运行;
发生硬件中断时,CPU 上的进程会被中断挂起,转而执行内核中的中断服务程序;
以上,就是发生进程上下文切换的常见场景了。
线程
在早期的操作系统中都是以进程作为独立运行的基本单位,直到后面,计算机科学家们又提出了更小的能独立运行的基本单位,也就是线程。
为什么使用线程?
我们举个例子,假设你要编写一个视频播放器软件,那么该软件功能的核心模块有三个:
从视频文件当中读取数据;
对读取的数据进行解压缩;
把解压缩后的视频数据播放出来;
对于单进程的实现方式,我想大家都会是以下这个方式:
![]() 单进程实现方式
对于单进程的这种方式,存在以下问题:
播放出来的画面和声音会不连贯,因为当 CPU 能力不够强的时候,Read 的时候可能进程就等在这了,这样就会导致等半天才进行数据解压和播放;
各个函数之间不是并发执行,影响资源的使用效率;
那改进成多进程的方式:
单进程实现方式
对于单进程的这种方式,存在以下问题:
播放出来的画面和声音会不连贯,因为当 CPU 能力不够强的时候,Read 的时候可能进程就等在这了,这样就会导致等半天才进行数据解压和播放;
各个函数之间不是并发执行,影响资源的使用效率;
那改进成多进程的方式:
![]() 多进程实现方式
对于多进程的这种方式,依然会存在问题:
进程之间如何通信,共享数据?
维护进程的系统开销较大,如创建进程时,分配资源、建立 PCB;终止进程时,回收资源、撤销 PCB;进程切换时,保存当前进程的状态信息;
那到底如何解决呢?需要有一种新的实体,满足以下特性:
实体之间可以并发运行;
实体之间共享相同的地址空间;
这个新的实体,就是线程( Thread ),线程之间可以并发运行且共享相同的地址空间。
多进程实现方式
对于多进程的这种方式,依然会存在问题:
进程之间如何通信,共享数据?
维护进程的系统开销较大,如创建进程时,分配资源、建立 PCB;终止进程时,回收资源、撤销 PCB;进程切换时,保存当前进程的状态信息;
那到底如何解决呢?需要有一种新的实体,满足以下特性:
实体之间可以并发运行;
实体之间共享相同的地址空间;
这个新的实体,就是线程( Thread ),线程之间可以并发运行且共享相同的地址空间。
什么是线程?
线程是进程当中的一条执行流程。
同一个进程内多个线程之间可以共享代码段、数据段、打开的文件等资源,但每个线程都有独立一套的寄存器和栈,这样可以确保线程的控制流是相对独立的。
![]() 多线程
线程的优缺点?
线程的优点:
一个进程中可以同时存在多个线程;
各个线程之间可以并发执行;
各个线程之间可以共享地址空间和文件等资源;
线程的缺点:
当进程中的一个线程奔溃时,会导致其所属进程的所有线程奔溃。
举个例子,对于游戏的用户设计,则不应该使用多线程的方式,否则一个用户挂了,会影响其他同个进程的线程。
多线程
线程的优缺点?
线程的优点:
一个进程中可以同时存在多个线程;
各个线程之间可以并发执行;
各个线程之间可以共享地址空间和文件等资源;
线程的缺点:
当进程中的一个线程奔溃时,会导致其所属进程的所有线程奔溃。
举个例子,对于游戏的用户设计,则不应该使用多线程的方式,否则一个用户挂了,会影响其他同个进程的线程。
线程与进程的比较
线程与进程的比较如下:
进程是资源(包括内存、打开的文件等)分配的单位,线程是 CPU 调度的单位;
进程拥有一个完整的资源平台,而线程只独享必不可少的资源,如寄存器和栈;
线程同样具有就绪、阻塞、执行三种基本状态,同样具有状态之间的转换关系;
线程能减少并发执行的时间和空间开销;
对于,线程相比进程能减少开销,体现在:
线程的创建时间比进程快,因为进程在创建的过程中,还需要资源管理信息,比如内存管理信息、文件管理信息,而线程在创建的过程中,不会涉及这些资源管理信息,而是共享它们;
线程的终止时间比进程快,因为线程释放的资源相比进程少很多;
同一个进程内的线程切换比进程切换快,因为线程具有相同的地址空间(虚拟内存共享),这意味着同一个进程的线程都具有同一个页表,那么在切换的时候不需要切换页表。
而对于进程之间的切换,切换的时候要把页表给切换掉,而页表的切换过程开销是比较大的;
由于同一进程的各线程间共享内存和文件资源,那么在线程之间数据传递的时候,就不需要经过内核了,这就使得线程之间的数据交互效率更高了;
所以,线程比进程不管是时间效率,还是空间效率都要高。
线程的上下文切换
在前面我们知道了,线程与进程最大的区别在于:线程是调度的基本单位,而进程则是资源拥有的基本单位。
所以,所谓操作系统的任务调度,实际上的调度对象是线程,而进程只是给线程提供了虚拟内存、全局变量等资源。
对于线程和进程,我们可以这么理解:
当进程只有一个线程时,可以认为进程就等于线程;
当进程拥有多个线程时,这些线程会共享相同的虚拟内存和全局变量等资源,这些资源在上下文切换时是不需要修改的;
另外,线程也有自己的私有数据,比如栈和寄存器等,这些在上下文切换时也是需要保存的。
线程上下文切换的是什么?
这还得看线程是不是属于同一个进程:
当两个线程不是属于同一个进程,则切换的过程就跟进程上下文切换一样;
当两个线程是属于同一个进程,因为虚拟内存是共享的,所以在切换时,虚拟内存这些资源就保持不动,只需要切换线程的私有数据、寄存器等不共享的数据;
所以,线程的上下文切换相比进程,开销要小很多。
线程的实现
主要有三种线程的实现方式:
用户线程(User Thread):在用户空间实现的线程,不是由内核管理的线程,是由用户态的线程库来完成线程的管理;
内核线程(Kernel Thread):在内核中实现的线程,是由内核管理的线程;
轻量级进程(LightWeight Process):在内核中来支持用户线程;
那么,这还需要考虑一个问题,用户线程和内核线程的对应关系。
首先,第一种关系是多对一的关系,也就是多个用户线程对应同一个内核线程:
![]() 多对一
第二种是一对一的关系,也就是一个用户线程对应一个内核线程:
多对一
第二种是一对一的关系,也就是一个用户线程对应一个内核线程:
![]() 一对一
第三种是多对多的关系,也就是多个用户线程对应到多个内核线程:
一对一
第三种是多对多的关系,也就是多个用户线程对应到多个内核线程:
![]() 多对多
用户线程如何理解?存在什么优势和缺陷?
用户线程是基于用户态的线程管理库来实现的,那么线程控制块(Thread Control Block, TCB) 也是在库里面来实现的,对于操作系统而言是看不到这个 TCB 的,它只能看到整个进程的 PCB。
所以,用户线程的整个线程管理和调度,操作系统是不直接参与的,而是由用户级线程库函数来完成线程的管理,包括线程的创建、终止、同步和调度等。
用户级线程的模型,也就类似前面提到的多对一的关系,即多个用户线程对应同一个内核线程,如下图所示:
多对多
用户线程如何理解?存在什么优势和缺陷?
用户线程是基于用户态的线程管理库来实现的,那么线程控制块(Thread Control Block, TCB) 也是在库里面来实现的,对于操作系统而言是看不到这个 TCB 的,它只能看到整个进程的 PCB。
所以,用户线程的整个线程管理和调度,操作系统是不直接参与的,而是由用户级线程库函数来完成线程的管理,包括线程的创建、终止、同步和调度等。
用户级线程的模型,也就类似前面提到的多对一的关系,即多个用户线程对应同一个内核线程,如下图所示:
![]() 用户级线程模型
用户线程的优点:
每个进程都需要有它私有的线程控制块(TCB)列表,用来跟踪记录它各个线程状态信息(PC、栈指针、寄存器),TCB 由用户级线程库函数来维护,可用于不支持线程技术的操作系统;
用户线程的切换也是由线程库函数来完成的,无需用户态与内核态的切换,所以速度特别快;
用户线程的缺点:
由于操作系统不参与线程的调度,如果一个线程发起了系统调用而阻塞,那进程所包含的用户线程都不能执行了。
当一个线程开始运行后,除非它主动地交出 CPU 的使用权,否则它所在的进程当中的其他线程无法运行,因为用户态的线程没法打断当前运行中的线程,它没有这个特权,只有操作系统才有,但是用户线程不是由操作系统管理的。
由于时间片分配给进程,故与其他进程比,在多线程执行时,每个线程得到的时间片较少,执行会比较慢;
以上,就是用户线程的优缺点了。
那内核线程如何理解?存在什么优势和缺陷?
内核线程是由操作系统管理的,线程对应的 TCB 自然是放在操作系统里的,这样线程的创建、终止和管理都是由操作系统负责。
内核线程的模型,也就类似前面提到的一对一的关系,即一个用户线程对应一个内核线程,如下图所示:
用户级线程模型
用户线程的优点:
每个进程都需要有它私有的线程控制块(TCB)列表,用来跟踪记录它各个线程状态信息(PC、栈指针、寄存器),TCB 由用户级线程库函数来维护,可用于不支持线程技术的操作系统;
用户线程的切换也是由线程库函数来完成的,无需用户态与内核态的切换,所以速度特别快;
用户线程的缺点:
由于操作系统不参与线程的调度,如果一个线程发起了系统调用而阻塞,那进程所包含的用户线程都不能执行了。
当一个线程开始运行后,除非它主动地交出 CPU 的使用权,否则它所在的进程当中的其他线程无法运行,因为用户态的线程没法打断当前运行中的线程,它没有这个特权,只有操作系统才有,但是用户线程不是由操作系统管理的。
由于时间片分配给进程,故与其他进程比,在多线程执行时,每个线程得到的时间片较少,执行会比较慢;
以上,就是用户线程的优缺点了。
那内核线程如何理解?存在什么优势和缺陷?
内核线程是由操作系统管理的,线程对应的 TCB 自然是放在操作系统里的,这样线程的创建、终止和管理都是由操作系统负责。
内核线程的模型,也就类似前面提到的一对一的关系,即一个用户线程对应一个内核线程,如下图所示:
![]() 内核线程模型
内核线程的优点:
在一个进程当中,如果某个内核线程发起系统调用而被阻塞,并不会影响其他内核线程的运行;
分配给线程,多线程的进程获得更多的 CPU 运行时间;
内核线程的缺点:
在支持内核线程的操作系统中,由内核来维护进程和线程的上下问信息,如 PCB 和 TCB;
线程的创建、终止和切换都是通过系统调用的方式来进行,因此对于系统来说,系统开销比较大;
以上,就是内核线的优缺点了。
最后的轻量级进程如何理解?
轻量级进程(Light-weight process,LWP)是内核支持的用户线程,一个进程可有一个或多个 LWP,每个 LWP 是跟内核线程一对一映射的,也就是 LWP 都是由一个内核线程支持。
另外,LWP 只能由内核管理并像普通进程一样被调度,Linux 内核是支持 LWP 的典型例子。
在大多数系统中,LWP与普通进程的区别也在于它只有一个最小的执行上下文和调度程序所需的统计信息。
一般来说,一个进程代表程序的一个实例,而 LWP 代表程序的执行线程,因为一个执行线程不像进程那样需要那么多状态信息,所以 LWP 也不带有这样的信息。
在 LWP 之上也是可以使用用户线程的,那么 LWP 与用户线程的对应关系就有三种:
1 : 1,即一个 LWP 对应 一个用户线程;
N : 1,即一个 LWP 对应多个用户线程;
N : N,即多个 LMP 对应多个用户线程;
接下来针对上面这三种对应关系说明它们优缺点。
先下图的 LWP 模型:
内核线程模型
内核线程的优点:
在一个进程当中,如果某个内核线程发起系统调用而被阻塞,并不会影响其他内核线程的运行;
分配给线程,多线程的进程获得更多的 CPU 运行时间;
内核线程的缺点:
在支持内核线程的操作系统中,由内核来维护进程和线程的上下问信息,如 PCB 和 TCB;
线程的创建、终止和切换都是通过系统调用的方式来进行,因此对于系统来说,系统开销比较大;
以上,就是内核线的优缺点了。
最后的轻量级进程如何理解?
轻量级进程(Light-weight process,LWP)是内核支持的用户线程,一个进程可有一个或多个 LWP,每个 LWP 是跟内核线程一对一映射的,也就是 LWP 都是由一个内核线程支持。
另外,LWP 只能由内核管理并像普通进程一样被调度,Linux 内核是支持 LWP 的典型例子。
在大多数系统中,LWP与普通进程的区别也在于它只有一个最小的执行上下文和调度程序所需的统计信息。
一般来说,一个进程代表程序的一个实例,而 LWP 代表程序的执行线程,因为一个执行线程不像进程那样需要那么多状态信息,所以 LWP 也不带有这样的信息。
在 LWP 之上也是可以使用用户线程的,那么 LWP 与用户线程的对应关系就有三种:
1 : 1,即一个 LWP 对应 一个用户线程;
N : 1,即一个 LWP 对应多个用户线程;
N : N,即多个 LMP 对应多个用户线程;
接下来针对上面这三种对应关系说明它们优缺点。
先下图的 LWP 模型:
![]() LWP 模型
1 : 1 模式
一个线程对应到一个 LWP 再对应到一个内核线程,如上图的进程 4,属于此模型。
优点:实现并行,当一个 LWP 阻塞,不会影响其他 LWP;
缺点:每一个用户线程,就产生一个内核线程,创建线程的开销较大。
N : 1 模式
多个用户线程对应一个 LWP 再对应一个内核线程,如上图的进程 2,线程管理是在用户空间完成的,此模式中用户的线程对操作系统不可见。
优点:用户线程要开几个都没问题,且上下文切换发生用户空间,切换的效率较高;
缺点:一个用户线程如果阻塞了,则整个进程都将会阻塞,另外在多核 CPU 中,是没办法充分利用 CPU 的。
M : N 模式
根据前面的两个模型混搭一起,就形成 M:N 模型,该模型提供了两级控制,首先多个用户线程对应到多个 LWP,LWP 再一一对应到内核线程,如上图的进程 3。
优点:综合了前两种优点,大部分的线程上下文发生在用户空间,且多个线程又可以充分利用多核 CPU 的资源。
组合模式
如上图的进程 5,此进程结合 1:1 模型和 M:N 模型。
开发人员可以针对不同的应用特点调节内核线程的数目来达到物理并行性和逻辑并行性的最佳方案。
LWP 模型
1 : 1 模式
一个线程对应到一个 LWP 再对应到一个内核线程,如上图的进程 4,属于此模型。
优点:实现并行,当一个 LWP 阻塞,不会影响其他 LWP;
缺点:每一个用户线程,就产生一个内核线程,创建线程的开销较大。
N : 1 模式
多个用户线程对应一个 LWP 再对应一个内核线程,如上图的进程 2,线程管理是在用户空间完成的,此模式中用户的线程对操作系统不可见。
优点:用户线程要开几个都没问题,且上下文切换发生用户空间,切换的效率较高;
缺点:一个用户线程如果阻塞了,则整个进程都将会阻塞,另外在多核 CPU 中,是没办法充分利用 CPU 的。
M : N 模式
根据前面的两个模型混搭一起,就形成 M:N 模型,该模型提供了两级控制,首先多个用户线程对应到多个 LWP,LWP 再一一对应到内核线程,如上图的进程 3。
优点:综合了前两种优点,大部分的线程上下文发生在用户空间,且多个线程又可以充分利用多核 CPU 的资源。
组合模式
如上图的进程 5,此进程结合 1:1 模型和 M:N 模型。
开发人员可以针对不同的应用特点调节内核线程的数目来达到物理并行性和逻辑并行性的最佳方案。
调度
进程都希望自己能够占用 CPU 进行工作,那么这涉及到前面说过的进程上下文切换。
一旦操作系统把进程切换到运行状态,也就意味着该进程占用着 CPU 在执行,但是当操作系统把进程切换到其他状态时,那就不能在 CPU 中执行了,于是操作系统会选择下一个要运行的进程。
选择一个进程运行这一功能是在操作系统中完成的,通常称为调度程序(scheduler)。
那到底什么时候调度进程,或以什么原则来调度进程呢?
调度时机
在进程的生命周期中,当进程从一个运行状态到另外一状态变化的时候,其实会触发一次调度。
比如,以下状态的变化都会触发操作系统的调度:
从就绪态 > 运行态:当进程被创建时,会进入到就绪队列,操作系统会从就绪队列选择一个进程运行;
从运行态 > 阻塞态:当进程发生 I/O 事件而阻塞时,操作系统必须另外一个进程运行;
从运行态 > 结束态:当进程退出结束后,操作系统得从就绪队列选择另外一个进程运行;
因为,这些状态变化的时候,操作系统需要考虑是否要让新的进程给 CPU 运行,或者是否让当前进程从 CPU 上退出来而换另一个进程运行。
另外,如果硬件时钟提供某个频率的周期性中断,那么可以根据如何处理时钟中断,把调度算法分为两类:
非抢占式调度算法挑选一个进程,然后让该进程运行直到被阻塞,或者直到该进程退出,才会调用另外一个进程,也就是说不会理时钟中断这个事情。
抢占式调度算法挑选一个进程,然后让该进程只运行某段时间,如果在该时段结束时,该进程仍然在运行时,则会把它挂起,接着调度程序从就绪队列挑选另外一个进程。
这种抢占式调度处理,需要在时间间隔的末端发生时钟中断,以便把 CPU 控制返回给调度程序进行调度,也就是常说的时间片机制。
调度原则
原则一:如果运行的程序,发生了 I/O 事件的请求,那 CPU 使用率必然会很低,因为此时进程在阻塞等待硬盘的数据返回。
这样的过程,势必会造成 CPU 突然的空闲。
所以,为了提高 CPU 利用率,在这种发送 I/O 事件致使 CPU 空闲的情况下,调度程序需要从就绪队列中选择一个进程来运行。
原则二:有的程序执行某个任务花费的时间会比较长,如果这个程序一直占用着 CPU,会造成系统吞吐量(CPU 在单位时间内完成的进程数量)的降低。
所以,要提高系统的吞吐率,调度程序要权衡长任务和短任务进程的运行完成数量。
原则三:从进程开始到结束的过程中,实际上是包含两个时间,分别是进程运行时间和进程等待时间,这两个时间总和就称为周转时间。
进程的周转时间越小越好,如果进程的等待时间很长而运行时间很短,那周转时间就很长,这不是我们所期望的,调度程序应该避免这种情况发生。
原则四:处于就绪队列的进程,也不能等太久,当然希望这个等待的时间越短越好,这样可以使得进程更快的在 CPU 中执行。
所以,就绪队列中进程的等待时间也是调度程序所需要考虑的原则。
原则五:对于鼠标、键盘这种交互式比较强的应用,我们当然希望它的响应时间越快越好,否则就会影响用户体验了。
所以,对于交互式比较强的应用,响应时间也是调度程序需要考虑的原则。
![]() 五种调度原则
针对上面的五种调度原则,总结成如下:
CPU 利用率:调度程序应确保 CPU 是始终匆忙的状态,这可提高 CPU 的利用率;
系统吞吐量:吞吐量表示的是单位时间内 CPU 完成进程的数量,长作业的进程会占用较长的 CPU 资源,因此会降低吞吐量,相反,短作业的进程会提升系统吞吐量;
周转时间:周转时间是进程运行和阻塞时间总和,一个进程的周转时间越小越好;
等待时间:这个等待时间不是阻塞状态的时间,而是进程处于就绪队列的时间,等待的时间越长,用户越不满意;
响应时间:用户提交请求到系统第一次产生响应所花费的时间,在交互式系统中,响应时间是衡量调度算法好坏的主要标准。
说白了,这么多调度原则,目的就是要使得进程要「快」。
五种调度原则
针对上面的五种调度原则,总结成如下:
CPU 利用率:调度程序应确保 CPU 是始终匆忙的状态,这可提高 CPU 的利用率;
系统吞吐量:吞吐量表示的是单位时间内 CPU 完成进程的数量,长作业的进程会占用较长的 CPU 资源,因此会降低吞吐量,相反,短作业的进程会提升系统吞吐量;
周转时间:周转时间是进程运行和阻塞时间总和,一个进程的周转时间越小越好;
等待时间:这个等待时间不是阻塞状态的时间,而是进程处于就绪队列的时间,等待的时间越长,用户越不满意;
响应时间:用户提交请求到系统第一次产生响应所花费的时间,在交互式系统中,响应时间是衡量调度算法好坏的主要标准。
说白了,这么多调度原则,目的就是要使得进程要「快」。
调度算法
不同的调度算法适用的场景也是不同的。
接下来,说说在单核 CPU 系统中常见的调度算法。
01 先来先服务调度算法
最简单的一个调度算法,就是非抢占式的先来先服务(First Come First Severd, FCFS)算法了。
![]() FCFS 调度算法
顾名思义,先来后到,每次从就绪队列选择最先进入队列的进程,然后一直运行,直到进程退出或被阻塞,才会继续从队列中选择第一个进程接着运行。
这似乎很公平,但是当一个长作业先运行了,那么后面的短作业等待的时间就会很长,不利于短作业。
FCFS 对长作业有利,适用于 CPU 繁忙型作业的系统,而不适用于 I/O 繁忙型作业的系统。
02 最短作业优先调度算法
最短作业优先(Shortest Job First, SJF)调度算法同样也是顾名思义,它会优先选择运行时间最短的进程来运行,这有助于提高系统的吞吐量。
FCFS 调度算法
顾名思义,先来后到,每次从就绪队列选择最先进入队列的进程,然后一直运行,直到进程退出或被阻塞,才会继续从队列中选择第一个进程接着运行。
这似乎很公平,但是当一个长作业先运行了,那么后面的短作业等待的时间就会很长,不利于短作业。
FCFS 对长作业有利,适用于 CPU 繁忙型作业的系统,而不适用于 I/O 繁忙型作业的系统。
02 最短作业优先调度算法
最短作业优先(Shortest Job First, SJF)调度算法同样也是顾名思义,它会优先选择运行时间最短的进程来运行,这有助于提高系统的吞吐量。
![]() SJF 调度算法
这显然对长作业不利,很容易造成一种极端现象。
比如,一个长作业在就绪队列等待运行,而这个就绪队列有非常多的短作业,那么就会使得长作业不断的往后推,周转时间变长,致使长作业长期不会被运行。
03 高响应比优先调度算法
前面的「先来先服务调度算法」和「最短作业优先调度算法」都没有很好的权衡短作业和长作业。
那么,高响应比优先 (Highest Response Ratio Next, HRRN)调度算法主要是权衡了短作业和长作业。
每次进行进程调度时,先计算「响应比优先级」,然后把「响应比优先级」最高的进程投入运行,「响应比优先级」的计算公式:
SJF 调度算法
这显然对长作业不利,很容易造成一种极端现象。
比如,一个长作业在就绪队列等待运行,而这个就绪队列有非常多的短作业,那么就会使得长作业不断的往后推,周转时间变长,致使长作业长期不会被运行。
03 高响应比优先调度算法
前面的「先来先服务调度算法」和「最短作业优先调度算法」都没有很好的权衡短作业和长作业。
那么,高响应比优先 (Highest Response Ratio Next, HRRN)调度算法主要是权衡了短作业和长作业。
每次进行进程调度时,先计算「响应比优先级」,然后把「响应比优先级」最高的进程投入运行,「响应比优先级」的计算公式:
![]() 从上面的公式,可以发现:
如果两个进程的「等待时间」相同时,「要求的服务时间」越短,「响应比」就越高,这样短作业的进程容易被选中运行;
如果两个进程「要求的服务时间」相同时,「等待时间」越长,「响应比」就越高,这就兼顾到了长作业进程,因为进程的响应比可以随时间等待的增加而提高,当其等待时间足够长时,其响应比便可以升到很高,从而获得运行的机会;
04 时间片轮转调度算法
最古老、最简单、最公平且使用最广的算法就是时间片轮转(Round Robin, RR)调度算法。
。
从上面的公式,可以发现:
如果两个进程的「等待时间」相同时,「要求的服务时间」越短,「响应比」就越高,这样短作业的进程容易被选中运行;
如果两个进程「要求的服务时间」相同时,「等待时间」越长,「响应比」就越高,这就兼顾到了长作业进程,因为进程的响应比可以随时间等待的增加而提高,当其等待时间足够长时,其响应比便可以升到很高,从而获得运行的机会;
04 时间片轮转调度算法
最古老、最简单、最公平且使用最广的算法就是时间片轮转(Round Robin, RR)调度算法。
。
![]() RR 调度算法
每个进程被分配一个时间段,称为时间片(Quantum),即允许该进程在该时间段中运行。
如果时间片用完,进程还在运行,那么将会把此进程从 CPU 释放出来,并把 CPU 分配另外一个进程;
如果该进程在时间片结束前阻塞或结束,则 CPU 立即进行切换;
另外,时间片的长度就是一个很关键的点:
如果时间片设得太短会导致过多的进程上下文切换,降低了 CPU 效率;
如果设得太长又可能引起对短作业进程的响应时间变长。
将
通常时间片设为 20ms~50ms 通常是一个比较合理的折中值。
05 最高优先级调度算法
前面的「时间片轮转算法」做了个假设,即让所有的进程同等重要,也不偏袒谁,大家的运行时间都一样。
但是,对于多用户计算机系统就有不同的看法了,它们希望调度是有优先级的,即希望调度程序能从就绪队列中选择最高优先级的进程进行运行,这称为最高优先级(Highest Priority First,HPF)调度算法。
进程的优先级可以分为,静态优先级或动态优先级:
静态优先级:创建进程时候,就已经确定了优先级了,然后整个运行时间优先级都不会变化;
动态优先级:根据进程的动态变化调整优先级,比如如果进程运行时间增加,则降低其优先级,如果进程等待时间(就绪队列的等待时间)增加,则升高其优先级,也就是随着时间的推移增加等待进程的优先级。
该算法也有两种处理优先级高的方法,非抢占式和抢占式:
非抢占式:当就绪队列中出现优先级高的进程,运行完当前进程,再选择优先级高的进程。
抢占式:当就绪队列中出现优先级高的进程,当前进程挂起,调度优先级高的进程运行。
但是依然有缺点,可能会导致低优先级的进程永远不会运行。
06 多级反馈队列调度算法
多级反馈队列(Multilevel Feedback Queue)调度算法是「时间片轮转算法」和「最高优先级算法」的综合和发展。
顾名思义:
「多级」表示有多个队列,每个队列优先级从高到低,同时优先级越高时间片越短。
「反馈」表示如果有新的进程加入优先级高的队列时,立刻停止当前正在运行的进程,转而去运行优先级高的队列;
RR 调度算法
每个进程被分配一个时间段,称为时间片(Quantum),即允许该进程在该时间段中运行。
如果时间片用完,进程还在运行,那么将会把此进程从 CPU 释放出来,并把 CPU 分配另外一个进程;
如果该进程在时间片结束前阻塞或结束,则 CPU 立即进行切换;
另外,时间片的长度就是一个很关键的点:
如果时间片设得太短会导致过多的进程上下文切换,降低了 CPU 效率;
如果设得太长又可能引起对短作业进程的响应时间变长。
将
通常时间片设为 20ms~50ms 通常是一个比较合理的折中值。
05 最高优先级调度算法
前面的「时间片轮转算法」做了个假设,即让所有的进程同等重要,也不偏袒谁,大家的运行时间都一样。
但是,对于多用户计算机系统就有不同的看法了,它们希望调度是有优先级的,即希望调度程序能从就绪队列中选择最高优先级的进程进行运行,这称为最高优先级(Highest Priority First,HPF)调度算法。
进程的优先级可以分为,静态优先级或动态优先级:
静态优先级:创建进程时候,就已经确定了优先级了,然后整个运行时间优先级都不会变化;
动态优先级:根据进程的动态变化调整优先级,比如如果进程运行时间增加,则降低其优先级,如果进程等待时间(就绪队列的等待时间)增加,则升高其优先级,也就是随着时间的推移增加等待进程的优先级。
该算法也有两种处理优先级高的方法,非抢占式和抢占式:
非抢占式:当就绪队列中出现优先级高的进程,运行完当前进程,再选择优先级高的进程。
抢占式:当就绪队列中出现优先级高的进程,当前进程挂起,调度优先级高的进程运行。
但是依然有缺点,可能会导致低优先级的进程永远不会运行。
06 多级反馈队列调度算法
多级反馈队列(Multilevel Feedback Queue)调度算法是「时间片轮转算法」和「最高优先级算法」的综合和发展。
顾名思义:
「多级」表示有多个队列,每个队列优先级从高到低,同时优先级越高时间片越短。
「反馈」表示如果有新的进程加入优先级高的队列时,立刻停止当前正在运行的进程,转而去运行优先级高的队列;
![]() 多级反馈队列
来看看,它是如何工作的:
设置了多个队列,赋予每个队列不同的优先级,每个队列优先级从高到低,同时优先级越高时间片越短;
新的进程会被放入到第一级队列的末尾,按先来先服务的原则排队等待被调度,如果在第一级队列规定的时间片没运行完成,则将其转入到第二级队列的末尾,以此类推,直至完成;
当较高优先级的队列为空,才调度较低优先级的队列中的进程运行。
如果进程运行时,有新进程进入较高优先级的队列,则停止当前运行的进程并将其移入到原队列末尾,接着让较高优先级的进程运行;
可以发现,对于短作业可能可以在第一级队列很快被处理完。
对于长作业,如果在第一级队列处理不完,可以移入下次队列等待被执行,虽然等待的时间变长了,但是运行时间也会更长了,所以该算法很好的兼顾了长短作业,同时有较好的响应时间。
看的迷迷糊糊?那我拿去银行办业务的例子,把上面的调度算法串起来,你还不懂,你锤我!
办理业务的客户相当于进程,银行窗口工作人员相当于 CPU。
现在,假设这个银行只有一个窗口(单核 CPU ),那么工作人员一次只能处理一个业务。
多级反馈队列
来看看,它是如何工作的:
设置了多个队列,赋予每个队列不同的优先级,每个队列优先级从高到低,同时优先级越高时间片越短;
新的进程会被放入到第一级队列的末尾,按先来先服务的原则排队等待被调度,如果在第一级队列规定的时间片没运行完成,则将其转入到第二级队列的末尾,以此类推,直至完成;
当较高优先级的队列为空,才调度较低优先级的队列中的进程运行。
如果进程运行时,有新进程进入较高优先级的队列,则停止当前运行的进程并将其移入到原队列末尾,接着让较高优先级的进程运行;
可以发现,对于短作业可能可以在第一级队列很快被处理完。
对于长作业,如果在第一级队列处理不完,可以移入下次队列等待被执行,虽然等待的时间变长了,但是运行时间也会更长了,所以该算法很好的兼顾了长短作业,同时有较好的响应时间。
看的迷迷糊糊?那我拿去银行办业务的例子,把上面的调度算法串起来,你还不懂,你锤我!
办理业务的客户相当于进程,银行窗口工作人员相当于 CPU。
现在,假设这个银行只有一个窗口(单核 CPU ),那么工作人员一次只能处理一个业务。
![]() 银行办业务
那么最简单的处理方式,就是先来的先处理,后面来的就乖乖排队,这就是先来先服务(FCFS)调度算法。
但是万一先来的这位老哥是来贷款的,这一谈就好几个小时,一直占用着窗口,这样后面的人只能干等,或许后面的人只是想简单的取个钱,几分钟就能搞定,却因为前面老哥办长业务而要等几个小时,你说气不气人?
银行办业务
那么最简单的处理方式,就是先来的先处理,后面来的就乖乖排队,这就是先来先服务(FCFS)调度算法。
但是万一先来的这位老哥是来贷款的,这一谈就好几个小时,一直占用着窗口,这样后面的人只能干等,或许后面的人只是想简单的取个钱,几分钟就能搞定,却因为前面老哥办长业务而要等几个小时,你说气不气人?
![]() 先来先服务
有客户抱怨了,那我们就要改进,我们干脆优先给那些几分钟就能搞定的人办理业务,这就是短作业优先(SJF)调度算法。
听起来不错,但是依然还是有个极端情况,万一办理短业务的人非常的多,这会导致长业务的人一直得不到服务,万一这个长业务是个大客户,那不就捡了芝麻丢了西瓜
先来先服务
有客户抱怨了,那我们就要改进,我们干脆优先给那些几分钟就能搞定的人办理业务,这就是短作业优先(SJF)调度算法。
听起来不错,但是依然还是有个极端情况,万一办理短业务的人非常的多,这会导致长业务的人一直得不到服务,万一这个长业务是个大客户,那不就捡了芝麻丢了西瓜
![]() 最短作业优先
那就公平起见,现在窗口工作人员规定,每个人我只处理 10 分钟。
如果 10 分钟之内处理完,就马上换下一个人。
如果没处理完,依然换下一个人,但是客户自己得记住办理到哪个步骤了。
这个也就是时间片轮转(RR)调度算法。
但是如果时间片设置过短,那么就会造成大量的上下文切换,增大了系统开销。
如果时间片过长,相当于退化成退化成 FCFS 算法了。
最短作业优先
那就公平起见,现在窗口工作人员规定,每个人我只处理 10 分钟。
如果 10 分钟之内处理完,就马上换下一个人。
如果没处理完,依然换下一个人,但是客户自己得记住办理到哪个步骤了。
这个也就是时间片轮转(RR)调度算法。
但是如果时间片设置过短,那么就会造成大量的上下文切换,增大了系统开销。
如果时间片过长,相当于退化成退化成 FCFS 算法了。
![]() 时间片轮转
既然公平也可能存在问题,那银行就对客户分等级,分为普通客户、VIP 客户、SVIP 客户。
只要高优先级的客户一来,就第一时间处理这个客户,这就是最高优先级(HPF)调度算法。
但依然也会有极端的问题,万一当天来的全是高级客户,那普通客户不是没有被服务的机会,不把普通客户当人是吗?那我们把优先级改成动态的,如果客户办理业务时间增加,则降低其优先级,如果客户等待时间增加,则升高其优先级。
时间片轮转
既然公平也可能存在问题,那银行就对客户分等级,分为普通客户、VIP 客户、SVIP 客户。
只要高优先级的客户一来,就第一时间处理这个客户,这就是最高优先级(HPF)调度算法。
但依然也会有极端的问题,万一当天来的全是高级客户,那普通客户不是没有被服务的机会,不把普通客户当人是吗?那我们把优先级改成动态的,如果客户办理业务时间增加,则降低其优先级,如果客户等待时间增加,则升高其优先级。
![]() 最高优先级(静态)
那有没有兼顾到公平和效率的方式呢?这里介绍一种算法,考虑的还算充分的,多级反馈队列(MFQ)调度算法,它是时间片轮转算法和优先级算法的综合和发展。
它的工作方式:
最高优先级(静态)
那有没有兼顾到公平和效率的方式呢?这里介绍一种算法,考虑的还算充分的,多级反馈队列(MFQ)调度算法,它是时间片轮转算法和优先级算法的综合和发展。
它的工作方式:
![]() 多级反馈队列
银行设置了多个排队(就绪)队列,每个队列都有不同的优先级,各个队列优先级从高到低,同时每个队列执行时间片的长度也不同,优先级越高的时间片越短。
新客户(进程)来了,先进入第一级队列的末尾,按先来先服务原则排队等待被叫号(运行)。
如果时间片用完客户的业务还没办理完成,则让客户进入到下一级队列的末尾,以此类推,直至客户业务办理完成。
当第一级队列没人排队时,就会叫号二级队列的客户。
如果客户办理业务过程中,有新的客户加入到较高优先级的队列,那么此时办理中的客户需要停止办理,回到原队列的末尾等待再次叫号,因为要把窗口让给刚进入较高优先级队列的客户。
可以发现,对于要办理短业务的客户来说,可以很快的轮到并解决。
对于要办理长业务的客户,一下子解决不了,就可以放到下一个队列,虽然等待的时间稍微变长了,但是轮到自己的办理时间也变长了,也可以接受,不会造成极端的现象,可以说是综合上面几种算法的优点。
多级反馈队列
银行设置了多个排队(就绪)队列,每个队列都有不同的优先级,各个队列优先级从高到低,同时每个队列执行时间片的长度也不同,优先级越高的时间片越短。
新客户(进程)来了,先进入第一级队列的末尾,按先来先服务原则排队等待被叫号(运行)。
如果时间片用完客户的业务还没办理完成,则让客户进入到下一级队列的末尾,以此类推,直至客户业务办理完成。
当第一级队列没人排队时,就会叫号二级队列的客户。
如果客户办理业务过程中,有新的客户加入到较高优先级的队列,那么此时办理中的客户需要停止办理,回到原队列的末尾等待再次叫号,因为要把窗口让给刚进入较高优先级队列的客户。
可以发现,对于要办理短业务的客户来说,可以很快的轮到并解决。
对于要办理长业务的客户,一下子解决不了,就可以放到下一个队列,虽然等待的时间稍微变长了,但是轮到自己的办理时间也变长了,也可以接受,不会造成极端的现象,可以说是综合上面几种算法的优点。
EFI System Partition (ESP)
EFI System Partition contains essential elements such as boot loader, system drivers, kernel images etc.
required to run your computer. Disturbing this partition may make your computer unusable.
The easiest way is to use Disk Manager to remove the drive letter
(set it with no drive letter) and it will become hidden in explorer
Information on UEFI disk structure
==========
get into the appdata folder
get into the appdata folder, win+R, type %appdata%.
==========
HP Insert Key: [shift][0]
Shift+Insert can be achieved by using Fn+Ins (PrtSc)
but it makes Ctrl+Insert and Shift+Insert more difficult.
Toggling Num Lock then using Ins on the numeric keypad will achieve the same result
==========
“Startup” is a hidden system folder
located in %APPDATA%\Microsoft\Windows\Start Menu\Programs\Startup
to open Startup folder
Windows logo + R keys
type shell:startup
check the "Startup" folder, task scheduluer, local policy-logon scripts (gpedit.msc), and registry (HKLM\Software\Microsoft\Windows\CurrentVersion\Run) for any possible indication of a something scheduled to run at logon.
Perform “msconfig” to start system configuration.
Click “startup” tab.
Understand and Control Startup Apps with the System Configuration Utility
==========
modify Access Control Lists (ACLs)
D:\Documents and Settings\Lawht\Local Settings\Temp
modify Access Control Lists (ACLs)
ICACLS Temp /c Administrators: F
%LocalAppData%\Packages
"%localappdata%" this is "%USERPROFILE%\AppData\Local".
For example c:\users\ravi\AppData\Local
C:\Users\User\AppData\Local\Packages
AppData Folder is a hidden folder, to see you need change: folder options, view, hidden files and folders, select: Display files, folders and hidden units.
==========
run command as an administrator from the windows command line
runas /user:Administrator ""
dir /s/b
Can't remove the "US keyboard" layout
Go to Control Panel Click Language applet
In the resultant Window click Options on the right hand side of the default language
Under Input Languages move the language you want to keep to the top of the list (set as default)
Then delete the English US Keyboard
Click Save, exit Control Panel
Windows 8.1’s notifications disappear from the screen in just 5 seconds
Fix It:
HKEY_CURRENT_USER/Control Panel/Accessibility key
double click MessageDuration and add a decimal value of 4294967295
SmartScreen Filter smack you down if you install software it doesn’t know
Fix It:
open the Action center, clicking Change Windows SmartScreen Filter settings in the left window pane
selecting “Don’t do anything (turn off Windows SmartScreen Filter)” from the menu that appears.
If you want to shut down more quickly, simply right click on the desktop and select Shortcut from the New menu.
Then enter the command "shutdown /s /t 0" into the dialog box that appears and click Next.
Fix It: To get rid of Windows 8.1’s time-wasting lock screen
HKEY_LOCAL_MACHINE\SOFTWARE\Policies\Microsoft\Windows\Personalization
create a DWORD Value named NoLockScreen and assign it a value of 1.
==========
powercfg /batteryreport
powercfg /batteryreport
C:\Users\User\battery-report.html
battery-report.html
==========
How to add a keyboard layout in Windows 10
Click on the Start Menu. ...
Click on Settings.
Click on Time & language.
Click on Region & language.
Click on the language you wish to add a keyboard layout to.
Click on Options.
Click on Add a keyboard.
Click on the keyboard you want to add.
==========
some Windows Task manager processes
xagtnotif.exe
Fireeye Agent User Notification
smcgui.exe
SmcGui.exe file is a software component of Symantec Endpoint Protection by Symantec.
vpnui.exe
a vpnui belonging to Cisco AnyConnect VPN Client from Cisco Systems
SCNotification.exe
This is the process that notifies users of advertisements .ect.
a software component of Microsoft System Center Configuration Manager by Microsoft.
The System Center Configuration Manager is system management tool.
acise.exe
Cisco AnyConnect ISE Posture.
The AnyConnect Secure Mobility Client offers an VPN Posture (HostScan) Module and an ISE Posture Module. Both provide the Cisco AnyConnect Secure Mobility Client with the ability to assess an endpoint's compliance for things like antivirus, antispyware, and firewall software installed on the host. You can then restrict network access until the endpoint is in compliance or can elevate local user privileges so they can establish remediation practices.
aciseposture.exe
Cisco AnyConnect ISE Posture
==========
System File Checker
System File Checker (SFC) sfc /scannow
==========
Power User Menu
WIN x open the power user menu
==========
resize icons spacing
resize icons spacing in Windows 7
adjust the spacing between icons
Right-click on any empty space on the desktop and select Personalize
click Window Color option.
click Advanced appearance settings
change windows 7 taskbar transparancy
==========
old-style Alt+Tab switcher
To activate the old-style Alt+Tab switcher
Create a DWORD Value called AltTabSettings in HKEY_CURRENT_USER/Software/Microsoft/Windows/CurrentVersion/Explorer and set it to 1.
==========
Windows Explorer menu bar
The Windows Explorer menu bar is not displayed in Windows Vista
Method: Press the ALT key
==========
Hack Windows 7 Become Admin
Hack Windows 7 Become Admin
Choose "Start windows normally" option and turn the UPS off immediately.
Then turn on the PC again, let it load.
After that you will be prompted with two options in the boot screen (again), select the first option - "Launch Start-up Repair(recommended)"
After 5 min, It will ask you to "restore defaults", select "Cancel" option.
Let it continue...
Wait for About 15-20 Minutes:
Now this is where the tricky part comes:
After 20 min, an error report screen will pop-up, asking to send information or not.
Ignore it, click on "View Problem Details" arrow, scroll down to the end of the report, then click a link stating X:\windows\ something...something (the link starts with an"X")
Another Window will pop-up, and will look like a notepad (it is a notepad)
Click File on the Menu-Bar, then select Open, and another window will pop-up (that's just too many windows!)
Navigate to C: drive (or whatever drive on which windows is installed), click Windows, then System32, after that click on the arrow beside the "File Type" option and select "all files"
Then search for a file named "sethc"(this is the shortcut to stickey keys), rename it to something else (Eg:abc)
Search for cmd, make its copy and rename the copy as "sethc"
--------------------------------------ITS DONE!!!---------------------------------------------
(Almost)
Close everything, restart the PC, go to the log-in screen, press shift 5 times, until a cmd (command prompt) pops-up.
Type in "net user administrator /active:yes", and this will activate the default administrator account of the PC.
Change/delete/manage/reset passwords from there.
Or you can directly change passwords from cmd, type "net user (admin/any admin account's name) and then after a space put an asterix.
---------------------------------------HACKED------------------------------------------------
Step 4The End:
I know that many of you may know this vulnerability in Windows 7, I just wanted that a tutorial like this should be in Null Byte.
Unfortunately, this vulnerability been overcame in Windows 8 :(
==========
Windows Key + Left Arrow
The secret involves pressing the Windows Key and the Arrow Keys:
Windows Key + Left Arrow makes a window fill up the left half of the screen.
Windows Key + Right Arrow makes a window fill up the right half of the screen.
Win + ↑ maximes the current window.
Windows Key + Down Arrow minimizes a maximized window, press it again to minimize it all the way.
Windows Key + T puts focus on the Windows 7 taskbar. (press left/right + Enter to choose window)
==========
Turn Off Windows 10 Updates Permanently
Turn Off Automatic Updates on Windows 10
Turn Off Windows 10 Updates Permanently
KillingWindowsUpdate
安全性識別碼 (SID)
SID: S-1-5-18
本機系統的名稱:
描述: 服務帳戶所使用的作業系統。
updateorchestrator
透過命令來修改「工作排程器」的內容,
基本上是要靠 Windows 提供的「schtasks」這個指令(MSDN);
而如果是要把「Reboot」這項工作給停用的話,命令的寫法則可以寫成下面的樣子:
schtasks /change /disable /TN \Microsoft\Windows\UpdateOrchestrator\Reboot
不過這邊要注意的是,要執行這個指令是需要系統管理員的身分的。
而之後,只要把上面的指令,存成一個 bat 檔案,
之後每次安裝完 Windows Update 後,
再去用系統管理員權限去執行這個批次檔,
理論上就可以避免電腦在安裝 Windows Update 後,還會自動從休眠狀態中被喚醒一次了。
關閉驅動程式更新
==========
Windows Start Menu
D:\Users\Lawht\AppData\Roaming\Microsoft\Windows\Start Menu\Programs\Startup
==========
Disable Windows Search Indexer
Disable Windows Search Indexer
click the Start button, type Services, right-click on Windows Search and choose Properties. Change to Disabled
Disable Windows 10 Search Indexing
To disable Search Indexing in Windows 10, do the following.
Press Win + X shortcut keys on the keyboard to open the Power user menu.
Alternatively, you can right-click on the Start menu.
In the menu, select the item Computer Management.
![]() The Computer Management utility will be opened.
On the left, expand the tree view to Services and Applications\Services.
The Computer Management utility will be opened.
On the left, expand the tree view to Services and Applications\Services.
![]() On the right, you will see the list of installed services.
Find the service named "Windows Search".
On the right, you will see the list of installed services.
Find the service named "Windows Search".
![]() Double-click the Windows Search row to open the service properties dialog.
If the service has the status "Running", click on the Stop button, and wait until its status shows as Stopped.
Double-click the Windows Search row to open the service properties dialog.
If the service has the status "Running", click on the Stop button, and wait until its status shows as Stopped.
![]() Now, change the startup type from Automatic (Delayed Start) to Disabled using the drop down list.
Now, change the startup type from Automatic (Delayed Start) to Disabled using the drop down list.
![]() Click Apply and OK and you are done.
If you prefer the command prompt method described in the article How to Disable A Service in Windows 10, do the following.
Click Apply and OK and you are done.
If you prefer the command prompt method described in the article How to Disable A Service in Windows 10, do the following.
Disable Search Indexing in Windows 10 using Command Prompt
Open an elevated command prompt.
Type the following commands:
sc stop "WSearch"
sc config "WSearch" start= disabled
The first command will stop the service.
The second command will disable it.
![]() Note: It is very important to add a space after "=" and not before it.
That's it!
Note: It is very important to add a space after "=" and not before it.
That's it!
Manage Windows 10 Search Indexing
You have three options when it comes to Windows Search Indexing:
Remove folders from indexation to reduce the scan time
Disable content indexation
Disable Windows Search indexing completely
Remove folders from indexation
Tip: It is a good idea to limit indexation to folders that you want Windows Search to index.
Indexing Options
control panel-> Indexing Options
![]() You manage the indexing locations in the Indexing Options.
To load the configuration, tap on the Windows-key, type indexing options, and select the result of the same name.
The Indexing Options window lists all folders that are included or excluded from indexation.
It furthermore highlights the number of items that are in the index currently, and the status of indexing.
You manage the indexing locations in the Indexing Options.
To load the configuration, tap on the Windows-key, type indexing options, and select the result of the same name.
The Indexing Options window lists all folders that are included or excluded from indexation.
It furthermore highlights the number of items that are in the index currently, and the status of indexing.
![]() Select Modify at the bottom to manage the indexing locations.
This opens a dual-pane window that lists all available locations in the top pane, and all folders selected for indexation at the bottom.
Tip: Make sure you click on the "show all locations" button to reveal locations that may not be shown by default.
Select Modify at the bottom to manage the indexing locations.
This opens a dual-pane window that lists all available locations in the top pane, and all folders selected for indexation at the bottom.
Tip: Make sure you click on the "show all locations" button to reveal locations that may not be shown by default.
![]() You add new locations by checking boxes in front of items in the top pane, and remove existing ones by removing the checkmarks from the boxes.
Since you may not want to navigate the top folder structure to locate all indexed locations, you may click on a location in the lower pane to jump straight to it.
This allows you to remove it with just two clicks.
When you remove a location from Windows Search indexing, Windows Search won't scan it anymore when it runs scans for changes in those locations.
You may also exclude subfolders from indexation.
This is useful if you want some locations of a folder to be indexed but not others.
Using exclude options may further help reduce the load of indexation when Windows Search indexing runs.
You add new locations by checking boxes in front of items in the top pane, and remove existing ones by removing the checkmarks from the boxes.
Since you may not want to navigate the top folder structure to locate all indexed locations, you may click on a location in the lower pane to jump straight to it.
This allows you to remove it with just two clicks.
When you remove a location from Windows Search indexing, Windows Search won't scan it anymore when it runs scans for changes in those locations.
You may also exclude subfolders from indexation.
This is useful if you want some locations of a folder to be indexed but not others.
Using exclude options may further help reduce the load of indexation when Windows Search indexing runs.
![]() Check the Advanced options once you are done.
Make sure that the options "index encrypted files" and "treat similar words with diacritics as different words" are not selected.
You may delete and recreate the index on the page as well, and change the location of the index.
The latter may be useful if the computer's main drive is slower than another drive connected to the device.
Check the Advanced options once you are done.
Make sure that the options "index encrypted files" and "treat similar words with diacritics as different words" are not selected.
You may delete and recreate the index on the page as well, and change the location of the index.
The latter may be useful if the computer's main drive is slower than another drive connected to the device.
Disable content indexation
![]() Another thing that you may want to check is whether Windows Search is allowed to index file content and not only file properties on select drives.
It takes more time obviously to scan the content of files as well, and if you don't need that, you may want to make sure that this is not done on the Windows machine in question.
You need to repeat the following steps for any drive of the Windows 10 PC:
Open File Explorer.
Right-click on the drive, e.g.
Local Disk (c:), and select properties from the context menu.
Go to the General tab if it does not open automatically.
Remove the checkmark from "Allow files on this drive to have contents indexed in addition to file properties".
Confirm the Attribute changes by selecting "apply changes to drive, subfolders and files, and click ok.
The process may take a while before it completes.
It can run for minutes and even longer than that depending on the size of the drive.
You may get an access denied error.
I suggest you select "ignore all" when that happens to tell Windows that it should ignore any future access denied error automatically.
Another thing that you may want to check is whether Windows Search is allowed to index file content and not only file properties on select drives.
It takes more time obviously to scan the content of files as well, and if you don't need that, you may want to make sure that this is not done on the Windows machine in question.
You need to repeat the following steps for any drive of the Windows 10 PC:
Open File Explorer.
Right-click on the drive, e.g.
Local Disk (c:), and select properties from the context menu.
Go to the General tab if it does not open automatically.
Remove the checkmark from "Allow files on this drive to have contents indexed in addition to file properties".
Confirm the Attribute changes by selecting "apply changes to drive, subfolders and files, and click ok.
The process may take a while before it completes.
It can run for minutes and even longer than that depending on the size of the drive.
You may get an access denied error.
I suggest you select "ignore all" when that happens to tell Windows that it should ignore any future access denied error automatically.
Disable Windows Search Indexing completely
![]() The final option that you have is to disable Windows Search indexing completely.
This prevents any indexation processes and should improve the situation on all devices that are affected by high load or performance issues that are caused by Windows Search indexing.
Tap on the Windows-key, type services.msc, and tap on the Enter-key.
This opens the Windows Services Manager.
Locate Windows Search when the services listing opens.
The services are sorted automatically, so jump to the bottom to find it more quickly.
Right-click on Windows Search and select properties from the menu.
Switch the startup type to "disabled".
Select "stop" under service status to block the service from running in that session.
Click apply and then ok.
You may still run searches, but without indexing.
This means that searches may take longer to complete.
==========
The final option that you have is to disable Windows Search indexing completely.
This prevents any indexation processes and should improve the situation on all devices that are affected by high load or performance issues that are caused by Windows Search indexing.
Tap on the Windows-key, type services.msc, and tap on the Enter-key.
This opens the Windows Services Manager.
Locate Windows Search when the services listing opens.
The services are sorted automatically, so jump to the bottom to find it more quickly.
Right-click on Windows Search and select properties from the menu.
Switch the startup type to "disabled".
Select "stop" under service status to block the service from running in that session.
Click apply and then ok.
You may still run searches, but without indexing.
This means that searches may take longer to complete.
==========
to decompile a chm file
to decompile a chm file
Note the spaces!
hh -decompile <TargetFolder> <MyFile>.chm
eg.
hh -decompile D:\Users\Lawht\Desktop procexp.chm
==========
Reverse Engineer Software
Reverse Engineer Software and Create Keygen
==========
VPN
FREE VPN ON WINDOWS 10
windows-7-pptp-vpn-setup
==========
taskhost.exe
taskhost.exe负责计划任务
wermgr.exe
wermgr.exe file is Windows Error Reporting manager
show encoding of a file
Get encoding of a file in Windows
Open up file using Notepad that comes with Windows.
It will show you the encoding of the file when you click "Save As...".
==========
disable OpenWith.exe
shows sync host 65246 the parameter is incorrect
Launch services.MSC utilities as an administrator using this method,
you need to: Right-click on the Start Menu button to launch the WinX Menu.
Click on Command Prompt (Admin) in the WinX Menu to launch an elevated Command Prompt with administrative privileges.
The service has the following description:
This service synchronizes mail, contacts, calendar and various other user data. Mail and other applications dependent on this functionality will not work properly when this service is not running.
Well, no, I don’t care about these applications to sync, so let’s disable this OneSyncSvc. When I tried set the Service Startup Type to Disabled, I got the following error:
Services – The parameter is incorrect
Grrr, annoying, and since I’m pretty stubborn in these situations, I used my last escape: Registry Editor:
Go to the following key:
HKEY_LOCAL_MACHINE\SYSTEM\CurrentControlSet\Services\OneSyncSvc
Then find the name “Start” and change the value to 4. (where 4 stands for Disabled)
Since I got 3 OneSyncSvc’s, I changed it for all three keys.
Disable Snipping Tool in Windows 10
Type ‘gpedit.msc’ in Start Search and hit Enter to open the Local Group Policy Editor. Next, navigate to the following setting:
User Configuration > Administrative Templates > Windows Components > Tablet PC > Accessories.
Here, on the right-side, double-click on ‘Do not allow Snipping Tool to run’ to open its Properties and select ‘Enabled’ option to disable the Sniping Tool in Windows 10.
==========
disk cleaner
wise disk cleaner
advanced systemcare
privazer
glary utilities
bleachbit
Delay, sleep, pause, wait
Delay, sleep, pause, wait etc in JavaScript
set time delay in javascript
jquery.delay()
Windows Script File (.WSF)
Getting started with scripting
About automating Echoview
wscript
Introduction to VBScript and Windows Script Host
Microsoft Windows Script Host 2.0 Developer's Guide
Creating and Using Scripts
WSH: Examples (All)
Windows Script Host Version 2.0 Tutorial
The advantage of the Windows Script File (.WSF) is that it allows the user to use a combination of scripting languages within a single file.
WSH engines include various implementations for the Rexx, BASIC, Perl, Ruby, Tcl, PHP, JavaScript, Delphi, Python, XSLT, and other languages.
Scripts may be run in either GUI mode (WScript.exe) or command line mode (CScript.exe).
So in addition to ASP, IIS, Internet Explorer, CScript and WScript, the WSH can be used to automate and communicate with any Windows application with COM and other exposed objects.
sedsvc
Description:
Sedsvc.exe is not essential for the Windows OS.
WUMT Wrapper Script 2.5.5
Sedsvc.exe is located in a subfolder of "C:\Program Files" (e.g.
C:\Program Files\rempl\).
It runs as service sedsvc.
The service remediates Windows Update Components.
The program is not visible.
It is not a Windows system file.
It's part of rempl v2 (forced update hijackers) installed by KB4023057 and KB4295110 to force update any version of Windows 10 to 1803.
create "Service name: sedsvc" "Display name: Windows Remediation Service" which runs "%ProgramFiles%\rempl\sedsvc.exe"
creates "\Microsoft\Windows\rempl\shell" task and runs "%ProgramFiles%\rempl\sedlauncher.exe" (which has replaced "%ProgramFiles%\rempl\rempl.exe") every 23 hours.
So, delete the %ProgramFiles%\rempl folder or use a script to disable it. One such script is the WUMT Wrapper Script. The latest version is always on Major Geeks.
windows start scripts
find start up scripts, or any batch files that run on start up
Check Task Scheduler Logon/Startup scripts for the user and the system.
Batch Commands to call the executables
start “Chrome” “C:\Program Files (x86)\Google\Chrome\Application\chrome.exe”
start “Outlook” “C:\Program Files\Microsoft Office\Office12\Outlook.exe”
start “Foxpro” “C:\Program Files\Microsoft Visual FoxPro 9\vfp9.exe”
pop-up Command Prompt window:
START CMD /C "ECHO My Popup Message && PAUSE"
get rid of the PAUSE and use cmd /k
direct run batch script
chrome.exe "D:\Dropbox\Public\Manulife Fund Chart append inline.html"
disable sedlauncher
How to disable sedlauncher.exe
important regedit location
this HKEY_LOCAL_MACHINE\SYSTEM\CurrentControlSet\services got lots of tweaks
HKEY_LOCAL_MACHINE\SYSTEM\CurrentControlSet\services\sppsvc
disbale sppsvc Software Protectionlocation
disbale sppsvc Software Protection
Registry key Start and corresponding Startup Type :
Automatic/Automatic (Delayed Start) - 2
Manual - 3
Disabled - 4
Registry key DelayedAutostart means Delayed Start:
Enable – 1
Disable – 0
Turn Off search Indexing Selectively
Turn Off "search" Indexing in Windows for Better Performance
Turn Off Indexing Selectively
click on Start and type in indexing.
select The first option, Indexing Options.
how-to-disable-search
Computer randomly shuts down
Computer randomly shuts down in Windows 10
Solution 3: Turn off Fast Startup
Right-click Start and run Power Options.
In Power Options click 'Choose what the power buttons do'.
Click 'Change settings that are currently unavailable'.
Uncheck the 'Turn on fast startup (recommended)' within the Shutdown settings.
Click OK to confirm and you are done.
Windows 10 Product Key
Find Windows 10 Product Key on a New Computer
Press Windows key + X.
Click Command Prompt (Admin)
At the command prompt, type: wmic path SoftwareLicensingService get OA3xOriginalProductKey. This will reveal the product key. Volume License Product Key Activation.
T487Y-B28W8-2QFXC-P8PBR-6Q7X4
Remove Activate Windows Watermark
Activate Windows watermark bottom right of screen
Restore Default Services in Windows 10
from Command prompt
For Automatic
REG add “HKLM\System\CurrentControlSet\services\sppsvc” /v Start/t REG_DWORD/d 2 /f
For Manual
REG add “HKLM\System\CurrentControlSet\services\sppsvc” /v Start/t REG_DWORD/d 3 /f
windows debloater
debloater
windows10debloater
windows update blocker
0&0 shutup10
w4rh4wk
Win10 CPU佔用高
Win10 CPU佔用高
Win+S 组合键
Win+S 组合键唤出 Cortana
delete folder need permission
administrator-permission-delete-folder
delete folder need permission
delete protected files
select user or group
enter the object name to select: (email address: w..g...com)
converting-bat-to-exe
convert a Windows batch script to a .exe
Converting .bat to .exe with no additional external software
C:\Windows\System32\ folder, there is a file called iexpress.exe.
Right-click it an Run as administrator.
Create a new SED and select "Extract files and run an installation command."
Add the script you want, and make sure that on the next screen,
you set the install program to cmd /c [your_script.bat] where [your_script.bat] is the script file you want to execute.
If you don't do this, windows will try to use Command.com (the old version of Command Prompt) which hasn't been in use for quite a while.
Select preferences (you might need to select "Store files using Long File Name inside Package),
set an output path (to the .exe file you want to create), and select "No restart".
Click next and you should have your .exe!
Just a note, this file actually only acts as a wrapper for your script, and the script itself actually gets executed in a temp folder created on execution (and deleted afterwards), so make sure you don't use any relative paths.
2 free programs for creating EXE's out of batch files
1 - Bat To Exe Converter
2 - Bat 2 Exe
Bat To Exe Converter supports also CLI commands (\? flag for help).
Basic example from documentation:
Bat_To_Exe_Converter.exe -bat mybatfile.bat -save myprogram.exe -icon myicon
========================
drag and drop your batch file over this script bat2exeIEXP.bat and it will be converted to exe file with the same name as the batch file.
;@echo off
;Title Converting batch scripts to file.exe with iexpress
;Mode 75,3 & color 0A
;Rem Original Script https://github.com/npocmaka/batch.scripts/edit/master/hybrids/iexpress/bat2exeIEXP.bat
;echo(
;if "%~1" equ "" (
;echo Usage : Drag and Drop your batch file over this script:"%~nx0"
;Timeout /T 5 /nobreak>nul & Exit
;)
;set "target.exe=%__cd__%%~n1.exe"
;set "batch_file=%~f1"
;set "bat_name=%~nx1"
;set "bat_dir=%~dp1"
;Set "sed=%temp%\2exe.sed"
;echo Please wait a while ... Creating "%~n1.exe" ...
;copy /y "%~f0" "%sed%" >nul
;(
;(echo()
;(echo(AppLaunched=cmd /c "%bat_name%")
;(echo(TargetName=%target.exe%)
;(echo(FILE0="%bat_name%")
;(echo([SourceFiles])
;(echo(SourceFiles0=%bat_dir%)
;(echo([SourceFiles0])
;(echo(%%FILE0%%=)
;)>>"%sed%"
;iexpress /n /q /m %sed%
;del /q /f "%sed%"
;exit /b 0
[Version]
Class=IEXPRESS
SEDVersion=3
[Options]
PackagePurpose=InstallApp
ShowInstallProgramWindow=0
HideExtractAnimation=1
UseLongFileName=1
InsideCompressed=0
CAB_FixedSize=0
CAB_ResvCodeSigning=0
RebootMode=N
InstallPrompt=%InstallPrompt%
DisplayLicense=%DisplayLicense%
FinishMessage=%FinishMessage%
TargetName=%TargetName%
FriendlyName=%FriendlyName%
AppLaunched=%AppLaunched%
PostInstallCmd=%PostInstallCmd%
AdminQuietInstCmd=%AdminQuietInstCmd%
UserQuietInstCmd=%UserQuietInstCmd%
SourceFiles=SourceFiles
[Strings]
InstallPrompt=
DisplayLicense=
FinishMessage=
FriendlyName=-
PostInstallCmd=
AdminQuietInstCmd=
Get a list of windows scheduled tasks
Get a list of windows scheduled tasks
The dos command schtasks
schtasks /query
produces a list of all the scheduled tasks, including Task Name, Next Run Time and Status.
a bit more detail
schtasks /query /v /fo LIST
which produces a detailed list of all tasks.
to get the output in a CSV format
schtasks /query /v /fo CSV
This produces the same quantity of detailed information as LIST.
finally, by piping the output
schtasks /query /v /fo CSV > tasks.csv
command prompt
schtasks /query>tasklist.txt
windows task schd
C:\Windows\System32\taskschd.msc
Tasks are saved in filesystem AND registry
Tasks are stored in 3 locations: 1 file system location and 2 registry locations.
File system:
C:\Windows\System32\Tasks
Registry:
HKLM\Software\Microsoft\Windows NT\CurrentVersion\Schedule\Taskcache\Tasks
HKLM\Software\Microsoft\Windows NT\CurrentVersion\Schedule\Taskcache\Tree
Display settings
Calibrate Windows 10 Monitor
Windows 10 Adjust Display Settings
Settings > System > Display
Display settings provide options for improving the color output of your screen, click the Advance Display Settings links then click Color Calibration.
Turn Off Windows Defender
Turn Off Windows Defender in Windows 10
Disable JavaScript in Internet Explorer
Enable or Disable JavaScript in Internet Explorer
encoding problems
Escaping from character encoding hell in R on Windows
detect invalid utf8 unicode/binary in a text file
Byte order mark
hex-editing
How to boot a Mac from USB media
Getting your Mac to load from a USB drive is fairly straightforward.
Insert the USB boot media into an open USB slot.
Press the Power button to turn on your Mac (or Restart your Mac if it’s already on).
When you hear the startup chime, press and hold the Option key. Holding that key gives you access to OS X’s Startup Manager. Once the Startup Manager screen appears, release the Option key. The utility will look for any available drives that include bootable content.
Using either the pointer or arrow keys on the keyboard, select the USB drive you wish to boot from.
Once selected, either hit the Return key or double-click your selection. The machine will start to boot from the USB drive.
NOTE: Have multiple USB devices connected to your Mac? Don’t worry. The Startup Manager only lists drives that include bootable content.
Boot from USB: Windows
Start by plugging the thumb drive into a USB port. Then to change the BIOS boot sequence:
Press the Power button for your computer.
During the initial startup screen, press ESC, F1, F2, F8 or F10. (Depending on the company that created your version of BIOS, a menu may appear.)
When you choose to enter BIOS Setup, the setup utility page will appear.
Using the arrow keys on your keyboard, select the BOOT tab. All of the available system devices will be displayed in order of their boot priority. You can reorder the devices here.
Move USB to be first in the boot sequence.
NOTE: If you cannot find USB or Removable Devices among the device options, your BIOS may list it under Hard Drive Devices. In that case, you’ll need to:
Move Hard Drive Devices to the top
Expand to show all hard drive device options
Move USB device to the top of that hard drive list
Save the change and then exit the BIOS Setup.
The computer will restart using the new settings, booting from your USB drive.
Stay alert! Depending on your BIOS, you may be prompted with a message to Press any key to boot from external device and you will only have a few seconds to respond. If you do nothing, your computer will go to the next device in the boot sequence list, which will likely be your hard drive.
In the future, your computer will first check the USB port for boot media when starting up. That won’t be a problem, since the BIOS will move to the next device in the boot sequence ... unless you keep the boot media in the USB port. Then the system will launch from that device every time.
Running Windows 10 From a USB Drive
First, sign into your current Windows 10 computer to create a Windows 10 ISO file that will be used to install Windows 10 onto the USB drive.
To do this, browse to the Download Windows 10 website.
This site offers the latest edition of Windows 10, which at this point is the Windows 10 October 2018 Update, or Windows 10 version 1809.
Click the Download tool now button.
Then double-click the downloaded MediaCreationTool.exe file to install the tool.
https://www.pcmag.com/article/352209/how-to-run-windows-10-from-a-usb-drive
![]() At the first screen for "Applicable notices and license terms," click the Access button. Then click the option to "Create installation media for another PC" and click Next. At the "Select language, architecture, and edition" screen, confirm that all of the options are correct and then click Next.
At the first screen for "Applicable notices and license terms," click the Access button. Then click the option to "Create installation media for another PC" and click Next. At the "Select language, architecture, and edition" screen, confirm that all of the options are correct and then click Next.
![]() You will then need to choose what media you want to use. Given the option between a USB flash drive and an ISO file, click ISO file. Then click Next.
You will then need to choose what media you want to use. Given the option between a USB flash drive and an ISO file, click ISO file. Then click Next.
![]() Choose a location on your hard drive to store the Windows.iso file. Click Save. Windows 10 generates the necessary ISO file. When the process is done, click Finish.
Choose a location on your hard drive to store the Windows.iso file. Click Save. Windows 10 generates the necessary ISO file. When the process is done, click Finish.
![]()
Running WinToUSB (With Caveats)
Next, it's time to enlist the aid of WinToUSB. This program is effective and user friendly, but it suffers from one major drawback.
The free version does not support the current flavor of Windows 10—specifically the Windows 10 October 2018 Update, or Windows 10 version 1809. And Microsoft no longer offers older ISO files of Windows 10 at its download site. If you want to make a USB copy of Windows 10 version 1809 using WinToUSB, you'll have to shell out $29.95 for the Professional version.
However, there is a trick that will let you download an ISO file of the Windows 10 April 2018 Update, or Windows 10 version 1803, which you can use with the free version of WinToUSB. (Kudos to technology writer Mauro Huculak for revealing this option in an article at Pureinfotech.com.) Here's how it works.
Open Microsoft Edge on your current Windows 10 computer. Copy and paste the following URL in the address bar: https://www.microsoft.com/en-us/software-download/windows10ISO.
![]() Yes, that takes you to Microsoft's Download Windows 10 website. But wait, there's more. Right-click on the page and select "Inspect element" to open the page's code.
Yes, that takes you to Microsoft's Download Windows 10 website. But wait, there's more. Right-click on the page and select "Inspect element" to open the page's code.
![]() In the right pane, click the down arrow on the top menu bar and select the option for Emulation.
In the right pane, click the down arrow on the top menu bar and select the option for Emulation.
![]() In the Mode section, open the drop-down menu for User agent string and change the entry to Apple Safari (iPad).
In the Mode section, open the drop-down menu for User agent string and change the entry to Apple Safari (iPad).
![]() The page in the left pane should automatically refresh. If not, refresh it manually. Click the drop-down menu for Select edition and select the option for the Windows 10 April 2018 Update. Click Confirm.
The page in the left pane should automatically refresh. If not, refresh it manually. Click the drop-down menu for Select edition and select the option for the Windows 10 April 2018 Update. Click Confirm.
![]() At the next screen, choose your language, then click Confirm. On the Downloads page, choose the 32-bit or 64-bit version of the Windows 10 April 2018 Update and then click Save to download the file. After the file has been downloaded, change the User agent string in Edge from Apple Safari (iPad) back to Microsoft Edge (Default). Close the right pane by clicking the X.
At the next screen, choose your language, then click Confirm. On the Downloads page, choose the 32-bit or 64-bit version of the Windows 10 April 2018 Update and then click Save to download the file. After the file has been downloaded, change the User agent string in Edge from Apple Safari (iPad) back to Microsoft Edge (Default). Close the right pane by clicking the X.
![]()
Create the USB Drive
Now, let's move over to WinToUSB to create the USB drive. Download and install the WinToUSB software from its dedicated website. You can start with the free version and then decide if you want to upgrade to the $29.95 Professional version to gain more features or use the software with the Windows 10 October 2018 Update.
![]() Next, connect a blank USB flash drive or stick to your computer. Launch WinToUSB from its Start menu shortcut. At the introductory screen, click the button to the right of the Image File field and choose your ISO file for the Windows 10 April 2018 Update. Then select the version of Windows 10 you wish to clone onto the USB stick. Click Next.
Next, connect a blank USB flash drive or stick to your computer. Launch WinToUSB from its Start menu shortcut. At the introductory screen, click the button to the right of the Image File field and choose your ISO file for the Windows 10 April 2018 Update. Then select the version of Windows 10 you wish to clone onto the USB stick. Click Next.
![]() At the next screen, you will need to determine your destination disk. Open the drop-down menu and choose your USB drive. A message pops up asking you to select a partition scheme. Click the option for "MBR for BIOS" and then click Yes.
At the next screen, you will need to determine your destination disk. Open the drop-down menu and choose your USB drive. A message pops up asking you to select a partition scheme. Click the option for "MBR for BIOS" and then click Yes.
![]() At the next screen, click the option for Legacy to choose the Installation mode. Click Next. Your Windows 10 USB stick will now be created.
At the next screen, click the option for Legacy to choose the Installation mode. Click Next. Your Windows 10 USB stick will now be created.
![]() When the installation process reaches 100 percent, indicating that it's finished, close the WinToUSB program and remove the USB drive.
When the installation process reaches 100 percent, indicating that it's finished, close the WinToUSB program and remove the USB drive.
![]()
Launch Windows 10 on a Different Computer
When you want to launch Windows 10 on a different computer, insert your USB drive into that PC and choose the option to boot up off the USB drive.
![]() The first time you run Windows 10 off the USB drive, you'll need to go through the familiar Windows setup process. You'll also need to activate Windows 10. You can then install apps onto the USB drive and access any files or documents stored online, so the experience comes close to working on one of your own Windows 10 PCs.
The first time you run Windows 10 off the USB drive, you'll need to go through the familiar Windows setup process. You'll also need to activate Windows 10. You can then install apps onto the USB drive and access any files or documents stored online, so the experience comes close to working on one of your own Windows 10 PCs.
Diskless boot
Diskless node
CCBoot
Open the PowerShell
Open the PowerShell with admin rights:
1) right-click on the Start button on the taskbar and then click Windows PowerShell (Admin) option
2) Alternatively, you can type PowerShell in the Start/taskbar search field and then simultaneously press Ctrl + Shift + Enter keys.
return the 'Open command window here' option to context menu
context menu Open PowerShell
change my username or password in windows
return the 'Open command window here' option to context menu
Add 'Open Command Window Here' to Windows 10 Context Menu
Open Command Window Here
change permission:
select user or group
enter the object name to select: (email address: w..g...com)
Press shift + right-click to select ‘Open command window here’ option on the Windows 10 Context Menu
shortcut arrow black box
Removing shortcut arrow from Desktop Icon without creating black square problem
How to prevent black boxes on desktop icons in Windows after removing shortcut arrows?
Rebuild Icon Cache in Windows 10
The Icon Cache or IconCache.db is a special database file that Windows utilizes to keep copies of each icon handy. When Windows needs to draw an icon, it uses the copy from the cache instead of retrieving the icon image from the original application file. This helps in making Windows draw the icons faster. Things were different in Windows XP, and they are different in Windows 7/8. Things changed again Windows 8.1 onwards. In Windows 10, you need to do the following.
If you needed to rebuild the Icon Cache in Windows 7 / 8, you needed to do the following: Open File Explorer > Folder Options > Views to show Hidden System Files. Next, go to C:\Users\%username%\AppData\Local folder and delete the hidden IconCache.db file. Reboot. This action would purge and rebuild the icon cache.
C:\Users\User\AppData\Local
But this is not enough in Windows 10 or Windows 8.1. You will have to navigate to the following folder:
C:\Users\%username%\AppData\Local\Microsoft\Windows\Explorer
How to Change Your Local Host Name
The default name of the local computer address is called "localhost."
It is also known as the loopback address because it is the same address as the loopback network interface.
The IP address of the localhost is "127.0.0.1."
To change the localhost name, you have to edit the "Hosts" file in Windows.
goto "C:\WINDOWS\System32\drivers\etc"
Show hidden files
The host file located here:
C:\WINDOWS\system32\drivers\etc
It's called: hosts
To disable Cortana in windows 10
Press Win + R keyboard accelerator to open Run dialog box.
Type GPedit.msc and hit Enter or OK to open Local Group Policy Editor. Navigate to
Local Computer Policy ->
Computer Configuration ->
Administrative Templates ->
Windows Components -> Search.
In the right pane, double click on policy named Allow Cortana.
Select the Disabled radio button.
Restart the PC and Cortana and Bing Search will be disabled.
(May work after signing out and in again)
Incompatibility of games in Windows 10
Try using compatibility mode on the program to hopefully allow it to run properly.
Follow the below steps:
Right click on the program icon, click on Properties.
Click the Compatibility tab.
Check the Run this program in compatibility mode for box and select the Preferred Windows.
Click on Apply and click OK button.
You can also update your display drivers from your computer manufacturer website and check if it helps.
Popup message from windows
PowerShell -Command "Add-Type -AssemblyName PresentationFramework;[System.Windows.MessageBox]::Show('Hello World')"
mshta vbscript:Execute("msgbox ""Hello World"":close")
The Msg command
msg %username% Your message here
I have a way to do this with cmd, but it does basically include a file, but the file is deleted instantly after the vbs is executed. So it isn't really. You can do :
echo x=msgbox("Hey! Here is a message!",Type+Icon+Action,"Hey! Here is a title!") > %tmp%\tmp.vbs
cscript //nologo %tmp%\tmp.vbs
del %tmp%\tmp.vbs
additionaly, with external (non windows) executable, there's
nircmd infobox "msg" "title"
sub main
msgbox command
end sub
Set Default Keyboard Layout in Windows 10
Open Settings.
Go to Devices - Typing.
Click on the Advanced keyboard settings link.
On the next page, use the drop down list Override for default input method. Select the default language in the list.
Create Windows 10 Bootable USB Flash Drive
Create Windows 10 Bootable USB Flash Drive
Adjusting contrast in Windows 10
adjust laptop brightness or contrast
Windows Mobility Center
Win+X press B
Hold the Shift and Alt keys on the left side of the keyboard, and press the Print Screen key.
Windows 8 Keyboard Shortcuts Ultimate Guide
Windows 8 Keyboard Shortcuts
https://www.hongkiat.com/blog/windows-8-keyboard-shortcuts/
| Shortcut |
Description |
| Windows Key + D |
Show Desktop |
| Windows Key + C |
Open Charms Menu |
| Windows Key + F |
Charms Menu – Search |
| Windows Key + H |
Charms Menu – Share |
| Windows Key + K |
Charms Menu – Devices |
| Windows Key + I |
Charms Menu – Settings |
| Windows Key + Q |
Search For Installed Apps |
| Windows Key + W |
Search Settings |
| Windows Key + Tab |
Cycle through open Modern UI Apps |
| Windows Key + Shift + Tab |
Cycle through open Modern UI Apps in reverse order |
| Windows Key + . |
Snaps app to the right (split screen multitasking) |
| Windows Key + Shift + . |
Snaps app to the left (split screen multitasking) |
| Windows Key + , |
Temporarily view desktop |
| Alt + F4 |
Quit Modern UI Apps |
| Windows Key + E |
Launch Windows Explorer Window |
| Windows Key + L |
Lock PC and go to lock screen |
| Windows Key + T |
Cycle through icons on taskbar (press Enter to launch app) |
| Windows Key + X |
Show Advanced Windows Settings Menu |
| Windows Key + E |
Launch Windows Explorer Window |
| Windows Key + Page Down |
Moves Start screen and apps to secondary monitor on the right |
| Windows Key + M |
Minimize all Windows |
| Windows Key + Shift + M |
Restore all minimized Windows |
| Windows Key + R |
Open Run dialog box |
| Windows Key + Up Arrow |
Maximize current window |
| Windows Key + Down Arrow |
Minimize current window |
| Windows Key + Left Arrow |
Maximize current window to left side of the screen |
| Windows Key + Right Arrow |
Maximize current window to right side of the screen |
| Ctrl + Shift + Escape |
Open Task Manager |
| Windows Key + Print Screen |
Takes a Print Screen and saves it to your Pictures folder |
| Windows Key + Page Up |
Moves Start screen and apps to secondary monitor on the left |
| Windows Key + Pause Break |
Display System Properties |
| Shift + Delete |
Permanently delete files without sending it to Recycle Bin |
| Windows Key + F1 |
Open Windows Help and Support |
| Windows Key + V |
Cycle through notifications |
| Windows Key + Shift + V |
Cycle through notifications in reverse order |
| Windows Key + 0 to 9 |
Launch/show app pinned to taskbar at indicated number |
| Windows Key + Shift + 0 to 9 |
Launch new instance of app pinned to taskbar at indicated number |
| Alt + Enter |
Display Properties of selected item in File Explorer |
| Alt + Up Arrow |
View upper level folder of current folder in File Explorer |
| Alt + Right Arrow |
View next folder in File Explorer |
| Alt + Left Arrow |
View previous folder in File Explorer |
| Windows Key + P |
Choose secondary display modes |
| Windows Key + U |
Open Ease of Access Center |
| Alt + Print Screen |
Print Screen focused Window only |
| Windows Key + Spacebar |
Switch input language and keyboard layout |
| Windows Key + Shift + Spacebar |
Switch to previous input language and keyboard layout |
| Windows Key + Enter |
Open Narrator |
| Windows Key + + |
Zoom in using Magnifier |
| Windows Key + – |
Zoom out using Magnifier |
| Windows Key + Escape |
Exit Magnifier |
Definition:
Charms : Icons on the right which offer Search, Share, Start Menu, Devices, and Settings.
Windows Key : Windows Logo Key on a standard keyboard built for the Microsoft Windows OS.
App Key
ESC : Escape Key on a standard keyboard.
Shift : Shift Key on a standard keyboard.
ALT : ALT Key on a standard keyboard.
PgUp / PgDown : The Page Up and Page Down Key on a standard keyboard.
Metro UI : Touch sensitive Windows 8 UI based off the Windows 7 Phone Metro UI Interface. The Metro “desktop” hosts all Metro based Apps and Non-Metro based Icons.
Windows 8 Metro Keyboard Shortcut Keys
| Windows Key | Jump between Start Metro Desktop and Previous App
|
| ESC | Return to Previous App
|
| Windows Key + spacebar | Switch input language and keyboard layout
|
| Windows Key + Y | Peek at the Desktop
|
| Windows Key + X | Open Windows 8 Advanced Tools Context Menu
|
| Windows Key + O | Lock device orientation
|
| Windows Key + V | Cycle through toasts
|
| Windows Key + Shift + V | Cycle through toasts in reverse order
|
| Windows Key + Enter | Launch Narrator
|
| Windows Key + PgUp | Move Tiles to the Left
|
| Windows Key + PgDown | Move Tiles to the Right
|
| Windows Key + Shift + . | Move Metro App Split Screen Left
|
| Windows Key + . | Move Metro App Split Screen Right
|
| Winodws Key + S | Open App Search
|
| Windows Key + F | Open File Search
|
| Windows Key + C | Open Charms Bar
|
| Windows Key + I | Open Charms Settings
|
| Windows Key + K | Opens Connect Charm
|
| Windows Key + H | Open Share Charm
|
| Windows Key + Q | Open Search Pane
|
| Windows Key + W | Open Search Settings
|
| Windows Key + Z | Open App Bar
|
| Arrow Keys | Select Metro Apps Left, Right, Up, Down
|
| CTRL + Arrow Right | Move 1 Page Right on Metro UI Menu
|
| CTRL + Arrow Left | Move 1 Page Left on Metro UI Menu
|
| Arrow Key, ALT + Arrow Right | Move Metro App Right
|
| Arrow Key, ALT + Arrow Left | Move Metro App Left
|
| Arrow Key, ALT + Arrow Up | Move Metro App Up
|
| Arrow Key, ALT + Arrow Down | Move Metro App Down
|
| Windows Key + L | Lock Screen
|
| Windows Key + E | Launch Windows Explorer on Classic Desktop
|
| Windows Key + R | Launch Run Box on Classic Desktop
|
| Windows Key + P | Projector Mode – Select Projector Output
|
| Windows Key + U | Launch Ease of Access Center
|
| Windows Key + T | Launch Classic Desktop with Arrow Key Icon Selection
|
| Windows Key + X | Launch Windows Mobility Center on Classic Desktop
|
| Windows Key + B | Launch Classic Desktop with Arrow Key Taskbar Icon Selection
|
| Windows Key + M | Launch Classic Desktop with Arrow Key Desktop Icon Selection
|
| Windows Key + D | Jump to Desktop Mode from anywhere
|
| Arrow Key, App Key | Display Unpin Option and Advanced Metro Icon Icons
|
| ALT + F4 Key | Closes the active app.
|
| ALT + F4 Key (From the Desktop) | Shutdown, Sleep, Switch User, Restart Computer |
General Keyboard Shortcuts
F1 :: Display Help
F2 :: Rename the selected item
F3 :: Search for a file or folder
F4 :: Display the Address bar list in Windows Explorer
F5 – Refresh the active window
F6 :: Cycle through screen elements in a window or on the desktop
F7 :: Check Spelling in open document
F10 :: Activate the menu bar in the active program
CTRL+A :: Select all items in a document or window
CTRL+C :: Copy the selected item
CTRL+X :: Cut the selected item
CTRL+V :: Paste the selected item
CTRL+Z :: Undo an action
CTRL+Y :: Redo an action
SHIFT+DELETE :: Delete the selected item without moving it to the Recycle Bin first (Outlook Tip also)
SHIFT+F10 :: Display the shortcut menu for the selected item
SHIFT when you insert a CD :: Prevent the CD from automatically playing
CTRL+ESC :: Open the Start menu
CTRL+SHIFT with an arrow key :: Select a block of text
CTRL+SHIFT+ESC :: Open Task Manager
CTRL+F4 :: Close the active document (in programs that allow you to have multiple documents open simultaneously)
CTRL+ALT+TAB :: Use the arrow keys to switch between open items
CTRL+Mouse scroll wheel :: Change the size of icons on the desktop
ALT+ESC :: Cycle through items in the order in which they were opened
ALT+ENTER :: Display properties for the selected item
ALT+F4 :: Close the active item, or exit the active program
ALT+SPACEBAR :: Open the shortcut menu for the active window
ALT+UP ARROW :: View the folder one level up in Windows Explorer
ALT+TAB :: Switch between open items
ALT+SHIFT+TAB :: Switch between open items in reverse order
Windows logo key + TAB :: Cycle through programs on the taskbar by using Windows Flip 3-D
CTRL+Windows logo key + TAB :: Use the arrow keys to cycle through programs on the taskbar by using Windows Flip 3-D
ESC :: Cancel the current task
Complete List of Windows 10 Keyboard Shortcuts
| Function | Command
|
| Power menu | Press Windows key + X or right-click Start
|
| Windows + Tab | Launch Windows 10 Task View
|
| Windows + Q | Search the web and Windows with Cortana (speech)
|
| Windows + S | Search the web and Windows with Cortana (keyboard input)
|
| Windows + I | Open Windows 10 settings
|
| Windows + A | Open Windows 10 notifications
|
| Windows + L | Lock your Windows 10 device
|
| Windows + Ctrl + D | Create new virtual desktop
|
| Windows + Ctrl + F4 | Close current virtual desktop
|
| Windows + Ctrl + [Left][Right] | Switch between virtual desktops
|
| Windows + [Left][Right][Up][Down] | Position windows on your screen
E.g. Windows + [Left] moves the current window to the left half of your screen.
If you use Windows + [Up] afterward, the current window will be placed in the upper left quarter of your screen.
And, what’s very handy in my opinion: If you release the Windows key after positioning a window, Task View shows up on the opposite side of the positioned window to select and position another app. |
| Windows + H | Share content (if supported by current app)
|
| Windows + K | Connect to wireless displays and audio devices
|
| Windows + X | Open Start button context menu
|
| Windows key + G | Starts App recording |
| Windows + D | Show Windows desktop
|
| Windows + E | Open File Explorer
|
| Windows + Space | Switch keyboard input language (if you have added at least a second one)
|
| Windows + Shift + [Left][Right] | Move current Window from one monitor to another (when using a multiple monitor setup)
|
| Windows + [1][2][3][…] | Open programs that are pinned to task barE.g. if first pinned program on your taskbar is Windows Explorer (from left to right); the shortcut Windows + 1 opens Windows Explorer for you
|
| Windows + R | Run a command
|
| Windows + P | Project a screen
|
| Alt + Tab | Switch to previous window
|
| Alt + Space | Restore, move, size, minimize, maximize or close current window. Also works like a charm for Windows 10 modern apps.
|
| Alt + F4 | a) Close current window. b) If you’re on your Windows 10 desktop, open Power dialogue to shut down or restart Windows, put your device in sleep mode, or sign out or switch the current user.
|
| CTRL + SHIFT + ESC | Open Task Manager
|
| Alt + underlined menu | Open menu or program. Example, to open the Edit menu in WordPad, press Alt then press E on your keyboard. Repeat the same step for the menu you want to open. |
General Windows keyboard shortcuts
| Function | Command
|
| Access help system in an application | F1
|
| Activate menu bar | F10
|
| Close a program | Alt + F4
|
| Close current window in Multiple Document interface based programs | CTRL + F4
|
| Access right-click menu in the application | Shift + F10
|
| Launch Start menu | Ctrl + ESC or Windows key
|
| Cut | CTRL + X
|
| Copy | CTRL + C
|
| Paste | CTRL + V
|
| Delete | DEL
|
| Undo | CTRL + Z
|
| System Properties | Windows key + Pause/Break
|
| Bypass auto-play when an external storage device is connected | Hold down SHIFT key while inserting a storage device |
Desktop, My Computer, and File Explorer
For selected items, you can use the following shortcuts:
| Function | Command
|
| Search | CTRL + F or F3
|
| Rename an item | F2
|
| Delete a folder or files permanently | SHIFT + DEL
|
| Access properties of a file or folder | ALT + ENTER or ALT + double-click
|
| Copy a file | CTRL key while dragging file
|
| Create a shortcut | CTRL + SHIFT while dragging file
|
| Select All | CTRL + A
|
| Refresh contents of a window | F5
|
| View the folder one level up | Backspace key
|
| Close the selected folder and its parent folders | SHIFT key while clicking the close button
|
| Switch between left and right panes | F6 |
File Explorer commands
| Function | Command
|
| Switch between left and right panes | F6
|
| Expand all subfolders under the selected folder | NUMLOCK + ASTERISK when using a numeric keyboard
|
| Expand the selected folder | NUMLOCK + PLUS sign when using a numeric keyboard
|
| Collapse the selected folder | NUMLOCK + MINUS sign when using a numeric keyboard
|
| Expand current selection if it’s collapsed, otherwise select first subfolder | Right arrow
|
| Collapse current selection if it’s expanded, otherwise, select parent folder | Left arrow |
Properties dialog commands
| Function | Command
|
| Move forward through options | Tab key
|
| Move backward through options | SHIFT + Tab
|
| Move forward through tabs | CTRL + Tab
|
| Move backward through tabs | CTRL + SHIFT + TAB |
Open and Save dialog commands
| Function | Command
|
| Open the Save In and address bar | CTRL + O and F4
|
| Refresh | F5
|
| Open the folder one level up, if a folder is selected | BACKSPACE |
Windows 10 Command Prompt keyboard commands
Text Selection
| Function | Command
|
| SHIFT + LEFT ARROW | Moves the cursor to the left one character, extending the selection
|
| SHIFT + RIGHT ARROW | Moves the cursor to the right one character, extending the selection
|
| SHIFT + UP ARROW | Selects text up line by line starting from the location of the insertion point
|
| SHIFT + DOWN ARROW | Extends text selection down one line, starting at the location of the insertion point
|
| SHIFT + END | If cursor is in current line being edited* First time extends selection to the last character in the input line.* Second consecutive press extends selection to the right margin; or else Selects text from the insertion point to the right margin.
|
| SHIFT + HOME | If cursor is in current line being edited* First time extends selection to the character immediately after the command prompt.* Second consecutive press extends selection to the left margin; or else Extends selection to the left margin.
|
| SHIFT + PAGE DOWN | Extends selection down one screen
|
| SHIFT + PAGE UP | Extends selection up one screen
|
| CTRL + SHIFT + RIGHT ARROW | Extends the selection one word to the right
|
| CTRL + SHIFT + LEFT ARROW | Extends the selection one word to the left
|
| CTRL + SHIFT + HOME | Extend selection to the beginning of the screen buffer
|
| CTRL + SHIFT + END | Extend selection to the end of the screen buffer
|
| CTRL + A | If cursor is in current line being edited (from first typed char to last type char) and line is not empty, and any selection cursor is also within the line being edited Selects all text after the prompt (phase 1); or else Selects the entire buffer (phase 2) |
Edit commands
| Function | Command
|
| Windows Key + V | Open clipboard history menu
|
| CTRL + V | Paste text into the command line
|
| SHIFT + INS | Paste text into the command line
|
| CTRL + C | Copy selected text to the clipboard
|
| CTRL + INS | Copy selected text to the clipboard |
| Function | Command
|
| CTRL + M | Enter “Mark Mode” to move cursor within window
|
| ALT | In conjunction with one of the selection key combinations, begins selection in block mode
|
| ARROW KEYS | Move cursor in the direction specified
|
| PAGE KEYS | Move cursor by one page in the direction specified
|
| CTRL + HOME | Move cursor to beginning of buffer
|
| CTRL + END | Move cursor to end of buffer |
History navigation keys
| Function | Command
|
| CTRL + UP ARROW | Moves up one line in the output history
|
| CTRL + DOWN ARROW | Moves down one line in the output history
|
| CTRL + PAGE UP | Moves up one page in the output history
|
| CTRL + PAGE DOWN | Moves down one page in the output history |
Additional commands
| Function | Command
|
| CTRL + F | Opens “Find” in console dialog
|
| ALT + F4 | Close the console window, of course! |
Keyboard Run Commands
Use the following to access locations such as Control Panel items, File Explorer shell folders quickly using the run command.
| Opens | Press Windows + R and type:
|
| Open Documents Folder | documents
|
| Open Videos folder | videos
|
| Open Downloads Folder | downloads
|
| Open Favorites Folder | favorites
|
| Open Recent Folder | recent
|
| Open Pictures Folder | pictures
|
| Adding a new Device | devicepairingwizard
|
| About Windows dialog | winver
|
| Add Hardware Wizard | hdwwiz
|
| Advanced User Accounts | netplwiz
|
| Advanced User Accounts | azman.msc
|
| Backup and Restore | sdclt
|
| Bluetooth File Transfer | fsquirt
|
| Calculator | calc
|
| Certificates | certmgr.msc
|
| Change Computer Performance Settings | systempropertiesperformance
|
| Change Data Execution Prevention Settings | systempropertiesdataexecutionprevention
|
| Change Data Execution Prevention Settings | printui
|
| Character Map | charmap
|
| ClearType Tuner | cttune
|
| Color Management | colorcpl
|
| Command Prompt | cmd
|
| Component Services | comexp.msc
|
| Component Services | dcomcnfg
|
| Computer Management | compmgmt.msc
|
| Computer Management | compmgmtlauncher
|
| Connect to a Projector | displayswitch
|
| Control Panel | control
|
| Create A Shared Folder Wizard | shrpubw
|
| Create a System Repair Disc | recdisc
|
| Data Execution Prevention | systempropertiesdataexecutionprevention
|
| Date and Time | timedate.cpl
|
| Default Location | locationnotifications
|
| Device Manager | devmgmt.msc
|
| Device Manager | hdwwiz.cpl
|
| Device Pairing Wizard | devicepairingwizard
|
| Diagnostics Troubleshooting Wizard | msdt
|
| Digitizer Calibration Tool | tabcal
|
| DirectX Diagnostic Tool | dxdiag
|
| Disk Cleanup | cleanmgr
|
| Disk Defragmenter | dfrgui
|
| Disk Management | diskmgmt.msc
|
| Display | dpiscaling
|
| Display Color Calibration | dccw
|
| Display Switch | displayswitch
|
| DPAPI Key Migration Wizard | dpapimig
|
| Driver Verifier Manager | verifier
|
| Ease of Access Center | utilman
|
| EFS Wizard | rekeywiz
|
| Event Viewer | eventvwr.msc
|
| Fax Cover Page Editor | fxscover
|
| File Signature Verification | sigverif
|
| Font Viewer | fontview
|
| Game Controllers | joy.cpl
|
| IExpress Wizard | iexpress
|
| Internet Explorer | iexplore
|
| Internet Options | inetcpl.cpl
|
| iSCSI Initiator Configuration Tool | iscsicpl
|
| Language Pack Installer | lpksetup
|
| Local Group Policy Editor | gpedit.msc
|
| Local Security Policy | secpol.msc
|
| Local Users and Groups | lusrmgr.msc
|
| Location Activity | locationnotifications
|
| Magnifier | magnify
|
| Malicious Software Removal Tool | mrt
|
| Manage Your File Encryption Certificates | rekeywiz
|
| Microsoft Management Console | mmc
|
| Microsoft Support Diagnostic Tool | msdt
|
| Mouse | main.cpl
|
| NAP Client Configuration | napclcfg.msc
|
| Narrator | narrator
|
| Network Connections | ncpa.cpl
|
| New Scan Wizard | wiaacmgr
|
| Notepad | notepad
|
| ODBC Data Source Administrator | odbcad32
|
| ODBC Driver Configuration | odbcconf
|
| On-Screen Keyboard | osk
|
| Paint | mspaint
|
| Pen and Touch | tabletpc.cpl
|
| People Near Me | collab.cpl
|
| Performance Monitor | perfmon.msc
|
| Performance Options | systempropertiesperformance
|
| Phone and Modem | telephon.cpl
|
| Phone Dialer | dialer
|
| Power Options | powercfg.cpl
|
| Presentation Settings | presentationsettings
|
| Print Management | printmanagement.msc
|
| Printer Migration | printbrmui
|
| Printer User Interface | printui
|
| Private Character Editor | eudcedit
|
| Problem Steps Recorder | psr
|
| Programs and Features | appwiz.cpl
|
| Protected Content Migration | dpapimig
|
| Region and Language | intl.cpl
|
| Registry Editor | regedit
|
| Registry Editor 32 | regedt32
|
| Remote Access Phonebook | rasphone
|
| Remote Desktop Connection | mstsc
|
| Resource Monitor | resmon
|
| Resultant Set of Policy | rsop.msc
|
| SAM Lock Tool | syskey
|
| Screen Resolution | desk.cpl
|
| Securing the Windows Account Database | syskey
|
| Services | services.msc
|
| Set Program Access and Computer Defaults | computerdefaults
|
| Share Creation Wizard | shrpubw
|
| Shared Folders | fsmgmt.msc
|
| Signout | logoff
|
| Snipping Tool | snippingtool
|
| Sound | mmsys.cpl
|
| Sound recorder | soundrecorder
|
| SQL Server Client Network Utility | cliconfg
|
| Sticky Notes | stikynot
|
| Stored User Names and Passwords | credwiz
|
| Sync Center | mobsync
|
| System Configuration | msconfig
|
| System Configuration Editor | sysedit
|
| System Information | msinfo32
|
| System Properties | sysdm.cpl
|
| System Properties (Advanced Tab) | systempropertiesadvanced
|
| System Properties (Computer Name Tab) | systempropertiescomputername
|
| System Properties (Hardware Tab) | systempropertieshardware
|
| System Properties (Remote Tab) | systempropertiesremote
|
| System Properties (System Protection Tab) | systempropertiesprotection
|
| System Restore | rstrui
|
| Task Manager | taskmgr
|
| Task Scheduler | taskschd.msc
|
| Trusted Platform Module (TPM) Management | tpm.msc
|
| Turn Windows features on or off | optionalfeatures
|
| User Account Control Settings | useraccountcontrolsettings
|
| Utility Manager | utilman
|
| Volume Mixer | sndvol
|
| Windows Action Center | wscui.cpl
|
| Windows Activation Client | slui
|
| Windows Anytime Upgrade Results | windowsanytimeupgraderesults
|
| Windows Disc Image Burning Tool | isoburn
|
| Windows Explorer | explorer
|
| Windows Fax and Scan | wfs
|
| Windows Firewall | firewall.cpl
|
| Windows Firewall with Advanced Security | wf.msc
|
| Windows Journal | journal
|
| Windows Media Player | wmplayer
|
| Windows Memory Diagnostic Scheduler | mdsched
|
| Windows Mobility Center | mblctr
|
| Windows Picture Acquisition Wizard | wiaacmgr
|
| Windows PowerShell | powershell
|
| Windows PowerShell ISE | powershell_ise
|
| Windows Remote Assistance | msra
|
| Windows Repair Disc | recdisc
|
| Windows Script Host | wscript
|
| Windows Update | wuapp
|
| Windows Update Standalone Installer | wusa
|
| Versione Windows | winver
|
| WMI Management | wmimgmt.msc
|
| WordPad | write
|
| XPS Viewer | xpsrchvw |
The name and terminology used for certain commands and functions have been revised in Windows 10, along with their locations. The following table provides how you can find and access them.
| Original Name | New Name, Location, and Functions
|
| Windows Explorer | File Explorer – (Press Windows key + E to launch)
|
| Favorites Navigation Pane (Windows Explorer) | Quick Access
|
| Folder options | Options (Files Explorer > View tab > Options)
|
| Recent Items | Located in File Explorer > This PC > Recent Files
|
| Computer or My Computer | This PC
|
| Control Panel | Settings (classic Control Panel can still be accessed – Windows key + X then click Control Panel)
|
| View Available Networks | Network Flyout – Notification or Show Available Networks (Settings > Network & Internet > Wi-Fi > Additional settings
|
| Action Center |  Located in the System Tray; Manage incoming email, system, social media notifications
|
| Start menu | Start
|
| Task View |  Create and Manage multiple desktops
|
| Aero Snap | Snap Assist – easily manage open windows on screen
|
| All Programs | All Apps
|
| Shutdown/Turn off computer | Power
|
| Switch Users | Located at the top of the Start represented by your account name |
find your MAC Address in Windows 10
Perhaps you're setting up your router and you'd like to filter out some devices out of your network for extra security.
Maybe your router lists connected devices by their MAC address and you'd like to figure out which device is which.
Or there's a chance you'll need to know your PC's MAC address to diagnose or resolve some computer network errors.
What is a MAC address?
A MAC address is a unique, alphanumeric hardware identifier for a device that connects to the internet.
Every network device or interface, such as your laptop's Wi-Fi adapter, has a MAC (or "media access control") address.
A MAC address is assigned by manufacturers and embedded into the device's network interface card -- it's permanently tied to the device, which means that a MAC address cannot be changed.
The MAC address is listed as series of 12 digits across six pairs (00:1A:C2:7B:00:47, for example).
A MAC address is essential in order for your device to interact with other local network devices.
When your device detects a router, its sends out its MAC address to initiate a connection.
This is where the IP address comes in -- your router will assign you an IP address so that you can connect to the internet.
So what's the difference between a MAC address and an IP address? In part, MAC addresses are permanently burned into your device while IP addresses can change depending on your location.
MAC addresses are used in the local network while IP addresses can be used to identify network devices all around the world.
Method 1: How to Find Your MAC Address in Windows 10 with Command Prompt
The quickest way to find the MAC address is through the command prompt.
1. Open the command prompt. Search "Command Prompt" in the taskbar, or if you have an older version of Windows, you can right-click on the Start button and select Command Prompt from the menu.
https://cdn.mos.cms.futurecdn.net/pBMu828w8EWybS8oNy3LVm-970-80.jpg
![]() 2. Type in ipconfig /all and press Enter. This will display your network configuration.
https://cdn.mos.cms.futurecdn.net/pBMu828w8EWybS8oNy3LVm-970-80.jpg
2. Type in ipconfig /all and press Enter. This will display your network configuration.
https://cdn.mos.cms.futurecdn.net/pBMu828w8EWybS8oNy3LVm-970-80.jpg
![]() 3. Find your adapter's physical address. Scroll down to your network adapter and look for the values next to "Physical Address," which is your MAC address.
https://cdn.mos.cms.futurecdn.net/pBMu828w8EWybS8oNy3LVm-970-80.jpg
3. Find your adapter's physical address. Scroll down to your network adapter and look for the values next to "Physical Address," which is your MAC address.
https://cdn.mos.cms.futurecdn.net/pBMu828w8EWybS8oNy3LVm-970-80.jpg
![]() https://cdn.mos.cms.futurecdn.net/pBMu828w8EWybS8oNy3LVm-970-80.jpg
https://cdn.mos.cms.futurecdn.net/pBMu828w8EWybS8oNy3LVm-970-80.jpg
How to find your MAC Address in Windows 10 without using
Command Prompt
![]() (Image credit: Future)
Perhaps you don't want to mess around with command prompt for some reason or another.
Here are some ways you can snag a MAC address without accessing command prompt.
(Image credit: Future)
Perhaps you don't want to mess around with command prompt for some reason or another.
Here are some ways you can snag a MAC address without accessing command prompt.
Method 2: How to Find Your MAC Address in Windows 10 in the Network Connection Settings
You can also find the MAC address by looking at the details of your network adapter in Windows.
1. Search "View network status and tasks" in the taskbar and click on it. (Or navigate to Control Panel > Network and Internet > Network and Sharing Center)
https://cdn.mos.cms.futurecdn.net/pBMu828w8EWybS8oNy3LVm-970-80.jpg
![]() 2. Click on your network connection.
https://cdn.mos.cms.futurecdn.net/pBMu828w8EWybS8oNy3LVm-970-80.jpg
2. Click on your network connection.
https://cdn.mos.cms.futurecdn.net/pBMu828w8EWybS8oNy3LVm-970-80.jpg
![]() 3. Click the "Details" button.
https://cdn.mos.cms.futurecdn.net/pBMu828w8EWybS8oNy3LVm-970-80.jpg
3. Click the "Details" button.
https://cdn.mos.cms.futurecdn.net/pBMu828w8EWybS8oNy3LVm-970-80.jpg
![]() 4. Locate the Physical Address. The value for the physical address in the Network Connection Details window is your MAC address.
https://cdn.mos.cms.futurecdn.net/pBMu828w8EWybS8oNy3LVm-970-80.jpg
4. Locate the Physical Address. The value for the physical address in the Network Connection Details window is your MAC address.
https://cdn.mos.cms.futurecdn.net/pBMu828w8EWybS8oNy3LVm-970-80.jpg
![]()
Method 3: How to get your MAC address by accessing your taskbar
Another avenue that you can use to find your device's MAC address is by clicking on an icon on your taskbar to quickly navigate to your PC's hardware identifier.
1. https://cdn.mos.cms.futurecdn.net/pBMu828w8EWybS8oNy3LVm-970-80.jpg
Click on the network icon on your Windows 10 taskbar. It
should be next to the clock.
![]() (Image credit: Future)
2. Click on "Properties" on your connection.
https://cdn.mos.cms.futurecdn.net/pBMu828w8EWybS8oNy3LVm-970-80.jpg
This will open your network's settings window.
(Image credit: Future)
2. Click on "Properties" on your connection.
https://cdn.mos.cms.futurecdn.net/pBMu828w8EWybS8oNy3LVm-970-80.jpg
This will open your network's settings window.
![]() (Image credit: Future)
3. Scroll down to the Properties section.
Your MAC address should be right next to the words "Physical address."
(Image credit: Future)
3. Scroll down to the Properties section.
Your MAC address should be right next to the words "Physical address."
![]() (Image credit: Future)
(Image credit: Future)
Windows 10 Security and Networking
How do I find my device's MAC address?
Example of a MAC address: 00:00:00:a1:2b:cc
Every device connected to your home network has a unique MAC address. If your computer has multiple network adapters (for example, an Ethernet adapter and a wireless adapter), each adapter has its own MAC address.
You can block (blacklist) or allow (whitelist) service to a specific device if you know its MAC address.
To find your device's MAC address:
Windows 10, 8, 7, Vista:
- Click Windows Start or press the Windows key.
- In the search box, type cmd.
- Press the Enter key. A command window displays.
- Type ipconfig /all.
- Press Enter. A physical address displays for each adapter. The physical address is your device's MAC address.
Windows 2000, 2003, XP, NT:
- Click Start > Run. A Run text box appears.
- In the Run text box, type cmd.
- Press Enter. A command prompt displays.
- In the command prompt, type ipconfig /all.
- Press Enter. Under Ethernet adapter Wireless Network Connection, a Physical Address displays. This is your computer's Ethernet MAC address.
Macintosh OS X:
- Select Apple Icon > System Preferences > Network > Advanced. A network box displays.
- Select WiFi. A WiFi Address or Airport Address displays. This is your device's MAC address.
Linux/Unix:
- Launch the terminal
- Type fconfig in terminal
- Your MAC address is displayed
IOS:
Select Settings > General > About.A Wi-Fi Address displays. This is your device's MAC address.
Android:
In most cases, you can follow this procedure to locate your MAC address:
Select Settings > About Device > Status.A WiFi Address or WiFi MAC Address displays. This is your device's MAC address.
If this does not work, refer to your device's user manual.
If you do not see your operating system listed, refer to your device's user manual or product support website.
To confirm that port is not blocked
http://portquiz.net:27017
Other useful tests to perform if it seems that you have difficulty connecting would be:
telnet cluster0-shard-00-00-jxeqq.mongodb.net 27017
or
ping cluster0-shard-00-00-jxeqq.mongodb.net
Windows Sandbox
Windows 10’s New Sandbox
Windows Sandbox is half app, half virtual machine.
It lets you quickly spin up a virtual clean OS imaged from your system’s current state so that you can test programs or files in a secure environment that’s isolated from your main system.
When you close the sandbox, it destroys that state.
Nothing can get from the sandbox to your main installation of Windows, and nothing remains after closing it.
To Windows features on or off:
Open Start.
Search for Turn Windows features on or off, and click the top result to open
Win 10 漏洞
開啟 Hyper-V system32資料夾可被修改 包括惡意程式,而這個檔案一旦被寫入就不能刪除或修改。
Change notification settings in Windows 10
Select the Start button, and then select Settings
Go to System > Notifications & actions.
Choose the quick actions you'll see in action center. Turn notifications, banners, and sounds on or off for some or all notification senders. Choose whether to see notifications on the lock screen.
make the titlebar thinner
The following registry .reg file will make the titlebar thinner, the titlebar text smaller, scroll bars thinner and the border padding as thin as possible.
[HKEY_CURRENT_USER\Control Panel\Desktop\WindowMetrics]
"CaptionHeight"="-285"
"CaptionWidth"="-285"
"CaptionFont"=hex:f4,ff,ff,ff,00,00,00,00,00,00,00,00,00,00,00,00,90,01,00,00,\ 00,00,00,01,00,00,05,00,53,00,65,00,67,00,6f,00,65,00,20,00,55,00,49,00,00,\
00,00,00,00,00,00,00,00,00,00,00,00,00,00,00,00,00,00,00,00,00,00,00,00,00,\
00,00,00,00,00,00,00,00,00,00,00,00,00,00,00,00,00,00,00,00,00,00
"ScrollWidth"="-240"
"ScrollHeight"="-240"
"PaddedBorderWidth"="0"
Remember to export the WindowMetrics key before you start modifying it, just in case you need to revert to the defaults after having messed something up. You also need to log out and back in again to see the changes.
For CaptionHeight and CaptionWidth, use the following formula: -15*desired height in pixels. For example, to set the title bar height to 18px, set the CaptionHeight value to -15*18, resulting in -270.
For ScrollWidth and ScrollHeight, the default value is -255. A higher value (ex: -1000) will give you a wider scrollbar, and lower value (ex: -100) will give you a thinner scrollbar.
windows Start Menu
there are two Start Menus
startup from task manager
C:\ProgramData\Microsoft\Windows\Start Menu\Programs\StartUp
startup from user folder
C:\Users\User\AppData\Roaming\Microsoft\Windows\Start Menu\Programs\Startup
Synchronize the clock
Synchronize the clock on your Windows computer to a time server
Recover Permanently Deleted Files
Recover Permanently Deleted Files in Windows 10
chkdsk D: /f
ATTRIB -H -R -S /S /D D:*.*
set up a Scheduled Task
Open Task Scheduler - click Start, type in "scheduler" then press enter
On the right pane, click "Create Task..."
Give it a name - perhaps "Say Time"
Select (click) on the "Triggers" tab, then the "New..." button - It will be set to One time.
Modify the Start Time so the time looks like: 12:00:00 to make it trigger at the top of each hour.
Check the box for "Repeat task every" - set it to 1 hour and for a duration of Indefinitely.
Check box for "Stop task if it runs longer than" and set it to 30 minutes
Click OK
Click on the "Actions" tab, then the "New..." button - It will open with Action set to Start a Program.
Browse to your saytime.vbs file
Click OK, then OK
Now, on the left side, click on "Task Scheduler Library"
Find your new entry, right-click on it and then click on Run
When you hear the voice say the time you know the task is working.
You can also see the trigger conditions.
To create a script for Task Scheduler
use a scripting language like PowerShell or batch scripting.
an example using PowerShell:
#powershell
$action = New-ScheduledTaskAction -Execute "C:\Path\to\your\script.bat"
$trigger = New-ScheduledTaskTrigger -Daily -At "12:00 PM"
$settings = New-ScheduledTaskSettingsSet
$task = New-ScheduledTask -Action $action -Trigger $trigger -Settings $settings
Register-ScheduledTask -TaskName "YourTaskName" -InputObject $task -User "Username" -Password "Password"
In the example above, the scheduled task will run a batch script located at "C:\Path\to\your\script.bat" daily at 12:00 PM.
Replace "YourTaskName" with the desired name for your task.
Also, replace "Username" and "Password" with the appropriate credentials.
Save the file with a .ps1 extension, such as myscript.ps1.
To run the script:
Open PowerShell as an administrator.
Set the execution policy to allow running scripts by executing the command Set-ExecutionPolicy -ExecutionPolicy RemoteSigned.
Change the directory to the location where you saved your script by executing the command cd C:\Path\to\your\script\directory.
Run the script by executing the command .\myscript.ps1.
The script will create a scheduled task using the provided parameters, and the task will appear in the Task Scheduler with the specified name and settings.
Note: Make sure to adjust the paths, names, and settings according to your requirements.
Also, exercise caution when storing and handling passwords in scripts.
To schedule a task using DOS batch scripting
use the schtasks command-line utility.
@echo off
REM Define the command to create the scheduled task
set "command=schtasks /Create /SC WEEKLY /D MON /TN "YourTaskName" /TR "C:\Path\to\your\script.bat" /ST 12:00"
REM Run the command
%command%
In the example above, the schtasks command is used to create a new weekly scheduled task.
The /SC WEEKLY option specifies that the task should run weekly, and the /D MON option indicates that the task should run on Mondays.
Replace "MON" with the desired day of the week abbreviation.
Adjust the path to your script and the task name as needed.
Save the batch script with a .bat extension, such as myscript.bat.
schtasks-create
use Python to create a script for Task Scheduler
an example using Python:
import subprocess
# Define the command to create the scheduled task
command = 'schtasks /Create /SC DAILY /TN "YourTaskName" /TR "C:\\Path\\to\\your\\script.bat" /ST 12:00'
# Run the command using subprocess
subprocess.run(command, shell=True)
In the example above, the subprocess.run() function is used to execute the schtasks command, which is a command-line utility for managing scheduled tasks in Windows.
The command creates a new daily scheduled task named "YourTaskName" that runs the batch script located at "C:\Path\to\your\script.bat" at 12:00 PM.
Replace "YourTaskName" with the desired name for your task, and adjust the path to your script accordingly.
Save the Python script with a .py extension, such as myscript.py.
To run the script:
Open a command prompt.
Change the directory to the location where you saved your script by using the cd command, for example, cd C:\Path\to\your\script\directory.
Run the script by executing the command python myscript.py.
The script will create a scheduled task using the provided parameters, and the task will appear in the Task Scheduler with the specified name and settings.
Note: Make sure that Python is installed on your system and accessible from the command prompt.
schedule the task to run at a specific time every week
example using Python:
import subprocess
# Define the command to create the scheduled task
command = 'schtasks /Create /SC WEEKLY /D MON /TN "YourTaskName" /TR "C:\\Path\\to\\your\\script.bat" /ST 12:00'
# Run the command using subprocess
subprocess.run(command, shell=True)
In this example, the /SC WEEKLY option is used to specify that the task should run weekly.
The /D MON option indicates that the task should run on Mondays.
You can replace "MON" with the desired day of the week abbreviation (e.g., "TUE" for Tuesday, "WED" for Wednesday, etc.).
Adjust the path to your script and the task name as needed.
Save the Python script with a .py extension, such as myscript.py, and follow the steps mentioned in the previous response to run the script.
The script will create a scheduled task that runs the batch script at the specified time on the specified day of the week.
two Start Menus
C:\ProgramData\Microsoft\Windows\Start Menu\Programs\StartUp
C:\Users\User\AppData\Roaming\Microsoft\Windows\Start Menu\Programs\Startup
記憶咭問題
sfc /scannow
faststone capture serial number
Name : www.xyraclius.com
Serial : OOCRYIMDMDPWRETFPSUZ
open a cmd window in a specific location
open a cmd window in a specific location
In File Explorer, press and hold the Shift key, then right click or press and hold on a folder or drive that you want to open the command prompt at that location for, and click/tap on Open Command Prompt Here option.
Windows 10 Keeps going into sleep after 2 minute idle
Windows 10 Keeps going into sleep after 2 minute idle
1. Click on the windows icon
2. Type regedit
3. Right-click on regedit icon, click Run as administrator
4. Go to HKEY_LOCAL_MACHINE\SYSTEM\CurrentControlSet\Control\Power\PowerSettings\238C9FA8-0AAD-41ED-83F4-97BE242C8F20\7bc4a2f9-d8fc-4469-b07b-33eb785aaca0
5. Double click on Attributes
6. Enter number 2.
7. Go to Advanced power settings (click on Windows button, write power options, click on Power Options, in the selected plan click on the Change plan settings, click on the Change advanced power settings).
8. Click on the Change settings that are currently unavailable
9. Click Sleep, then System unattended sleep timeout, then change these settings from 2 Minutes to 20 for example.
killing processes
a safer way to use a tool named 'Process Explorer',
it displays more information including the directory path location
disable the windowsinternal.composableshell.experiences.textinput.inputapp.exe which uses a dedicated GPU
WindowsInternal.ComposableShell.Experiences.TextInput.InputApp.exe.
C:\Windows\SystemApps\InputApp_cw5n1h2txyewy
Go to Task Manager (Details tab) and click End task.
Add .bak postfix to the end of app directory and, optionally, after the .exe file extention.
Click your Start button, type services and hit Enter
When the Services applet opens, click on the Name column to sort the services by name, and then scroll until you locate the “Touch Keyboard and Handwriting Panel Service“.
Double-click on that service, if it is started, click stop and set its Startup type to Disabled
adjust windows 11 colors
HKEY_CURRENT_USER\Control Panel\Colors
HKEY_CURRENT_USER\Software\Microsoft\Windows\DWM
Disable Windows 8 Charms bar
Disable Windows 8 Charms bar
right-click on Taskbar and select properties.
Under Navigation tab, uncheck the When I point to the upper-right corner show the charms option.
This will disable it from the top right corner only, which means moving the cursor to the bottom right corner will still display the Charms Bar.
To get rid of it from lower corner as well, you can use ImmersiveShell key in Registry Editor.
HKEY_CURRENT_USER>Software>Microsoft>Windows>CurrentVersion>ImmersiveShell
go to ImmersiveShell > New > Key from the context menu, and then name the new Key as EdgeUI.
4. Right-click the EdgeUI key, point to New, DWORD (32-bit) Value and then name the new DWORD as DisableCharmsHint.
5. Now double-click the newly created DWORD value, type 1 and click OK. You may also need to reboot Windows for the changes to come into effect.
虛擬機
虛擬機 附最新安裝教程
VMware 16 Pro
VirtualBox
Windows 11 ISO
Windows 11 首個官方ISO鏡像正式發布
🔰翻牆VPN推薦(排名前3)
ExpressVPN
NordVPN
Surfshark
XDM下載管理器
XDM下載管理器
寶藏級電腦軟體
5款Windows 寶藏級電腦軟體
1.KMSOffline – https://free.appnee.com/kmsoffline
Itellyou- https://msdn.itellyou.cn
2.Office Tool Plus – https://otp.landian.vip
3.虛擬定位 – https://www.i4.cn
Fake GPS location – https://play.google.com/store/apps/details?id=com.lexa.fakegps&hl=en_US&gl=US
5.Remotely 電腦遠程控制 – https://remotely.one/
remove homegroup from windows 8.1
Click Start, type “homegroup,” and then click the “HomeGroup” setting.
In the main “HomeGroup” window, click “Leave the homegroup.”
Homegroup icon appearing suddenly on Windows desktop
1. Open Control Panel > Personalization, open Desktop Icon Settings,
and then first check and then uncheck the Network checkbox. Click Apply and Exit.
2. Via Control Panel > Network and Sharing Center, open Advanced Sharing Settings in the Control Panel and see if checking the Turn off network discovery helps.
3. Open Control Panel > Folder Options > View tab. Uncheck Use Sharing Wizard (Recommended) and click Apply.
Then Check it back and click Apply. The Homegroup icon will be removed from your Windows desktop and should not reappear again.
4. If you don’t use Homegroup, then you could open Services Manager or services.msc and disable Homegroup Listener and Homegroup Provider services.
Change their start-up types from Manual to Disabled.
The Homegroup Provider service performs networking tasks associated with configuration and maintenance of Homegroups. If this service is stopped or disabled, your computer will be unable to detect other Homegroups and your Homegroup might not work properly. The Homegroup Listener service makes local computer changes associated with configuration and maintenance of the Homegroup-joined computer. If this service is stopped or disabled, your computer will not work properly in a Homegroup and your Homegroup might not work properly.
5. If the icon continues to appear on the desktop, back up your Registry first and then open Registry Editor or regedit, and delete the following key.
Computer\HKEY_LOCAL_MACHINE\SOFWARE\Microsoft\Windows\CurrentVersion\Explorer\Desktop\NameSpace\
delete homegroup key
This folder key relates to the Homegroup icon-
{B4FB3F98-C1EA-428d-A78A-D1F5659CBA93}
If you get an error while deleting the key, you may be required to take control of the registry key OR you may disable Homegroup Listener and Homegroup Provider service as mentioned above and see it this allows you to delete the registry key.
Have you noticed this behavior? I have and at times, it appeared after I had use Disk Cleanup and a Registry Cleaner – but I have no idea if it is connected in any way.
NOTE:
Refresh the desktops. Yes, that does work, so do try that first.
suggests you could just leave the Homegroup via Control Panel > Homegroup > “Leave the homegroup”.
NirCmd
NirCmd
download, password is nirsoft123!
cannot create directory: Permission denied
Probable problem cause: some other process is using/locking file/folder you're trying to remove
Solution: stop this process, then try again.
One way to found it is via Resource Monitor:
Open Task Manager
Navigate to Performance tab
Click Open Resource Monitor at the bottom
Navigate to CPU tab
At Associated Handles section, there's a search field - enter path to dir/file for which you're getting 'Permission denied' error
(Review and) stop any process that appeares as search result.
WSL
WSL The Windows Subsystem for Linux (WSL) lets developers install a Linux distribution (such as Ubuntu, OpenSUSE, Kali, Debian, Arch Linux, etc) and use Linux applications, utilities, and Bash command-line tools directly on Windows, unmodified, without the overhead of a traditional virtual machine or dualboot setup
Manual installation for WSL
Install Linux on Windows with WSL
wsl --install
To change the distribution installed, enter:
wsl --install -d
To see a list of available Linux distributions available for download through the online store, enter:
wsl --list --online or wsl -l -o
To install additional Linux distributions after the initial install, you may also use the command:
wsl --install -d <Distribution Name>.
wsl --list --online
A valid distribution name (not case sensitive).
Examples:
wsl --install -d Ubuntu
wsl --install --distribution Debian
--set-default-version <Version>
Changes the default install version for new distributions.
--shutdown
Immediately terminates all running distributions and the WSL 2
lightweight utility virtual machine.
--status
Show the status of Windows Subsystem for Linux.
--update [Options]
If no options are specified, the WSL 2 kernel will be updated
to the latest version.
Options:
--rollback
Revert to the previous version of the WSL 2 kernel.
Arguments for managing distributions in Windows Subsystem for Linux:
--export <Distro> <FileName>
Exports the distribution to a tar file.
The filename can be - for standard output.
--import <Distro> <InstallLocation> <FileName> [Options]
Imports the specified tar file as a new distribution.
The filename can be - for standard input.
Options:
--version <Version>
Specifies the version to use for the new distribution.
--list, -l [Options]
Lists distributions.
Options:
--all
List all distributions, including distributions that are
currently being installed or uninstalled.
--running
List only distributions that are currently running.
--quiet, -q
Only show distribution names.
--verbose, -v
Show detailed information about all distributions.
--online, -o
Displays a list of available distributions for install with 'wsl --install'.
--set-default, -s <Distro>
Sets the distribution as the default.
--set-version <Distro> <Version>
Changes the version of the specified distribution.
--terminate, -t <Distro>
Terminates the specified distribution.
--unregister <Distro>
Unregisters the distribution and deletes the root filesystem.
Show accent color on Start and taskbar grayed
Change the Windows 10 Taskbar Color
Press Win + I to open the Settings app.
Head to Personalization > Colors. ...
Click the Choose your mode dropdown and select Dark.
Once Dark mode loads, you'll notice that Show accent color on Start and taskbar is no longer disabled.
you can change the default app mode to light and leave the default windows mode as dark
in settings -> personalisation -> colours
under "choose your colour", choose custom
under "choose your default windows mode", choose dark
under "choose your default app mode", choose light
Disable the Antimalware Executable
Open the Start Menu, then type Windows Security.
Select the first option.
Find Virus & threat protection on the sidebar.
Under Virus & threat protection settings, click the Manage Settings option.
Toggle the Real-time threat protection button to off.
open the Windows Terminal
open the Run window by pressing the Windows + R keys on your keyboard.
Then, type wt and press Enter or click OK.
Enable gpedit.msc using Command Prompt
If you are running Windows 10/11 Home Edition, you can easily enable the group policy editor using the following commands:
Open Command Prompt in administrative mode and run the following commands:
FOR %F IN ("%SystemRoot%\servicing\Packages\Microsoft-Windows-GroupPolicy-ClientTools-Package~*.mum") DO (DISM /Online /NoRestart /Add-Package:"%F")
FOR %F IN ("%SystemRoot%\servicing\Packages\Microsoft-Windows-GroupPolicy-ClientExtensions-Package~*.mum") DO (DISM /Online /NoRestart /Add-Package:"%F")
These commands will install gpedit.msc console on your computer.
After the commands are successfully executed, go to
Run –> gpedit.msc.
This will open the group policy editor in your Windows Home edition.
How to enable GPEdit.msc in Windows 10 Home using PowerShell script
If you are not comfortable with running the commands, you can download and run the batch file below.
This will do the same thing and install gpedit.msc on your Windows Home computer.
Download the GPEdit Enabler script from the link below
GPEdit Enabler for Windows 10 Home Edition (393 bytes, 260,000 hits)This is a simple PowerShell script that will install the disabled Group Policy feature in the Windows 10 Home edition.Right-click the downloaded
gpedit-enabler.bat file and select
Run as Administrator.This will start the installation process.
It may take some time depending upon your system performance.
When the process is complete, press any key to close the command prompt window.
Although a restart is not required, if the policies are not working, you should restart the computer once.
Enable Group Policy Editor in Windows 10 Home using GPEdit Installer
If the above methods do not work for you, you can try this method, which lets you download and install the actual group policy editor.Since the Group Policy Editor is not included in Windows 10 by default, we will need to download the editor first.
You may download it from the below-mentioned download link.
Download GPEdit.msc Installer (854.7 KiB, 207,913 hits)
This is a simple setup file which when run will install and configure the Group Policy Editor in your Windows Home system.If you have 32-bit Windows (x86) then the setup should be installed smoothly without any problems and you should be able to access the Group Policy Editor through the Microsoft Management Console by going to
Run –> gpedit.msc.
But if you have 64-bit Windows (x64) then you will need some extra steps after running the installer.
Follow the steps below after running the installer:
Go to C:\Windows\SysWOW64 folderCopy the following folders and files from
C:\Windows\SysWOW64 to
C:\Windows\System32“GroupPolicy“, “GroupPolicyUsers” and
gpedit.msc.
This will make sure you run the editor from the Run dialog.Solving common problems when running gpedit.msc
If you are getting an “MMC cannot create a snap-in” error message while starting gpedit.msc, you may follow the steps below for the solution:
Go to C:\Windows\Temp\gpedit\ folder and make sure it exists.Download the following zip file and unzip it to C:\Windows\Temp\gpedit\.
This should replace two files x86.bat and x64.bat.
gpedit-temp-files-x86x64 (1.3 KiB, 70,941 hits)Now run x86.bat if you are running 32-bit Operating System and x64.bat if you are running 64-bit Windows 10.
Make sure you are running the batch files as Administrator.
After following the above-mentioned steps, you should have a working Group Policy Editor in Windows 10 Home edition.
In case of any confusion or problem, you are always encouraged to discuss by commenting below.
Download Group Policy Editor for Windows 10 – Policy Plus
Policy Plus is a third-party app and an alternative to the built-in Group Policy editor.
The interface is very similar to GPEdit.
One major benefit of using Policy Plus is that it comes with a search function where you can search for your required policies.
Download Policy Plus from the below-given link:
Policy Plus (10.3 KiB, 38,953 hits)Run Policy-Plus.exe.
It is a portable app so it will open immediately.
You can make changes to the policies exactly how you do it in the Windows built-in group policy editor.
![]() Hopefully, these methods will help you enable gpedit.msc in your system.One thing to note here is that these methods are useful when you want to use local group policy editor.
If you are a domain administrator and want to configure group policies on a Windows 10 Home computer using Windows Server Active Directory, this method will not be effective as Windows 10 Home does not support joining a domain in Active Directory.
Hopefully, these methods will help you enable gpedit.msc in your system.One thing to note here is that these methods are useful when you want to use local group policy editor.
If you are a domain administrator and want to configure group policies on a Windows 10 Home computer using Windows Server Active Directory, this method will not be effective as Windows 10 Home does not support joining a domain in Active Directory.
How to open the group policy editor
Open the Run dialog by pressing Windows key + R.Type in gpedit.msc and press Ok.
This will open the local group policy editor.You can also enable other functionalities in Windows 10 Home:
fix broken permissions for Windows scheduled task
fix broken permissions for Windows scheduled task
All tasks definitions stored in both
Registry:
HKEY_LOCAL_MACHINE\SOFTWARE\Microsoft\Windows NT\CurrentVersion\Schedule\TaskCache\*
and
Filesystem: C:\Windows\System32\Tasks\*
Security Descriptors exists both on files in filesystem and stored in the registry for each task:
HKEY_LOCAL_MACHINE\SOFTWARE\Microsoft\Windows NT\CurrentVersion\Schedule\TaskCache\Tree\<TaskName>\SD
This registry value is in the binary form and it seems that there is no decent UI for it.
You could get retrive it via Powershell and Task Scheduler API (https://docs.microsoft.com/en-us/windows/win32/api/_taskschd/index):
$ts = New-Object -ComObject "Schedule.Service"
$ts.Connect("localhost")
$task = $ts.GetFolder("").GetTask("<TaskName>")
Write-Host $task.GetSecurityDescriptor(0xF)
This method return security descriptor in SDDL format
BUT:
I've got into the same problem and it seems that the problem is not directly related to task permissions, but to hardlinks on tasks created during Windows 10 upgrade
Check folder C:\$WINDOWS.~BT\NewOS\Windows\System32\Tasks_Migrated\ whether it contains hardlinks to task's files in C:\Windows\System32\Tasks
I've removed all hardlinks from C:\$WINDOWS.~BT\NewOS\Windows\System32\Tasks_Migrated\ and after that Unregister-ScheduledTask work as expected.
UPDATE:
I've finally investigated a problem with "broken" tasks permissions in Windows 10. It has nothing common with permissions at all and looks like an unexpected outcome of security patch.
11/06/2019 Microsoft released a patch for CVE-2019-1069. This patch fixed a vulnerability of the Task Scheduler and to exploit it an adversary need to create a hardlink to a file associated with some task.
If this patch installed you can't change/enable/disable/delete Task with Task Scheduler API (schtasks, powershell -ScheduledTask, COM "Schedule.Service") if associated task file in C:\Windows\System32\Tasks\ have any hardlink.
Windows Feature update during installation do "Tasks migration" procedure and create hardlinks to all tasks in the folder C:\$WINDOWS.~BT\NewOS\Windows\System32\Tasks_Migrated\ and this could be a reason why tasks cannot be deleted.
Deleting all hardlinks solves the problem.
God Mode in Windows 11 or 10
God Mode - A complete list of direct shortcuts settings.
How to Enable God Mode in Windows 11 or 10
1. Right click on the desktop and select New->Folder.
2. Name the folder as follows:
GodMode.{ED7BA470-8E54-465E-825C-99712043E01C}
The name will disappear once you are finished.
3. Open the folder.
You'll notice a more than 200 settings menus to choose from, organized into categories such as Security and Maintenance and Power Options.
4. Drag and drop individual shortcuts to the desktop if you want even quicker access.
For example, if you want one-click access to the "Manage audio devices" menu, drag it onto the desktop and and you'll have a dedicated shortcut there.
Note that the folder icon for the God Mode folder may change its icon at some point, perhaps after you reboot.
monitoring
start the Performance Monitor
Performance Monitoring to investigate slow disk performance
Monitor GPU Performance
Process Monitoring Tools
Resource Monitor vs Performance Monitor
%windir%\system32\resmon.exe
%windir%\system32\perfmon.msc /s
Windows background apps and your privacy
In Windows, apps can continue to perform actions even when you are not actively in the app’s window.
These are commonly called background apps.
You can decide which apps will run in the background, and which won't.
Control whether an app can run in the background
Select Start , then select Settings > Apps > Apps & features.
Scroll to the desired app, select More options on the right edge of the window, then select Advanced options.
In the Background apps permissions section, under Let this app run in the background, select one of the following options:
Always—The app runs in the background, receiving info, sending notifications, and staying up-to-date even when you're not actively using it.
This option may use more power.
Power optimized—Windows decides what will save the most power while still allowing the app to receive notifications and update periodically.
This option may limit an app that uses a lot of power.
Note: You can also manage background activity for apps from the battery settings.
Stop an app from running in the background
If you don't want to get notifications or updates for an app when you're not using it, you can set it so it won't run in the background.
Select Start , then select Settings > Apps > Apps & features.
Scroll to the desired app, select More options on the right edge of the window, then select Advanced options.
In the Background apps permissions section, under Let this app run in the background, select Never.
Exceptions to the privacy settings
Desktop apps won’t appear in the App list.
To allow or block desktop apps, use the settings in those applications.
Note: How can you tell if an app is a desktop app? Desktop apps are usually downloaded from the Internet or with some type of media (such as a CD, DVD, or USB storage device).
They’re launched using an .EXE or .DLL file, and they typically run on your device unlike web-based apps (which run in the cloud).
You can also find desktop applications in Microsoft Store.
Not sure which programs are running in the background
1. Click the Windows Start button, then click Run.
2. Type MSCONFIG, then click OK. The System Configuration Utility window opens.
3. Click the Startup tab.
Disable NVIDIA Telemetry Container Service
The NVIDIA Telemetry Container accompanies NVIDIA software as a service program.
It helps to maintain logs, and behaviors of the system.
Also, they are used to disclose any undesired happenings to the NVIDIA.
Similar to the NVIDIA task scheduler, disable the NVIDIA Telemetry Container to fix the NVIDIA container high CPU usage problem.
Follow the steps to do it.
1. Open the Run dialog box, type services.msc, and hit Enter key to launch Services.
![]() 2. Locate NVIDIA Telemetry Container on the Services window.
Then, right-click it and select Properties from the context menu.
2. Locate NVIDIA Telemetry Container on the Services window.
Then, right-click it and select Properties from the context menu.
![]() 3. Here, set the Startup type to Disabled from the dropdown options.
Note: If the Service status is Running, click on the Stop button.
3. Here, set the Startup type to Disabled from the dropdown options.
Note: If the Service status is Running, click on the Stop button.
![]() 4. Now, click Apply and then OK to save the changes made.
Once done, check NVIDIA container high CPU usage issue is resolved.
4. Now, click Apply and then OK to save the changes made.
Once done, check NVIDIA container high CPU usage issue is resolved.
Powercfg command-line options
Use powercfg.exe to control power plans - also called power schemes - to use the available sleep states, to control the power states of individual devices, and to analyze the system for common energy-efficiency and battery-life problems.
powercfg /requests
| Option | Description |
|---|
| /?, -help | Displays information about command-line parameters. |
| /list, /L | Lists all power schemes. |
| /query, /Q | Displays the contents of a power scheme. |
| /change, /X | Modifies a setting value in the current power scheme. |
| /changename | Modifies the name and description of a power scheme. |
| /duplicatescheme | Duplicates a power scheme. |
| /delete, /D | Deletes a power scheme. |
| /deletesetting | Deletes a power setting. |
| /setactive, /S | Makes a power scheme active on the system. |
| /getactivescheme | Retrieves the currently active power scheme. |
| /setacvalueindex | Sets the value associated with a power setting while the system is powered by AC power. |
| /setdcvalueindex | Sets the value associated with a power setting while the system is powered by DC power. |
| /import | Imports all power settings from a file. |
| /export | Exports a power scheme to a file. |
| /aliases | Displays all aliases and their corresponding GUIDs. |
| /getsecuritydescriptor | Gets a security descriptor associated with a specified power setting, power scheme, or action. |
| /setsecuritydescriptor | Sets a security descriptor associated with a power setting, power scheme, or action. |
| /hibernate, /H | Enables and disables the hibernate feature. |
| /availablesleepstates, /A | Reports the sleep states available on the system. |
| /devicequery | Returns a list of devices that meet specified criteria. |
| /deviceenableawake | Enables a device to wake the system from a sleep state. |
| /devicedisablewake | Disables a device from waking the system from a sleep state. |
| /lastwake | Reports information about what woke the system from the last sleep transition. |
| /waketimers | Enumerates active wake timers. |
| /requests | Enumerates application and driver Power Requests. |
| /requestsoverride | Sets a Power Request override for a particular Process, Service, or Driver. |
| /energy | Analyzes the system for common energy-efficiency and battery life problems. |
| /batteryreport | Generates a report of battery usage. |
| /sleepstudy | Generates a diagnostic system power transition report. |
| /srumutil | Dumps Energy Estimation data from System Resource Usage Monitor (SRUM). |
| /systemsleepdiagnostics | Generates a diagnostic report of system sleep transitions. |
| /systempowerreport | Generates a diagnostic system power transition report. |
Command-line option descriptions
The following sections describe Powercfg command-line options and arguments.
-help or /?
Displays information about command-line parameters.
Syntax:
powercfg /?
/list or /L
Lists all power schemes.
Syntax:
powercfg /list
/query or /Q
Displays the contents of the specified power scheme.
Syntax:
powercfg /query [scheme_GUID] [sub_GUID]
If neither the parameter scheme_GUID or sub_GUID are provided, the settings of the current active power scheme are displayed. If the parameter sub_GUID is not specified, all settings in the specified power scheme are displayed.
Arguments:
scheme_GUID
Specifies a power scheme GUID. Running powercfg /list returns a power scheme GUID.
sub_GUID
Specifies a power-setting subgroup GUID. A power setting subgroup GUID is returned by running powercfg /query.
Examples:
powercfg /query
powercfg /query 381b4222-f694-41f0-9685-ff5bb260df2e 238c9fa8-0aad-41ed-83f4-97be242c8f20
/change or /X
Modifies a setting value in the current power scheme.
Syntax:
/change setting value
Arguments:
setting
Specifies one of the following options:
monitor-timeout-ac
monitor-timeout-dc
disk-timeout-ac
disk-timeout-dc
standby-timeout-ac
standby-timeout-dc
hibernate-timeout-ac
hibernate-timeout-dc
value
Specifies the new value, in minutes.
Examples:
powercfg /change monitor-timeout-ac 5
/changename
Modifies the name of a power scheme and optionally its description.
Syntax:
powercfg /changename *scheme_GUID * name [description]
Arguments:
scheme_GUID
Specifies a power scheme GUID. Running powercfg /list returns a power scheme GUID.
name
Specifies the power scheme's new name.
description
Specifies the power scheme's new description. If no description is specified, only the name is changed.
Examples:
powercfg /changename 381b4222-f694-41f0-9685-ff5bb260df2e "Customized Balanced"
/duplicatescheme
Duplicates the specified power scheme. The resulting GUID which represents the new scheme is displayed.
Syntax:
powercfg /duplicatescheme scheme_GUID [destination_GUID]
Arguments:
scheme_GUID
Specifies a power scheme GUID. A power scheme GUID is returned by running powercfg /list.
destination_GUID
Specifies the new power scheme's GUID. If no GUID is specified, a new GUID is created.
Examples:
powercfg /duplicatescheme 381b4222-f694-41f0-9685-ff5bb260df2e
/delete or /D
Deletes the power scheme with the specified GUID.
Syntax:
powercfg /delete scheme_GUID
Arguments:
scheme_GUID
Specifies a power scheme GUID. A power scheme GUID is returned by running powercfg /list.
Examples:
powercfg /delete 381b4222-f694-41f0-9685-ff5bb260df2e
/deletesetting
Deletes a power setting.
Syntax:
powercfg /deletesetting sub_GUID setting_GUID
Arguments:
sub_GUID
Specifies a power setting subgroup GUID. A power setting subgroup GUID is returned by running powercfg /query.
setting_GUID
Specifies a power setting GUID. A power setting GUID is returned by running powercfg /query.
Examples:
powercfg /deletesetting 238c9fa8-0aad-41ed-83f4-97be242c8f20 29f6c1db-86da-48c5-9fdb-f2b67b1f44da
/setactive or /S
Makes the specified power scheme active on the system.
Syntax:
powercfg /setactive scheme_GUID
Arguments:
scheme_GUID
Specifies a power scheme GUID. A power scheme GUID is returned by running powercfg /list.
Examples:
powercfg /setactive 381b4222-f694-41f0-9685-ff5bb260df2e
/getactivescheme
Retrieves the currently active power scheme.
Syntax:
powercfg /getactivescheme
/setacvalueindex
Sets the value associated with a specified power setting while the system is powered by AC power.
Syntax:
powercfg /setacvalueindex scheme_GUID sub_GUID setting_GUID setting_index
Arguments:
scheme_GUID
Specifies a power scheme GUID. A power scheme GUID is returned by running powercfg /list.
sub_GUID
Specifies a power setting subgroup GUID. Running powercfg /query returns a power setting subgroup GUID.
setting_GUID
Specifies a power setting GUID. A power setting GUID is returned by running powercfg /query.
setting_index
Specifies which possible value this setting is set to. A list of possible values is returned by running powercfg /query.
Examples:
powercfg /setacvalueindex 381b4222-f694-41f0-9685-ff5bb260df2e 238c9fa8-0aad-41ed-83f4-97be242c8f20 29f6c1db-86da-48c5-9fdb-f2b67b1f44da 0
/setdcvalueindex
Sets the value associated with a specified power setting while the system is powered by DC power.
Syntax:
powercfg /setdcvalueindex scheme_GUID sub_GUID setting_GUID setting_index
Arguments:
scheme_GUID
Specifies a power scheme GUID. A power scheme GUID is returned by running powercfg /list.
sub_GUID
Specifies a power setting subgroup GUID. A power setting subgroup GUID is returned by running powercfg /query.
setting_GUID
Specifies a power setting GUID. A power setting GUID is returned by running powercfg /query.
setting_index
Specifies which possible value this setting is set to. A list of possible values is returned by running powercfg /query.
Examples:
powercfg /setdcvalueindex 381b4222-f694-41f0-9685-ff5bb260df2e 238c9fa8-0aad-41ed-83f4-97be242c8f20 29f6c1db-86da-48c5-9fdb-f2b67b1f44da 300
/import
Imports a power scheme from the specified file.
Syntax:
powercfg /import file_name [GUID]
Arguments:
file_name
Specifies a fully-qualified path to a file returned by running powercfg /export.
GUID
Specifies the GUID for the imported scheme. If no GUID is specified, a new GUID is created.
Examples:
powercfg /import c:\scheme.pow
/export
Exports a power scheme, represented by the specified GUID, to the specified file.
Syntax:
powercfg /export file_name GUID
Arguments:
file_name
Specifies a fully-qualified path to a destination file.
GUID
Specifies a power scheme GUID. A power scheme GUID is returned by running powercfg /list.
Examples:
powercfg /export c:\scheme.pow 381b4222-f694-41f0-9685-ff5bb260df2e
/aliases
Displays a list of aliases and their corresponding GUIDs. These aliases may be used instead of a GUID in any command.
Syntax:
powercfg /aliases
Note
Some settings do not contain aliases. For a full list of GUIDs, use powercfg /query.
/getsecuritydescriptor
Gets the security descriptor associated with the specified power setting, power scheme, or action.
Syntax:
powercfg /getsecuritydescriptor GUID | action
Arguments:
GUID
Specifies a power scheme or a power setting GUID. A power scheme GUID is returned by running powercfg /list. A power setting GUID is returned by running powercfg /query.
action
Specifies one of the following actions:
ActionSetActive
ActionCreate
ActionDefault
Examples:
powercfg /getsecuritydescriptor 381b4222-f694-41f0-9685-ff5bb260df2e<br >
powercfg /getsecuritydescriptor ActionSetActive
/setsecuritydescriptor
Sets a security descriptor associated with the specified power setting, power scheme, or action.
Syntax:
powercfg /setsecuritydescriptor GUID | action SDDL
Arguments:
GUID
Specifies a power scheme or a power setting GUID. A power scheme GUID is returned by running powercfg /list. A power setting GUID is returned by running powercfg /query.
action
Specifies one of the following actions:
ActionSetActive
ActionCreate
ActionDefault
SDDL
Specifies a valid security descriptor string in SDDL format. An example SDDL string can be obtained by running powercfg /getsecuritydescriptor.
Examples:
powercfg /setsecuritydescriptor 381b4222-f694-41f0-9685-ff5bb260df2e O:BAG:SYD:P(A;CI;KRKW;;;BU)(A;CI;KA;;;BA)(A;CI;KA;;;SY)(A;CI;KA;;;CO)<br >
powercfg /setsecuritydescriptor ActionSetActive O:BAG:SYD:P(A;CI;KR;;;BU)(A;CI;KA;;;BA)(A;CI;KA;;;SY)(A;CI;KA;;;CO)
/hibernate or /H
Enables or disables the hibernate feature; also, sets the hiberfile size.
Syntax:
powercfg /hibernate
powercfg /hibernate [ on | off ]
powercfg /hibernate [ /size percent_size]
powercfg /hibernate [ /type reduced | full ]
Arguments:
On
Enables the hibernate feature.
Off
Disables the hibernate feature.
/size percent_size
Specifies the desired hiberfile size as a percentage of the total memory size. The default size cannot be smaller than 50. This parameter also causes hibernation to be enabled.
/type reduced | full
Specifies the desired hiberfile type. A reduced hiberfile only supports hiberboot.
Note
A hiberfile that has a custom default size, or HiberFileSizePercent >= 40, is considered as a full hiberfile. HiberFileSizePercent is set in the registry in HKEY_LOCAL_MACHINE\SYSTEM\CurrentControlSet\Control\Power.
To change the hiberfile type to reduced, the OS has to manage the default hiberfile size. To do this, run the following commands:
powercfg /hibernate /size 0
powercfg /hibernate /type reduced
Examples:
powercfg /hibernate off<br > powercfg /hibernate /size 100<br > powercfg /hibernate /type reduced
/availablesleepstates or /A
Reports the sleep states available on the system. Attempts to report reasons why sleep states are unavailable.
Syntax:
powercfg /availablesleepstates
/devicequery
Returns a list of devices that meet the specified criteria.
Syntax:
powercfg /devicequery query_flag
Arguments:
query_flag
Specifies one of the following criteria:
wake_from_S1_supported Returns all devices that support waking the system from a light sleep state.
wake_from_S2_supported Returns all devices that support waking the system from a deeper sleep state.
wake_from_S3_supported Returns all devices that support waking the system from the deepest sleep state.
wake_from_any Returns all devices that support waking the system from any sleep state.
S1_supported Lists devices supporting light sleep.
S2_supported Lists devices supporting deeper sleep.
S3_supported Lists devices supporting deepest sleep.
S4_supported List devices supporting hibernation.
wake_programmable Lists devices that are user-configurable to wake the system from a sleep state.
wake_armed Lists devices that are currently configured to wake the system from any sleep state.
all_devices Returns all devices present in the system.
Examples:
powercfg /devicequery wake_armed
/deviceenableawake
Enables the specified device to wake the system from a sleep state.
Syntax:
powercfg /deviceenableawake device_name
Arguments:
device_name
Specifies a device. This device name may be retrieved using powercfg /devicequery wake_programmable.
Examples:
powercfg /deviceenableawake "Microsoft USB IntelliMouse Optical"
/devicedisablewake
Disables the specified device from waking the system from a sleep state.
Syntax:
powercfg /devicedisablewake device_name
Arguments:
device_name
Specifies a device. This device name may be retrieved using powercfg /devicequery wake_armed.
Examples:
powercfg /devicedisablewake "Microsoft USB IntelliMouse Optical"
/lastwake
Reports information about what woke the system from the last sleep transition.
Syntax:
powercfg /lastwake
/waketimers
Enumerates the active wake timers. If enabled, the expiration of a wake timer wakes the system from sleep and hibernate states.
Syntax:
powercfg /waketimers
/requests
Enumerates application and driver Power Requests. Power Requests prevent the computer from automatically powering off the display or entering a low-power sleep mode.
Syntax:
powercfg /requests
/requestsoverride
Sets a Power Request override for a particular process, service, or driver. If no parameters are specified, this command displays the current list of Power Request overrides.
Syntax:
powercfg /requestsoverride [caller_type name request]
Arguments:
Caller_type
Specifies one of the following caller types: process, service, driver. This is obtained by running powercfg /requests.
name
Specifies the caller name. This is the name returned by running powercfg /requests.
request
Specifies one or more of the following Power Request types:
Display
System
Awaymode
Examples:
powercfg /requestsoverride process wmplayer.exe display system
/energy
Analyzes the system for common energy-efficiency and battery-life problems and generates a report, an HTML file, in the current path.
Syntax:
powercfg /energy [ /output file_name] [ /xml ] [ /duration seconds ]
powercfg /energy /trace [ /d file_path] [ /xml ] [ /duration seconds]
The /energy option should be used when the computer is idle and has no open programs or documents.
Arguments:
/output file_name
Specify the path and file name to store the energy report HTML or XML file.
/xml
Formats the report file as XML.
/duration seconds
Specifies the number of seconds to observe system behavior. Default is 60 seconds.
/trace
Records system behavior and does not perform analysis. Trace files are generated in the current path unless the /D parameter is specified.
/d file_path
Specify the directory to store trace data. May only be used with the /trace parameter.
Examples:
powercfg /energy<br >
powercfg /energy /output "longtrace.html" /duration 120
/batteryreport
Generates a report of battery usage characteristics over the lifetime of the system. Running powercfg /batteryreport generates an HTML report file in the current path.
Syntax:
powercfg /batteryreport [ /output file_name ] [ /xml ]
powercfg /batteryreport [ /duration days ]
Arguments:
/output file_name
Specify the path and file name to store the battery report HTML.
/output file_name /xml
Formats the battery report file as XML.
/duration days
Specifies the number of days to analyze for the report.
Examples:
powercfg /batteryreport /output "batteryreport.html"<br >
powercfg /batteryreport /duration 4
/sleepstudy
Generates a diagnostic report of modern standby quality over the last three days on the system. The report is a file that is saved in the current path.
Syntax:
powercfg /sleepstudy [ /output file_name ] [ /xml ]
powercfg /sleepstudy [ /duration days]
powercfg /sleepstudy [ /transformxmL file_name.xml ] [ /output file_name.html ]
Arguments:
/output file_name
Specify the path and file name to store the Sleepstudy report HTML.
/output file_name /xml
Formats the Sleepstudy report file as XML.
/duration days
Specifies the number of days to analyze for the report.
/transformxml file_name.xml /output file_name.html
Transforms the Sleepstudy report from XML to HTML.
Examples:
powercfg /sleepstudy /output "sleepstudy.html"<br >
powercfg /sleepstudy /duration 7
/srumutil
Enumerates the entire Energy Estimation data from the System Resource Usage Monitor (SRUM) in an XML or CSV file.
Syntax:
powercfg /srumutil [ /output file_name ] [ /xml ] [ /csv ]
Arguments:
/output file_name
Specify the path and file name to store the SRUM data.
/output file_name /xml
Formats the file as XML.
/output file_name /csv
Formats the file as CSV.
Examples:
powercfg /batteryreport /output "srumreport.xml" /xml
/systemsleepdiagnostics
Generates a report of intervals when the user was not present over the last three days on the system, and if the system went to sleep. This option generates a report, an HTML file, in the current path.
This command requires administrator privileges and must be executed from an elevated command prompt.
Syntax:
powercfg /systemsleepdiagnostics [ /output file_name ] [ /xml ]
Arguments:
/output file_name
Specifies the path and file name of the diagnostics report.
/xml
Save the report as an XML file.
/duration days
Specifies the number of days to analyze for the report.
/transformxml file_name
Produces a report in HTML from a report that was previously created in XML.
Examples:
powercfg /systemsleepdiagnostics<br>
powercfg /systemsleepdiagnostics /output "system-sleep-diagnostics.html"<br>
powercfg /systemsleepdiagnostics /output "system-sleep-diagnostics.xml" /XML<br>
powercfg /systemsleepdiagnostics /transformxml "system-sleep-diagnostics.xml"
/systempowerreport or /spr
Generates a report of system power transitions over the last three days on the system, including connected standby power efficiency. This option generates a report, an HTML file, in the current path.
This command requires administrator privileges and must be executed from an elevated command prompt.
Syntax:
powercfg /getsecuritydescriptor GUID | action
Arguments:
/output file_name
Specifies the path and file name of the diagnostics report.
/xml
Save the report as an XML file.
/duration days
Specifies the number of days to analyze for the report.
/transformxml file_name
Produces a report in HTML from a report that was previously created in XML.
Examples:
powercfg /systempowerreport<br>
powercfg /systempowerreport /output "sleepstudy.html"<br>
powercfg /systempowerreport /output "sleepstudy.xml" /XML<br>
powercfg /systempowerreport /transformxml "sleepstudy.xml"
Overlay Scheme and PPM Profile Support
Overlay power schemes and PPM profiles can now be customized through powercfg.exe. It is important to note that overlay schemes are now limited to customizing settings that affect performance versus power savings tradeoff. This is currently related to settings under the PPM and Graphics power settings subgroups (with aliases SUB_PROCESSOR and SUB_GRAPHICS in powercfg). Attempts to write to other subgroups under overlay schemes will result in an error message.
Reading from overlay schemes
The powercfg commands used earlier to read power schemes now support overlay schemes as well for reads and writes.
Syntax:
powercfg /q overlay_scheme_alias subgroup_alias setting_alias
All arguments after the /q flag are optional. If the setting alias is not specified, all settings under the specified overlay scheme and subgroup will be enumerated. If the subgroup is not specified, then all settings for all subgroups under the specified overlay scheme will be enumerated. If the overlay scheme is not specified, then it will be assumed to be the currently active overlay scheme (if active) or the current power scheme (if no overlay is active).
Writing to overlay schemes
The commands setacvalueindex and setdcvalueindex now support overlay schemes as well.
Syntax:
powercfg /setacvalueindex overlay_scheme_alias subgroup_alias setting_alias value
powercfg /setdcvalueindex overlay_scheme_alias subgroup_alias setting_alias value
Reading from PPM profile
The commands are similar to that of overlay schemes and power schemes, except that they use the /qp flag.
Syntax:
powercfg /queryprofile overlay_or_power_scheme_alias profile_alias setting_alias
powercfg /qp overlay_or_power_scheme_alias profile_alias setting_alias
PPM profile aliases are visible by running the same powercfg /aliasesh command. Support for missing arguments is provided, and the behavior is similar to when arguments are missing and the /q flag is used.
Writing to PPM profile
For writing to PPM profiles, the /setacprofileindex and /setdcprofileindex commands can be used.
Syntax:
powercfg /setacprofileindex overlay_or_scheme_alias profile_alias setting_alias value
powercfg /setdcprofileindex overlay_or_scheme_alias profile_alias setting_alias value
Enumerating non-empty PPM Profiles
For enumerating PPM profiles which have at least one power setting value explicitly set.
Syntax:
powercfg /listprofiles
powercfg /lp
Provisioning XML Generation Support
Powercfg now supports automatically generating a provisioning XML file that can be used as an input to Windows Configuration Designer in order to generate a provisioning package (.ppkg) that contains the customized settings from a device under test. This file contains all settings on the device with the "RUNTIME_OVERRIDE" altitude value.
Syntax:
powercfg /pxml /output output_file_path
powercfg /pxml /output output_file_path /version version_number /name package_name /id GUID /owner OwnerType_value
Required Arguments:
/output_file_path: Specifies the location and name of the generated XML.
Optional Arguments:
/version: Optionally specifies the value of the "Version" field in the generated XML. Default: 1.0
/name: Optionally specifies the value of the "Name" field in the generated XML. Default: CustomOEM.Power.Settings.Control
/id: Optionally specifies a GUID string that is used in the "ID" field in the generated XML. Default: new GUID is generated
/owner: Optionally specified the value of the "OwnerType" field in the generated XML. Default: OEM
MoUsoCoreWorker.exe
MoUsoCoreWorker.exe is a replacement file for wuauclt.exe related to Windows updates.
A long and complicated name for a file, the part of the file name ‘Uso’ stands for; Update Session Orchestrator.
The file is located in C:\Windows\System32.
In short, it is a Windows system file.
to Stop MoUsoCoreWorker process
Stop MoUsoCoreWorker.exe in Task Scheduler.
Task Scheduler Library -> Microsoft -> Windows -> Install Service.
Right-click and Disable the following two (2) tasks.
WakeUpAndContinueUpdates
WakeUpAndScanForUpdates
to Stop MoUsoCoreWorker by disable the Wake Timers.
Power Settings plan
select Change Advanced Power Settings.
Expand Sleep, set the Allow wake times to Disable and click OK. *
disable antimalware by setting registry table
run the following command and press Enter:
REG ADD "hklm\software\policies\microsoft\windows defender" /v DisableAntiSpyware /t REG_DWORD /d 1 /f
删除 alibabaprotect
管理员模式打开cmd,输入
sc delete AlibabaProtect 回车,删除AlibabaProtect服务,得到成功的提示。
重启电脑,任务管理器中alibabaprotect进程和服务已经消失。
然后进入C:\Program Files (x86)目录,删除AlibabaProtect整个目录。
What is MoUSO Core Worker Process?
MoUSO Core Worker Process is a PHP-based core script client on its server network, which is dedicated for running commands on the servers.
It is a process responsible for handling updates for the Windows operating system.
![]()
Can I stop MoUSO Core Worker Process?
Yes, you can kill the MoUSO Core Worker Process if it's causing high CPU or disk usage on your computer.
To do this, open the Task Manager (press CTRL+ALT+DEL or search for "task manager" in your Start menu), locate the process in the Processes tab, right-click it and select "End Process".
However, note that stopping MoUSO Core Worker Process may cause some programs to stop working correctly, so only do this if you're sure that the process is causing problems.
How do you stop MoUSO Core Worker Process?
While MoUSO core worker process is an important part of Windows, it can sometimes cause high disk or CPU usage, which can lead to reduced performance on your computer.
There are a few things you can do to fix it.
You can try ending the MoUSO core worker process in the Task Manager.
To do this, press Ctrl+Shift+Esc to open the Task Manager, then find MoUSO core worker process under the Processes tab.
Right-click on it and select End task.
If ending the task doesn't work or if you see MoUSO Core Worker Process starting up again after you end it, you may need to uninstall the program that's using it.
Try disabling the MoUSO Core Worker process from starting automatically.
Open the Windows Registry Editor (regedit.exe) and go to the following key:
HKEY_LOCAL_MACHINE\SOFTWARE\Policies\Microsoft\Windows\MoUSO
Next, create a new DWORD value called "DisableAutoStart" and set it to 1.
Once you've done that, reboot your computer and see if the problem persists.
If you're still having issues, you can try uninstalling any recently installed programs or updates as they may be causing the issue.
You can also run a virus scan to make sure there are no malicious files on your system.
There are a few other different ways to fix the problem:
Restart your computer: This will often solving the issue, as the MoUSO Core Worker process will restart and hopefully not get stuck again.
Run a virus scan: If you think that there might be a virus or other malware causing the problem, running a full scan of your computer with your antivirus software should help to fix it.
Update Windows: Sometimes errors in the MoUSO Core Worker process can be caused by outdated system files.
Running Windows Update can help fix these problems by downloading and installing the latest versions of these files.
If none of these solutions work, or if the MoUSO Core Worker process is taking up an unusually high amount of
What Causes MoUSO Core Worker Process to take High Memory?
When a process called MoUSOCoreWorker.exe starts taking up an unusually high amount of disk space or CPU usage, it's probably because the process is working overtime to try and fix errors in your computer's system files.
The MoUSO Core Worker process is a Windows program that's responsible for scanning your system for corrupt or missing files and then repairing them if possible.While it's normal for this process to use up some resources from time to time, if it's using too much it can start to affect your computer's performance.
If you notice that your computer is running slowly or freezing up more often than usual, it's worth checking to see if the MoUSO Core Worker process is responsible.
FAQ
Is the mousocoreworker.exe malware? <
The mousocoreworker.exe process is a core process of the MoUSO software.
It is responsible for registering and maintaining user accounts, as well as for providing security features such as password recovery and Two-Factor Authentication.Is MoUSO Core Worker Process Safe?When it comes to computer safety, there is no such thing as a 100% guarantee.
However, the MoUSO Core Worker Process is generally considered to be a safe and reliable process.
This is due in part to the fact that it is a core process of the Windows operating system,Is it safe to delete mousocoreworker.exe?The answer is: maybe.
MoUSO Core Worker Process is part of the Microsoft Office Suite and is responsible for certain updates and tasks related to that software.
However, if you're not using Microsoft Office regularly, you may not need this process running in the background.
AppData Folder
The AppData folder in Windows 10 is a hidden folder located in C:\Users\<username>\AppData.
Press the Windows logo Key + R to launch the Run dialog box
Once the box opens, type %APPDATA% and press “Enter”
Windows will directly launch the Roaming folder in the AppData folder
If you still can't see the AppData folder on your computer, you can use advanced methods such as the Command Prompt to see the folder.
Press the Windows logo Key and type “cmd”.
On the Command Prompt Apps, select Run as administrator.
Once the Command Prompt opens, type (or copy and pasted) this command: attrib -s -h C:\Users\jabutojabuto\AppData (replace the “myusername” with your actual user name.)
Press “Enter”.
The command will remove any attributes set to hide this folder.
If you want to test it, just hit the “arrow up” on your keyboard after executing the command, and it will appear again.
You can then replace -s and -h with +s +h and see what happens.
Now the AppData folder should be greyed out, and you'll be able to access it.
It contains custom settings and other information that PC system applications need for their operation.
Don't move or delete files from the AppData folder; doing so will corrupt the linked program.
The AppData folder has three hidden sub-folders:
Local: includes files tied to your current PC.
You cannot move these files with your user profile without breaking something.
LocalLow: is the same as the Local folder but contains “low integrity” applications that run with more restricted Windows security settings, such as temporary data of your browser.
Roaming: includes critical application files and/or saved games that can roam from device to device with a user account.
Email programs like Outlook or Thunderbird, also store data in this folder.
Computer games and game clients' saved files also end up in the AppData folder.
Internet browsers, such as Edge, Firefox, and Chrome, store your bookmarks and profiles in the AppData folder.
Since your Windows apps use the AppData folder, you can keep data synced between devices or transfer data from one device to another using the same profile.
AppData Folder in Windows 10
⇧
When you install a program on Windows 10, it will go to the Program Files x86 folder or the Program Files folder, depending on its configuration and customization features.
You might already be aware of how Windows stores applications' information.
After installing the program, when you run it, you may need to change its settings, configure it, customize its interface (if this feature is available, and do other things according to your needs.
This data is also stored on your computer's hard disk, inside the AppData folder.
This data includes:
program cache,
app settings,
temporary files, and
app configuration files.
Why Use a Separate AppData Folder?
⇧
Windows uses a separate AppData folder to store the application information, data, and files instead of the Program Files x86 or Program Files folder.
This comes with several advantages, including:
Ease of managing user data, especially if the PC has multiple accounts.
This allows Windows to create separate AppData folders for each user, making it easy for each user to manage their settings for each particular app.
Security of apps and programs: with a separate AppData folder, one user cannot access another user's profile or folder, making their apps and programs secure.
Preventing the system from suffering messed-up data because every user will have a separate AppData folder and app settings.
Removal of unnecessary access to the Program Files x86or the Program Files folders.
Windows only allow users with administrative rights to access the Program Files directory.
If the AppData were stored in it, any user would have permission, and this can cause issues in the system.
Note: Some programs install in the AppData folder by default.
On the other hand, some programs ask you permission to install in the AppData folder.
What Happens If I Delete Appdata Folder?
⇧
If you delete the AppData folder, you will reset all related settings and information of your programs and applications.
Browsers, for example, will erase your user profile data and settings, while games will erase all your gaming data and settings.
Eventually, deleting the AppData folder will cause problems with the application installed on the computer, and it may even wreck your computer.
This is something you do not want to experience.
You must be very careful when deleting any folder in the C:/ drive.
However, if you feel that the AppData folder is consuming much PC space and wish to free some space from the folder, you can delete all the temporary files that are not useful for Windows or any app.
Here's what to do:
Press the Windows logo key + R to launch the “Run” App.
In the Run app, type %temp% and hit enter.
This will open the temporary files folder in the AppData app.
Now, press “Ctrl + A” on your computer to select all the temporary files.
Press “Delete” to delete all the temporary files in the folder.
Note: If your PC is showing signs of lagging or operational inefficiency, you can use a third-party tool to optimize your computer to keep your machine protected.
Windows 10 极限精简版
Windows 10 极限精简版
5 Ways to Add Apps to Startup
1. Using the Task Manager
2. Using the Registry Editor
location: HKEY_LOCAL_MACHINE\Software\Microsoft\Windows\CurrentVersion\Run
click New, and then choose String Value.
paste the Target location in the Value data.
3. Using the Command Prompt
REG ADD "HKLM\SOFTWARE\Microsoft\Windows\CurrentVersion\Run" /V "AppName" /t REG_SZ /F /D "C:\AppLoaction"
4. Using the Task Scheduler
Switch to the Triggers tab, and click the New option.
Click the drop-down icon and choose At startup.
5. Using the Startup Folder
最大的流氓公司 怎样删除Alibaba PC safe Service
阿里巴巴是个大流氓,在安装了旺旺(或千牛)电脑版之后,alibaba pc safe service和wwbizsrv这两个程序总是开机启动,怎么关也关不了,在系统服务里也禁用不了。
研究了半天,下面把具体方法分享给大家。
1.开机按F8进入安全模式,右击我的电脑,打开系统服务。
![]() 安全模式
2.将alibaba pc safe service进程禁用后重启电脑。
安全模式
2.将alibaba pc safe service进程禁用后重启电脑。
![]() 禁用alibaba pc safe service进程
3.正常进入系统后再打开系统服务,发现alibaba pc safe service这个进程已经是禁用状态。
禁用alibaba pc safe service进程
3.正常进入系统后再打开系统服务,发现alibaba pc safe service这个进程已经是禁用状态。
![]() 已经成功禁用
4.然后再找到wwbizsrv这个进程,先停止,再禁用。
已经成功禁用
4.然后再找到wwbizsrv这个进程,先停止,再禁用。
![]() 先停止才能禁用
5.复制这个进程所在文件夹(如图),在我的电脑里打开alibaba文件夹,将这个文件夹删除。
先停止才能禁用
5.复制这个进程所在文件夹(如图),在我的电脑里打开alibaba文件夹,将这个文件夹删除。
![]() 复制选中的地址
复制选中的地址
![]() 再删除wwbizsrv文件夹
6.再查看alibaba pc safe service进程的属性,找到alibabaprotect文件夹位置C:\Program Files (x86)\AlibabaProtec,把这个文件夹全部删除。
再删除wwbizsrv文件夹
6.再查看alibaba pc safe service进程的属性,找到alibabaprotect文件夹位置C:\Program Files (x86)\AlibabaProtec,把这个文件夹全部删除。
![]() AlibabaProtect文件夹位置
7.打开注册表regeditHKEY_LOCAL_MACHINE\SYSTEM\ControlSet001\services\HKEY_LOCAL_MACHINE\SYSTEM\ControlSet002\services\把其下的AlibabaProtect项全部删除。
AlibabaProtect文件夹位置
7.打开注册表regeditHKEY_LOCAL_MACHINE\SYSTEM\ControlSet001\services\HKEY_LOCAL_MACHINE\SYSTEM\ControlSet002\services\把其下的AlibabaProtect项全部删除。
![]() 注册表
8.再ctrl+F打开查找栏,将含有AlibabaProtect的每一个键值全部删除。
再说一句,不止阿里巴巴,国内的几大IT巨头都是流氓,当然腾讯如果称流氓界的第二,没人敢称第一。
注册表
8.再ctrl+F打开查找栏,将含有AlibabaProtect的每一个键值全部删除。
再说一句,不止阿里巴巴,国内的几大IT巨头都是流氓,当然腾讯如果称流氓界的第二,没人敢称第一。
Group Policy Editor Guide
The Group Policy Editor is a Windows administration tool that allows users to configure many important settings on their computers or networks.
Administrators can configure password requirements, startup programs, and define what applications or settings users can change.
These settings are called Group Policy Objects (GPOs).
Attackers use GPO’s to turn off Windows Defender.
System Administrators use GPOs to deal with locked out users.
This blog will deal with the Windows 10 version of Group Policy Editor (also known as gpedit), but you can find it in Windows 7, 8, and Windows Server 2003 and later.
This piece will cover how to open and use Group Policy Editor, some important security settings in GPOs, and some alternatives to gpedit.
How To Access Group Policy Editor Windows 10: 5 Options
There are several ways to open Group Policy Editor.
Choose your favorite!
Option 1: Open Local Group Policy Editor in Run
Open Search in the Toolbar and type Run, or select Run from your Start Menu.
Type ‘gpedit.msc’ in the Run command and click OK.
Option 2: Open Local Group Policy Editor in Search
Open Search on the Toolbar
Type ‘gpedit’ and click ‘Edit Group Policy.’
Option 3: Open Local Group Policy Editor in Command Prompt
From the Command Prompt, type ‘gpedit.msc’ and hit ‘Enter.’
Option 4: Open Local Group Policy Editor in PowerShell
In PowerShell, type ‘gpedit’ and then ‘Enter.’
If you would prefer, you can also use PowerShell to make changes to Local GPOs without the UI.
Option 5: Open Local Group Policy Editor in Start Menu Control Panel
Open the Control Panel on the Start Menu.
Click the Windows icon on the Toolbar, and then click the widget icon for Settings.
Start typing ‘group policy’ or ‘gpedit’ and click the ‘Edit Group Policy’ option.
What Can You Do With Group Policy Editor
A better question would be, what can’t you do with Group Policy Editor! You can do anything from set a desktop wallpaper to disable services and remove Explorer from the default start menu.
Group policies control what version of network protocols are available and enforce password rules.
A corporate IT security team benefits significantly by setting up and maintaining a strict Group Policy.
Here are a few examples of good IT security group policies:
Limit the applications users can install or access on their managed corporate devices.
Disable removable devices like USB drives or DVD drives.
Disable network protocols like TLS 1.0 to enforce usage of more secure protocols.
Limit the settings a user can change with the Control Panel.
For example, let them change screen resolution but not the VPN settings.
Specify an excellent company-sanctioned wallpaper, and turn off the user’s ability to change it.
Keep users from accessing gpedit to change any of the above settings.
Those are just a few examples of how an IT security team could use Group Policies.
If the goal is a more secure and hardened environment for your organization, use group policies to enforce good security habits.
Components of the Group Policy Editor
The Group Policy Editor window is a list view on the left and a contextual view on the right.
When you click an item on the left side, it changes the focus of the right to show you details about that thing you clicked.
The top-level nodes on the left are “Computer Configuration” and “User Configuration.” If you open the tree for Computer Configuration, you can explore the options you have to manage different system behavior aspects.
For example, under Computer Configuration -> Administrative Templates -> Control Panel -> Personalization, you will see things like “Do not display the lock screen” on the right side.
![]() You can edit the setting by double-clicking.
You can edit the setting by double-clicking.
![]() There are hundreds of different settings like this in Group Policy Editor.
Click around or view the Microsoft documentation for a list of all of them.
There are hundreds of different settings like this in Group Policy Editor.
Click around or view the Microsoft documentation for a list of all of them.
Local Group Policy Editor Components
Computer Configuration: These policies apply to the local computer, and do not change per user.
User Configuration: These policies apply to users on the local machine, and will apply to any new users in the future, on this local computer.
Those two main categories are further broken down into sub-categories:
Software Settings: Software settings contain software specific group policies: this setting is empty by default.
Stop tweaking GPOs and take control of AD with Varonis.
How to Configure a Security Policy Setting Using the Local Group Policy Editor Console
Once you have an idea of what you GPOs you want to set, using Group Policy Editor to make the changes is pretty simple.
Let’s look at a quick password setting we can change:
In gpedit, click Windows Settings, then Account Settings, then Password Policy.
![]() Select the option for “Password must meet complexity requirements.”
Select the option for “Password must meet complexity requirements.”
![]() Click “Enabled” and then “Apply,” and your change happens on this local computer.
Applying changes to GPOs at the enterprise level is out of the scope of this blog.
Click “Enabled” and then “Apply,” and your change happens on this local computer.
Applying changes to GPOs at the enterprise level is out of the scope of this blog.
How to use PowerShell to Administer Group Policies
Many sysadmins are moving to PowerShell instead of the UI to manage group policies.
Here are a few of the PowerShell GroupPolicy cmdlets to get you started.
New-GPO: This cmdlet creates a new unassigned GPO.
You can pass a name, owner, domain, and more parameters to the new GPO.
Get-GPOReport: This cmdlet returns all or the specified GPO(s) that exist in a domain in an XML or HTML file.
Very useful for troubleshooting and documentation.
Get-GPResultantSetOfPolicy: This cmdlet returns the entire Resultant Set of Policy (RsoP) for a user or computer or both and creates an XML file with the results.
This is a great cmdlet to research issues with GPOs.
You might think that a policy is set to a certain value, but that policy could be overwritten by another GPO, and the only way to figure that out is to know the actual values applied to a user or computer.
Invoke-GPUpdate: This cmdlet allows you to refresh the GPOs on a computer, it’s the same as running gpupdate.exe.
You can schedule the update to happen at a certain time on a remote computer with the cmdlet, which also means you can write a script to push out many refreshes if the need arises.
Limitations of Group Policy Editor
The gpedit application is very simplistic for a tool that is supposed to help secure your entire enterprise.
GPO updates occur at some time interval on computers throughout the network differently or on a reboot.
Therefore, the time between your changes and all computers on the network receiving this change is unknown.
Attackers can change local group policies using the same gpedit, or PowerShell, which can undo any protections you have enabled on that system.
Several companies provide alternative group policy editing tools, and you can learn how to make all the changes with PowerShell to make your job simpler.
However, gpedit does not have any native auditing built-in, so you need to have a rock-solid change management plan and audit all GPO changes independently to ensure your enterprise remains secure.
It’s crucial to monitor Active Directory for any changes made to Group Policy – often, these changes are the first signals in APT attacks, where hackers intend to be in your network for a while, and they want to remain hidden.
Varonis detects threats by monitoring and correlating current activity against normalized behavior and advanced data security threat models to detect APT attacks, malware infections, brute-force attacks, including attempts to change GPOs.
Check out this PowerShell course by Adam Bertram, where he teaches you how to use PowerShell to manage Active Directory.
Once you learn the basics, you can start managing GPOs with PowerShell
FastStone Capture 注册
企业版序列号
1、name/用户名:bluman
serial/序列号/注册码:VPISCJULXUFGDDXYAUYF
2、name/用户名:TEAM JiOO
key/注册码:CPCWXRVCZW30HMKE8KQQUXW
3、name/用户名:TEAM_BRAiGHTLiNG_2007
注册码:XPNMF-ISDYF-LCSED-BPATU或RPTME-IMDHD-MIEPX-VLXAW
4、name/用户名:1028
注册码:AXJQI-RWMDW-YBXZC-LOPHI
Turn off Defender antivirus protection in Windows Security
Select Start and type "Windows Security"
Select the Windows Security app,
go to Virus & threat protection,
under Virus & threat protection settings select Manage settings.
Switch Real-time protection to Off.
scheduled scans will continue to run. However, files that are downloaded or installed will not be scanned until the next scheduled scan.
To turn off scheduled scans,
Open Task Scheduler Library > Microsoft > Windows, and then scroll down and select the Windows Defender folder.
Disable all scheduled scans
Four Simple Ways to Disable Windows Auto Update
By default, Windows 10 automatically checks for update, downloads and installs them, and it becomes more difficult to disable windows auto updates than in previous versions of the operating system.
Microsoft Windows 10 left users without any choice — Pro Edition allows you to postpone the installation of updates only for a while, while users of Windows 10 Home are not allowed to disable Windows auto update.
In other words, the new version of the operating system downloads and installs updates automatically and without notice.
Solution 1. Disable Windows Update Service.
Open Services.Msc
Press the Windows logo key + R at the same time to invoke the Run box.
Type services.msc and press Enter.
![Step 1 to disable windows auto update is to Disable Windows Update Service.
Open Services.Msc]()
Double-click on Windows Update Service
Scroll down the service list to Windows Update and double-click it.
![]()
In Window with Startup Type Select Option Disabled
In Startup type window select Disabled.
Then click Apply and OK to save the settings.
![]()
Solution 2. Change the Setting of the Group Policy Editor
The Group Policy feature is not available in the Home edition.
So, only when you run Windows 10 Professional, Enterprise, or Education, you can use the Group Policy Editor to change the settings to prevent Windows 10 from automatically updating.
The local group policy editor will notify you of new updates without automatically installing them.
Press the Windows logo key + R then type gpedit.msc and click OK.
Go to Computer Configuration > Administrative Templates > Windows Components > Windows Update.
Double-click Configure Automatic Updates.
Select Disabled in Configured Automatic Updates on the left, and click -- Apply and OK to disable the Windows automatic update feature.
Note: If you need to update your Windows version later, you can repeat the steps above, then select Enabled to turn on this feature, so that you can continue to download the updates.
![]()
Solution 3. Meter Your Network Connection
Click the Start button at the bottom left on your desktop, then click the Settings app.
Click Network & Internet.
![]()
Click Wi-Fi Icon in the Windows Taskbar
Click Wi-Fi in the left pane, then click the name of your Wi-Fi connection.
![]()
Click to Turn on Set as Metered Connection
Toggle on the option Set as metered connection and click to turn on.
![]()
Solution 4. Change the Way of Windows 10 Updates Using Registry
Use the Windows key + R keyboard shortcut to open the Run command.
Type regedit, and click OK to open the Registry.
Browse the following path: HKEY_LOCAL_MACHINE\SOFTWARE\Policies\Microsoft\Windows
Right-click the Windows (folder) key, select New, and then click Key.
Name the new key WindowsUpdate and press Enter.
Right-click the newly created key, select new, and click Key.
Name the new key AU and press Enter.
Inside the newly created key, right-click on the right side, select New, and click on DWORD (32-bit) Value.
Name the new key AUOptions and press Enter.
Double-click the newly created key and change its value to 2.
It’s for “Notify for download and notify for install”.
Click OK.
Close the Registry to complete the task.
![]()
Consider Using Action1 to Disable Windows Updates Remotely if:
You need to perform an action on multiple computers simultaneously.
You have remote employees with computers not connected to your corporate network.
Action1 is a cloud-based RMM solution for patch management, software deployment, remote desktop, software/hardware inventory, endpoint management and endpoint configuration reporting.
Windows Modules Installer Worker
Windows Modules Installer Worker (TiWorker.exe) is applied to Windows Update (automatically) and install some installation programs released by Microsoft, fix or replace system files.
In addition, it will maintain system regularly such as deleting temporary files, managing the system disk fragmentation, disk antivirus and other optimizations according to the set time.
This system tool will run in the background immediately when your computer connects to the internet in order to check whether there is available Windows or other programs to update.
Fix 1: Convert Windows Installer Startup Type as Manual
Step 1: Press Windows plus R key to open the management window.
Type services.msc and click OK in the pop-up window to open Windows Services.
![]() Step 2: Find Windows Modules Installer Worker in the services list at first.
Then right click it and choose Properties from the drop-down menu or just double click the Windows Modules Installer Worker service.
Step 2: Find Windows Modules Installer Worker in the services list at first.
Then right click it and choose Properties from the drop-down menu or just double click the Windows Modules Installer Worker service.
![]() Step 3: Click Manual option from the Startup type list and click OK.
Step 3: Click Manual option from the Startup type list and click OK.
![]()
Fix 2: End the TiWorker.exe Process
If you find that the error still exists after changing Windows Modules Installer Worker as manual, you can try to end the TiWorker.exe process through task manager.
Windows modules installer worker end task may assist you in getting rid of the error.
Specific steps to fix TiWorker.exe are shown in below.
You can operate step by step according to the guide.
Step 1: After clicking the Start button, choose Task Manager in the menu list.
![]() Step 2: Drop down the procedure list in the Details tab to find the TiWorker.exe.
Click End task after right clicking the TiWorker.exe file.
Step 2: Drop down the procedure list in the Details tab to find the TiWorker.exe.
Click End task after right clicking the TiWorker.exe file.
![]()
Fix 3: Delete the SoftwareDistribution Folder
Usually, Windows downloads and stores updates in the SoftwareDistribution folder.
As the downloaded updates files are unable to install correctly, those corrupted Windows Update files lead to Windows Modules Installer Worker high CPU usage.
Therefore, deleting the SoftwareDistribution folder is also a way to fix the error.
This method is very easy to carry out.
Follow the below steps to delete the SoftwareDistribution folder to fix the Windows Modules Installer Worker high CPU usage problem.
Step 1: Press Windows and R key at the same time, then type services.
msc in the pop-up window.
Step 2: Find the Windows Update option from the services list and stop the service.
![]() Step 3: Click the OK button after typing the C:\Windows\ command in the Run window.
Step 3: Click the OK button after typing the C:\Windows\ command in the Run window.
![]() Step 4: Scroll down the Windows files to find the SoftwareDsitribution folder, then delete it.
Step 4: Scroll down the Windows files to find the SoftwareDsitribution folder, then delete it.
![]() Step 5: Reboot your computer and check the Windows Update.
Step 5: Reboot your computer and check the Windows Update.
Fix 4: Use Windows Update Troubleshooter
Windows Update Troubleshooter is a useful tool to diagnose and troubleshoot problems related to Windows updates.
Though it is unable to resolve all problems, it is still a popular tool to fix certain computer issues.
Besides, it is rather easy to operate.
You just need a few steps to start troubleshooting.
Step 1: Type control panel in the search window, then open the control panel page.
Find Troubleshooting from the All Control Panels Items page.
![]() Step 2: Choose the Fix Problems with Windows Update link under System and Security in the Troubleshooting page.
Step 2: Choose the Fix Problems with Windows Update link under System and Security in the Troubleshooting page.
![]() Step 3: Click Next to continue the process, then the program will start to detect problem on the computer.
After the process finishes, you can check whether it resolves the Windows modules installer worker high CPU usage error.
Step 3: Click Next to continue the process, then the program will start to detect problem on the computer.
After the process finishes, you can check whether it resolves the Windows modules installer worker high CPU usage error.
![]()
![]()
Fix 5: Run Full System Scan
System File Checker (SFC), a built-in Windows tool, is a useful program.
It allows you to scan Windows system files and restore the corrupted files.
Now, the guide to how to run SFC.exe to scan Windows system files and repair the lost or corrupted system files including DLL files will be given to you.
Tip: The SFC scan program may be not working.
If you encounter this issue, this article may be helpful for you: Quick Fix – SFC Scannow Not Working (Focus on 2 Cases).
To start the process, you need to type command prompt in the search window.
Then start to operate the following steps.
Step 1: Click the Run as administrator option from the function list after right clicking the command prompt in the pop-up list.
![]() Step 2: Type the sfc /scannow order in the pop-up window, then press the Enter key.
This process will take a long time (about 15minutes) to finish the scan process.
Hence, the rest is to wait patiently.
Step 2: Type the sfc /scannow order in the pop-up window, then press the Enter key.
This process will take a long time (about 15minutes) to finish the scan process.
Hence, the rest is to wait patiently.
![]() You are able to check whether the Windows Modules Installer Worker high CPU usage error is resolved when the scan finishes.
Generally speaking, the issue can be addressed.
If not, you can try other methods.
You are able to check whether the Windows Modules Installer Worker high CPU usage error is resolved when the scan finishes.
Generally speaking, the issue can be addressed.
If not, you can try other methods.
Fix 6: Reset PC
If all the above methods fail work, resetting you PC perhaps is worthwhile to try.
Reset your computer to the original condition, then restart it.
If you click the Remove Everything option during the reset process, you may lose your important data.
So, making a backup is absolutely a wise idea before resetting the computer.
Here, strongly recommend you a professiona backup software – MiniTool ShadowMaker.
You can back up your system, partitions, files and folders quickly and effectively in case your data get lost when resetting the computer.
You are allowed to use the trial edition 30 days for free.
Don’t hesitate to download it.
MiniTool ShadowMaker TrialClick to Download100%Clean & SafeHere are some steps to back up files.
Step 1: Click Connect in the local blanket when the following page appears.
Tip: If you want to click the Connect in the remote blanket, you have to type the IP address of another computer in the same LAN.
![]() Step 2: Click the Source blanket to choose the backup files.
Step 2: Click the Source blanket to choose the backup files.
![]() Step 3: Click the Destination blanket to select a destination for the backup files.
Step 3: Click the Destination blanket to select a destination for the backup files.
![]() Step 4: After choosing the backup source and destination, you can execute the backup operation.
Here, you have two options: Back up Now and Back up Later.
Tip: If you would like to get some advanced settings like: automatic backup, full backup, differential backup, please click the Schedule, Scheme and Option to change the settings before clicking Back up Now.
Step 4: After choosing the backup source and destination, you can execute the backup operation.
Here, you have two options: Back up Now and Back up Later.
Tip: If you would like to get some advanced settings like: automatic backup, full backup, differential backup, please click the Schedule, Scheme and Option to change the settings before clicking Back up Now.
![]() Now, let’s beagin to reset your PC.
Click the Start button to open the Settings page, then type reset this pc in the search window to get the following page.
Click the Get Started option to beagin to reset.
Now, let’s beagin to reset your PC.
Click the Start button to open the Settings page, then type reset this pc in the search window to get the following page.
Click the Get Started option to beagin to reset.
![]() Choose the Keep my files option (to avoid data loss) to continue the resetting process.
Additionally, you can click Remove everything if you have backed up your important data.
Choose the Keep my files option (to avoid data loss) to continue the resetting process.
Additionally, you can click Remove everything if you have backed up your important data.
![]() I tried the methods that MiniTool offered and I successfully fixed the Windows modules installer worker high CPU usage error.
Click to Tweet
I tried the methods that MiniTool offered and I successfully fixed the Windows modules installer worker high CPU usage error.
Click to Tweet
wsl
在windows快速部署一台linux作为开发环境,之前是采用virtualbox,或许使用的是vwvare,现在可以有一个新的选择,wsl,只要你的windows是win10之后的系统,那么就可以直接使用。
测试下是不是可用,直接在你喜欢的终端工具上执行:
wsl--install--online有如下返回,那么事情就成功了一半
![]() 继续往下看:
继续往下看:
wsl简介
wsl全称是(Windows Subsystem for Linux),作用嘛就是突破 Windows 与 Linux 之间的壁垒,在过去的几十年里,Windows 和 Linux 一直被视为两个不同的宇宙。
Windows 是桌面应用程序和游戏的主场,而Linux 则是服务器和开发者的天下。
这两个操作系统在许多方面都有不同,包括文件系统、命令行工具、软件包管理和编程环境。
然而,随着技术的不断发展,Windows 和 Linux 之间的界限开始模糊,而 Windows Subsystem for Linux(简称WSL)正是这种变革的一个关键组成部分。
WSL 是 Microsoft 开发的一种技术,它允许在 Windows 操作系统上运行 Linux 发行版,如 Ubuntu、Debian 和 CentOS。
这意味着您可以在 Windows 机器上享受到 Linux 提供的强大功能,而无需离开 Windows 界面。
本文将深入探讨WSL,介绍它的背景、功能、用途和如何使用它来获得最佳的跨操作系统体验想要实践的直接跳转后面
WSL的主要功能
WSL 的主要功能和优势包括:
1. Linux 命令行工具
WSL 允许用户在 Windows 上使用 Linux 命令行工具,包括 Bash shell、grep、awk、sed 等。
这些工具可以让开发者和系统管理员在 Windows 环境中执行各种任务,从文件操作到文本处理再到系统管理。
2. Linux 发行版支持
WSL 支持多个流行的 Linux 发行版,包括但不限于:
Ubuntu
Debian
CentOS
Fedora
Kali Linux
openSUSE
用户可以根据自己的需求选择并安装这些发行版。
这意味着您可以在同一台计算机上同时运行多个不同的Linux发行版,以适应不同的用例。
3. 强大的开发环境
对于开发者来说,WSL 提供了一个强大的开发环境,可以进行本地开发和测试,而无需在多个操作系统之间切换。
开发者可以在WSL中安装和运行各种开发工具、编程语言和框架,从而更轻松地构建和测试应用程序。
4. 完全集成到 Windows
WSL 完全集成到 Windows 操作系统中,用户可以在 Windows 文件系统中访问WSL文件,也可以通过WSL运行的Linux应用程序访问Windows文件。
这种深度集成使得在两个操作系统之间切换变得非常容易。
5. 高性能
WSL 2.0 使用真正的 Linux 内核,因此在性能方面表现出色。
与WSL 1.0相比,WSL 2.0 更快速、响应更迅速,并支持更多的系统调用,这使得更多的Linux应用程序可以在WSL中运行。
6. 虚拟机兼容性
WSL 2.0 还具有虚拟机兼容性,这意味着您可以在WSL中运行虚拟机,包括Docker容器。
WSL的用途
WSL 在各种场景中都具有广泛的用途,以下是一些主要用途:
1. 软件开发
WSL 提供了一个强大的开发环境,可以在 Windows 操作系统上轻松进行软件开发。
开发者可以在WSL中运行各种编程语言,如Python、JavaScript、Go 和Ruby,以及开发工具,如Visual Studio Code。
这使得跨平台开发变得更加便捷。
2. 系统管理和自动化
系统管理员可以使用WSL来执行系统管理任务和自动化脚本。
Linux 命令行工具和脚本语言使得管理服务器、配置网络和监视系统变得更加容易。
3. 跨平台兼容性测试
如果您的应用程序需要在不同的操作系统上运行,WSL可以用于进行跨平台兼容性测试。
开发者可以在WSL中模拟不同的Linux环境,以确保应用程序在各种Linux发行版上正常运行。
4. Docker 开发和测试
WSL 2.0 兼容 Docker,这使得开发和测试容器化应用程序变得更加便捷。
开发者可以在WSL中运行Docker容器,而无需安装Docker Desktop。
5. 教育和学习
WSL 可以用于教育和学习Linux操作系统和命令行。
学生和初学者可以在WSL中练习Linux命令和系统管理技能,而无需购买或设置额外的硬件。
如何开始使用WSL
要开始使用WSL,请按照以下步骤操作:
1. 如何安装centos
在前面的截图中已经看到,wls默认自带的发行版,只有如下:
wsl--list--online以下是可安装的有效分发的列表。
请使用“wsl --install -d <分发>”安装。
如果你要安装一台centos环境,那么你需要另外一个包,包括其他的发行版,同样也是可以找到的。
https://github.com/mishamosher/CentOS-WSL/releases/tag/7.9-2211下载之后是一个压缩吧,解压后里面有个exe执行程序,放到你需要目录后,双击执行
![]() 如果有如下报错,那么需要以管理员权限执行如下:
the windows subsystem for linux optional component is not enabled
Enable-WindowsOptionalFeature-Online-FeatureNameMicrosoft-Windows-Subsystem-Linux
直到出现:
如果有如下报错,那么需要以管理员权限执行如下:
the windows subsystem for linux optional component is not enabled
Enable-WindowsOptionalFeature-Online-FeatureNameMicrosoft-Windows-Subsystem-Linux
直到出现:
![]() 然后再去看wsl list,已经有centos了
然后再去看wsl list,已经有centos了
![]() 然后直接使用如下命令就可以进入了:
wsl-dCentOS7
然后直接使用如下命令就可以进入了:
wsl-dCentOS7
![]() 后面会具体介绍如何在上面装一些中间件用来测试
后面会具体介绍如何在上面装一些中间件用来测试结论
Windows Subsystem for Linux(WSL)是一项强大的技术,它消除了 Windows 和 Linux 之间的壁垒,为开发者和系统管理员提供了强大的工具,用于开发、管理和测试应用程序。
WSL 的持续改进和增强使得它成为在不同操作系统之间无缝切换的理想选择。
无论您是一名开发者、系统管理员还是对 Linux 感兴趣的用户,WSL 都是您需要了解和掌握的重要工具之一,它将增强您的计算体验。
Client Server Runtime Process
Client Server Runtime Process (csrss.exe) is a Windows process that was responsible for handling the entire graphical subsystem during the era of Windows NT 3.x.
It is also responsible for something else, like managing windows, drawing things on the screen, and other similar functions.However, since the release of Windows NT 4.0, most of its work is done by the Windows kernel.
As a result, it does not require a lot of GPU power to run.
If you notice the Client Server Runtime Process (csrss.exe) consuming many GPU resources, something is wrong with your system.
![]()
Causes of Client Server Runtime Process High GPU Usage
Here are some common reasons:
The Windows and drivers on your PC are outdated.
Hardware acceleration is enabled on your PC.
You have set the Processes to High Priority on your PC.
Windows Transparency Effects is enabled on your PC.
There are some corrupt system files on your PC.
Now, you can know what can cause the Client Server Runtime Process high GPU usage issue.
How to Fix the Client Server Runtime Process High GPU Usage Issue?
Solution 1. Install Pending Windows Update
Many people report that updating Windows can fix the Client Server Runtime Process high GPU usage issue.
If you haven’t upgraded to Windows 11, you can have a try.
Here’s the tutorial:
Press the Windows and R keys simultaneously to open the Run window.
Type "ms-settings:windowsupdate"" in the box and press the Enter key.
Click the Check for update button to download and install the updates.
After that, click Advanced options under the More options section.
Click on Optional updates and open it.
Now, check all the optional updates and click "Download & Install"" to download and install those as well.
Once done, restart your PC and check if the error is fixed.
Solution 2.
Update, Roll Back, Restart or Reinstall Graphics Driver
The graphic card is one of the core components of your PC.
And the graphic drivers is essential for getting top performance from your GPU.
If there is anything wrong with your graphic drivers, it may cause high GPU usage.In this case, you can try updating, rolling back, restarting, or reinstalling the GPU driver to fix this csrss.exe process high GPU usage issue.
Here's the guide:To restart the graphic drivers, you just need to press the "Ctrl+Windows+Shift+B"" keys at the same time.
After that, your screen will turn black and restart again within a few seconds.To update, roll back, or reinstall display drivers:Step 1. Press the Windows and X keys simultaneously and select Device Manager from the menu.Step 2. Expand the Display adapters category.To update drivers:
Right-click the driver and select Update driver from the menu.
Select the "Search automatically for updated driver software"" option in the pop-up window.
To roll back drivers:
Right-click the driver and select Properties from the menu.
Go to the Driver tab and click the Roll Back Driver button.
Choose a reason and click Yes.
To reinstall drivers:
Write down the graphics card's detailed information.
Download the latest graphics card version from the manufacturer's website.
Right-click the driver and select Uninstall device from the menu to uninstall the driver.
Open the new graphics driver folder and double-click the setup file to install it.
![]()
Solution 3. Disable the Hardware Acceleration Features
Hardware acceleration is a feature that can utilize the graphics processing unit of the computer system to provide a high-end rendering of the user interface and its elements.
When you enable this feature on your PC, it can make your PC run faster.However, it may result in extremely high GPU use at the same time.
In this situation, you can disable it to decrease your GPU usage.
Here's the way:
Press the Windows and I keys simultaneously to open the Settings window.
Then go to System > Display > Graphics.
Now go to Hardware-accelerated GPU scheduling, and toggle off the switch below.
Restart your computer to apply the changes made and see if the issue was resolved.
Solution 4. Stop Using Windows Transparency Effects
The Windows transparency effects can result in high GPU usage too.
So, you can try fixing the csrss.exe process high GPU usage issue on your PC by disabling this feature.
Here’s how to do it:
Go to Settings > Personalization > Colors, and then find Transparency effects on the right panel.
Toggle off this switch and close all the windows.
Restart your PC and check if the issue is fixed.
![]()
Solution 5. Disable the HDR Effects
The HDR effects can also cause high GPU usage.
If you have enabled this on your PC, you can try disabling it to fix the Client Server Runtime Process high GPU usage issue.
These are the steps required:
Go to Settings > Systems > Display, and then select the HDR option.
Click on the toggle to turn it off.
After that, restart your PC and check if the issue has been resolved.
Solution 6. Reinstall Windows
If all the above solutions are unable to help you fix this csrss.exe process high GPU usage issue, you can suspect there is something wrong with your system.
In this case, you can try a clean install or repair install.
取代Windows
取代Windows 的操作系统 运行速度极快 软件丰富 可运行安卓APP 支持google play fydeos17安装教程
install Windows 11
install Windows 11
Windows built-in system accounts
In Windows, there are several built-in system accounts that serve specific purposes.
These accounts are created by default during the installation of the operating system.
Here are some of the commonly known built-in system accounts in Windows:
Administrator: The Administrator account is the most powerful account in Windows.
It has full control over the system and can perform all administrative tasks, including managing user accounts, installing software, and modifying system settings.
Guest: The Guest account is an unprivileged account intended for temporary or occasional use by someone who doesn't have a regular user account on the computer.
It has limited permissions and restrictions to protect the system from unauthorized access.
DefaultAccount: The DefaultAccount is a built-in account created during Windows installation.
It is used for running apps and performing system tasks with limited privileges.
It is primarily utilized for new user account creation and initial application setup.
SYSTEM: The SYSTEM account is a highly privileged account used by the operating system.
It is responsible for running essential Windows services and processes.
The SYSTEM account has full control over the system and is used for performing critical system operations.
LOCAL SERVICE: The LOCAL SERVICE account is a built-in account used by Windows services that don't need network access.
It has limited permissions and is designed to run services in a more restricted environment.
NETWORK SERVICE: The NETWORK SERVICE account is similar to the LOCAL SERVICE account, but it is used by services that require network access.
It has more permissions than the LOCAL SERVICE account but still operates under certain restrictions.
TrustedInstaller: The TrustedInstaller account is used by the Windows Module Installer service (trustedinstaller.exe).
It is responsible for installing, modifying, and removing Windows system components and updates.
The account has extensive permissions to perform these tasks.
IWAM and IUSR: These accounts are used by Internet Information Services (IIS), which is Microsoft's web server software.
IWAM (Internet Information Services Worker Process Identity) is used for running application pools in IIS 6.0 and earlier versions, while IUSR (Internet Information Services Anonymous User) is used for anonymous access to web content.
ASPNET: The ASPNET account is used by older versions of the .NET Framework (up to version 1.1).
It is used for running ASP.NET web applications with the necessary permissions and restrictions.
SQL Server Service Accounts: When you install Microsoft SQL Server, you can specify service accounts for different SQL Server services.
These accounts, such as SQLServerAgent and SQLServerMSSQLUser$, are used to run specific SQL Server components with the required permissions.
HomeGroupUser$: This account is used for sharing resources in a HomeGroup network.
It is created automatically when you set up a HomeGroup and is used to control access to shared files and printers.
Windows Default Accounts (WDAGUtilityAccount, WaaSMedicSvc, etc.): These accounts are specific to Windows 10 and later versions.
They are used by various system services and processes, such as Windows Defender Application Guard (WDAG) and Windows Update Medic Service (WaaSMedicSvc).
NetworkService and LocalSystem: These are two additional built-in accounts that are commonly used in Windows.
The NetworkService account has more permissions than the LOCAL SERVICE account and is used by services that require access to network resources.
The LocalSystem account is a highly privileged account with unrestricted access to the local system.
ASP.NET Machine Account: This account is used by newer versions of the .NET Framework (starting from version 2.0) for running ASP.NET web applications.
It has the necessary permissions to execute the applications and access resources.
IIS AppPool{AppPoolName}: When you create an application pool in Internet Information Services (IIS), a corresponding virtual account is created with the name "IIS AppPool{AppPoolName}".
These accounts are used to isolate and manage individual application pools in IIS.
Managed Service Accounts (MSAs): Managed Service Accounts are a feature introduced in Windows Server 2008 R2 and Windows 7.
They are designed to provide automatic password management and simplified SPN (Service Principal Name) management for services running on multiple computers.
WDAGUtilityAccount: This account is used by the Windows Defender Application Guard feature introduced in Windows 10.
It is responsible for running processes in a secure container to isolate potentially malicious content from the rest of the system.
File Explorer shortcuts Keys:
Alt + D - Select address bar.
Alt + Enter - Open Properties settings for the selected item.
Alt + Left arrow key (or Backspace) - View previous folder.
Alt + P - Display preview panel.
Alt + Right arrow key - View next folder.
Alt + Up arrow - Move up a level in the folder path.
Ctrl + E (or F) - Select search box.
Ctrl + F (or F3) - Start search.
Ctrl + L - Focus on the address bar.
Ctrl + Mouse scroll wheel - Change view file and folder.
Ctrl + N - Open new window.
Ctrl + Shift + E - Expands all folders from the tree in the navigation pane.
Ctrl + Shift + N - Creates a new folder on desktop or File Explorer.
Ctrl + Shift + Number (1-8) - Changes folder view.
Ctrl + W - Close active window.
End - Scroll to the bottom of the window.
F11 - Switch active window full-screen mode.
F2 - Rename selected item.
F4 - Switch focus to address bar.
F5 - Refresh File Explorer's current view.
F6 - Cycle through elements on the screen.
Home - Scroll to the top of the window.
Windows key + E - Open File Explorer.
cmd常用命令介绍
ipconfig
ipconfig命令可以查询本机IP地址相关信息。
mstsc
远程连接桌面。
自己电脑已经设置过远程云服务器的连接,直接使用mstsc命令即可实现远程桌面连接。
PowerShell
可以通过在运行界面输入PowerShell来打开PowerShell界面。
control
打开控制面板。
截图+贴图+OCR文字识别+GIF录制
软件打开后,按ctrl+1可选择区域截图,可对截屏区域打码、标序号、添加箭头等编辑,也可把图片贴在桌面最上层,方便对比查看
截长图
截图后选择【截长图】,可通过上下滑动,来截取超出屏幕范围的部分,也可左右滑动,截出一个超宽的图

GIF录制
截图后选择【GIF】,可对截图区域进行录制GIF图片,录制好,可以直接观看和下载

文字识别
截图后按下shift+c,可直接识别文字并复制到剪贴板,也可以选择贴图,然后单独复制贴图中的文字

to remap keyboard keys on Windows 11, 10
Key Points
To remap a keyboard key on Windows 11 and 10, open PowerToys > Keyboard Manager > Remap a key, configure the key remap and save changes.
To remap a shortcut on Windows 11 and 10, open PowerToys > Keyboard Manager > Remap a shortcut, configure the shortcut remap and save changes.
On Windows 11 (or 10), you can remap keys and shortcuts in different ways, but I have found that using PowerToys is the fastest and easiest method, and in this guide, I’ll show you how.
If you use your computer for gaming or work, sometimes you may need to reassign some keys and shortcuts to different keys or a combo of keys because it makes more sense or can help improve productivity.
Regardless of the reason, Windows 11 doesn’t include a feature to change the actions of keys or shortcuts, but you can use tools like PowerToys from Microsoft to remap virtually any key globally or for a specific application.
The app also works to remap shortcuts.
You can even create remaps to launch apps, URIs, and web pages.
In this guide, I will teach you how to quickly use the PowerToys app to remap keys and shortcuts on Windows 11 and even on Windows 10.
Remap keyboard keys on Windows
To remap keys on your keyboard on Windows 11 (or 10), use these steps:
Open PowerToys.
Click on Keyboard Manager.
Turn on the “Enable Keyboard Manager” toggle switch.
Click the “Remap a key” option.
 Click the “Add key remapping” button.
Choose the “Send key/Shortcut” option.
Click the Select button.
 Press the keyboard key to remap (source).
Click the OK button.
Click the Select button to set the “To send” setting.
Press the keyboard key to remap (destination).
Quick note: You can remap virtually any key.
For example, if the “Windows” key isn’t working, you can map it to one of the functions or extra keys available on the keyboard you typically don’t use.
You can also remap to a keyboard shortcut.
Click the OK button.
Click the OK button again.
Click the Continue anyway button (if applicable).
Once you complete the steps, the key will now perform the action of the new key mapping on Windows 11.
Remap keyboard shortcuts on Windows
To remap keyboard shortcuts on Windows, use these steps:
Open PowerToys.
Click on Keyboard Manager.
Turn on the “Enable Keyboard Manager” toggle switch.
Click the “Remap a Shortcuts” option.
 Click the “Add shortcut remapping” button in the “Select” setting.
Click the Shortcut (pen) button.
Confirm the keyboard shortcut to remap in the setting (for example, “ALT + T”).
Quick note: PowerToys also support “chords,” allowing you to specify two modifiers for the shortcut so that you can use two variations of the shortcut to execute the shortcut, but this is an optional function.
Click the OK button.
Select the action from the “To” setting.
 Quick tip: You can map a shortcut to another keyboard key or shortcut.
You can also remap the shortcut to open an application or URI, meaning a web page or specific settings page.
Confirm the shortcut remap (according to your selection).
Quick note: In my example, I use the “ms-settings:appsfeatures” URI that opens the “Installed apps” settings page.
You can learn more about Windows 11 URIs on this page.
(Optional) Specify the name of the “.exe” program (for example, msedge.exe (Edge), explorer.exe (File Explorer), and chrome.exe (Google Chrome)) to target the shortcut on a specific application.
Click the OK button.
After you complete the steps, the Windows shortcut remap will perform the action you configured in the application.
If you want to remove the remap, you can go to the “Remap a key” or “Remap shortcuts” page and click the “Delete” (trash) button for the action you want to remove.
Although PowerToys can make it easier to remap keys and shortcuts on Windows, it’s important to note that the application doesn’t make system changes, meaning that the remaps will only work as long as PowerToys is running on the system.
Windows 自带的远程桌面功能
1、被控电脑远程桌面功能开启方法
a. windows 10系统开启方法:
通过系统属性:
按“Win + R”键,输入“sysdm.cpl”并按回车,打开系统属性。
单击“远程”选项卡,勾选“允许远程连接到此计算机”。
 b. windows 11系统开启方法:
按“Windows + R”键打开运行对话框,执行control打开控制面板,选择“系统和安全”>“允许远程访问”。
在“远程桌面”区域中,选择“允许远程连接到此计算机”,并勾选“仅允许运行使用网络级别身份验证的远程桌面的计算机连接(建议)”。
 2、系统防火墙开放远程端口的准入
方法如下:
呼出运行栏输入wf.msc回车调出高级防火墙设置,确认远程桌面-用户模式启用,或者新建入站规则,TCP端口3389允许入站。
 3、访问连接
通过上述两步骤设置,在同一个局域网内就可以通过内网
IP地址对设置好的计算机进行远程访问控制了。
方法:
呼出运行栏输入mstsc回车,在对话框输入需要远控的计算机IP地址然后输入用户名密码就可以连接进行远程控制了。
 4、外网连接
如果企业在运营商处申请的有固定IP地址,那么可以将需要远程访问的地址端口映射到外网地址,然后通过固定的外网IP地址和端口进行远程访问此计算机。
WX信息提取工具
通过命令行找到微信客户端的PID,再使用procdump64.exe来生成对应的.dmp文件。
tasklist | find /I "WeChat.exe"
procdump64.exe -accepteula -ma 你的PID
downloads procdump
接着,只需打开相应的软件,选择之前生成的.dmp文件,就可以方便地提取出想要的数据了。
 而使用类似上面介绍的命令和工具,如通过procdump64.exe提取PID并生成.dmp文件,对于我来说也是相当重要的。
它们不仅简化了繁琐的操作步骤,还提高了工作效率,让我能够更专注地处理实际的安全问题。
想要获取工具的小伙伴可以直接拉至文章末尾
我们来提取并讨论上述工具描述中涉及的网络安全关键技术点:
1、定期例行安全活动和护网工作:定期进行安全漏洞扫描、系统漏洞修复、日志监控分析等安全活动是网络安全的基础工作。
通过这些活动,可以及时发现并排除系统中存在的安全隐患,提高系统的整体安全性。
2、安全培训和知识分享:安全培训和知识分享是提升团队整体安全水平的有效途径。
通过不断学习最新的安全威胁和防范策略,团队成员可以增强自身的安全意识,提高对安全事件的应对能力。
3、使用开源网络安全工具:开源网络安全工具提供了丰富的功能和灵活的配置选项,可以帮助安全团队更高效地进行安全检测和响应工作。
例如,使用procdump64.exe提取PID并生成.dmp文件,有助于分析软件运行状态,快速定位问题并采取相应措施。
4、红蓝对抗和模拟安全演练:红蓝对抗和模拟安全演练是一种实战训练方式,可以帮助安全团队更好地理解真实安全事件处理流程,提高团队的安全应急响应能力。
通过模拟攻击和防御场景,团队成员能够锻炼技能,加深对网络安全原理的理解。
5、应急响应和事件处理:网络安全领域面临各种攻击和威胁,因此建立有效的应急响应机制至关重要。
团队需要迅速响应安全事件,分析攻击痕迹并采取相应措施来减轻损失。
实施应急响应计划可以帮助组织降低遭受攻击的风险,并减少潜在损失。
下载链接
https://0x001.lanzn.com/iuLlO2c3mqof

Easy Ways to Read Crash Dump Files
https://www.goldstarsoftware.com/papers/ObtainingAWindowsMemoryDumpWithProcDump.pdf
When your PC crashes with a blue screen error, Windows automatically creates a dump file (minidump) which contains helpful troubleshooting information, including the stop codes that led to the error.
Opening and analyzing a dump file can help you determine which drivers or programs led to the crash.
To read the dump file, you'll just need to download a simple free crash analysis tool like WinDbg or BlueScreenView.
This wikiHow guide will walk you through opening, analyzing, managing, and making sense of Windows crash dump files.
Things You Should Know
Windows blue screen errors create DMP files in C:\Windows\Minidump by default.
The location varies if Windows is installed on a different drive.
You can use WinDbg by Microsoft to open all types of .DMP files—not just those created by Windows memory or kernel errors.
BlueScreenView is a free debugging tool that clearly highlights the software and drivers that were involved in the system crash.
Using WinDbg
 Install WinDbg from the Microsoft Store. This free debugging tool from Microsoft will help you analyze all types of dump (DMP) files, including memory dumps from blue screen errors.
To download, go to https://apps.microsoft.com/store/detail/windbg-preview/9PGJGD53TN86, click Get in Store app, and click Install.
 Open WinDbg as an administrator. If you want to analyze system-level dump files, you'll typically need administrator privileges.
To run the app as an administrator:
Press the Windows key and type windbg.
Right-click WinDbg Preview and select Run as administrator.
Click Yes to confirm.
 Click the File menu and select Start debugging. A list of debugging processes will appear.
 Select Open dump file. You'll see a "Supported file formats" area that displays a list of dump formats and file extensions you can debug with this tool, including:
Windows user and kernel mode dump formats: DMP, HDMP, MDMP
Windows binary image formats: EXE, DLL, SYS
Linux user and kernel mode core dumps and binary formats: ELF, KDUMP
macOS user mode core dumps and binary formats: MACHO
 Click the Browse button and select a dump file. The location of your dump file will vary.
You'll usually find it in C:\Windows\minidump.
You can also select a compressed CAB or ZIP file that contains a dump file.
No need to decompress it first.
Minidump files are shorter versions of the dump files that are easier to open and analyze.
They still contain all of the information you'll need to track down the error.
If you're not sure where your dump files are saved by default, you can check the location in your advanced system settings.
 Click Open. WinDbg will now load the dump file in the analyzer.
This might take a few moments depending on the size of the file.
 Type !analyze -v into the command line and press ↵ Enter. This command line is just below the body of the dump file.
Running this command will analyze and display verbose information in the Command tab.
This process might take some time, as dump files can be rather large.
You'll know the analysis is complete when the progress bar is no longer moving.
 Look for errors in the Bugcheck Analysis area. Once the analysis is complete, you can scroll through the data to view information that can help you troubleshoot the crash.
Sometimes you'll see a really clear description of what caused the dump or kernel panic, while other times the text might be kind of vague.
It really depends on the type of dump file you're reading and what caused the issue.
If you caught a blue screen error in the moment and remember the stop code (such as DRIVER_IRQL_NOT_LESS_OR_EQUAL, DPC_WATCHDOG_VIOLATION, or a hexadecimal code like0xC000000F), search the dump analysis for that string of text.
You can also look for "MODULE_NAME" and "FAILURE_BUCKET_ID" in the analyzer to find the specific program or driver that caused the crash.
Using BlueScreenView
 Download BlueScreenView by Nirsoft. This free utility makes it easy to open and analyze minidump files created by Windows blue screen crashes.
You can download the tool from https://www.nirsoft.net/utils/blue_screen_view.html.
To install BlueScreenView, click Download BlueScreenView with full install/uninstall support, double-click the downloaded bluescreenview_setup.exe file, and follow the on-screen instructions.
If you don't want to install a program, you can download the standalone version by clicking the Download BlueScreenView (in Zip file) link.
Then, just unzip the file to find a fully-usable version of the app that doesn't require installation.
 Open BlueScreenView. If you downloaded the standalone version of BlueScreenView, just double-click BlueScreenView.exe in the extracted folder.
If you installed the app, you'll find BlueScreenView in your Start menu.
If BlueScreenView detects a dump file (ending with DMP) in the default location of C:\Windows\MiniDump, it will display the dump file's name and date in the upper portion of the window.
 Select a dump file location (if needed). If you don't see the dump file you're looking for, you can change the location:
Press Control + O on the keyboard to open the Advanced Options.
Click Browse.
Select the location of your dump file (such as C:\MiniDump}} and click OK.
If you're not sure where your dump files are saved by default, you can check the location in your advanced system settings.
Minidump files are shorter versions of the dump files that are easier to open and analyze.
They still contain all of the information you'll need to track down the error.
 Select the dump file you want to analyze. The most recent dump file in the selected folder appears in the upper portion of the window.
When you click the dump file, its details expand in the bottom panel.
 Read the dump file. You'll see the stop code for the dump (e.g., DRIVER_IRQL_NOT_LESS_OR_EQUAL} in the "Bug Check String" column in the top panel.
In the bottom panel, you'll see the drivers and programs responsible for the crash highlighted in red.
Changing Memory Dump File Settings
Press the Windows key on your keyboard. If you need to view or change the location of your Windows system dump files, you can do so in your Advanced System Settings.
Start by pressing the Windows key on your keyboard or clicking the magnifying glass on the taskbar.
By default, your system dump files are automatically overwritten with each new crash.
You can disable this automatic overwriting if you want to keep old dump files for analysis.
 Type view advanced system settings. A list of search results will appear.
 Click View advanced system settings. It's a computer monitor with a checkmark icon at the top of the Start menu.
Doing so opens the Advanced System Settings window.
 Click the Advanced tab. You'll see this at the top of the window.
 Click the Settings button. It's below the "Startup and Recovery" heading near the bottom of the page.
 Select Small memory dump from the "Write debugging information" menu. Each item in this menu is a different type of Windows dump file that you can configure separately.
For the dump file generated by a blue screen error, choose Small memory dump from the menu.
A memory dump file is a file that's taken from RAM. RAM has a number of allocation tables—or buckets—inside.
A memory dump file is an entire download of whatever was inside that file when a catastrophic failure happened, and it goes into a log so an engineer or a software professional can look at it and see where the conflict happened.
 Find (or change) the location of this dump file. The dump file's location appears under the "Dump file" heading.
If you see something like %SystemRoot%\Minidump, the &SystemRoot& part of the location is just a link to the root of your Windows installation (e.g., C:\Windows).
So, if Windows is installed on your C drive and the dump file location is %SystemRoot%\Minidump, your dump files are saved to C:\Minidump.
 Choose what to do with old dump files when new crashes occur. For small memory dump files, older dumps are not overwritten.
However, larger dump files (kernel memory dump, complete memory dump, automatic memory dump, and active memory dump) are automatically overwritten each time a new crash is logged.
If you'd rather keep these old logs for analysis, select the log type, then remove the checkmark from "Overwrite any existing file."
The complete memory dump file is the largest type of Windows dump file.
If you're low on disk space and face a lot of crashes, you might want to overwrite these automatically to conserve space.
 Click OK to save your changes. If you changed any of your dump file settings, this saves them permanently.
You can then click OK again to exit Advanced System Settings.
一行命令激活Windows和Office
进入指定目录
切换到C:/WINDOWS/system32目录下:
C:\windows\system32>
Windows系统激活 Win10, Win11
输入命令:
irm https://get.activated.win | iex
 回车后,就会弹出下面对话框,选择对应的激活选项,选择[1]永久激活就OK了(按键盘上数字键1)。
 选择对应的激活选项
[1] 是永久激活windows系统
[2]是永久激活office
[3]激活系统2038年
[4]激活windows/office,有效期180天
 检查一下系统是否激活成功,具体操作:
(1)使用windows徽标+R快捷键打开运行框,
(2)然后输出slmgr.vbs /xpr,就可以看到系统被永久激活了;

 Office软件激活
和Windows激活一样,在上述C:/WINDOWS/system32目录下,输入命令:
irm https://get.activated.win | iex
 回车后,就会弹出下面对话框,选择对应的激活选项,选择[2]是永久激活Office(按键盘上数字键2),接下来会弹出另一个框Ohook Activation,然后选择[1]开始激活office(按键盘数字1):

 选择对应的选项
[1]是激活Office
[2]是取消Office激活
[3]下载Office软件
[0]返回上一个界面
 最后你可以看一下Office是否已经正常激活:

FreeFileSync 一键同步文件到远程服务器
FreeFileSync 简介
FreeFileSync 与远程主机的文件同步。
同时支持 Windows、Linux、mac

创建同步任务
程序安装后会在桌面创建两个快捷方式,绿色为同步任务编辑器,红色为实时同步
 打开编辑器创建同步任务,源目录支持直接拖拽和手动浏览选择,目的目录则要手动选择
 这里以远程 ftp 服务器为例,点击右侧的云添加在线存储空间
 同时支持三种类型的在线存储同步,我这里选择 FTP
 填写远程服务器的 IP、端口(FTP 默认为 21)、 用户名、密码,点击浏览即可选择要同步到的远程服务器目录
 选择好后,点击确定即可完成。
支持添加多个路径
 下面设置一下同步规则
 默认支持三种同步方式,支持自定义规则
 同时支持对同步后已删除和覆盖的文件做保留或永久删除,可以将旧文件移动至本地或云端指定目录,防止误操作导致文件丢失。
 这里创建一个镜像任务测试。
注:镜像时会从本地同步至远程主机,如果本地目录和远程目录内容不一致则会以本地目录为主,对远程主机内的文件做删除操作。
 点击开始同步后,会弹出提示框,询问是否开始,本地主机会列出要同步的文件,远程主机侧会列出要删除和要同步的文件
 点击开始后可以看到同步日志以及同步时间
 在日志中可以看到,按照设置的规则将要删除的文件移动至本地目录内
 此时在远程主机目录只能看到同步过去的 txt 文件,其余文件全部被删除移动至本地指定目录内

实时同步任务
如果你需要实时同步,可以将设置的同步任务保存导出,添加到实时任务中。
保存时点击另存为批处理作业,文件名称随意,建议使用英文字母+数字避免出现未知错误
 保存到指定位置后,创建一个实时同步任务,直接将任务拖动到下图所示位置即可
 拖动后会自动填充要监视的文件夹,可以设置同步间隔时间,默认为 10 秒一次。
这里需要注意,该自动任务不支持将 ftp 服务器配置为被监视的目录。
所以这里我们使用 windows 定时任务的方式实现同步任务自动化。
 按住 win+x 打开计算机管理
 找到任务计划程序
 创建一个目录用于添加同步任务的自动执行
 创建基本任务,添加一个名称
 这里可以选择执行时间,根据实际需要选择即可
 设置每天几点执行
 选择启动程序
 选中我们刚才保存的脚本文件
 勾选点击完成时打开属性对话框
 勾选使用最高权限运行,然后确定即可
 当任务触发时便会执行脚本
 至此,就可以实现本地主机与远程主机的自动同步了。
官网下载地址:https://freefilesync.org/download.php
ColorConsole、ConEmu、Cmder, Windows 命令行替代方案
以橙色为主题的 cmd.exe 替代方案,重点介绍 ColorConsole
ColorConsole是一款为Windows上的系统管理员打造的命令行提示符替代程序,ColorConsole体积小巧,功能强大,兼容性强,提供收藏与合并、批量功能,简化用户的工作流程,特别适合经常在命令行提示符下操作的用户使用。
一、软件介绍
ColorConsole
ColorConsole 是一款免费的命令行模拟器,它为用户提供了丰富的自定义选项。
用户可以轻松改变控制台窗口、背景和文本的颜色,为命令行界面增添个性化色彩。
此外,它还支持诸如标签页浏览、分屏显示和透明度调整等多种功能。
 ConEmu
与 ColorConsole 类似,ConEmu 也是一款免费、开源的命令行模拟器。
同样可以对控制台窗口、背景和文本的颜色进行调整,并且支持标签页、分屏和自定义主题等功能。
 Cmder
Cmder 是基于 ConEmu 的一款免费、开源命令行模拟器。
它集成了许多额外的功能,如内置终端模拟器、文件浏览器和 Git 集成等。
当然,也可以像其他两款软件一样改变控制台窗口、背景和文本的颜色。
Cmder
Cmder 是基于 ConEmu 的一款免费、开源命令行模拟器。
它集成了许多额外的功能,如内置终端模拟器、文件浏览器和 Git 集成等。
当然,也可以像其他两款软件一样改变控制台窗口、背景和文本的颜色。

二、使用方法
选择适合自己的命令行模拟器:在众多的橙色主题 cmd.exe 替代方案中,用户可以根据自己的需求和喜好进行选择。
如果追求简洁和基本的功能,可以选择 ColorConsole;
如果需要更多的自定义选项和高级功能,ConEmu 或 Cmder 可能更适合。
三、总结
在 Windows 10 及其他版本的 Windows 系统中,使用橙色主题的 cmd.exe 替代方案可以极大地提升用户在命令行操作中的体验。
CMD 命令大全
系统操作类
dir:列出当前目录下的所有文件和文件夹。
cd:切换当前目录。
md / rd:创建或删除文件夹。
copy / xcopy:复制文件或目录。
tasklist:查看当前运行的进程。
taskkill:结束指定任务或进程。
shutdown:执行定时关机、重启或取消关机操作。
网络相关类
ipconfig:查看网络配置及网卡信息。
ping:检查网络连通性。
tracert:跟踪数据包的路由路径。
nslookup:查询域名解析情况。
netstat:查看当前网络连接及端口使用状态。
arp:显示或修改 ARP 表项。
route:查看或配置路由表。
文件和磁盘操作类
attrib:设置或移除文件属性(如隐藏、只读)。
chkdsk:检查磁盘状态并修复错误。
diskpart:管理磁盘分区。
del:删除指定文件。
format:格式化指定磁盘。
系统诊断和修复类
sfc:扫描并修复系统文件。
systeminfo:查看系统详细信息。
wmic:获取硬件和软件信息。
driverquery:查看系统已安装驱动程序列表。
批量操作类
echo:输出文本到屏幕或文件。
for:循环批量处理文件或指令。
pause:暂停批处理执行,等待用户操作。
call:调用其他批处理文件。
Easy Ways to Read Crash Dump Files
When your PC crashes with a blue screen error, Windows automatically creates a dump file (minidump) which contains helpful troubleshooting information, including the stop codes that led to the error.
Opening and analyzing a dump file can help you determine which drivers or programs led to the crash.
To read the dump file, you'll just need to download a simple free crash analysis tool like WinDbg or BlueScreenView.
Things You Should Know
Windows blue screen errors create DMP files in C:\Windows\Minidump by default.
The location varies if Windows is installed on a different drive.
You can use WinDbg by Microsoft to open all types of .DMP files—not just those created by Windows memory or kernel errors.
BlueScreenView is a free debugging tool that clearly highlights the software and drivers that were involved in the system crash.
Steps
Method 1
Using WinDbg
 Install WinDbg from the Microsoft Store.
This free debugging tool from Microsoft will help you analyze all types of dump (DMP) files, including memory dumps from blue screen errors.
Open WinDbg as an administrator.
If you want to analyze system-level dump files, you'll typically need administrator privileges.
To run the app as an administrator:
Press the Windows key and type windbg.
Right-click WinDbg Preview and select Run as administrator.
 Click the File menu and select Start debugging. A list of debugging processes will appear.
 Windows user and kernel mode dump formats: DMP, HDMP, MDMP
Windows binary image formats: EXE, DLL, SYS
Linux user and kernel mode core dumps and binary formats: ELF, KDUMP
macOS user mode core dumps and binary formats: MACHO
 You can also select a compressed CAB or ZIP file that contains a dump file.
No need to decompress it first.
Minidump files are shorter versions of the dump files that are easier to open and analyze.
They still contain all of the information you'll need to track down the error.
If you're not sure where your dump files are saved by default, you can check the location in your advanced system settings.
 Click Open. WinDbg will now load the dump file in the analyzer.
 Type !analyze -v into the command line and press ↵ Enter. This command line is just below the body of the dump file.
This process might take some time, as dump files can be rather large.
You'll know the analysis is complete when the progress bar is no longer moving.
 Look for errors in the Bugcheck Analysis area. Once the analysis is complete, you can scroll through the data to view information that can help you troubleshoot the crash.
Sometimes you'll see a really clear description of what caused the dump or kernel panic, while other times the text might be kind of vague.
It really depends on the type of dump file you're reading and what caused the issue.
If you caught a blue screen error in the moment and remember the stop code (such as DRIVER_IRQL_NOT_LESS_OR_EQUAL, DPC_WATCHDOG_VIOLATION, or a hexadecimal code like0xC000000F), search the dump analysis for that string of text.
You can also look for "MODULE_NAME" and "FAILURE_BUCKET_ID" in the analyzer to find the specific program or driver that caused the crash.
Method 2
Using BlueScreenView
 Download BlueScreenView by Nirsoft. This free utility makes it easy to open and analyze minidump files created by Windows blue screen crashes.
You can download the tool from https://www.nirsoft.net/utils/blue_screen_view.html.
To install BlueScreenView, click Download BlueScreenView with full install/uninstall support, double-click the downloaded bluescreenview_setup.exe file, and follow the on-screen instructions.
If you don't want to install a program, you can download the standalone version by clicking the Download BlueScreenView (in Zip file) link.
Then, just unzip the file to find a fully-usable version of the app that doesn't require installation.
 Open BlueScreenView. If you downloaded the standalone version of BlueScreenView, just double-click BlueScreenView.exe in the extracted folder.
If you installed the app, you'll find BlueScreenView in your Start menu.
If BlueScreenView detects a dump file (ending with DMP) in the default location of C:\Windows\MiniDump, it will display the dump file's name and date in the upper portion of the window.
 Select a dump file location (if needed). If you don't see the dump file you're looking for, you can change the location:
Press Control + O on the keyboard to open the Advanced Options.
Click Browse.
Select the location of your dump file (such as C:\MiniDump}} and click OK.
If you're not sure where your dump files are saved by default, you can check the location in your advanced system settings.
Minidump files are shorter versions of the dump files that are easier to open and analyze.
They still contain all of the information you'll need to track down the error.
 Select the dump file you want to analyze. The most recent dump file in the selected folder appears in the upper portion of the window.
When you click the dump file, its details expand in the bottom panel.
 Read the dump file. You'll see the stop code for the dump (e.g., DRIVER_IRQL_NOT_LESS_OR_EQUAL} in the "Bug Check String" column in the top panel.
In the bottom panel, you'll see the drivers and programs responsible for the crash highlighted in red.
Method 3
Changing Memory Dump File Settings
 Press the Windows key on your keyboard. If you need to view or change the location of your Windows system dump files, you can do so in your Advanced System Settings.
Start by pressing the Windows key on your keyboard or clicking the magnifying glass on the taskbar.
By default, your system dump files are automatically overwritten with each new crash.
You can disable this automatic overwriting if you want to keep old dump files for analysis.
 Type view advanced system settings. A list of search results will appear.
 Click View advanced system settings. It's a computer monitor with a checkmark icon at the top of the Start menu.
Doing so opens the Advanced System Settings window.
 Click the Advanced tab. You'll see this at the top of the window.
 Click the Settings button. It's below the "Startup and Recovery" heading near the bottom of the page.
 Select Small memory dump from the "Write debugging information" menu. Each item in this menu is a different type of Windows dump file that you can configure separately.
For the dump file generated by a blue screen error, choose Small memory dump from the menu.
 Find (or change) the location of this dump file. The dump file's location appears under the "Dump file" heading.
If you see something like %SystemRoot%\Minidump, the &SystemRoot& part of the location is just a link to the root of your Windows installation (e.g., C:\Windows).
So, if Windows is installed on your C drive and the dump file location is %SystemRoot%\Minidump, your dump files are saved to C:\Minidump.
 Choose what to do with old dump files when new crashes occur. For small memory dump files, older dumps are not overwritten.
However, larger dump files (kernel memory dump, complete memory dump, automatic memory dump, and active memory dump) are automatically overwritten each time a new crash is logged.
If you'd rather keep these old logs for analysis, select the log type, then remove the checkmark from "Overwrite any existing file."
The complete memory dump file is the largest type of Windows dump file.
If you're low on disk space and face a lot of crashes, you might want to overwrite these automatically to conserve space.
 Click OK to save your changes. If you changed any of your dump file settings, this saves them permanently.
You can then click OK again to exit Advanced System Settings.
CMD命令汇总
常用 CMD 命令及其功能
以下是查看电脑配置的常用 CMD 命令及其具体用途:
1.查看处理器信息
命令:wmic cpu get name
作用:
返回处理器的名称和型号。
例如:Intel(R) Core(TM) i7-10750H CPU @ 2.60GHz
2.查看内存容量
命令:wmic memorychip get capacity
作用:
显示每条内存的容量(以字节为单位)。
例如:8,589,934,592 表示 8GB。
3.查看硬盘信息
命令:wmic diskdrive get model,size
作用:
显示硬盘的型号和容量(以字节为单位)。
例如:TOSHIBA MQ01ABD100 1,000,204,886,016 表示 1TB 硬盘。
4.查看主板信息
命令:wmic baseboard get product,Manufacturer
作用:
返回主板的制造商和型号。
例如:ASUSTeK COMPUTER INC. 和 PRIME B450M-K
5.查看显卡信息
命令:wmic path win32_videocontroller get name
作用:
显示显卡名称。
例如:NVIDIA GeForce GTX 1660 Ti
6.查看操作系统版本
命令:systeminfo | findstr /B /C:"OS Name" /C:"OS Version"
作用:
显示当前操作系统的名称和版本号。
例如:
OS Name: Microsoft Windows 10 Home
OS Version: 10.0.19044 N/A Build 19044
7.查看网络适配器信息
命令:ipconfig /all
作用:
显示所有网络适配器的详细信息,包括 IP 地址、MAC 地址、子网掩码等。
8.查看电池信息(针对笔记本电脑)
命令:powercfg /batteryreport
作用:
生成详细的电池状态报告,保存在用户目录下。
返回电池健康状况和使用记录。
9.查看详细系统信息
命令:systeminfo
作用:
显示电脑的完整系统信息,包括系统制造商、BIOS 版本、可用内存、网络配置等。
10.查看所有硬件配置
命令:dxdiag
作用:
打开 DirectX 诊断工具,提供电脑的综合硬件信息。
包括处理器、内存、显卡、声卡等详细信息。
具体案例操作
示例 1:检查电脑的处理器和内存
打开 CMD(按下 Win + R 输入 cmd,按回车)。
输入以下命令逐一查看:
查看处理器型号:wmic cpu get name
查看内存大小:wmic memorychip get capacity
示例 2:查看操作系统版本
打开 CMD,输入:systeminfo | findstr /B /C:"OS Name" /C:"OS Version"
返回结果会显示操作系统名称和版本号。
WMIC: WMI command-line utility
Important: WMIC is deprecated.
This utility is superseded by Windows PowerShell for WMI.
This deprecation applies only to the WMIC utility.
Windows Management Instrumentation (WMI) itself is not affected.
The WMI command-line (WMIC) utility provides a command-line interface for Windows Management Instrumentation (WMI).
WMIC is compatible with existing shells and utility commands.
The following information is a general reference guide for WMIC.
For more information and guidelines on how to use WMIC, including additional information on aliases, verbs, switches, and commands and WMIC - Take command-line control over WMI.
Alias
An alias is a friendly renaming of a class, property, or method that makes WMI easier to use and read.
You can determine what aliases are available for WMIC through the /? command.
You can also determine the aliases for a specific class using the <className> /? command.
For more information.
Switch
A switch is a WMIC option that you can set globally or optionally.
For a list of available switches.
Verbs
To use verbs in WMIC, enter the alias name followed by the verb.
If an alias doesn't support a verb, you receive the message "provider is not capable of the attempted operation." For more info.
Most aliases support the following verbs:
ASSOC
Returns the result of the Associators of (<wmi_object>) query where <wmi_object> is the path of objects returned by the PATH or CLASS commands.
The results are instances associated with the object.
When ASSOC is used with an alias, the classes with the class underlying the alias are returned.
By default, the output is returned in HTML format.
The ASSOC verb has the following switches:
| Switch | Description |
|---|
| /RESULTCLASS:<classname> | Returned endpoints associated with the source object must belong to, or be derived from, the specified class. |
| /RESULTROLE:<rolename> | Returned endpoints must play a specific role in associations with the source object. |
| /ASSOCCLASS:<assocclass> | Returned endpoints must be associated with the source through the specified class, or one of its derived classes. |
Example: os assoc
CALL
Executes a method.
Example: service where caption="telnet" call startservice
Note
To determine the methods available for a given class, use /?.
For example, service where caption="telnet" call /? lists the available functions for the service class.
CREATE
Creates a new instance, and sets the property values.
CREATE can't be used to create a new class.
Example: environment create name="temp"; variablevalue="new"
DELETE
Deletes the current instance or set of instances.
DELETE can be used to delete a class.
Example: process where name="calc.exe" delete
GET
Retrieves specific property values.
GET has the following switches:
| Switch | Description |
|---|
| /VALUE | Output is formatted with each value listed on a separate line and with the name of the property. |
| /ALL | Output is formatted as a table. |
| /TRANSLATE:<translation table> | Translates the output using the translation table named by the command.
The translation tables BasicXml and NoComma are included with WMIC. |
| /EVERY:<interval> | Repeats the command every <interval> seconds. |
| /FORMAT:<format specifier> | Specifies a key word or XSL file name to format the data. |
Example: process get name
LIST
Shows data.
LIST is the default verb.
LIST has the following adverbs:
| Adverb | Description |
|---|
| BRIEF | Core set of the properties |
| FULL | Full set of properties.
This is the default adverb for LIST |
| INSTANCE | Instance paths only |
| STATUS | Status of the objects |
| SYSTEM | System properties |
LIST has the following switches:
| Switch | Description |
|---|
| /TRANSLATE:<translation table> | Translate the output using the translation table named by the command.
The translation tables BasicXml and NoComma are included with WMIC. |
| /EVERY:<interval> | Repeat the command every <interval> seconds. |
| /FORMAT:<format specifier> | Specifies a key word or XSL file name to format the data. |
Example: process list brief
SET
Assigns values to properties.
Example: environment set name="temp", variablevalue="new"
Switches
Global switches are used to set defaults for the WMIC environment.
You can view the current value of the conditions set by these switches by entering the CONTEXT command.
/NAMESPACE
Namespace that the alias uses typically.
The default is root\cimv2.
Example: /namespace:\\root
/ROLE
Namespace that WMIC typically looks in for aliases and other WMIC information.
Example: /role:\\root
/NODE
Computer names, comma delimited.
All commands are synchronously executed against all computers listed in this value.
File names must be prefixed with &.
Computer names within a file must be comma delimited or on separate lines.
/IMPLEVEL
Impersonation level.
Example: /implevel:Anonymous
/AUTHLEVEL
Authentication level.
Example: /authlevel:Pkt
/LOCALE
Locale.
Example: /locale:ms_411
/PRIVILEGES
Enables or disables all privileges.
Example: /privileges:enable or /privileges:disable
/TRACE
Displays the success or failure of all functions used to execute WMIC commands.
Example: /trace:on or /trace:off
/RECORD
Records all output to an XML file.
Output is also displayed at the command prompt.
Example: /record:MyOutput.xml
/INTERACTIVE
Typically, delete commands are confirmed.
Example: /interactive:on or /interactive:off
/FAILFAST on|off|TimeoutInMilliseconds
If ON, the /NODE computers are pinged before sending WMIC commands to them.
If a computer doesn't respond, then the WMIC commands aren't sent to it.
Example: /failfast:on or /failfast:off
/USER
User name used by WMIC when accessing the /NODE computers or computers specified in the aliases.
You're prompted for the password.
A user name can't be used with the local computer.
Example: /user:JSMITH
/PASSWORD
Password used by WMIC when accessing the /NODE computers.
The password is visible at the command line.
Example: /password:password
/OUTPUT
Specifies a mode for all output redirection.
Output doesn't appear at the command line and the destination is cleared before output begins.
Valid values are STDOUT, CLIPBOARD, or a file name.
Example: /output:clipboard
/APPEND
Specifies a mode for all output redirection.
Output doesn't appear at the command line and the destination is not cleared before output begins and output is appended to the end of the current contents of the destination.
Valid values are STDOUT, CLIPBOARD, or a file name.
Example: /append:clipboard
/AGGREGATE
Used with the LIST and GET /EVERY switch.
If AGGREGATE is ON, LIST and GET display their results when all computers in the /NODE have either responded or timed out.
If AGGREGATE is OFF, LIST and GET display their results as soon as they are received.
Example: /aggregate:off or /aggregate:on
Commands
The following WMIC commands are available at all times.
For more information.
CLASS
Escapes from the default alias mode of WMIC to access classes in the WMI schema directly.
For more information on available WMI classes.
Example: wmic /output:c:\ClassOutput.htm class Win32_SoundDevice
PATH
Escapes from the default alias mode of WMIC to access instances in the WMI schema directly.
Example: wmic /output:c:\PathOutput.txt path Win32_SoundDevice get /value
CONTEXT
Displays the current values of all global switches.
Example: wmic context
QUIT
Exits from WMIC.
Example: wmic quit
EXIT
Exits from WMIC.
Example: wmic exit
一键禁用Windows更新和Windows实时保护
一、禁用Windows更新的Windows Update Blocker工具
1.介绍:Windows Update Blocker 是一款由 BlueLife 开发的免费软件,旨在帮助用户在 Windows 系统上完全禁用或启用自动更新功能。
2.Windows更新带来的困扰:Windows更新可能会在不适当的时间自动下载和安装更新,这可能会导致系统重启,打断正在进行的工作。更新有时可能会与某些软件或硬件不兼容,导致系统不稳定或某些功能失效等
https://gitcode.com/open-source-toolkit/64f80b
https://soft.3dmgame.com/down/317681.html
打开软件,根据需要选择“禁用更新”或“启用更新”。
3. 点击“应用”按钮,系统将立即执行相应的操作。
二、禁用Windows实时保护的Defender Control工具
1.介绍:Defender Control 是一个开源的 Windows Defender 管理工具,由社区开发者创建,旨在提供一种简便的方式来永久禁用 Windows Defender。这个项目尤其适合那些需要关闭系统内置防病毒软件以运行特定程序或进行系统优化的用户。
2.Windows Defender带来的困扰:Windows Defender可能会错误地将合法文件或程序识别为恶意软件,导致用户无法正常使用这些文件或程序。
https://gitcode.com/gh_mirrors/de/defender-control
https://www.downkuai.com/soft/129574.html
下载并运行 Defender Control。
启动程序后,您会看到明确的操作按钮,根据需要选择“停用”或“启用”Windows Defender。
3. 如果需要系统重新识别更改,可能需要重启电脑或手动管理服务状态。
注意事项
禁用自动更新可能会导致系统安全漏洞无法及时修复,请谨慎使用。
关闭 Windows Defender 可能会使您的电脑在没有其他防病毒软件的情况下变得易受攻击。建议在不使用敏感应用或进行重要操作时临时关闭,并在完成后重新启用。
请确保从可信的来源下载这些工具,并在操作前备份重要数据,以防止数据丢失。
online keyboard tester
online keyboard tester
keyboard-tester
Press the Windows key + R to open the Run dialog, type "osk" (without quotes) to open onscreen keyboard, and press Enter.
The "m" key works fine in controlled environments (key tester), but not in real-world applications, which often have additional layers of input processing.
The most probable causes at this point are keyboard settings (like Sticky/Filter keys), background processes, or corrupted system/user settings.
Running the additional tests (Safe Mode, checking accessibility settings, new user profile) will help narrow down the issue further.
Check "Update drivers manually in Windows" to manually update and reintall the driver
Check for Sticky or Filter Keys.
To check, press Windows key + I to open Settings, go to Accessibility, then select Keyboard.
Make sure both Sticky Keys and Filter Keys are turned off.
Test in Safe Mode.
This will help us see if there’s a background process interfering with your keyboard.
You can boot into Safe Mode by pressing Windows key + R, typing "msconfig" (without quotes), and then going to the Boot tab and selecting Safe Boot.
After restarting in Safe Mode, try typing the lowercase "m" again know if it behaves the same.
Create a New User Profile.
Sometimes corrupted user profiles can cause strange issues.
You can create a new user profile by going to Settings > Accounts > Family & other users, then adding a new user.
Log in with that new account and test if the issue persists.
To disable Microsoft Defender
Open Resource Monitor (type resmon.exe in the search box)
Overview
Find MsMpEng.exe in the list
Right-click > Suspend Process
In Windows 10 1903, Tamper Protection was added.
Tamper Protection must be disabled before changing Group Policy settings, otherwise these are ignored.
Open Windows Security (type Windows Security in the search box)
Virus & threat protection > Virus & threat protection settings > Manage settings
Switch Tamper Protection to Off
To permanently disable real-time protection:
Open Local Group Policy Editor (type gpedit.msc in the search box)
Computer Configuration > Administrative Templates > Windows Components > Microsoft Defender Antivirus > Real-time Protection
Enable Turn off real-time protection
Restart the computer
To permanently disable Microsoft Defender:
Open Local Group Policy Editor (type gpedit.msc in the search box)
Computer Configuration > Administrative Templates > Windows Components > Microsoft Defender Antivirus
Enable Turn off Microsoft Defender Antivirus
Restart the computer
Windows上创建Linux环境
安装
要在Linux系统环境下进行学习或测试,很多情况下苦于没有Linux系统环境而无法进行。
在Window10及以上版本有了WSL功能,可以实现这一操作。
一、WSL,全称 Windows Subsystem for Linux(Windows 的 Linux 子系统),是 Windows 操作系统的一项功能,它使得用户能够在 Windows 上原生运行 Linux 环境,而无需使用虚拟机或双系统启动。
WSL 提供了对 Linux 命令行工具和应用程序的访问权限,允许开发者在 Windows 上使用 Linux 工具链和开发环境。
这对于需要在 Linux 系统上测试或部署软件的开发者来说尤其有用,因为它可以减少跨平台开发时遇到的问题,并简化工作流程。
WSL 有多个版本,其中:
WSL 1:最初发布的版本,提供了基础的 Linux 兼容性层。
WSL 2:引入了一个轻量级的虚拟化技术,包含一个完整的 Linux 内核,提供更好的性能和额外的功能,比如完全的系统调用兼容性。
要使用 WSL,你需要确保你的 Windows 版本支持它(通常是 Windows 10 或 Windows 11),并且需要通过 PowerShell 或命令提示符启用该特性。
之后,你可以从 Microsoft Store 安装你选择的 Linux 发行版,如 Ubuntu、Debian、Kali Linux 等。
WSL启用步骤如下:
1.启用 WSL 和虚拟机平台 在windows命令提示符窗口中,执行以下命令来启用 WSL 和虚拟机平台,执行成功后需要重启计算机。
dism.exe /online /enable-feature /featurename:Microsoft-Windows-Subsystem-Linux /all /norestartdism.exe /online /enable-feature /featurename:VirtualMachinePlatform /all /norestart
2.查看WSL的版本 在windows命令提示符窗口中,执行以下命令来查看WSL的版本,如果是WSL1可以升级到WSL2。
wsl --list --verbose
3.升级WSL的版本在windows命令提示符窗口中,执行以下命令来设置默认版本为WSL2。
wsl --set-default-version 2
更新WSL2的内核
点击如下链接下载 WSL 2 内核更新包
https://wslstorestorage.blob.core.windows.net/wslblob/wsl_update_x64.msi?spm=5176.28103460.0.0.40f75d27OnYpdO&file=wsl_update_x64.msi
下载完成后,双击运行该 .msi 文件,按照提示完成安装过程。
完成后重启计算机。
重启后再次查看WSL的版本,可以看到已经是WSL2.二、在WLS上安装Linux系统我们这里直接从Microsoft Store 安装 Ubuntu-22.04版本的Linux系统。
在windows的搜索栏中搜索Microsoft Store,打开Microsoft Store,在Microsoft Store中搜索Ubuntu,选择合适的版本,我们这里选择Ubuntu-22.04 LTS版本,点击获取开始安装,安装完成在我们的开始菜单中就会出现进入Ubuntu系统的入口,点击就可以进入Ubuntu系统。
点击菜单打开Ubuntu系统
输入linux命令就可以进行操作
比如查看一级目录
ls /
三、如果C盘空间有限还可以迁移到其他盘
1.导出Ubuntu 22.04
打开PowerShell或命令提示符作为管理员,并执行以下命令来导出Ubuntu 22.04实例:
wsl --exportUbuntu-22.04"D:\path\to\backup\Ubuntu-22.04.tar"
这里D:\path\to\backup\是您希望保存备份文件的位置,请根据实际情况调整路径。
2.注销当前的Ubuntu 22.04实例
使用以下命令注销(删除)当前的Ubuntu 22.04实例:
wsl --unregister Ubuntu-22.04
这将从WSL中删除Ubuntu 22.04实例,但不用担心,因为我们已经有了它的备份。
3.在D盘创建新的存储位置
确保您想要存放Ubuntu的新位置已经存在。
如果不存在,可以使用以下命令创建:
mkdir D:\path\to\new\location
请替换D:\path\to\new\location为您实际想要存放Ubuntu的位置。
4.导入Ubuntu 22.04到新位置
使用以下命令将Ubuntu 22.04导入到新位置,并指定为WSL 2版本:
wsl --importUbuntu-22.04"D:\path\to\new\location""D:\path\to\backup\Ubuntu-22.04.tar"--version2
这里的第一个路径是新的安装位置,第二个路径是你导出的.tar文件的位置。
5.设置默认用户(可选)
如果您需要设置启动时的默认用户,可以使用以下命令:
ubuntu2204 config --default-user <username>
请将<username>替换为您的用户名。
6.验证迁移
最后,你可以使用以下命令来启动你的Ubuntu 22.04实例,验证迁移是否成功:
wsl -d Ubuntu-22.04
或者,您也可以使用wsl --list --verbose命令查看所有WSL实例的状态,确认Ubuntu 22.04是否已经成功迁移。
通过上述步骤,您可以将WSL中的Ubuntu 22.04成功迁移到D盘,从而节省C盘空间。
这个过程同样适用于迁移其他Linux发行版。
确保在每一步骤中都小心操作,以避免数据丢失。
Linux USB Boot Process
To boot Ubuntu from USB media, the process is very similar to the Windows instructions above.
Confirm the BIOS boot sequence lists the USB drive first, or make that change as needed.
After the USB flash drive is inserted into the USB port, press the Power button for your machine (or Restart if the computer is running).
The installer boot menu will load, where you will select Run Ubuntu from this USB.
Ubuntu will launch and you can begin to working in the system – setting preferences, reconfiguring the system as needed, or running any diagnostic tools.
Creating USB boot media
Windows and Linux users might consider
Acronis Disk Director 12, which includes an intuitive Boot Media Builder.
How to Run Windows 10 From a USB Drive
You will need a USB flash drive with at least 16GB of free space, but preferably 32GB.
You will also need a license to activate Windows 10 on the USB drive.
That means you have to either purchase one or use an existing one associated with your digital ID.
You can then use a Windows USB utility to set up the USB drive with Windows 10. Once you're done, you'll be able to boot up off the drive to launch Windows 10.
The one disadvantage of booting from a USB drive is that Windows 10 will run much slower than it does off your hard drive.
But in a pinch, you can at least work with the OS and access different apps this way.
Microsoft offers its own tool called Windows to Go, which can generate a bootable Windows USB drive. However, that program works only with the Enterprise and Education versions of Windows 10 and requires a certified Windows to Go drive. A better (and free) option is a utility called WinToUSB, which can create a bootable drive from any version of the operating system and on any type of USB drive.
Run a Linux Desktop Using the WSL
Windows Subsystem for Linux comes without a desktop.
Running Linux alongside Windows has proven to be increasingly useful over the years.
But dual booting can be difficult to manage while setting up a virtual machine comes some stability issues.
One solution is to use the Windows Subsystem for Linux.
What Is the Windows Subsystem for Linux?
Windows Subsystem for Linux (WSL) is an optional feature for Windows 10 and 11 that supports the installation of the Linux operating systems available in the Windows Store.
It basically means that you can open a Linux terminal in Windows and install and run Linux software.
There is no need to install any virtualization apps and there is no dual booting.
The problem with Windows Subsystem for Linux, however, is that by default it is purely a command line experience.
There is no desktop.
For power users, this probably won't be a problem, but as Linux has a wide selection of desktop environments, it does seem a bit of an oversight.
Fortunately, you can install a Linux desktop in Windows with WSL.
Make Sure Windows 10 Is Compatible
Before proceeding, here's the important bit: you need to be running a 64-bit version of Windows.
You can check this in Settings > System > About, where you'll find the System type entry.
Install a WSL Desktop
If you have set up the Windows Subsystem for Linux already, click Start and enter bash.
Click the first option (the bash run command) to start using Linux.
The following steps assume you installed Ubuntu as your preferred Linux operating system.
Start by running an update and upgrading Ubuntu:
sudo apt update
sudo apt upgrade
While this upgrade is running, head to Sourceforge to download and install the VcXsrv Windows X Server utility.
(Other X Servers are available for Windows, including Xming and MobaXterm.
For the remainder of this guide, we'll be using VcXsrv.)
An X server lets you access a Linux application or desktop environment's graphic user interface (GUI).
Linux systems rely on X for displaying the desktop, but it can also be used across a network.
Ensure your X window server is installed before proceeding.
The next step is to install your Linux desktop environment (LDE).
Many Linux desktop environments are available for WSL.
We're going to keep things simple and install a lightweight environment called LXDE.
To install, input:
sudo apt install lxde
Following installation of LXDE, input this command
export DISPLAY=:0
export LIBGL_ALWAYS_INDIRECT=1
This instructs Linux to display the desktop through the X server.
So, when you run the X Server program you downloaded above, you'll see the Linux desktop environment.
We used VcXsrv which features the XLaunch tool.
Click this to view the X Display Settings window and select One large window or One large window without titlebar.
Look for the Display number while you're there and set it to 0.
![]() Click Next, then select Start no client to ensure the XLaunch starts only the server, allowing you to start the Linux desktop later.
Click Next again, then Finish.
You might first like to click Save configuration to save it.
Click Next, then select Start no client to ensure the XLaunch starts only the server, allowing you to start the Linux desktop later.
Click Next again, then Finish.
You might first like to click Save configuration to save it.
![]() Ready to launch your Linux desktop? Enter the command to start your preferred LDE.
For LXDE, for example, use:
Ready to launch your Linux desktop? Enter the command to start your preferred LDE.
For LXDE, for example, use:
startlxde
The Linux desktop environment should then appear!
![]() You can now run any of the preinstalled Linux software and even install new apps and utilities.
Other WSL-compatible desktop environments include KDE.
You can even install GNOME on Windows for a full Ubuntu desktop experience.
You can now run any of the preinstalled Linux software and even install new apps and utilities.
Other WSL-compatible desktop environments include KDE.
You can even install GNOME on Windows for a full Ubuntu desktop experience.
Don't Want a WSL Desktop Environment? Just Install a Linux App
In addition to installing a Linux desktop, you can simply install a Linux desktop app from Windows 10.
This is useful if you consider installing a full desktop for one to be overkill.
For example, to install the Rhythmbox media player and run it in Linux on Windows, use:
sudo apt install rhythmbox
Ensure that you have set the export command:
export DISPLAY=:0
Then simply run the app from the bash prompt:
rhythmbox
The media player will launch, ready for you to browse for a library.
![]() Now, in this case, you would obviously need to add some media files into the Linux environment on your computer.
You might do this by installing a browser and downloading files, or simply by hooking up a USB drive with media files on.
After connecting the USB drive, remember to mount it (this example uses D: as the drive letter):
Now, in this case, you would obviously need to add some media files into the Linux environment on your computer.
You might do this by installing a browser and downloading files, or simply by hooking up a USB drive with media files on.
After connecting the USB drive, remember to mount it (this example uses D: as the drive letter):
sudo mount -t drvfs D: /mnt/d
When you're done, you'll need to unmount the drive before removal.
This ensures the integrity of the data on the drive.
sudo umount /mnt/d
While it's possible to browse your Windows folders from within the Linux apps, no actual files can be opened.
This is a shortcoming of the Windows Subsystem for Linux, albeit one that protects both the Windows and Linux environments from damage.
Run a Linux Desktop in Windows: The Ultimate Convergence!
The Windows Subsystem for Linux makes it simple to run Linux software on a Windows PC.
There's no need to worry about virtual machines or the pain of dual booting.
With a Linux desktop installed, the convergence is almost complete.
It's a great way to get to grips with Linux from the comfort of the Windows desktop.
run Ubuntu desktop on Windows 10
Once you have Ubuntu installed, you'll need to update it.
1. apt-get update
2. apt-get upgrade
Now, switch back to Windows 10 and install a Windows compatible Xserver.
This is what Ubuntu uses to display a graphical interface.
The best of these for our purposes are vcxsrv or Xming.
Next, you have to tell Ubuntu about the Xserver so it can use it.
To do this you can enter the following command at the shell:
DISPLAY=:0.0
Now, any graphical Linux program will display on Windows 10.
Better still, if you're going to keep working with graphical Linux software on WSL, have WSL automatically ready itself for graphical programs by placing the command in Bash's configuration file: ".bashrc".
An easy way to do this is to use the echo command to write it with the following shell command.
echo "export DISPLAY=:0.0" >> ~/.bashrc
After this, you can run graphical Linux programs, such as Firefox, or desktops...
but they won't run well or for long.
That's because WSL doesn't include socket support.
Sockets are what Unix and Linux use to communicate between services.
On the Linux desktop, the default way to implement sockets is the D-Bus messaging system.
Without D-Bus, many Linux desktop graphical programs don't work that well, if, at all.
WSL does, however, support the TCP networking protocol and a Reddit user named ShaRose has found a way to make D-Bus use tcp in place of sockets.
Perfect? No.
But it works.
To enable this, run the following command:
sudo sed -i 's/<listen>.*<\/listen>/<listen>tcp:host=localhost,port=0<\/listen>/' /etc/dbus-1/session.conf
This used the sed stream editor to change D-Bus's configuration file so that from here on out it will use tcp instead of sockets.
The end result? Applications that need D-Bus will now run on WSL.
In the next step, it's time to install the graphical desktop programs.
You do this by running these programs from Bash:
apt-get install ubuntu-desktop
apt-get install unity
apt-get install compiz-core
apt-get install compizconfig-settings-manager
The first command installs the basic Ubuntu desktop programs.
This will include end-user programs such as LibreOffice, The next instruction installs the Unity desktop.
The final two commands install, Compiz, an OpenGL graphics composting manager and its front-end ccsm.
Your next step will be to use ccsm to set up the desktop's settings.
Before you can use a desktop GUI on Ubuntu in Windows 10 you need to use the Compiz Config Setting Manager (ccsm) to set the display off properly.
After all these programs are installed, run ccsm from Bash.
From the ccsm interface, you'll need to enable the following Compiz plugins:
General:
Commands
Composite
Copy to texture
OpenGL
Desktop:
Ubuntu Unity Plugin
Image Loading:
PNG
Utility:
Compiz Library Toolbox
Windows Management
Move Window
Place Windows
Resize Window
Scale
Snapping Windows
Now, to get this show on the road, close ccsm and bring up the Unity interface by running compiz from Bash.
In a minute or so you should have Unity up and running.
How to install Linux Mint on WSL
To use Linux Mint on WSL, use an community project called LinuxmintWSL.
It's hosted at GitHub, so the first port of call is to load up its repository.
It's also only built for WSL 2, so if you aren't using that yet, check out our full guide to get ready.
It does, however, support both Intel/AMD and ARM machines, so Windows on ARM users aren't left out.
On the GitHub repository, hit the releases page and download the latest package.
Once downloaded, extract the zip file to the directory you want to run it from, then simply run Mint.exe from cmd.
It'll take a few seconds to run its installation, but the installer doesn't require any interaction from you.
It'll open a terminal window and when it's complete you'll be asked to press Enter.
The terminal window will then close.
If you use Windows Terminal, Mint will now show in the dropdown menu to launch the next time you load it up.
If you don't, you can launch it through PowerShell the same as any other Linux distro with this command:
wsl -d Mint
By default you'll only have root access, so you'll need to do some basic setup before you get rolling.
To set up Linux Mint on WSL
Enter Mint in your terminal using one of the methods described above.
You'll be presented with a basic prompt that begins with
root@
As with any other Linux distro on WSL, you'll want to add a user to Mint with the right permissions before doing anything.
You don't have a password, either, so you'll need to add one of those before beginning.
In the terminal enter:
passwd
Follow the prompts to set a root password.
Next, we'll add a user with:
useradd -m <username></username>
And then we'll follow that up with a password for the user with:
passwd <username></username>
Again, follow the prompts to add your password.
These commands have added a root password, a user, and a user password.
The next step is to add the right permissions to your user to be able to use the sudo command, otherwise you'll be met with an error.
We can do this by entering:
usermod -aG sudo <yourusername></yourusername>
You can then switch to your user with:
su <username></username>
The next thing to do is to ensure that when you launch Mint if you want to be user and not root (which is advisable), you configure it so you don't have to manually do it every time.
There are two ways to do this, the first is with the wsl.conf file and the second is by configuring Windows Terminal if you use that.
You won't have a wsl.conf file when you first set up Linux Mint, so we'll need to create that and enter the right settings.
As we're going to be inside the /etc/ directory it's easiest to be root for this one.
In the terminal as root enter:
nano /etc/wsl.conf
The Nano text editor will now open with a new blank file.
Enter this block into the file:
# Set the user when launching a distribution with WSL.[user]default=YourUserName
Hit Ctrl + X followed by Y and then Enter to save and exit.
Close down your Linux Mint instance, wait a few seconds (eight is the official line from Microsoft), and then when you relaunch you should be ready to go, already logged in as user.
Alternatively, if you're using Windows Terminal, open the Settings, find your Linux Mint install in the sidebar, and then in the command line box ensure this command is stored:
wsl.exe -d <distroname> -u <yourusername></yourusername></distroname>
This will have the same effect once closed down and restarted.
Setting up a wsl.conf file is preferable, though, as it ensures you're always entering as user.
If you use the Windows Terminal settings and you load up Linux Mint via PowerShell, you'll be taken in as root.
That's all there is to it.
Linux Mint is now set up on WSL for you to use just like any other you would install through the Microsoft Store.
You may find some GUI apps have appeared in your Start menu as well that come with the standard installation of Linux Mint, but those can all be removed if you don't want them (and the chances are you don't).
Additionally, you can run multiple instances of Linux Mint on WSL.
For each subsequent installation, simply change the name of the Mint.exe file from the top of this guide to something else, then run it again.
The new instance will be set up with the changed file name.
Using the X server to display graphical programs
install Ubuntu on WSL
 提纲
提纲
 进程 1 与进程 2 切换
这种多个程序、交替执行的思想,就有 CPU 管理多个进程的初步想法。
对于一个支持多进程的系统,CPU 会从一个进程快速切换至另一个进程,其间每个进程各运行几十或几百个毫秒。
虽然单核的 CPU 在某一个瞬间,只能运行一个进程。
但在 1 秒钟期间,它可能会运行多个进程,这样就产生并行的错觉,实际上这是并发。
并发和并行有什么区别?
一图胜千言。
 并发与并行
进程与程序的关系的类比
到了晚饭时间,一对小情侣肚子都咕咕叫了,于是男生见机行事,就想给女生做晚饭,所以他就在网上找了辣子鸡的菜谱,接着买了一些鸡肉、辣椒、香料等材料,然后边看边学边做这道菜。
 突然,女生说她想喝可乐,那么男生只好把做菜的事情暂停一下,并在手机菜谱标记做到哪一个步骤,把状态信息记录了下来。
然后男生听从女生的指令,跑去下楼买了一瓶冰可乐后,又回到厨房继续做菜。
这体现了,CPU 可以从一个进程(做菜)切换到另外一个进程(买可乐),在切换前必须要记录当前进程中运行的状态信息,以备下次切换回来的时候可以恢复执行。
所以,可以发现进程有着「运行 - 暂停 - 运行」的活动规律。
 进程的三种基本状态
上图中各个状态的意义:
运行状态(Runing):该时刻进程占用 CPU;
就绪状态(Ready):可运行,但因为其他进程正在运行而暂停停止;
阻塞状态(Blocked):该进程正在等待某一事件发生(如等待输入/输出操作的完成)而暂时停止运行,这时,即使给它CPU控制权,它也无法运行;
当然,进程另外两个基本状态:
创建状态(new):进程正在被创建时的状态;
结束状态(Exit):进程正在从系统中消失时的状态;
于是,一个完整的进程状态的变迁如下图:
 进程五种状态的变迁
再来详细说明一下进程的状态变迁:
NULL > 创建状态:一个新进程被创建时的第一个状态;
创建状态 > 就绪状态:当进程被创建完成并初始化后,一切就绪准备运行时,变为就绪状态,这个过程是很快的;
就绪态 > 运行状态:处于就绪状态的进程被操作系统的进程调度器选中后,就分配给 CPU 正式运行该进程;
运行状态 > 结束状态:当进程已经运行完成或出错时,会被操作系统作结束状态处理;
运行状态 > 就绪状态:处于运行状态的进程在运行过程中,由于分配给它的运行时间片用完,操作系统会把该进程变为就绪态,接着从就绪态选中另外一个进程运行;
运行状态 > 阻塞状态:当进程请求某个事件且必须等待时,例如请求 I/O 事件;
阻塞状态 > 就绪状态:当进程要等待的事件完成时,它从阻塞状态变到就绪状态;
另外,还有一个状态叫挂起状态,它表示进程没有占有物理内存空间。
这跟阻塞状态是不一样,阻塞状态是等待某个事件的返回。
由于虚拟内存管理原因,进程的所使用的空间可能并没有映射到物理内存,而是在硬盘上,这时进程就会出现挂起状态,另外调用 sleep 也会被挂起。
 虚拟内存管理-换入换出
挂起状态可以分为两种:
阻塞挂起状态:进程在外存(硬盘)并等待某个事件的出现;
就绪挂起状态:进程在外存(硬盘),但只要进入内存,即刻立刻运行;
这两种挂起状态加上前面的五种状态,就变成了七种状态变迁(留给我的颜色不多了),见如下图:
 七种状态变迁
 知乎搜 PCB 的提示
打住打住,我们是个正经的人,怎么会去看那些问题呢?是吧,回来回来。
PCB 是进程存在的唯一标识,这意味着一个进程的存在,必然会有一个 PCB,如果进程消失了,那么 PCB 也会随之消失。
PCB 具体包含什么信息呢?
进程描述信息:
进程标识符:标识各个进程,每个进程都有一个并且唯一的标识符;
用户标识符:进程归属的用户,用户标识符主要为共享和保护服务;
进程控制和管理信息:
进程当前状态,如 new、ready、running、waiting 或 blocked 等;
进程优先级:进程抢占 CPU 时的优先级;
资源分配清单:
有关内存地址空间或虚拟地址空间的信息,所打开文件的列表和所使用的 I/O 设备信息。
CPU 相关信息:
CPU 中各个寄存器的值,当进程被切换时,CPU 的状态信息都会被保存在相应的 PCB 中,以便进程重新执行时,能从断点处继续执行。
可见,PCB 包含信息还是比较多的。
每个 PCB 是如何组织的呢?
通常是通过链表的方式进行组织,把具有相同状态的进程链在一起,组成各种队列。
比如:
将所有处于就绪状态的进程链在一起,称为就绪队列;
把所有因等待某事件而处于等待状态的进程链在一起就组成各种阻塞队列;
另外,对于运行队列在单核 CPU 系统中则只有一个运行指针了,因为单核 CPU 在某个时间,只能运行一个程序。
那么,就绪队列和阻塞队列链表的组织形式如下图:
 就绪队列和阻塞队列
除了链接的组织方式,还有索引方式,它的工作原理:将同一状态的进程组织在一个索引表中,索引表项指向相应的 PCB,不同状态对应不同的索引表。
一般会选择链表,因为可能面临进程创建,销毁等调度导致进程状态发生变化,所以链表能够更加灵活的插入和删除。
 进程上下文切换
大家需要注意,进程的上下文开销是很关键的,我们希望它的开销越小越好,这样可以使得进程可以把更多时间花费在执行程序上,而不是耗费在上下文切换。
发生进程上下文切换有哪些场景?
为了保证所有进程可以得到公平调度,CPU 时间被划分为一段段的时间片,这些时间片再被轮流分配给各个进程。
这样,当某个进程的时间片耗尽了,就会被系统挂起,切换到其它正在等待 CPU 的进程运行;
进程在系统资源不足(比如内存不足)时,要等到资源满足后才可以运行,这个时候进程也会被挂起,并由系统调度其他进程运行;
当进程通过睡眠函数 sleep 这样的方法将自己主动挂起时,自然也会重新调度;
当有优先级更高的进程运行时,为了保证高优先级进程的运行,当前进程会被挂起,由高优先级进程来运行;
发生硬件中断时,CPU 上的进程会被中断挂起,转而执行内核中的中断服务程序;
以上,就是发生进程上下文切换的常见场景了。
 单进程实现方式
对于单进程的这种方式,存在以下问题:
播放出来的画面和声音会不连贯,因为当 CPU 能力不够强的时候,Read 的时候可能进程就等在这了,这样就会导致等半天才进行数据解压和播放;
各个函数之间不是并发执行,影响资源的使用效率;
那改进成多进程的方式:
 多进程实现方式
对于多进程的这种方式,依然会存在问题:
进程之间如何通信,共享数据?
维护进程的系统开销较大,如创建进程时,分配资源、建立 PCB;终止进程时,回收资源、撤销 PCB;进程切换时,保存当前进程的状态信息;
那到底如何解决呢?需要有一种新的实体,满足以下特性:
实体之间可以并发运行;
实体之间共享相同的地址空间;
这个新的实体,就是线程( Thread ),线程之间可以并发运行且共享相同的地址空间。
 多线程
线程的优缺点?
线程的优点:
一个进程中可以同时存在多个线程;
各个线程之间可以并发执行;
各个线程之间可以共享地址空间和文件等资源;
线程的缺点:
当进程中的一个线程奔溃时,会导致其所属进程的所有线程奔溃。
举个例子,对于游戏的用户设计,则不应该使用多线程的方式,否则一个用户挂了,会影响其他同个进程的线程。
 多对一
第二种是一对一的关系,也就是一个用户线程对应一个内核线程:
 一对一
第三种是多对多的关系,也就是多个用户线程对应到多个内核线程:
 多对多
用户线程如何理解?存在什么优势和缺陷?
用户线程是基于用户态的线程管理库来实现的,那么线程控制块(Thread Control Block, TCB) 也是在库里面来实现的,对于操作系统而言是看不到这个 TCB 的,它只能看到整个进程的 PCB。
所以,用户线程的整个线程管理和调度,操作系统是不直接参与的,而是由用户级线程库函数来完成线程的管理,包括线程的创建、终止、同步和调度等。
用户级线程的模型,也就类似前面提到的多对一的关系,即多个用户线程对应同一个内核线程,如下图所示:
 用户级线程模型
用户线程的优点:
每个进程都需要有它私有的线程控制块(TCB)列表,用来跟踪记录它各个线程状态信息(PC、栈指针、寄存器),TCB 由用户级线程库函数来维护,可用于不支持线程技术的操作系统;
用户线程的切换也是由线程库函数来完成的,无需用户态与内核态的切换,所以速度特别快;
用户线程的缺点:
由于操作系统不参与线程的调度,如果一个线程发起了系统调用而阻塞,那进程所包含的用户线程都不能执行了。
当一个线程开始运行后,除非它主动地交出 CPU 的使用权,否则它所在的进程当中的其他线程无法运行,因为用户态的线程没法打断当前运行中的线程,它没有这个特权,只有操作系统才有,但是用户线程不是由操作系统管理的。
由于时间片分配给进程,故与其他进程比,在多线程执行时,每个线程得到的时间片较少,执行会比较慢;
以上,就是用户线程的优缺点了。
那内核线程如何理解?存在什么优势和缺陷?
内核线程是由操作系统管理的,线程对应的 TCB 自然是放在操作系统里的,这样线程的创建、终止和管理都是由操作系统负责。
内核线程的模型,也就类似前面提到的一对一的关系,即一个用户线程对应一个内核线程,如下图所示:
 内核线程模型
内核线程的优点:
在一个进程当中,如果某个内核线程发起系统调用而被阻塞,并不会影响其他内核线程的运行;
分配给线程,多线程的进程获得更多的 CPU 运行时间;
内核线程的缺点:
在支持内核线程的操作系统中,由内核来维护进程和线程的上下问信息,如 PCB 和 TCB;
线程的创建、终止和切换都是通过系统调用的方式来进行,因此对于系统来说,系统开销比较大;
以上,就是内核线的优缺点了。
最后的轻量级进程如何理解?
轻量级进程(Light-weight process,LWP)是内核支持的用户线程,一个进程可有一个或多个 LWP,每个 LWP 是跟内核线程一对一映射的,也就是 LWP 都是由一个内核线程支持。
另外,LWP 只能由内核管理并像普通进程一样被调度,Linux 内核是支持 LWP 的典型例子。
在大多数系统中,LWP与普通进程的区别也在于它只有一个最小的执行上下文和调度程序所需的统计信息。
一般来说,一个进程代表程序的一个实例,而 LWP 代表程序的执行线程,因为一个执行线程不像进程那样需要那么多状态信息,所以 LWP 也不带有这样的信息。
在 LWP 之上也是可以使用用户线程的,那么 LWP 与用户线程的对应关系就有三种:
1 : 1,即一个 LWP 对应 一个用户线程;
N : 1,即一个 LWP 对应多个用户线程;
N : N,即多个 LMP 对应多个用户线程;
接下来针对上面这三种对应关系说明它们优缺点。
先下图的 LWP 模型:
 LWP 模型
1 : 1 模式
一个线程对应到一个 LWP 再对应到一个内核线程,如上图的进程 4,属于此模型。
优点:实现并行,当一个 LWP 阻塞,不会影响其他 LWP;
缺点:每一个用户线程,就产生一个内核线程,创建线程的开销较大。
N : 1 模式
多个用户线程对应一个 LWP 再对应一个内核线程,如上图的进程 2,线程管理是在用户空间完成的,此模式中用户的线程对操作系统不可见。
优点:用户线程要开几个都没问题,且上下文切换发生用户空间,切换的效率较高;
缺点:一个用户线程如果阻塞了,则整个进程都将会阻塞,另外在多核 CPU 中,是没办法充分利用 CPU 的。
M : N 模式
根据前面的两个模型混搭一起,就形成 M:N 模型,该模型提供了两级控制,首先多个用户线程对应到多个 LWP,LWP 再一一对应到内核线程,如上图的进程 3。
优点:综合了前两种优点,大部分的线程上下文发生在用户空间,且多个线程又可以充分利用多核 CPU 的资源。
组合模式
如上图的进程 5,此进程结合 1:1 模型和 M:N 模型。
开发人员可以针对不同的应用特点调节内核线程的数目来达到物理并行性和逻辑并行性的最佳方案。
 五种调度原则
针对上面的五种调度原则,总结成如下:
CPU 利用率:调度程序应确保 CPU 是始终匆忙的状态,这可提高 CPU 的利用率;
系统吞吐量:吞吐量表示的是单位时间内 CPU 完成进程的数量,长作业的进程会占用较长的 CPU 资源,因此会降低吞吐量,相反,短作业的进程会提升系统吞吐量;
周转时间:周转时间是进程运行和阻塞时间总和,一个进程的周转时间越小越好;
等待时间:这个等待时间不是阻塞状态的时间,而是进程处于就绪队列的时间,等待的时间越长,用户越不满意;
响应时间:用户提交请求到系统第一次产生响应所花费的时间,在交互式系统中,响应时间是衡量调度算法好坏的主要标准。
说白了,这么多调度原则,目的就是要使得进程要「快」。
 FCFS 调度算法
顾名思义,先来后到,每次从就绪队列选择最先进入队列的进程,然后一直运行,直到进程退出或被阻塞,才会继续从队列中选择第一个进程接着运行。
这似乎很公平,但是当一个长作业先运行了,那么后面的短作业等待的时间就会很长,不利于短作业。
FCFS 对长作业有利,适用于 CPU 繁忙型作业的系统,而不适用于 I/O 繁忙型作业的系统。
02 最短作业优先调度算法
最短作业优先(Shortest Job First, SJF)调度算法同样也是顾名思义,它会优先选择运行时间最短的进程来运行,这有助于提高系统的吞吐量。
 SJF 调度算法
这显然对长作业不利,很容易造成一种极端现象。
比如,一个长作业在就绪队列等待运行,而这个就绪队列有非常多的短作业,那么就会使得长作业不断的往后推,周转时间变长,致使长作业长期不会被运行。
03 高响应比优先调度算法
前面的「先来先服务调度算法」和「最短作业优先调度算法」都没有很好的权衡短作业和长作业。
那么,高响应比优先 (Highest Response Ratio Next, HRRN)调度算法主要是权衡了短作业和长作业。
每次进行进程调度时,先计算「响应比优先级」,然后把「响应比优先级」最高的进程投入运行,「响应比优先级」的计算公式:
 从上面的公式,可以发现:
如果两个进程的「等待时间」相同时,「要求的服务时间」越短,「响应比」就越高,这样短作业的进程容易被选中运行;
如果两个进程「要求的服务时间」相同时,「等待时间」越长,「响应比」就越高,这就兼顾到了长作业进程,因为进程的响应比可以随时间等待的增加而提高,当其等待时间足够长时,其响应比便可以升到很高,从而获得运行的机会;
04 时间片轮转调度算法
最古老、最简单、最公平且使用最广的算法就是时间片轮转(Round Robin, RR)调度算法。
。
 RR 调度算法
每个进程被分配一个时间段,称为时间片(Quantum),即允许该进程在该时间段中运行。
如果时间片用完,进程还在运行,那么将会把此进程从 CPU 释放出来,并把 CPU 分配另外一个进程;
如果该进程在时间片结束前阻塞或结束,则 CPU 立即进行切换;
另外,时间片的长度就是一个很关键的点:
如果时间片设得太短会导致过多的进程上下文切换,降低了 CPU 效率;
如果设得太长又可能引起对短作业进程的响应时间变长。
将
通常时间片设为 20ms~50ms 通常是一个比较合理的折中值。
05 最高优先级调度算法
前面的「时间片轮转算法」做了个假设,即让所有的进程同等重要,也不偏袒谁,大家的运行时间都一样。
但是,对于多用户计算机系统就有不同的看法了,它们希望调度是有优先级的,即希望调度程序能从就绪队列中选择最高优先级的进程进行运行,这称为最高优先级(Highest Priority First,HPF)调度算法。
进程的优先级可以分为,静态优先级或动态优先级:
静态优先级:创建进程时候,就已经确定了优先级了,然后整个运行时间优先级都不会变化;
动态优先级:根据进程的动态变化调整优先级,比如如果进程运行时间增加,则降低其优先级,如果进程等待时间(就绪队列的等待时间)增加,则升高其优先级,也就是随着时间的推移增加等待进程的优先级。
该算法也有两种处理优先级高的方法,非抢占式和抢占式:
非抢占式:当就绪队列中出现优先级高的进程,运行完当前进程,再选择优先级高的进程。
抢占式:当就绪队列中出现优先级高的进程,当前进程挂起,调度优先级高的进程运行。
但是依然有缺点,可能会导致低优先级的进程永远不会运行。
06 多级反馈队列调度算法
多级反馈队列(Multilevel Feedback Queue)调度算法是「时间片轮转算法」和「最高优先级算法」的综合和发展。
顾名思义:
「多级」表示有多个队列,每个队列优先级从高到低,同时优先级越高时间片越短。
「反馈」表示如果有新的进程加入优先级高的队列时,立刻停止当前正在运行的进程,转而去运行优先级高的队列;
 多级反馈队列
来看看,它是如何工作的:
设置了多个队列,赋予每个队列不同的优先级,每个队列优先级从高到低,同时优先级越高时间片越短;
新的进程会被放入到第一级队列的末尾,按先来先服务的原则排队等待被调度,如果在第一级队列规定的时间片没运行完成,则将其转入到第二级队列的末尾,以此类推,直至完成;
当较高优先级的队列为空,才调度较低优先级的队列中的进程运行。
如果进程运行时,有新进程进入较高优先级的队列,则停止当前运行的进程并将其移入到原队列末尾,接着让较高优先级的进程运行;
可以发现,对于短作业可能可以在第一级队列很快被处理完。
对于长作业,如果在第一级队列处理不完,可以移入下次队列等待被执行,虽然等待的时间变长了,但是运行时间也会更长了,所以该算法很好的兼顾了长短作业,同时有较好的响应时间。
看的迷迷糊糊?那我拿去银行办业务的例子,把上面的调度算法串起来,你还不懂,你锤我!
办理业务的客户相当于进程,银行窗口工作人员相当于 CPU。
现在,假设这个银行只有一个窗口(单核 CPU ),那么工作人员一次只能处理一个业务。
 银行办业务
那么最简单的处理方式,就是先来的先处理,后面来的就乖乖排队,这就是先来先服务(FCFS)调度算法。
但是万一先来的这位老哥是来贷款的,这一谈就好几个小时,一直占用着窗口,这样后面的人只能干等,或许后面的人只是想简单的取个钱,几分钟就能搞定,却因为前面老哥办长业务而要等几个小时,你说气不气人?
 先来先服务
有客户抱怨了,那我们就要改进,我们干脆优先给那些几分钟就能搞定的人办理业务,这就是短作业优先(SJF)调度算法。
听起来不错,但是依然还是有个极端情况,万一办理短业务的人非常的多,这会导致长业务的人一直得不到服务,万一这个长业务是个大客户,那不就捡了芝麻丢了西瓜
 最短作业优先
那就公平起见,现在窗口工作人员规定,每个人我只处理 10 分钟。
如果 10 分钟之内处理完,就马上换下一个人。
如果没处理完,依然换下一个人,但是客户自己得记住办理到哪个步骤了。
这个也就是时间片轮转(RR)调度算法。
但是如果时间片设置过短,那么就会造成大量的上下文切换,增大了系统开销。
如果时间片过长,相当于退化成退化成 FCFS 算法了。
 时间片轮转
既然公平也可能存在问题,那银行就对客户分等级,分为普通客户、VIP 客户、SVIP 客户。
只要高优先级的客户一来,就第一时间处理这个客户,这就是最高优先级(HPF)调度算法。
但依然也会有极端的问题,万一当天来的全是高级客户,那普通客户不是没有被服务的机会,不把普通客户当人是吗?那我们把优先级改成动态的,如果客户办理业务时间增加,则降低其优先级,如果客户等待时间增加,则升高其优先级。
 最高优先级(静态)
那有没有兼顾到公平和效率的方式呢?这里介绍一种算法,考虑的还算充分的,多级反馈队列(MFQ)调度算法,它是时间片轮转算法和优先级算法的综合和发展。
它的工作方式:
 多级反馈队列
银行设置了多个排队(就绪)队列,每个队列都有不同的优先级,各个队列优先级从高到低,同时每个队列执行时间片的长度也不同,优先级越高的时间片越短。
新客户(进程)来了,先进入第一级队列的末尾,按先来先服务原则排队等待被叫号(运行)。
如果时间片用完客户的业务还没办理完成,则让客户进入到下一级队列的末尾,以此类推,直至客户业务办理完成。
当第一级队列没人排队时,就会叫号二级队列的客户。
如果客户办理业务过程中,有新的客户加入到较高优先级的队列,那么此时办理中的客户需要停止办理,回到原队列的末尾等待再次叫号,因为要把窗口让给刚进入较高优先级队列的客户。
可以发现,对于要办理短业务的客户来说,可以很快的轮到并解决。
对于要办理长业务的客户,一下子解决不了,就可以放到下一个队列,虽然等待的时间稍微变长了,但是轮到自己的办理时间也变长了,也可以接受,不会造成极端的现象,可以说是综合上面几种算法的优点。
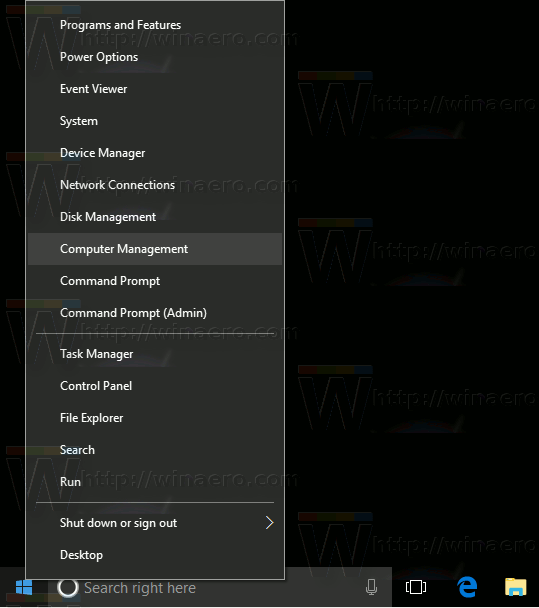 The Computer Management utility will be opened.
On the left, expand the tree view to Services and Applications\Services.
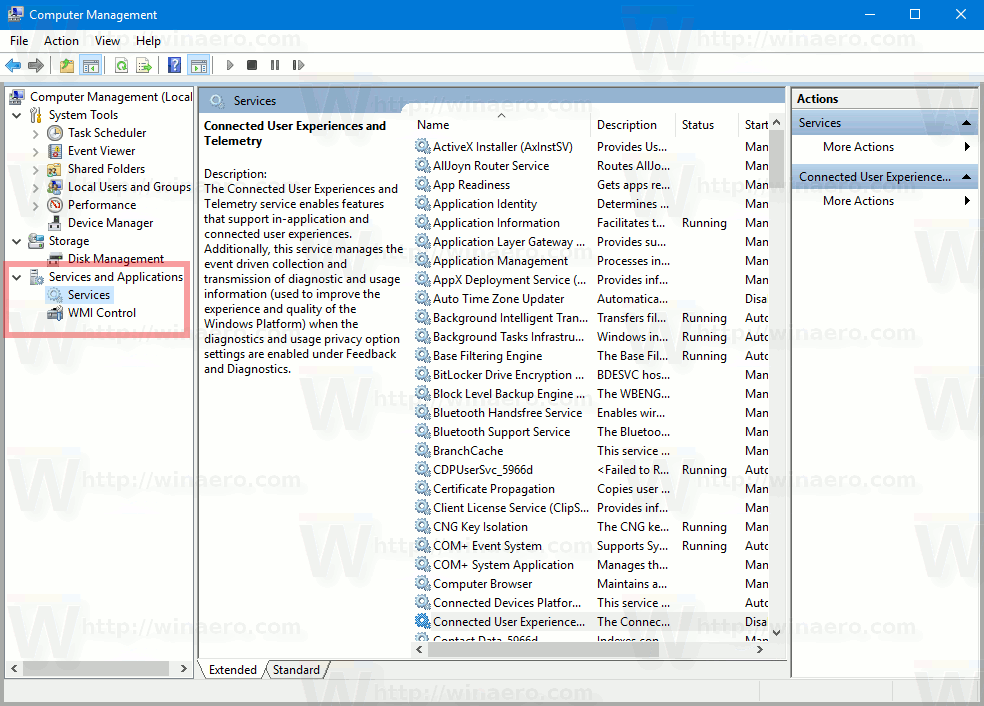 On the right, you will see the list of installed services.
Find the service named "Windows Search".
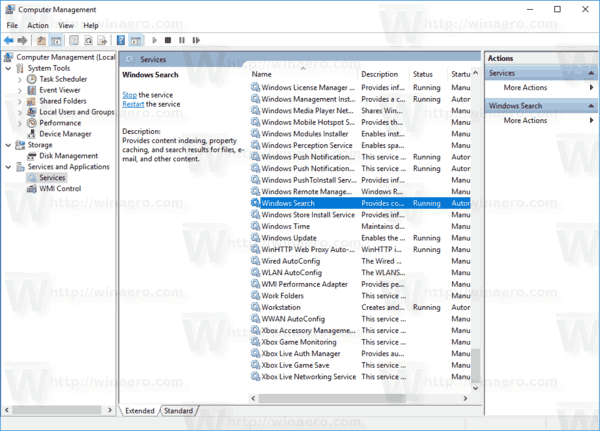 Double-click the Windows Search row to open the service properties dialog.
If the service has the status "Running", click on the Stop button, and wait until its status shows as Stopped.
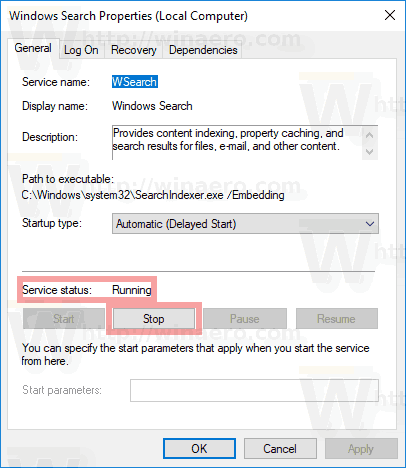 Now, change the startup type from Automatic (Delayed Start) to Disabled using the drop down list.
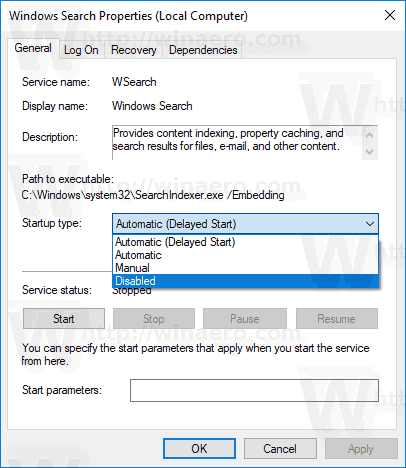 Click Apply and OK and you are done.
If you prefer the command prompt method described in the article How to Disable A Service in Windows 10, do the following.
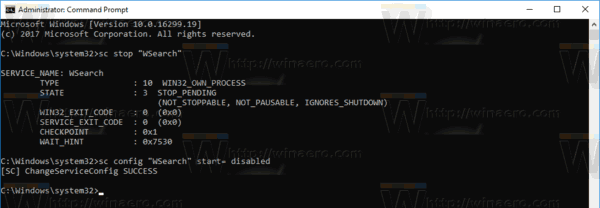 Note: It is very important to add a space after "=" and not before it.
That's it!
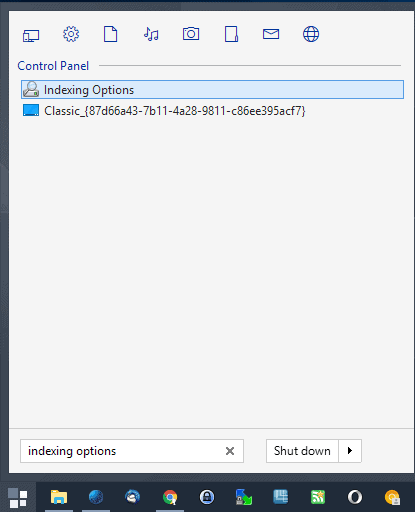 You manage the indexing locations in the Indexing Options.
To load the configuration, tap on the Windows-key, type indexing options, and select the result of the same name.
The Indexing Options window lists all folders that are included or excluded from indexation.
It furthermore highlights the number of items that are in the index currently, and the status of indexing.
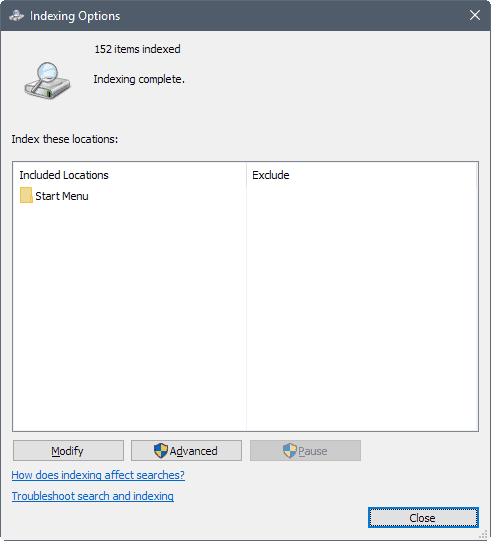 Select Modify at the bottom to manage the indexing locations.
This opens a dual-pane window that lists all available locations in the top pane, and all folders selected for indexation at the bottom.
Tip: Make sure you click on the "show all locations" button to reveal locations that may not be shown by default.
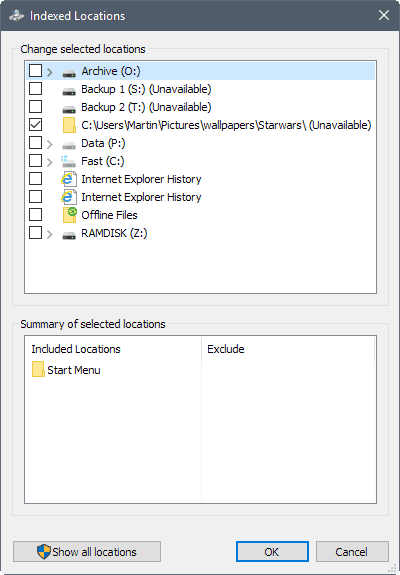 You add new locations by checking boxes in front of items in the top pane, and remove existing ones by removing the checkmarks from the boxes.
Since you may not want to navigate the top folder structure to locate all indexed locations, you may click on a location in the lower pane to jump straight to it.
This allows you to remove it with just two clicks.
When you remove a location from Windows Search indexing, Windows Search won't scan it anymore when it runs scans for changes in those locations.
You may also exclude subfolders from indexation.
This is useful if you want some locations of a folder to be indexed but not others.
Using exclude options may further help reduce the load of indexation when Windows Search indexing runs.
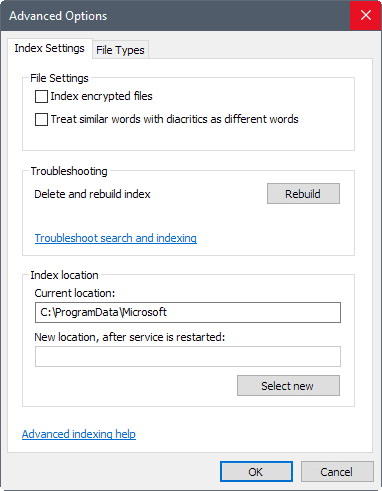 Check the Advanced options once you are done.
Make sure that the options "index encrypted files" and "treat similar words with diacritics as different words" are not selected.
You may delete and recreate the index on the page as well, and change the location of the index.
The latter may be useful if the computer's main drive is slower than another drive connected to the device.
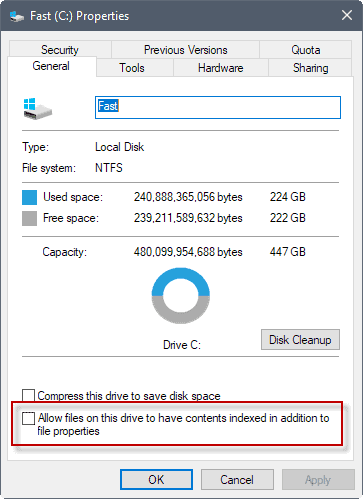 Another thing that you may want to check is whether Windows Search is allowed to index file content and not only file properties on select drives.
It takes more time obviously to scan the content of files as well, and if you don't need that, you may want to make sure that this is not done on the Windows machine in question.
You need to repeat the following steps for any drive of the Windows 10 PC:
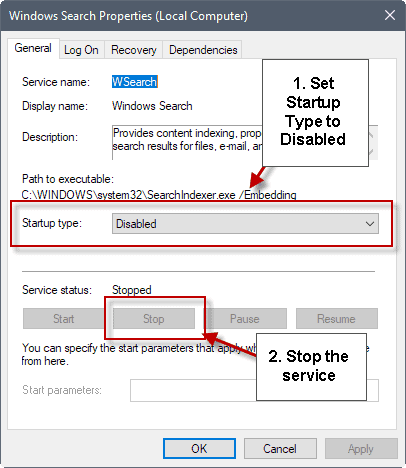 The final option that you have is to disable Windows Search indexing completely.
This prevents any indexation processes and should improve the situation on all devices that are affected by high load or performance issues that are caused by Windows Search indexing.
 At the first screen for "Applicable notices and license terms," click the Access button. Then click the option to "Create installation media for another PC" and click Next. At the "Select language, architecture, and edition" screen, confirm that all of the options are correct and then click Next.
 You will then need to choose what media you want to use. Given the option between a USB flash drive and an ISO file, click ISO file. Then click Next.
 Choose a location on your hard drive to store the Windows.iso file. Click Save. Windows 10 generates the necessary ISO file. When the process is done, click Finish.

 Yes, that takes you to Microsoft's Download Windows 10 website. But wait, there's more. Right-click on the page and select "Inspect element" to open the page's code.
 In the right pane, click the down arrow on the top menu bar and select the option for Emulation.
 In the Mode section, open the drop-down menu for User agent string and change the entry to Apple Safari (iPad).
 The page in the left pane should automatically refresh. If not, refresh it manually. Click the drop-down menu for Select edition and select the option for the Windows 10 April 2018 Update. Click Confirm.
 At the next screen, choose your language, then click Confirm. On the Downloads page, choose the 32-bit or 64-bit version of the Windows 10 April 2018 Update and then click Save to download the file. After the file has been downloaded, change the User agent string in Edge from Apple Safari (iPad) back to Microsoft Edge (Default). Close the right pane by clicking the X.

 Next, connect a blank USB flash drive or stick to your computer. Launch WinToUSB from its Start menu shortcut. At the introductory screen, click the button to the right of the Image File field and choose your ISO file for the Windows 10 April 2018 Update. Then select the version of Windows 10 you wish to clone onto the USB stick. Click Next.
 At the next screen, you will need to determine your destination disk. Open the drop-down menu and choose your USB drive. A message pops up asking you to select a partition scheme. Click the option for "MBR for BIOS" and then click Yes.
 At the next screen, click the option for Legacy to choose the Installation mode. Click Next. Your Windows 10 USB stick will now be created.
 When the installation process reaches 100 percent, indicating that it's finished, close the WinToUSB program and remove the USB drive.

 The first time you run Windows 10 off the USB drive, you'll need to go through the familiar Windows setup process. You'll also need to activate Windows 10. You can then install apps onto the USB drive and access any files or documents stored online, so the experience comes close to working on one of your own Windows 10 PCs.
 Located in the System Tray; Manage incoming email, system, social media notifications
 Create and Manage multiple desktops
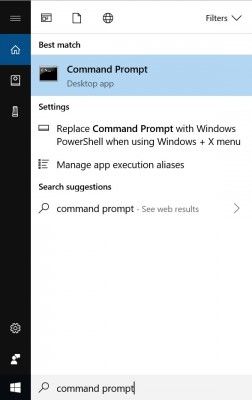 2. Type in ipconfig /all and press Enter. This will display your network configuration.
https://cdn.mos.cms.futurecdn.net/pBMu828w8EWybS8oNy3LVm-970-80.jpg
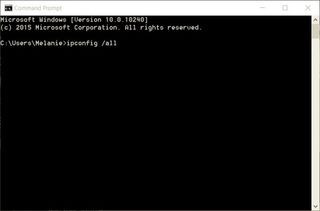 3. Find your adapter's physical address. Scroll down to your network adapter and look for the values next to "Physical Address," which is your MAC address.
https://cdn.mos.cms.futurecdn.net/pBMu828w8EWybS8oNy3LVm-970-80.jpg
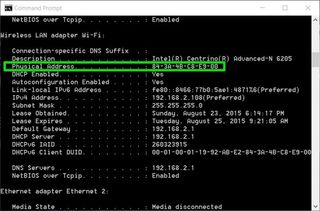 https://cdn.mos.cms.futurecdn.net/pBMu828w8EWybS8oNy3LVm-970-80.jpg
 (Image credit: Future)
Perhaps you don't want to mess around with command prompt for some reason or another.
Here are some ways you can snag a MAC address without accessing command prompt.
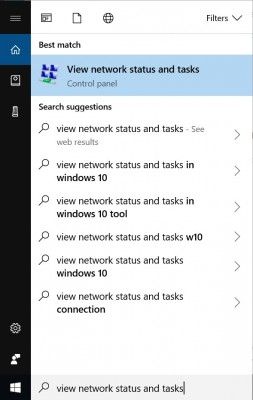 2. Click on your network connection.
https://cdn.mos.cms.futurecdn.net/pBMu828w8EWybS8oNy3LVm-970-80.jpg
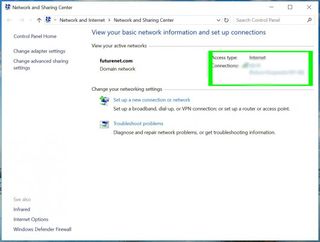 3. Click the "Details" button.
https://cdn.mos.cms.futurecdn.net/pBMu828w8EWybS8oNy3LVm-970-80.jpg
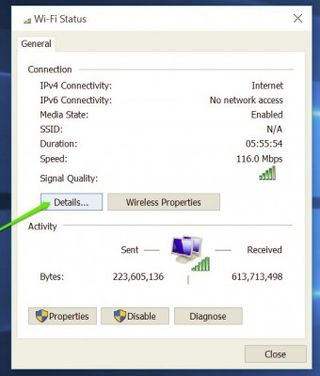 4. Locate the Physical Address. The value for the physical address in the Network Connection Details window is your MAC address.
https://cdn.mos.cms.futurecdn.net/pBMu828w8EWybS8oNy3LVm-970-80.jpg
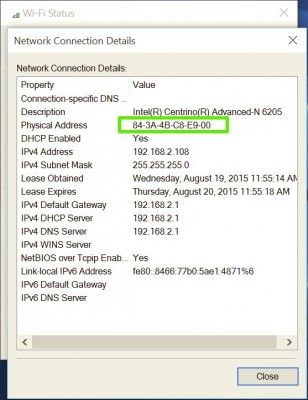
 (Image credit: Future)
2. Click on "Properties" on your connection.
https://cdn.mos.cms.futurecdn.net/pBMu828w8EWybS8oNy3LVm-970-80.jpg
This will open your network's settings window.
 (Image credit: Future)
3. Scroll down to the Properties section.
Your MAC address should be right next to the words "Physical address."
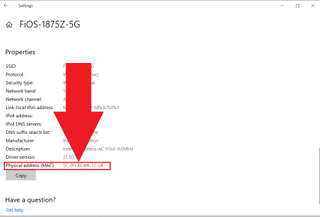 (Image credit: Future)
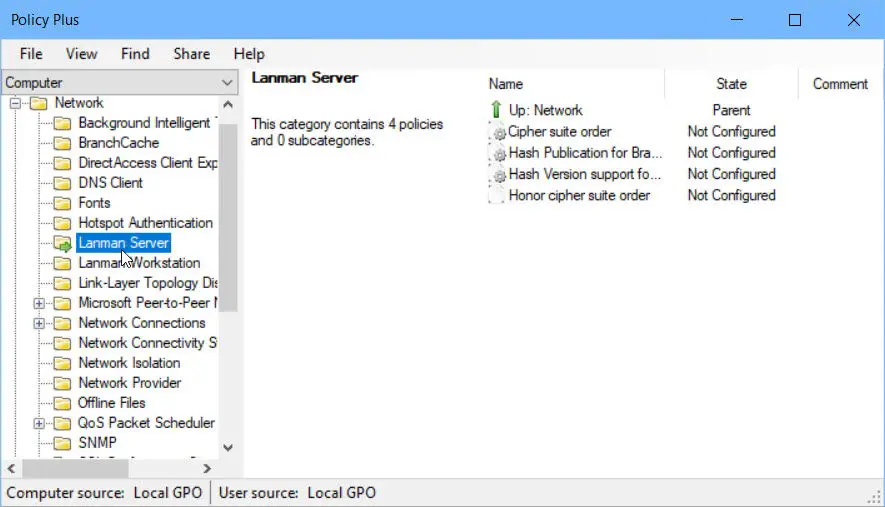 Hopefully, these methods will help you enable gpedit.msc in your system.One thing to note here is that these methods are useful when you want to use local group policy editor.
If you are a domain administrator and want to configure group policies on a Windows 10 Home computer using Windows Server Active Directory, this method will not be effective as Windows 10 Home does not support joining a domain in Active Directory.
 2. Locate NVIDIA Telemetry Container on the Services window.
Then, right-click it and select Properties from the context menu.
 3. Here, set the Startup type to Disabled from the dropdown options.
Note: If the Service status is Running, click on the Stop button.
 4. Now, click Apply and then OK to save the changes made.
Once done, check NVIDIA container high CPU usage issue is resolved.
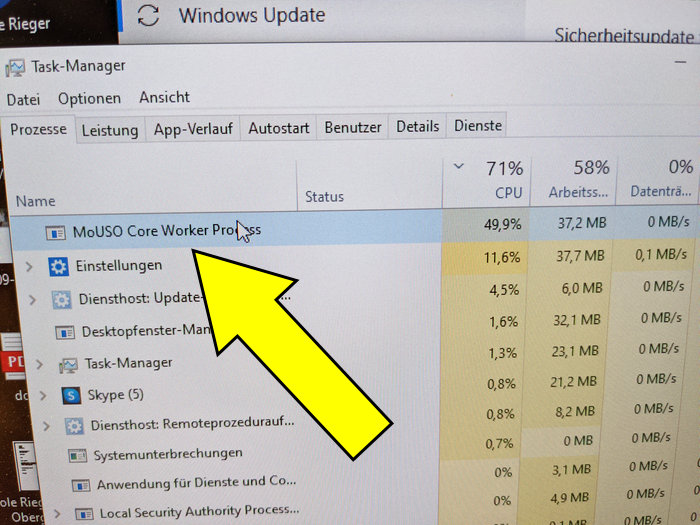
 安全模式
2.将alibaba pc safe service进程禁用后重启电脑。
 禁用alibaba pc safe service进程
3.正常进入系统后再打开系统服务,发现alibaba pc safe service这个进程已经是禁用状态。
 已经成功禁用
4.然后再找到wwbizsrv这个进程,先停止,再禁用。
 先停止才能禁用
5.复制这个进程所在文件夹(如图),在我的电脑里打开alibaba文件夹,将这个文件夹删除。
 复制选中的地址
 再删除wwbizsrv文件夹
6.再查看alibaba pc safe service进程的属性,找到alibabaprotect文件夹位置C:\Program Files (x86)\AlibabaProtec,把这个文件夹全部删除。
 AlibabaProtect文件夹位置
7.打开注册表regeditHKEY_LOCAL_MACHINE\SYSTEM\ControlSet001\services\HKEY_LOCAL_MACHINE\SYSTEM\ControlSet002\services\把其下的AlibabaProtect项全部删除。
 注册表
8.再ctrl+F打开查找栏,将含有AlibabaProtect的每一个键值全部删除。
再说一句,不止阿里巴巴,国内的几大IT巨头都是流氓,当然腾讯如果称流氓界的第二,没人敢称第一。
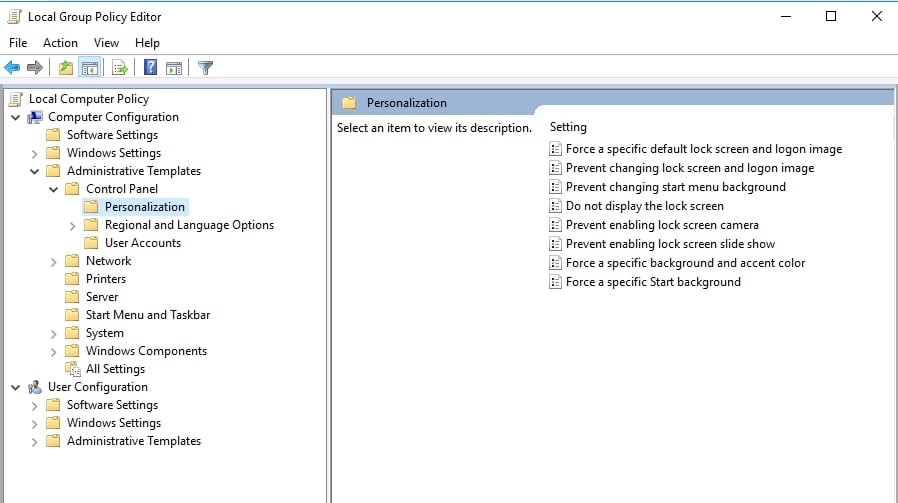 You can edit the setting by double-clicking.
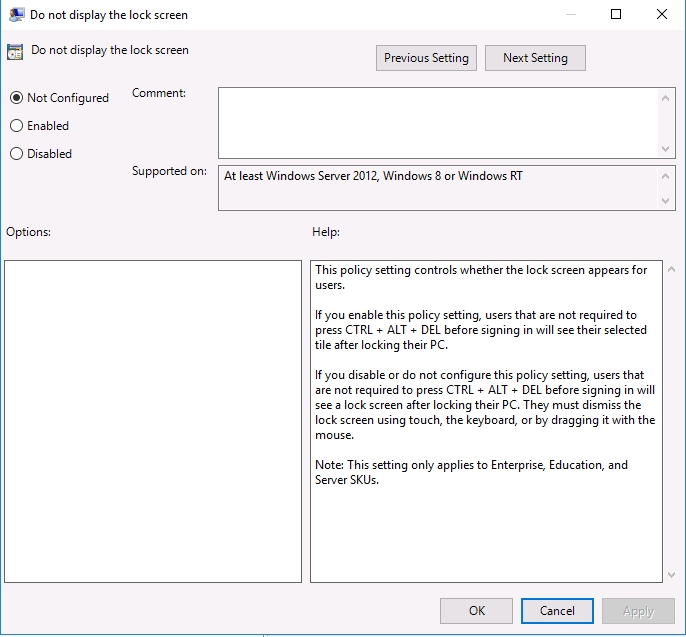 There are hundreds of different settings like this in Group Policy Editor.
Click around or view the Microsoft documentation for a list of all of them.
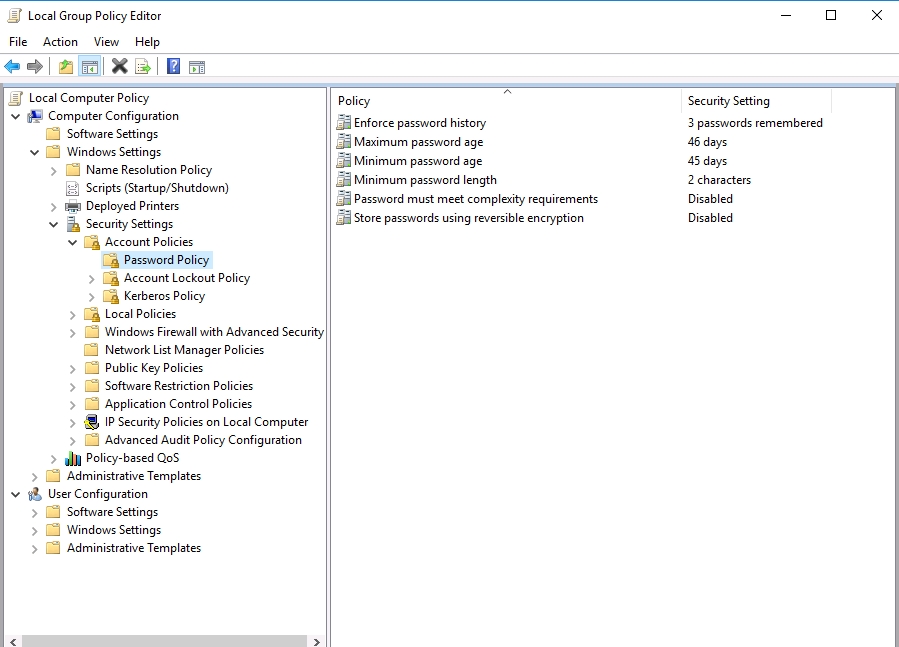 Select the option for “Password must meet complexity requirements.”
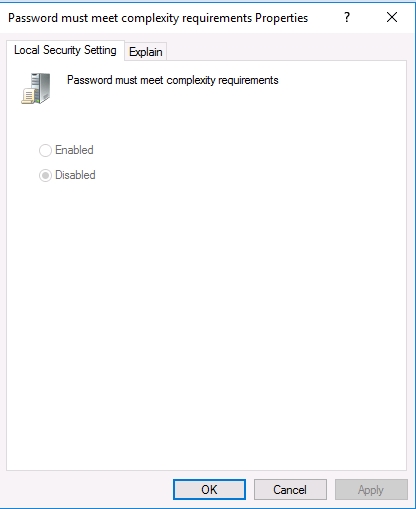 Click “Enabled” and then “Apply,” and your change happens on this local computer.
Applying changes to GPOs at the enterprise level is out of the scope of this blog.
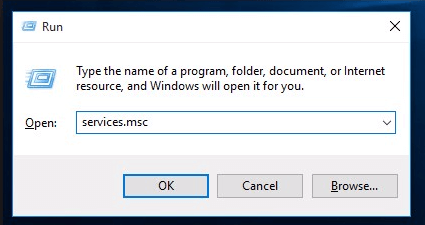
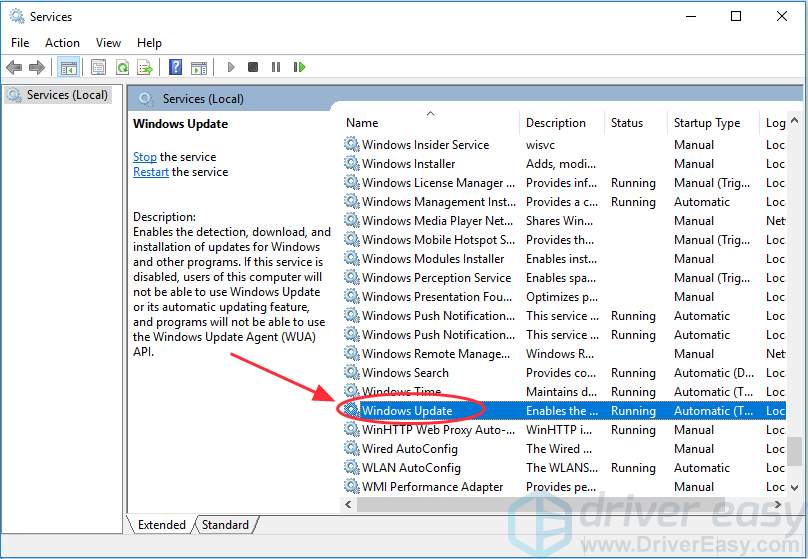
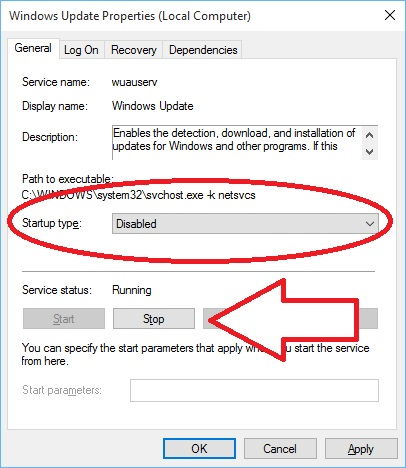
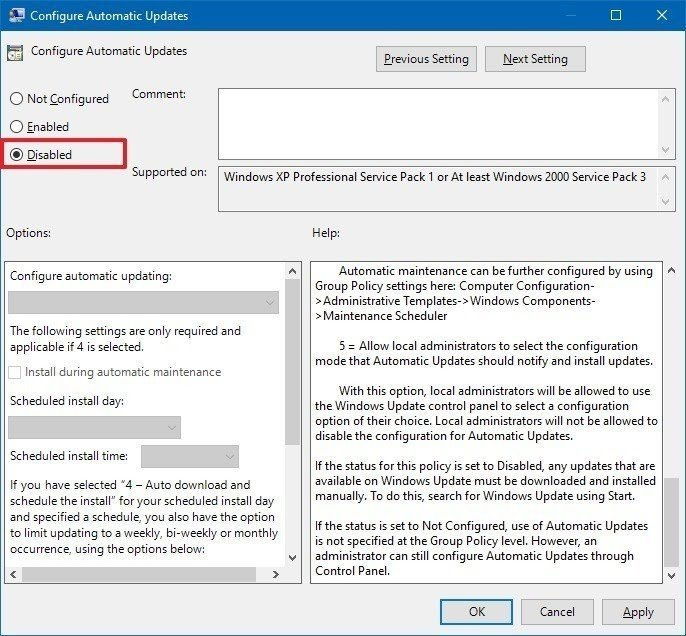
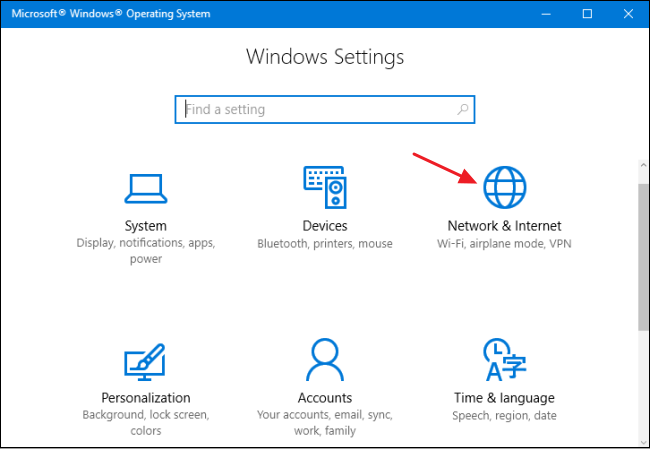
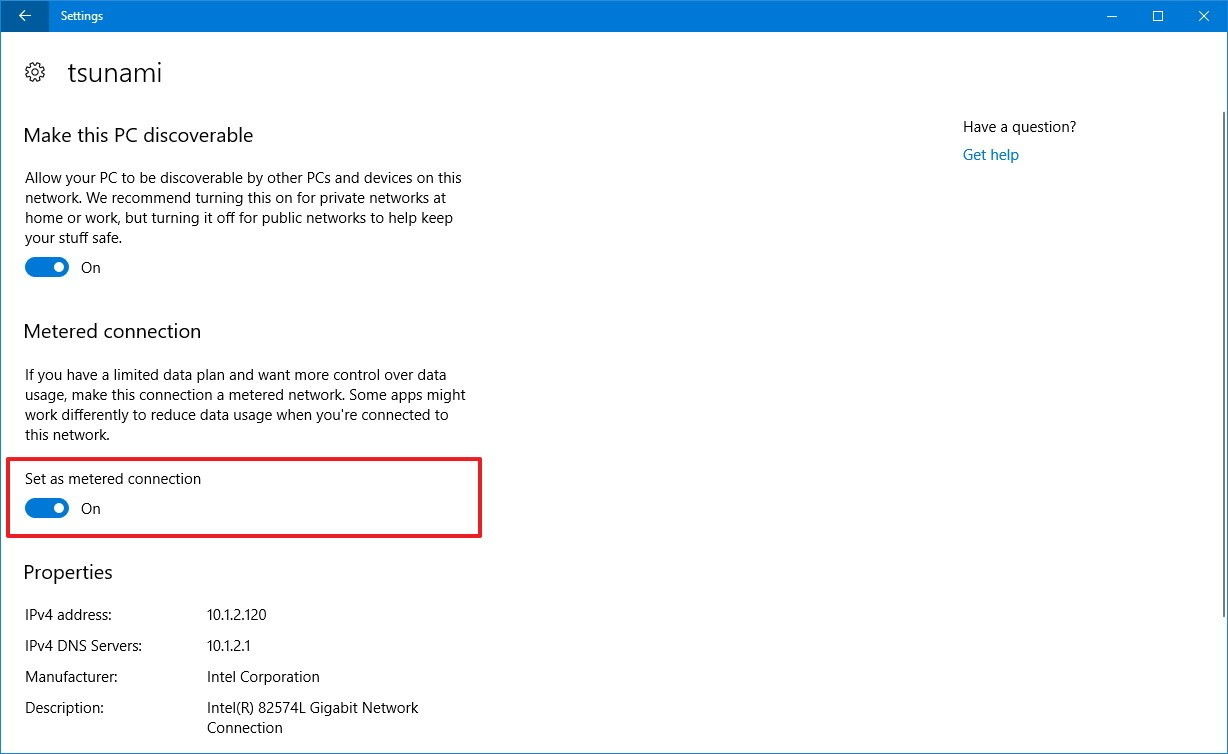
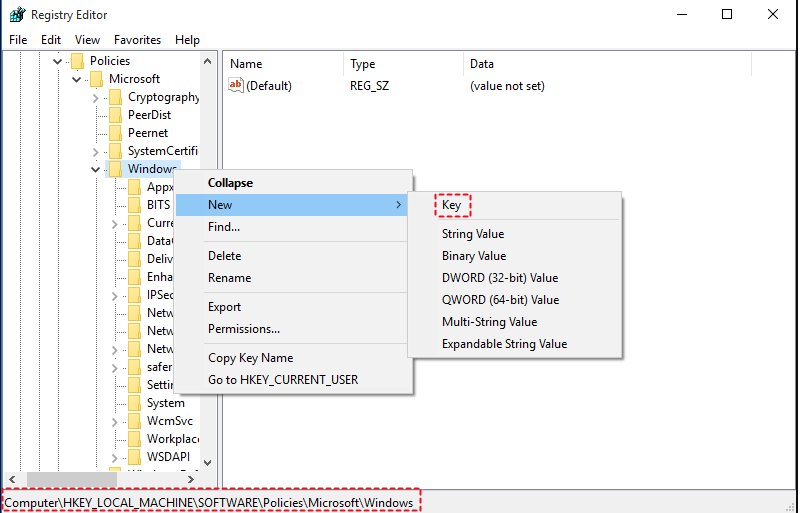
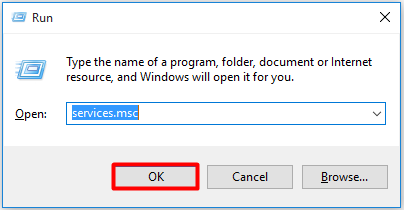 Step 2: Find
 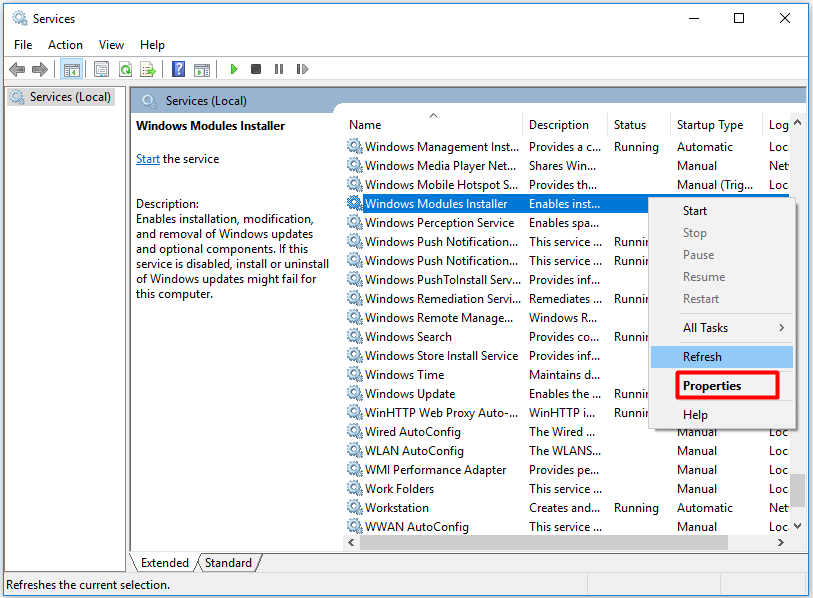 Step 3: Click
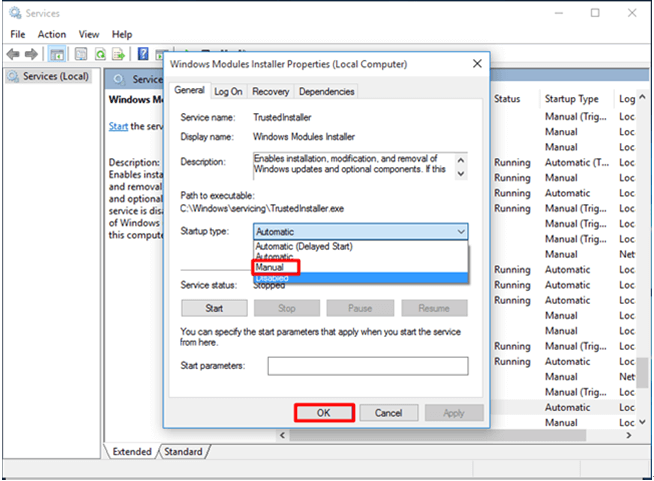
 Step 2: Drop down the procedure list in the
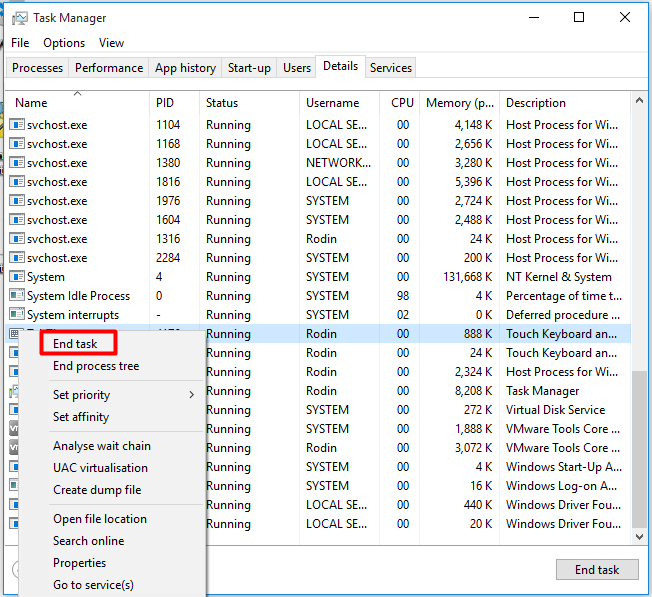
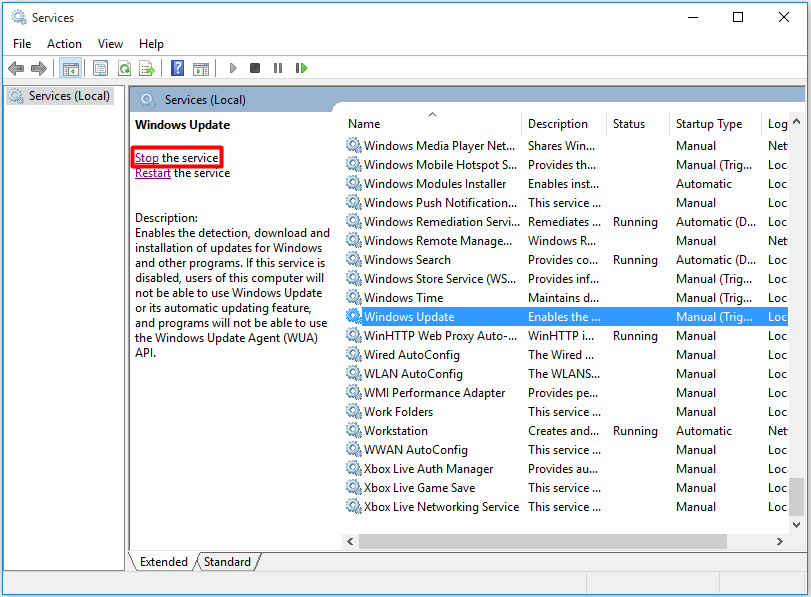 Step 3: Click the
  Step 4: Scroll down the Windows files to find the SoftwareDsitribution folder, then delete it.
 Step 5: Reboot your computer and check the Windows Update.
 Step 2: Choose the
 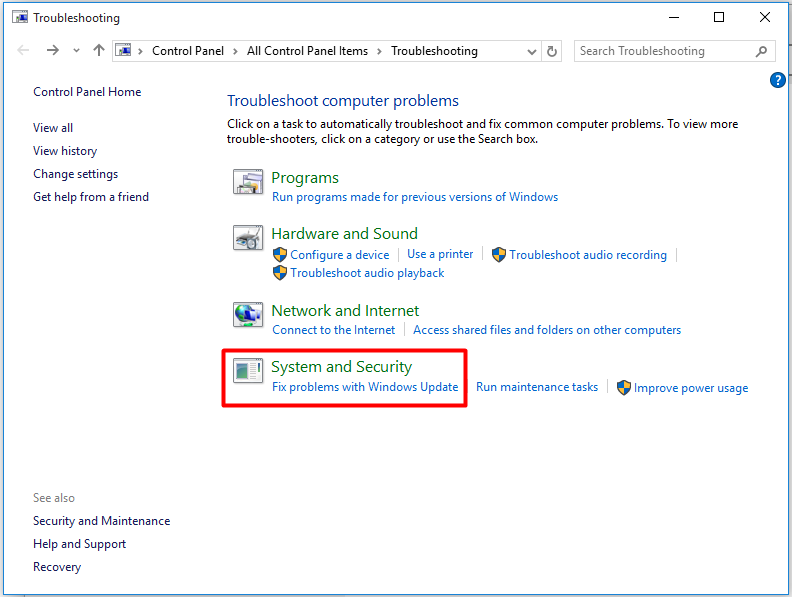 Step 3: Click
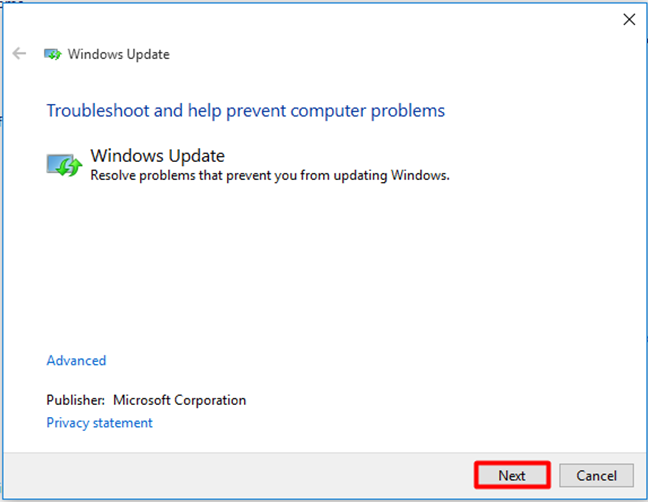

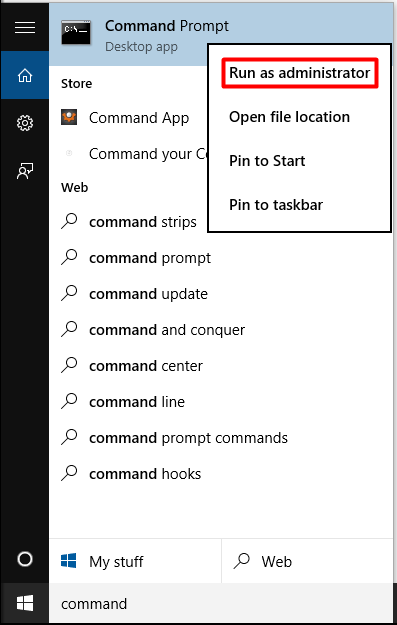 Step 2: Type the
 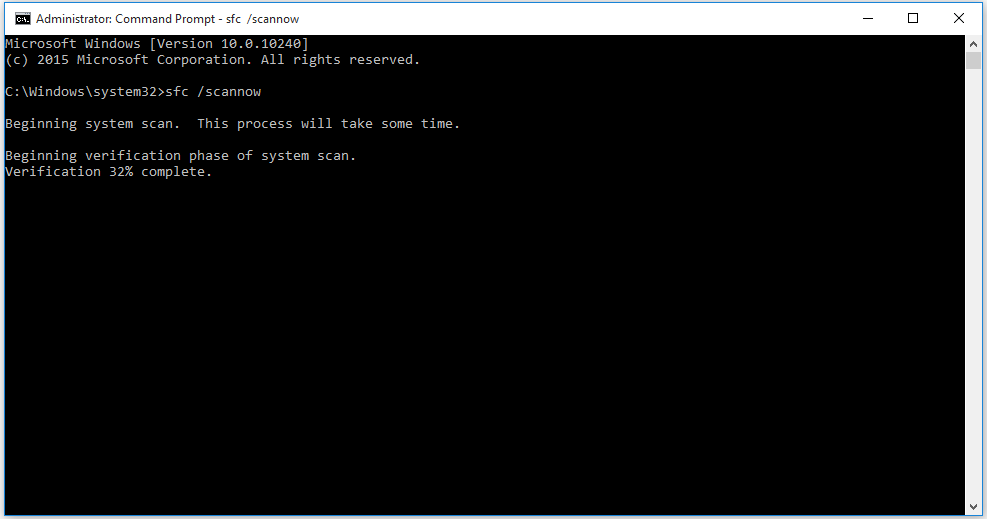 You are able to check whether the Windows Modules Installer Worker high CPU usage error is resolved when the scan finishes.
Generally speaking, the issue can be addressed.
If not, you can try other methods.
 Step 2: Click the
 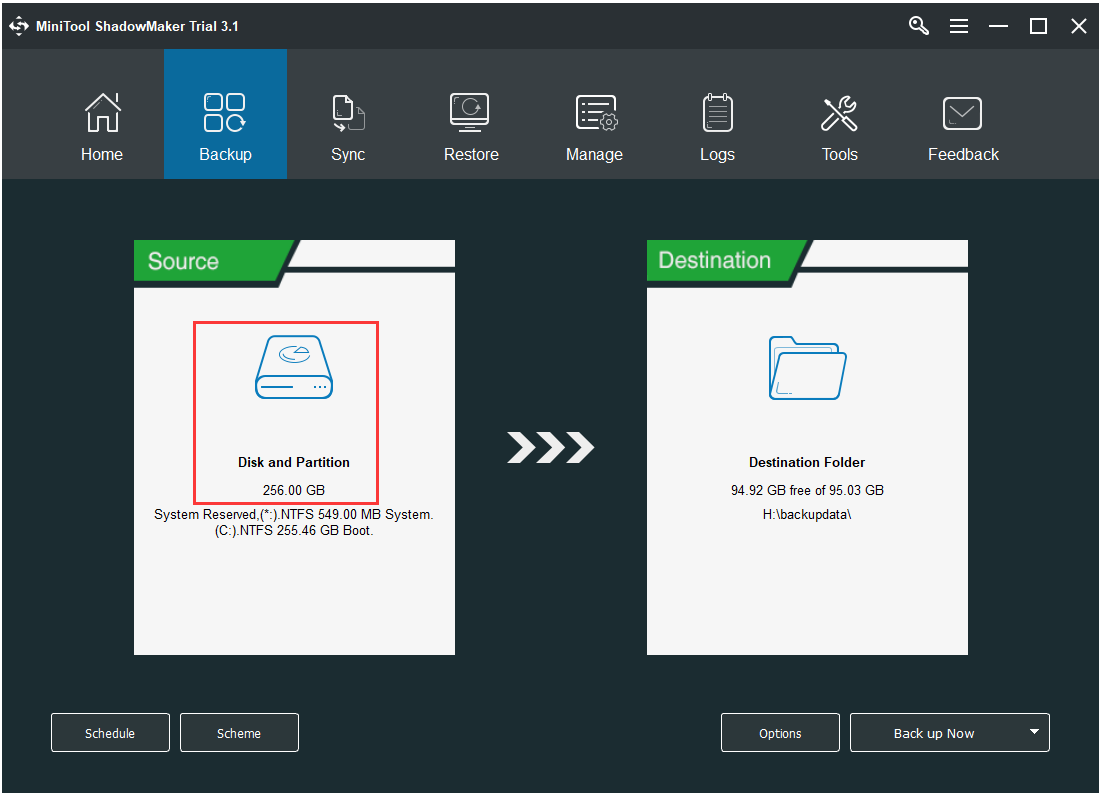 Step 3: Click the
 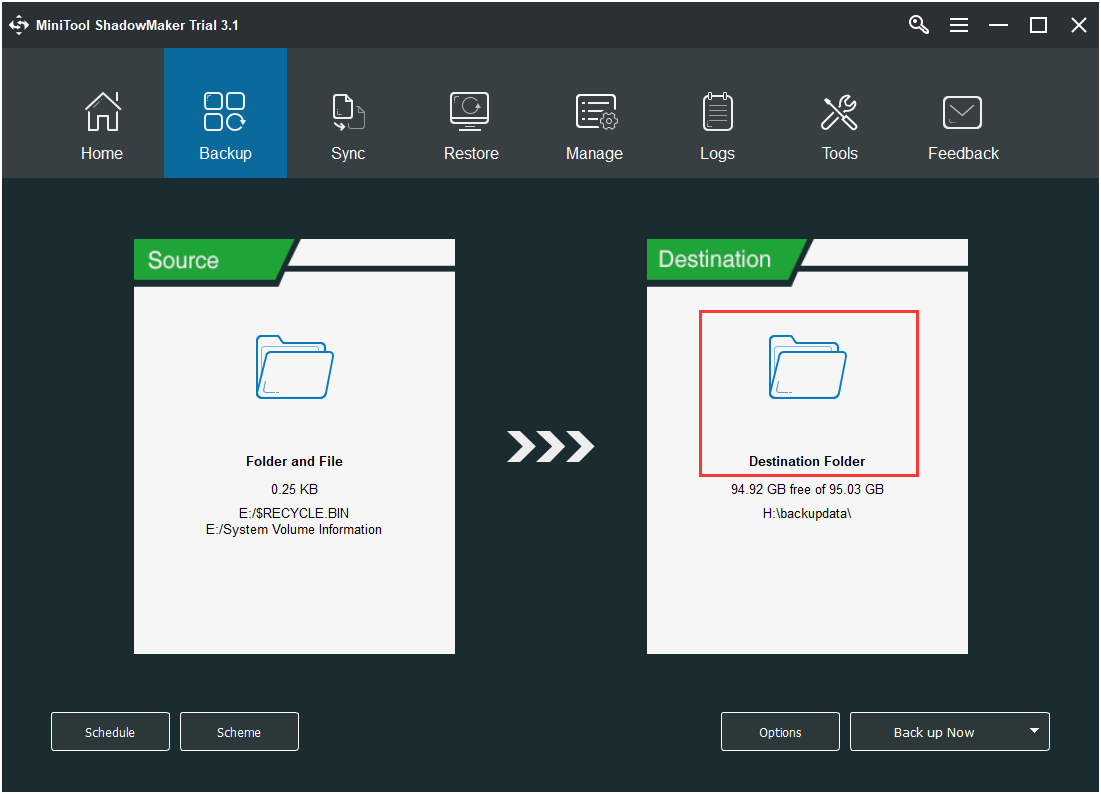 Step 4: After choosing the backup source and destination, you can execute the backup operation.
Here, you have two options:
 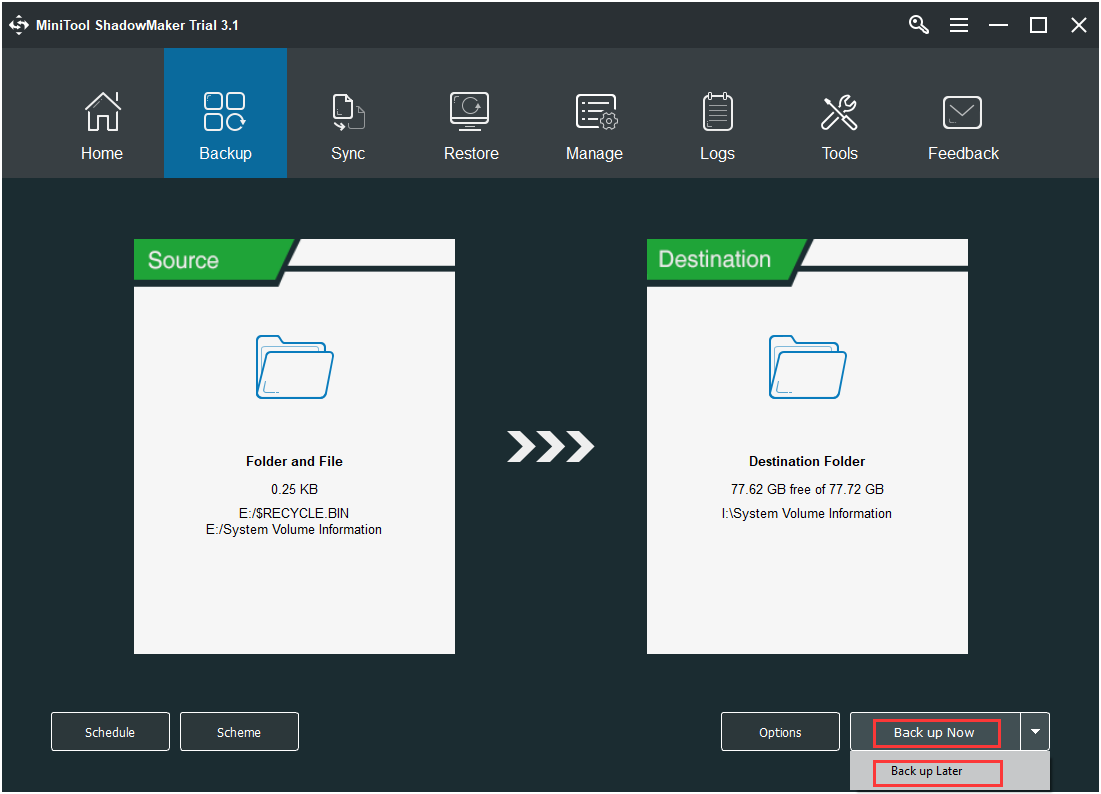 Now, let’s beagin to reset your PC.
Click the
  Choose the
 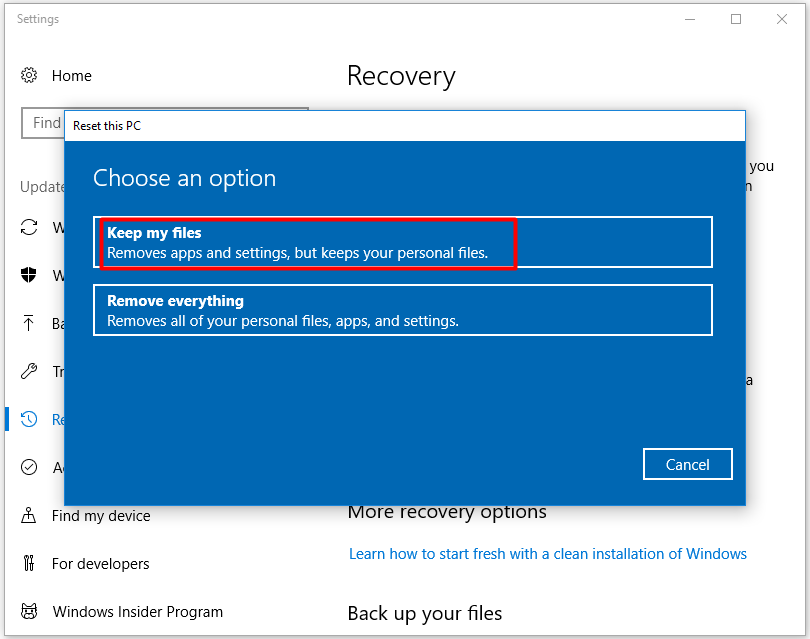 I tried the methods that MiniTool offered and I successfully fixed the Windows modules installer worker high CPU usage error.
Click to Tweet
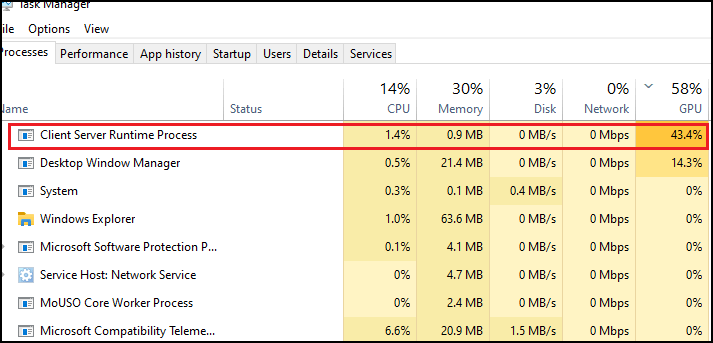
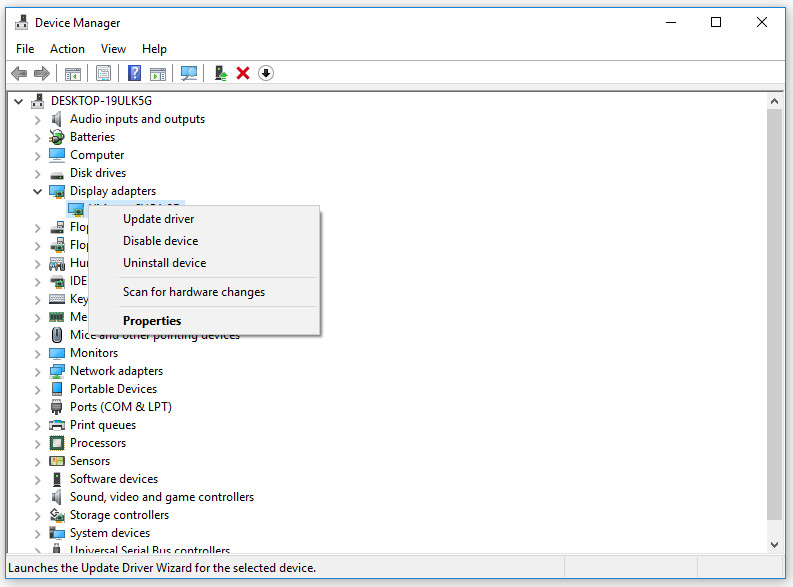
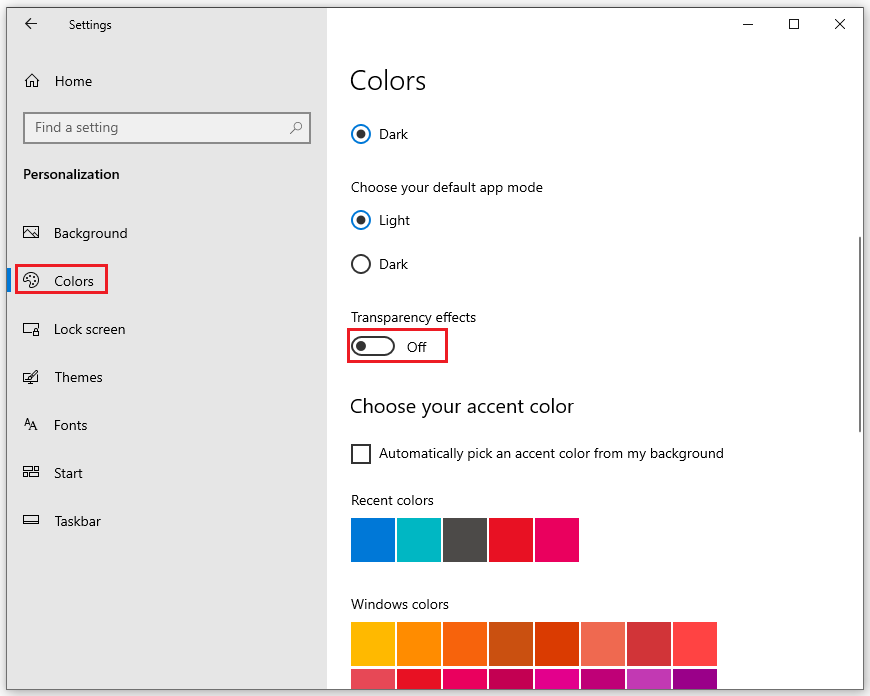
 Click the
  Press the keyboard key to remap (source).
Click the
  Click the
 Install WinDbg from the Microsoft Store. This free debugging tool from Microsoft will help you analyze all types of dump (DMP) files, including memory dumps from blue screen errors.
To download, go to https://apps.microsoft.com/store/detail/windbg-preview/9PGJGD53TN86, click Get in Store app, and click Install.
 Open WinDbg as an administrator. If you want to analyze system-level dump files, you'll typically need administrator privileges.
To run the app as an administrator:
Press the Windows key and type windbg.
Right-click WinDbg Preview and select Run as administrator.
Click Yes to confirm.
 Click the File menu and select Start debugging. A list of debugging processes will appear.
 Select Open dump file. You'll see a "Supported file formats" area that displays a list of dump formats and file extensions you can debug with this tool, including:
Windows user and kernel mode dump formats: DMP, HDMP, MDMP
Windows binary image formats: EXE, DLL, SYS
Linux user and kernel mode core dumps and binary formats: ELF, KDUMP
macOS user mode core dumps and binary formats: MACHO
 Click the Browse button and select a dump file. The location of your dump file will vary.
You'll usually find it in C:\Windows\minidump.
You can also select a compressed CAB or ZIP file that contains a dump file.
No need to decompress it first.
Minidump files are shorter versions of the dump files that are easier to open and analyze.
They still contain all of the information you'll need to track down the error.
If you're not sure where your dump files are saved by default, you can check the location in your advanced system settings.
 Click Open. WinDbg will now load the dump file in the analyzer.
This might take a few moments depending on the size of the file.
 Type !analyze -v into the command line and press ↵ Enter. This command line is just below the body of the dump file.
Running this command will analyze and display verbose information in the Command tab.
This process might take some time, as dump files can be rather large.
You'll know the analysis is complete when the progress bar is no longer moving.
 Look for errors in the Bugcheck Analysis area. Once the analysis is complete, you can scroll through the data to view information that can help you troubleshoot the crash.
Sometimes you'll see a really clear description of what caused the dump or kernel panic, while other times the text might be kind of vague.
It really depends on the type of dump file you're reading and what caused the issue.
If you caught a blue screen error in the moment and remember the stop code (such as DRIVER_IRQL_NOT_LESS_OR_EQUAL, DPC_WATCHDOG_VIOLATION, or a hexadecimal code like0xC000000F), search the dump analysis for that string of text.
You can also look for "MODULE_NAME" and "FAILURE_BUCKET_ID" in the analyzer to find the specific program or driver that caused the crash.
 Download BlueScreenView by Nirsoft. This free utility makes it easy to open and analyze minidump files created by Windows blue screen crashes.
You can download the tool from https://www.nirsoft.net/utils/blue_screen_view.html.
To install BlueScreenView, click Download BlueScreenView with full install/uninstall support, double-click the downloaded bluescreenview_setup.exe file, and follow the on-screen instructions.
If you don't want to install a program, you can download the standalone version by clicking the Download BlueScreenView (in Zip file) link.
Then, just unzip the file to find a fully-usable version of the app that doesn't require installation.
 Open BlueScreenView. If you downloaded the standalone version of BlueScreenView, just double-click BlueScreenView.exe in the extracted folder.
If you installed the app, you'll find BlueScreenView in your Start menu.
If BlueScreenView detects a dump file (ending with DMP) in the default location of C:\Windows\MiniDump, it will display the dump file's name and date in the upper portion of the window.
 Select a dump file location (if needed). If you don't see the dump file you're looking for, you can change the location:
Press Control + O on the keyboard to open the Advanced Options.
Click Browse.
Select the location of your dump file (such as C:\MiniDump}} and click OK.
If you're not sure where your dump files are saved by default, you can check the location in your advanced system settings.
Minidump files are shorter versions of the dump files that are easier to open and analyze.
They still contain all of the information you'll need to track down the error.
 Select the dump file you want to analyze. The most recent dump file in the selected folder appears in the upper portion of the window.
When you click the dump file, its details expand in the bottom panel.
 Read the dump file. You'll see the stop code for the dump (e.g., DRIVER_IRQL_NOT_LESS_OR_EQUAL} in the "Bug Check String" column in the top panel.
In the bottom panel, you'll see the drivers and programs responsible for the crash highlighted in red.
 Type view advanced system settings. A list of search results will appear.
 Click View advanced system settings. It's a computer monitor with a checkmark icon at the top of the Start menu.
Doing so opens the Advanced System Settings window.
 Click the Advanced tab. You'll see this at the top of the window.
 Click the Settings button. It's below the "Startup and Recovery" heading near the bottom of the page.
 Select Small memory dump from the "Write debugging information" menu. Each item in this menu is a different type of Windows dump file that you can configure separately.
For the dump file generated by a blue screen error, choose Small memory dump from the menu.
A memory dump file is a file that's taken from RAM. RAM has a number of allocation tables—or buckets—inside.
A memory dump file is an entire download of whatever was inside that file when a catastrophic failure happened, and it goes into a log so an engineer or a software professional can look at it and see where the conflict happened.
 Find (or change) the location of this dump file. The dump file's location appears under the "Dump file" heading.
If you see something like %SystemRoot%\Minidump, the &SystemRoot& part of the location is just a link to the root of your Windows installation (e.g., C:\Windows).
So, if Windows is installed on your C drive and the dump file location is %SystemRoot%\Minidump, your dump files are saved to C:\Minidump.
 Choose what to do with old dump files when new crashes occur. For small memory dump files, older dumps are not overwritten.
However, larger dump files (kernel memory dump, complete memory dump, automatic memory dump, and active memory dump) are automatically overwritten each time a new crash is logged.
If you'd rather keep these old logs for analysis, select the log type, then remove the checkmark from "Overwrite any existing file."
The complete memory dump file is the largest type of Windows dump file.
If you're low on disk space and face a lot of crashes, you might want to overwrite these automatically to conserve space.
 Click OK to save your changes. If you changed any of your dump file settings, this saves them permanently.
You can then click OK again to exit Advanced System Settings.
 Install WinDbg from the Microsoft Store.
This free debugging tool from Microsoft will help you analyze all types of dump (DMP) files, including memory dumps from blue screen errors.
Open WinDbg as an administrator.
If you want to analyze system-level dump files, you'll typically need administrator privileges.
To run the app as an administrator:
Press the Windows key and type windbg.
Right-click WinDbg Preview and select Run as administrator.
 Click the File menu and select Start debugging. A list of debugging processes will appear.
 Windows user and kernel mode dump formats: DMP, HDMP, MDMP
Windows binary image formats: EXE, DLL, SYS
Linux user and kernel mode core dumps and binary formats: ELF, KDUMP
macOS user mode core dumps and binary formats: MACHO
 You can also select a compressed CAB or ZIP file that contains a dump file.
No need to decompress it first.
Minidump files are shorter versions of the dump files that are easier to open and analyze.
They still contain all of the information you'll need to track down the error.
If you're not sure where your dump files are saved by default, you can check the location in your advanced system settings.
 Click Open. WinDbg will now load the dump file in the analyzer.
 Type !analyze -v into the command line and press ↵ Enter. This command line is just below the body of the dump file.
This process might take some time, as dump files can be rather large.
You'll know the analysis is complete when the progress bar is no longer moving.
 Look for errors in the Bugcheck Analysis area. Once the analysis is complete, you can scroll through the data to view information that can help you troubleshoot the crash.
Sometimes you'll see a really clear description of what caused the dump or kernel panic, while other times the text might be kind of vague.
It really depends on the type of dump file you're reading and what caused the issue.
If you caught a blue screen error in the moment and remember the stop code (such as DRIVER_IRQL_NOT_LESS_OR_EQUAL, DPC_WATCHDOG_VIOLATION, or a hexadecimal code like0xC000000F), search the dump analysis for that string of text.
You can also look for "MODULE_NAME" and "FAILURE_BUCKET_ID" in the analyzer to find the specific program or driver that caused the crash.
Method 2
 Download BlueScreenView by Nirsoft. This free utility makes it easy to open and analyze minidump files created by Windows blue screen crashes.
You can download the tool from https://www.nirsoft.net/utils/blue_screen_view.html.
To install BlueScreenView, click Download BlueScreenView with full install/uninstall support, double-click the downloaded bluescreenview_setup.exe file, and follow the on-screen instructions.
If you don't want to install a program, you can download the standalone version by clicking the Download BlueScreenView (in Zip file) link.
Then, just unzip the file to find a fully-usable version of the app that doesn't require installation.
 Open BlueScreenView. If you downloaded the standalone version of BlueScreenView, just double-click BlueScreenView.exe in the extracted folder.
If you installed the app, you'll find BlueScreenView in your Start menu.
If BlueScreenView detects a dump file (ending with DMP) in the default location of C:\Windows\MiniDump, it will display the dump file's name and date in the upper portion of the window.
 Select a dump file location (if needed). If you don't see the dump file you're looking for, you can change the location:
Press Control + O on the keyboard to open the Advanced Options.
Click Browse.
Select the location of your dump file (such as C:\MiniDump}} and click OK.
If you're not sure where your dump files are saved by default, you can check the location in your advanced system settings.
Minidump files are shorter versions of the dump files that are easier to open and analyze.
They still contain all of the information you'll need to track down the error.
 Select the dump file you want to analyze. The most recent dump file in the selected folder appears in the upper portion of the window.
When you click the dump file, its details expand in the bottom panel.
 Read the dump file. You'll see the stop code for the dump (e.g., DRIVER_IRQL_NOT_LESS_OR_EQUAL} in the "Bug Check String" column in the top panel.
In the bottom panel, you'll see the drivers and programs responsible for the crash highlighted in red.
Method 3
 Press the Windows key on your keyboard. If you need to view or change the location of your Windows system dump files, you can do so in your Advanced System Settings.
Start by pressing the Windows key on your keyboard or clicking the magnifying glass on the taskbar.
By default, your system dump files are automatically overwritten with each new crash.
You can disable this automatic overwriting if you want to keep old dump files for analysis.
 Type view advanced system settings. A list of search results will appear.
 Click View advanced system settings. It's a computer monitor with a checkmark icon at the top of the Start menu.
Doing so opens the Advanced System Settings window.
 Click the Advanced tab. You'll see this at the top of the window.
 Click the Settings button. It's below the "Startup and Recovery" heading near the bottom of the page.
 Select Small memory dump from the "Write debugging information" menu. Each item in this menu is a different type of Windows dump file that you can configure separately.
For the dump file generated by a blue screen error, choose Small memory dump from the menu.
 Find (or change) the location of this dump file. The dump file's location appears under the "Dump file" heading.
If you see something like %SystemRoot%\Minidump, the &SystemRoot& part of the location is just a link to the root of your Windows installation (e.g., C:\Windows).
So, if Windows is installed on your C drive and the dump file location is %SystemRoot%\Minidump, your dump files are saved to C:\Minidump.
 Choose what to do with old dump files when new crashes occur. For small memory dump files, older dumps are not overwritten.
However, larger dump files (kernel memory dump, complete memory dump, automatic memory dump, and active memory dump) are automatically overwritten each time a new crash is logged.
If you'd rather keep these old logs for analysis, select the log type, then remove the checkmark from "Overwrite any existing file."
The complete memory dump file is the largest type of Windows dump file.
If you're low on disk space and face a lot of crashes, you might want to overwrite these automatically to conserve space.
 Click OK to save your changes. If you changed any of your dump file settings, this saves them permanently.
You can then click OK again to exit Advanced System Settings.
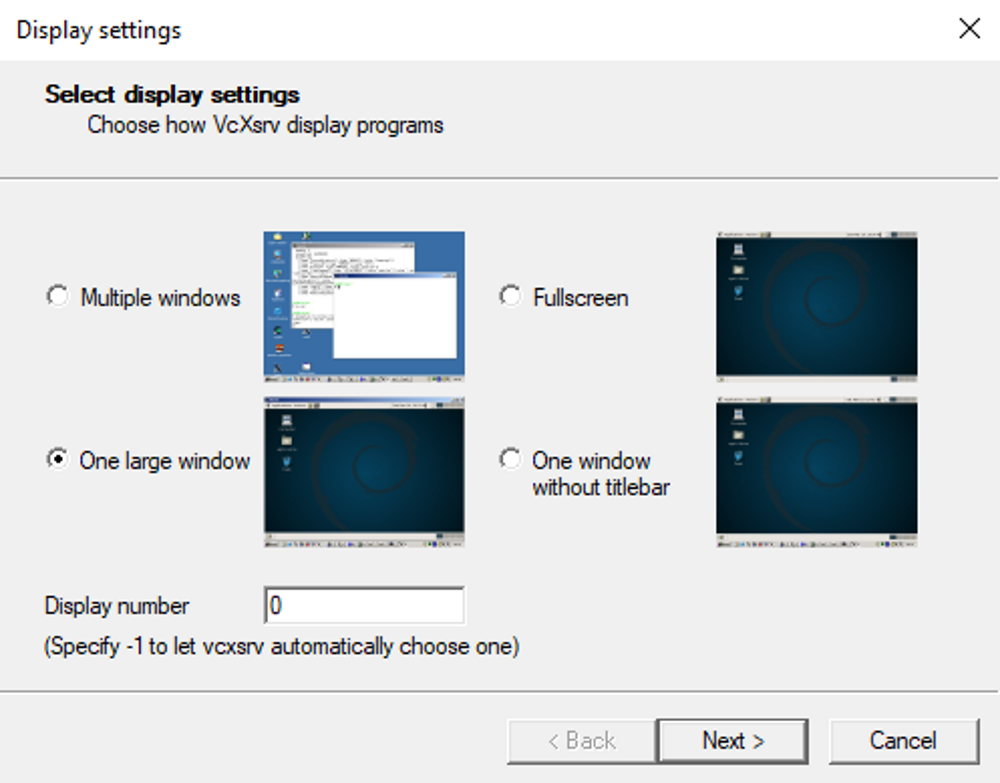 Click Next, then select Start no client to ensure the XLaunch starts only the server, allowing you to start the Linux desktop later.
Click Next again, then Finish.
You might first like to click Save configuration to save it.
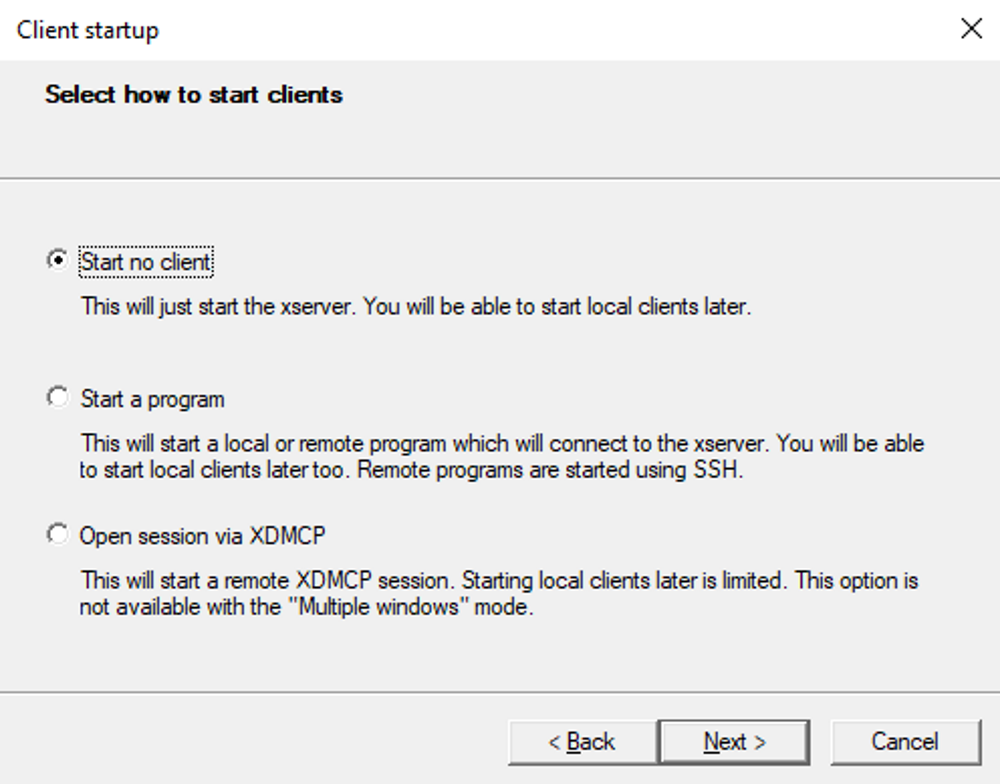 Ready to launch your Linux desktop? Enter the command to start your preferred LDE.
For LXDE, for example, use:
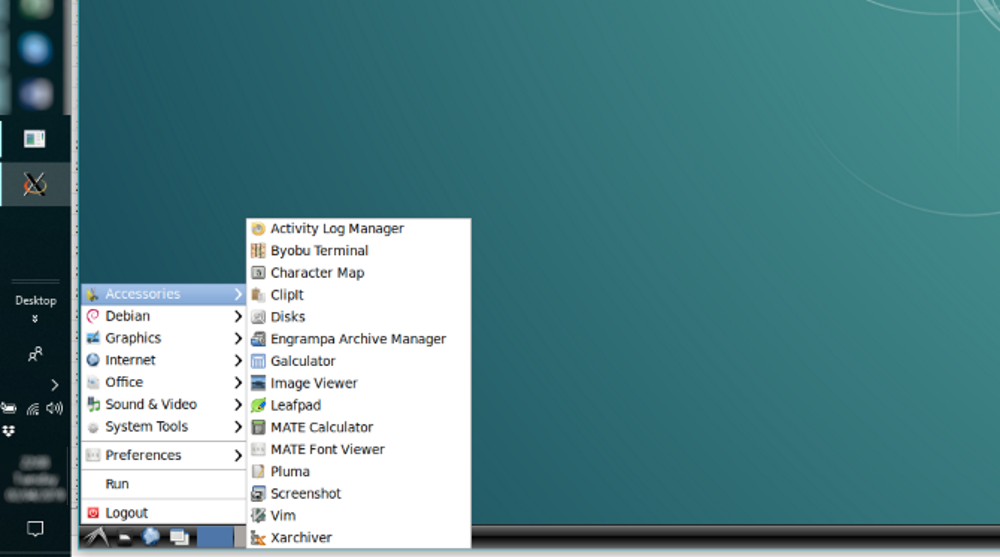 You can now run any of the preinstalled Linux software and even install new apps and utilities.
Other WSL-compatible desktop environments include KDE.
You can even install GNOME on Windows for a full Ubuntu desktop experience.
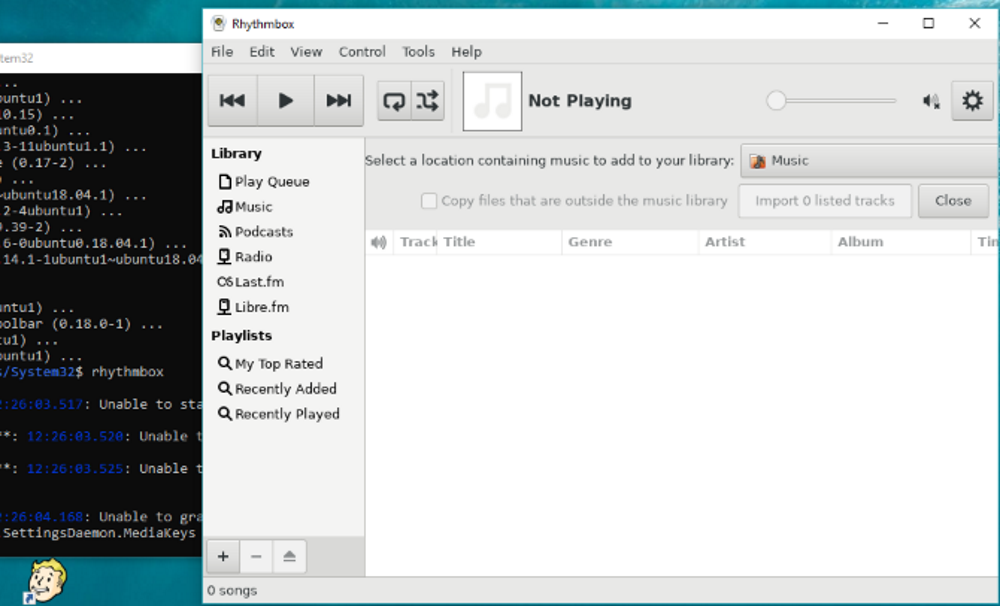 Now, in this case, you would obviously need to add some media files into the Linux environment on your computer.
You might do this by installing a browser and downloading files, or simply by hooking up a USB drive with media files on.
After connecting the USB drive, remember to mount it (this example uses D: as the drive letter):