Writing Python Extensions in Assembly
Must Watch!
MustWatch
https://tonybaloney.github.io/posts/extending-python-with-assembly.html
On occasion, you need to take something apart and put it back together to fully understand it.
I'm sure many of the people reading this article will have been one of those kids.
Kids who took a screwdriver to something, just to see whats inside it.
It's a thrill, but its a whole different skill to put it back together.
![]() The working machine on the outside obscures a network of patterns, patches, and workarounds in its internals.
Programmers are used to working on the guts of a system and manipulating the ugly-inner workings to get it to follow some simple instructions.
This experiment was no different.
I wanted to see if I could write a CPython Extension in 100% assembly.
Why? Well, because after finishing the CPython Internals book, the assembly code was still something of a mystery.
I started learning x86-64 assembly from Jo Van Hooey's book and understood some of the basic concepts but struggled to relate
them to the high-level languages that I'm familiar with.
There are some questions I wanted answers to, like:
Why do extensions in CPython need to be written in Python or C?
If Python C extensions compile to shared libraries, whats the magic inside them that makes them loadable by Python?
What ABI does CPython have between C that could make it more extensible by other languages
The working machine on the outside obscures a network of patterns, patches, and workarounds in its internals.
Programmers are used to working on the guts of a system and manipulating the ugly-inner workings to get it to follow some simple instructions.
This experiment was no different.
I wanted to see if I could write a CPython Extension in 100% assembly.
Why? Well, because after finishing the CPython Internals book, the assembly code was still something of a mystery.
I started learning x86-64 assembly from Jo Van Hooey's book and understood some of the basic concepts but struggled to relate
them to the high-level languages that I'm familiar with.
There are some questions I wanted answers to, like:
Why do extensions in CPython need to be written in Python or C?
If Python C extensions compile to shared libraries, whats the magic inside them that makes them loadable by Python?
What ABI does CPython have between C that could make it more extensible by other languages
Assembly quick summary
Assembly code is a sequence of instructions, using an instruction set.
Different CPU architectures have different instruction sets.
With the most common being x86, ARM, and x86-64.
There are also extension instructions on those CPU architectures.
Over releases of a CPU architecture the manufacturers add new instructions to the set.
Often to improve performance.
The CPU has many registers and it loads data from registers to execute the instructions.
You can also copy data from memory (RAM), but you can't copy from RAM to RAM, it must go via a register.
This means that when writing assembly instructions, you need to need to run many steps to accomplish something which would otherwise be done in 1 line in a higher-level language.
For example, to assign a variable a to the reference of variable b in Python:
a = b
Whereas in assembly, you copy first to a register (we'll use RAX) and then to the destination:
mov RAX, a
mov b, RAX
The instruction mov RAX, a will copy the address of the variable a to the register.
The register RAX is a 64-bit register, so it can contain any value which fits into 64 bits (8 bytes).
On a 64-bit Operating System, memory addresses are 64-bit addresses, so the address value will be 64 bits.
You can also copy the value of the variable to the register by using [] around the name:
mov a, 1
mov RAX, [a]
Now the value of the RAX register will be the decimal value 1 (0000 0000 0000 0001 in hexadecimal).
I picked RAX because it's the first register, but you can arbitrary pick any register if you're writing a standalone application.
64-bit registers start with r, the first 8 registers can also be used with 32, 16 or 8-bit values by referencing the lower bits of the register.
Addressing 32-bits of a register is faster, so most compilers will use a smaller register address if the
value is within 32-bits:
| 64-bit register | Lower 32 bits | Lower 16 bits | Lower 8 bits |
|---|
| rax | eax | ax | al |
| rbx | ebx | bx | bl |
| rcx | ecx | cx | cl |
| rdx | edx | dx | dl |
| rsi | esi | si | sil |
| rdi | edi | di | dil |
| rbp | ebp | bp | bpl |
| rsp | esp | sp | spl |
| r8 | r8d | r8w | r8b |
| r9 | r9d | r9w | r9b |
| r10 | r10d | r10w | r10b |
| r11 | r11d | r11w | r11b |
| r12 | r12d | r12w | r12b |
| r13 | r13d | r13w | r13b |
| r14 | r14d | r14w | r14b |
| r15 | r15d | r15w | r15b |
As assembly is a sequence of instructions, branching can be tricky.
The way to implement branching is to use conditional and unconditional jump statements to move the instruction pointer (rip) to the instruction address.
Instruction addresses can be labeled in the assembly source code and the assembly will replace these names with a actual memory address.
This address is either relative or absolute (will be explained later).
jmp leapfrog ; jump to leapfrog label
mov rax, rcx ; this never gets executed
leapfrog:
mov rcx, rax
This simple Python code, contains a branch when comparing a with the decimal value 5:
a = 2
a += 3
if a == 5:
  print("YES")
else:
  print("NO")
You could do this in assembly by simplifying the assignment of (a and increment by 3) into a simple comparison.
Most compilers would make this sort of optimization automatically, because they would determine that you're comparing constant values.
Here is some pseudo-assembly to demonstrate:
 mov rcx, 2  ; Move the decimal value 2 to the RCX CPU register
 add rcx, 3  ; Add 3 to the value in the RCX CPU register, RCX is now equal to 5
 cmp rcx, 5  ; Compare RCX to the value 5,
 je YES      ; If the comparison was equal, jump to the instruction offset YES
 jmp NO      ; Jump to the instruction offset NO
 YES:  ; RCX == 5
   ...

   jmp END
 NO:   ; RCX != 5
   ...
   jmp END
- Calling external functions
Unless you want to entirely reinvent the wheel, your application or library will probably be using functions from other compiled libraries.
In assembly, you can refer to the address of an external function by using the extern instruction with the symbol name.
The linker will replace this with the actual value of the library, if the executable is statically linked, or depend upon a runtime value if the executable is dynamically linked.
I don't want to get into linking in this article
otherwise it will keep going into a mini-book (and I don't really know that much about linkers).
If you were writing an application in C and required to call a function in another library, you would use the Header (H) file.
Header files would tell the compiler:
The name of the function (symbol)
Its return value and the size of the response
The arguments and their types
For example, if you defined a function in C:
char* pad_right(char * message, int width, char padding);
What this header tells us:
- The function takes 3 arguments
- The first argument is a char pointer, so a 64-bit address to an 8-bit value (char)
- The second argument is an int, which (depending on the OS and some other factors) is probably a 32-bit value
- The third argument is a char, which is 8-bits
- The response is a char pointer, so we need a 64-bit address to store the result
Assembly function calls don't have the concept of arguments, but instead Operating Systems define a specification (called a calling convention) on which registers
should be used for which argument.
Luckily, macOS and Linux have the same calling convention called System-V for arguments, which states that the following registers should be populated with the values of the arguments when a function is called:
| Argument | 64-bit Register |
|---|
| Argument 1 | rdi |
| Argument 2 | rsi |
| Argument 3 | rdx |
| Argument 4 | rcx |
| Argument 5 | r8 |
| Argument 6 | r9 |
NB: Windows has a calling convention, which uses different registers to System-V.
Additional arguments are loaded from the value stack, and because its a value stack you push them in reverse order.
For example, if the function had 10 arguments, you would push the 10th first:
 push arg10
 push arg9
 push arg8
 push arg7
This calling convention means that if you're calling a function written in C, C++, or even Rust, the function will read whatever is in the rdi CPU register and use that as the first argument.
If you wanted to call the pad_right() function you would write the equivalent assembly code:
extern pad_right
section .data
    message db "Hello", 0 ; null-terminated string
section .bss
    result  resb 11
section .text
    mov rdi, db  ; argument 1
    mov rsi, 10  ; argument 2
    mov rdx, '-' ; argument 3
    call pad_right
    mov [result], rax ; result
The calling convention states that the register rax will be populated with the result.
Because this function returns a char *, we expect the result to be a pointer (64-bit memory address value).
We reserved 11 bytes (10 letters + null terminator) in the bss section and then write the result rax to that address.
Something else important to remember is that assembly doesn't have scope.
So if you were using a register for something, like storing a value, then called an external function, that register could have changed values.
Registers are effectively global.
The correct way to preserve the state of your registers before calling functions is to push them onto the value stack, then pop them back off when the function call has completed:
...
do stuff with r9
push r9
call externalFunction
pop r9
When you are building your own functions, its expected that you preserve the call frame during your instructions.
The call frame uses the stack pointer (rsp) and rbp registers.
To accomplish this, assembly functions should include some extra instructions at the beginning and end (called the prolog and epilog):
push rbp
mov rbp, rsp

...
your code

mov rsp, rbp
pop rbp
Windows defines another calling convention, using different registers for the arguments.
It also requires a different prolog and epilog, which calculates address limits.
This is a bit more complex than the original Intel spec.
- Turning assembly into an executable
You can't execute an assembly source file directly.
It may seem like you're coding machine-code, but there is a wrapper around the assembly instructions required to make the OS run the instructions (an Executable File Format).
The assembler will take an assembly source file and assemble it into a machine-code format.
The formats are Operating System specific.
Some common formats for executable code are:
Mach-O for macOS
ELF for Linux
PE for Windows
Executable file formats include a few components, not just instructions:
The machine-code instructions (in a section called text)
A list of external symbols (external references)
A list of memory requirements (Bytes Started by Sequence, bss section)
Constant values, like strings (in a section called data)
EFF headers also contain some other useful information that the Operating System needs.
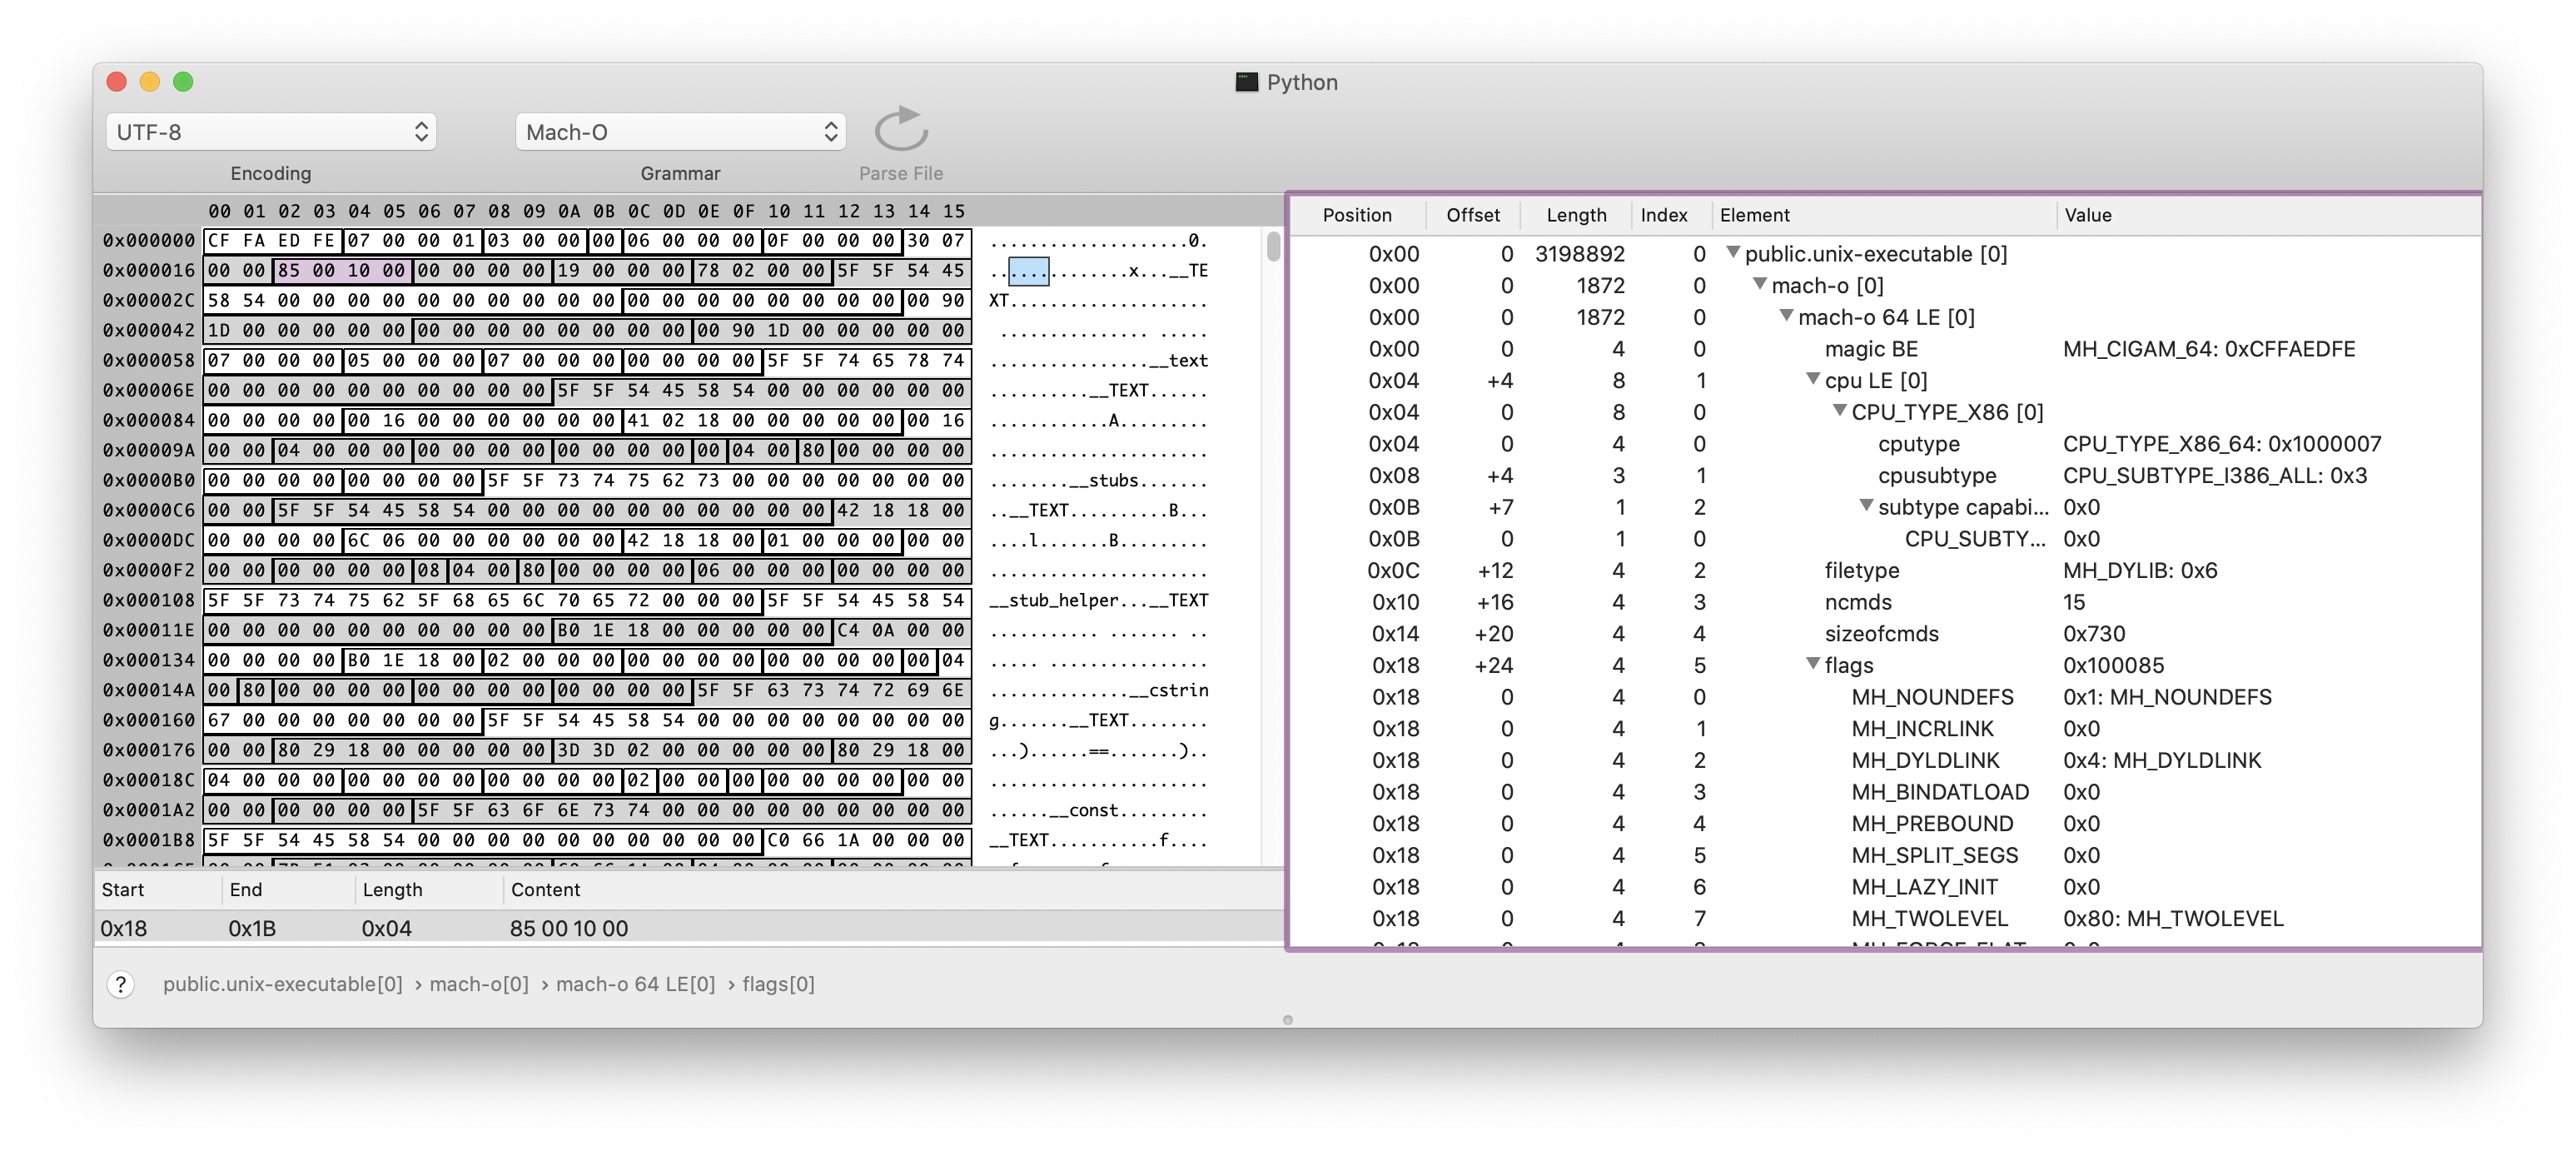
The Mach-O format contains a detailed header before any data or instructions.
I like a program called SynalizeIT!, a HEX Editor that can apply binary grammars to visualize and decode binary file formats.
The Mach-O format is a supported grammar, and if you open up the CPython executable (/usr/bin/python3 or whereever you've installed it), you can see and explore those headers.
![]() On the right, you can see some attributes like:
The CPU architecture this binary was assembled for.
In the future, when Apple release an ARM MacBook, this executable won't work as it will inspect this header and see a mismatch in the CPU architecture (before trying to load the instructions)
The length, positions and offsets of the data, text and bss sections
Any runtime flags, such as Position-Independent-Executable (PIE) (covered later)
Another feature of the ELF, mach-O and PE formats is the ability to build shared libraries (.so files in Linux, .dylib or .so in macOS, and .dll files in Windows).
A shared library can be imported dynamically (like a plugin) or linked during the build stage as a dependency to your application.
When building CPython C extensions, you need to link the extension with the Python shared library.
Your C extension is also in itself a shared library, and is dynamically loaded by CPython (when you
On the right, you can see some attributes like:
The CPU architecture this binary was assembled for.
In the future, when Apple release an ARM MacBook, this executable won't work as it will inspect this header and see a mismatch in the CPU architecture (before trying to load the instructions)
The length, positions and offsets of the data, text and bss sections
Any runtime flags, such as Position-Independent-Executable (PIE) (covered later)
Another feature of the ELF, mach-O and PE formats is the ability to build shared libraries (.so files in Linux, .dylib or .so in macOS, and .dll files in Windows).
A shared library can be imported dynamically (like a plugin) or linked during the build stage as a dependency to your application.
When building CPython C extensions, you need to link the extension with the Python shared library.
Your C extension is also in itself a shared library, and is dynamically loaded by CPython (when you import mylibrary).
- Complex data structures in assembly
If you were calling a function that had a more complex data type for its argument (like a pointer to a struct), you need to be aware of the storage size
of the C data types:
| Scalar Type | C Data Type | Storage Size (in bytes) | Recommended Alignment |
|---|
| INT8 | char | 1 | Byte |
| UINT8 | unsigned char | 1 | Byte |
| INT16 | short | 2 | Word |
| UINT16 | unsigned short | 2 | Word |
| INT32 | int, long | 4 | Doubleword |
| UINT32 | unsigned int, unsigned long | 4 | Doubleword |
| INT64 | __int64 | 8 | Quadword |
| UINT64 | unsigned __int64 | 8 | Quadword |
| FP32 (single precision) | float | 4 | Doubleword |
| FP64 (double precision) | double | 8 | Quadword |
| POINTER | * | 8 | Quadword |
Take this example of a struct in C with 3 integer fields (x, y, and z):
typedef struct {
    int x;
    int y;
    int z;
} position
Each of those 3 fields would use 4 bytes (32-bits), so if you were to define in C:
position myself = { 3, 9, 0} ;
That would equate the variable myself to the hexadecimal value:
0000 0003 0000 0009 0000 0000
You can recreate this structure in NASM assembly using the struc and istruc macros:
section .data:
    struc position
        x: resd 1
        y: resd 1
        z: resd 1
    endstruc

    myself:
        istruc position
            at x, dd 3
            at y, dd 9
            at z, dd 0
        iend
The struc macro is equivalent to the struct construct in C, for defining memory structures.
The istruc allocates a constant value with the values defined.
The instruction resd means to reserve a double word (4 bytes), the dd means to define a double word to the value.
This would create the identical memory sequence:
0000 0003 0000 0009 0000 0000
Because this doesn't fit into 64-bits, you would send a pointer to the address of the allocated memory.
If, in C you had a function that used the typedef:
void calculatePosition(position* p);
You could call that function from assembly by setting the rdi register to the address of your allocated memory:
mov rdi, myself
call calculatePosition
The function, calculatePosition(), is ignorant to whether it's being called by code written in C, Assembly, C++, etc.
Its this principal that I'll explore next to see if we can write a dynamically loaded CPython Extension in Assembly.
Registering the Python Extension module
When you load a module in Python, the import library will look in the PYTHONPATH for a matching module for the name you provided.
Modules can be in either C (as compiled extensions) or Python.
Many of the CPython standard library modules are written in C because they either require interfaces to lower-level Operating System APIs (disk IO, networking, etc.).
The remainder of the standard library modules are written in Python.
Some are a combination of both, a Python module with C extension functions.
This is normally implemented as a hidden-module written in C with the public module written in Python.
The Python module will import the hidden C module and wrap its functions.
To write a C extension module, you need:
A C compiler
A linker
The Python libraries
Setuptools
The C code we're trying to recreate is a function called PyInit_pymult() that returns a PyObject*, which is created by calling PyModule_Create2().
PyObject* PyInit_pymult() {
    return PyModule_Create2(&_moduledef, 1033);
}
There are many options for registering your module, but I'm just going to go into this approach, called a single-phase registration.
When you type import XYZ in Python, it looks for,
A file called XYZ-cpython-{version}-{os.name}.so in the Python Path
A file called XYZ.so in the Python Path
The first option is a compiled library for that version of Python.
You could have multiple compiled libraries in a binary-distribution (wheel) of a package.
e.g.,
XYZ-cpython-39-darwin.so Python 3.9
XYZ-cpython-38-darwin.so Python 3.8
XYZ-cpython-37-darwin.so Python 3.7
If you're wondering what “darwin” is, its the old name for the macOS kernel.
It's still referred to that today in CPython.
PyModule_Create2() is a function that takes a PyModule_Def * and an int with the version of CPython this module is for.
The type structures, defined in CPython Include/moduleobject.h:
typedef struct PyModuleDef_Base {
  PyObject_HEAD // PyObject header
  PyObject* (*m_init)(void); // Pointer to the init function
  Py_ssize_t m_index; // index
  PyObject* m_copy; // Optional pointer to a copy() function
} PyModuleDef_Base;
...

typedef struct PyModuleDef{
  PyModuleDef_Base m_base; // The base data
  const char* m_name;      // The module name
  const char* m_doc;       // The module docstring
  Py_ssize_t m_size;       // The module size
  PyMethodDef *m_methods;  // A list of methods, terminated by NULL, NULL, NULL, NULL
  struct PyModuleDef_Slot* m_slots; // Defined slots for Python protocols (e.g., __eq__, __contains__)
  traverseproc m_traverse; // Optional custom traverse method
  inquiry m_clear;         // Optional custom clear method
  freefunc m_free;         // Optional custom free method (called when module is destroyed by GC)
} PyModuleDef;
...
We can recreate those structures in assembly with a knowledge of the storage requirements of the basic C types:
default rel
bits 64

section .data
    modulename db "pymult", 0
    docstring db "Simple Multiplication function", 0

    struc   moduledef
        ;pyobject header
        m_object_head_size: resq 1
        m_object_head_type: resq 1
        ;pymoduledef_base
        m_init: resq 1
        m_index: resq 1
        m_copy: resq 1
        ;moduledef
        m_name: resq    1
        m_doc:  resq    1
        m_size: resq    1
        m_methods:  resq    1
        m_slots: resq   1
        m_traverse: resq    1
        m_clear: resq   1
        m_free: resq    1
    endstruc
section .bss
section .text
Then we can define a global function to be exported as a symbol when this shared library is compiled:
global PyInit_pymult
The __init__ function can load the correct values into the moduledef structure:
PyInit_pymult:
    extern PyModule_Create2
    section .data

        _moduledef:
            istruc moduledef
                at m_object_head_size, dq  1
                at m_object_head_type, dq 0x0  ; null
                at m_init, dq 0x0       ; null
                at m_index, dq 0        ; zero
                at m_copy, dq 0x0       ; null
                at m_name, dq modulename
                at m_doc, dq   docstring
                at m_size, dq 2
                at m_methods, dq 0 ; null - no functions
                at m_slots, dq 0    ; null- no slots
                at m_traverse, dq 0 ; null
                at m_clear, dq 0    ; null - no custom clear
                at m_free, dq 0     ; null - no custom free()
            iend
The instructions for the __init__ function will follow the System-V calling convention and call PyModule_Create2(&_moduledef, 1033):
    section .text
        push rbp                    ; preserve stack pointer
        mov rbp, rsp

        lea rdi, [_moduledef]  ; load module def
        mov esi, 0x3f5              ; 1033 - module_api_version
        call PYMODULE_CREATE2       ; create module, leave return value in register as return result

        mov rsp, rbp ; reinit stack pointer
        pop rbp
        ret
The constant 0x3f5 is 1033, the integer value for the CPython API we're using.
Next, to compile the source, we have to assemble the pymult.asm file, then link it to the libpythonXX library.
This is done in two steps.
The first step is to create the object file, using nasm.
The second step is to link the object file with the Python 3.X (in my case 3.9) library:
For macOS, we use the macho64 object format, include debug symbols with -g, and tell the NASM compiler that all symbols will have the prefix _.
When the external module is linked, PyModule_Create2 will be called _PyModule_Create2 in macOS.
But later on, we're going to try Linux and it won't have that prefix.
nasm -g -f macho64 -DMACOS --prefix=_ pymult.asm -o pymult.obj
cc -shared -g pymult.obj -L/Library/Frameworks/Python.framework/Versions/3.9/lib -lpython3.9 -o pymult.cpython-39-darwin.so
This will produce the artifact pymult.cpython-39-darwin.so which can be loaded into CPython.
Because we build with the debug symbols (the -g flag), the lldb or gdb debugger can be used to set a breakpoint in the assembly code.
 $ lldb python3.9
(lldb) target create "python3.9"
Current executable set to 'python3.9' (x86_64).
(lldb) b pymult.asm:128
Breakpoint 2: where = pymult.cpython-39-darwin.so`PyInit_pymult + 16, address = 0x00000001059c7f6c
When the module is loaded, lldb will hit the breakpoint.
You can start the process with the arguments -c 'import pymult' to just import the new module and quit:
(lldb) process launch -- -c "import pymult"
Process 30590 launched: '/Library/Frameworks/Python.framework/Versions/3.9/Resources/Python.app/Contents/MacOS/Python' (x86_64)
1 location added to breakpoint 1
Process 30590 stopped
* thread #1, queue = 'com.apple.main-thread', stop reason = breakpoint 1.1
    frame #0: 0x00000001007f6f6c pymult.cpython-39-darwin.so`PyInit_pymult at pymult.asm:128
   125
   126          lea rdi, [_moduledef]  ; load module def
   127          mov esi, 0x3f5              ; 1033 - module_api_version
-> 128          call PyModule_Create2       ; create module, leave return value in register as return result
   129
   130          mov rsp, rbp ; reinit stack pointer
   131          pop rbp
Target 0: (Python) stopped.
Hooray! The module is being initialized.
At this point you can manipulate any of the registers or visualize the data.
(lldb) reg read
General Purpose Registers:
       rax = 0x00000001007d3d20
       rbx = 0x0000000000000000
       rcx = 0x000000000000000f
       rdx = 0x0000000101874930
       rdi = 0x00000001007f709a  pymult.cpython-39-darwin.so`..@31.strucstart
       rsi = 0x00000000000003f5
       rbp = 0x00007ffeefbfdbf0
       rsp = 0x00007ffeefbfdbf0
        r8 = 0x0000000000000000
        r9 = 0x0000000000000000
       r10 = 0x0000000000000000
       r11 = 0x0000000000000000
       r12 = 0x00000001007d3cf0
       r13 = 0x000000010187c670
       r14 = 0x00000001007f6f5c  pymult.cpython-39-darwin.so`PyInit_pymult
       r15 = 0x00000001003a1520  Python`_Py_PackageContext
       rip = 0x00000001007f6f6c  pymult.cpython-39-darwin.so`PyInit_pymult + 16
    rflags = 0x0000000000000202
        cs = 0x000000000000002b
        fs = 0x0000000000000000
        gs = 0x0000000000000000
You can also inspect the frame and see the frame stack:
(lldb) fr info
frame #0: 0x0000000101adbf6c pymult.cpython-39-darwin.so`PyInit_pymult at pymult.asm:128
(lldb) bt
* thread #1, queue = 'com.apple.main-thread', stop reason = breakpoint 1.1
  * frame #0: 0x0000000101adbf6c pymult.cpython-39-darwin.so`PyInit_pymult at pymult.asm:128
    frame #1: 0x000000010023326a Python`_PyImport_LoadDynamicModuleWithSpec + 714
    frame #2: 0x0000000100232a2a Python`_imp_create_dynamic + 298
    frame #3: 0x0000000100166699 Python`cfunction_vectorcall_FASTCALL + 217
    frame #4: 0x000000010020131c Python`_PyEval_EvalFrameDefault + 28636
    frame #5: 0x0000000100204373 Python`_PyEval_EvalCode + 2611
    frame #6: 0x00000001001295b1 Python`_PyFunction_Vectorcall + 289
    frame #7: 0x0000000100203567 Python`call_function + 471
    frame #8: 0x0000000100200c1e Python`_PyEval_EvalFrameDefault + 26846
    frame #9: 0x0000000100129625 Python`function_code_fastcall + 101
    ...
To compile for Linux, we need to add Position-Independent-Executable (PIE or PIC) support.
This is normally done by the GCC compiler, but since we're writing straight assembly we have to do this ourselves.
Position-independent code can be executed at any memory address without modification, the only components we need to care about the positions are the external references to the Python C API.
Instead of defining the external symbol as being at a static location like we did for macOS:
call PyModule_Create2
We need to call the position of the symbol with respect to the Global Offset Table.
NASM has a shorthand for defining it as an offset of the PLT/GOT:
call PyModule_Create2 wrt ..plt
Instead of maintaining two source files for PIE and non-PIE, we can use a NASM macro to replace the instruction if NOPIE is defined.
%ifdef PIE
    %define PYARG_PARSETUPLE PyArg_ParseTuple wrt ..plt
    %define PYLONG_FROMLONG PyLong_FromLong wrt ..plt
    %define PYMODULE_CREATE2 PyModule_Create2 wrt ..plt
%else
    %define PYARG_PARSETUPLE PyArg_ParseTuple
    %define PYLONG_FROMLONG PyLong_FromLong
    %define PYMODULE_CREATE2 PyModule_Create2
%endif
Then replace call PyModule_Create2 with the macro value call PYMODULE_CREATE2.
When assembled, NASM will replace this with the correct instruction.
Linux uses the ELF format instead of macho, so specify the output format in NASM:
nasm -g -f elf64 -DPIE pymult.asm -o pymult.obj
cc -shared -g pymult.obj -L/usr/shared/lib -lpython3.9 -o pymult.cpython-39-linux.so
Adding a function to the module
When we initialized the module, we provided the value 0 (NULL) as the list of functions.
Using the same pattern as before, the PyMethodDef struct is:
struct PyMethodDef {
    const char  *ml_name;   /* The name of the built-in function/method */
    PyCFunction ml_meth;    /* The C function that implements it */
    int         ml_flags;   /* Combination of METH_xxx flags, which mostly
                               describe the args expected by the C func */
    const char  *ml_doc;    /* The __doc__ attribute, or NULL */
};
In assembly, you can represent those fields as:
    struc methoddef
        ml_name:  resq 1
        ml_meth: resq 1
        ml_flags: resd 1
        ml_doc: resq 1

        ml_term: resq 1  // NULL terminator
        ml_term2: resq 1 // NULL terminator
    endstruc

    method1name db "multiply", 0
    method1doc db "Multiply two values", 0

    _method1def:
        istruc methoddef
            at ml_name, dq method1name
            at ml_meth, dq PyMult_multiply
            at ml_flags, dd 0x0001 ; METH_VARARGS
            at ml_doc, dq 0x0
            at ml_term, dq 0x0 ; Method defs are terminated by two NULL values,
            at ml_term2, dq 0x0 ; equivalent to qword[0x0], qword[0x0]
        iend
Then define the function, equivalent to the C code:
static PyObject* PyMult_multiply(PyObject *self, PyObject *args) {
    long x, y, result;
    if (!PyArg_ParseTuple(args, "LL", &x, &y))
        return NULL;
    result = x * y;
    return PyLong_FromLong(result);
}
Writing extension modules in C (or assembly) requires knowledge of the CPython C API.
For example, if you're working with Python integers, they don't map to a simple low-level memory structure like a C long.
To convert a C long to a Python long, you have to call PyLong_FromLong.
To convert a Python long to a C long, you call PyLong_AsLong.
Because Python long's can be longer than the maximum value of a C long, there is a chance of an overflow, so you can use PyLong_AsLongAndOverFlow().
Alternatively, if the value will fit into a long long, you can use `PyLong_AsLongLong().
These decisions are abstracted for arguments to a method by calling the PyArg_ParseTuple() function will will convert a tuple of method arguments into native C types.
You provide this method a special format string and a list of pointers to the desination addresses.
The example we used, to turn the arguments into two C long (“LL”) values and the addresses for the output:
PyArg_ParseTuple(args, "LL", &x, &y)
Accomplishing this in assembly, you send the PyArg_ParseTuple the args (in rsi), the string as a constant and the addresses of two reserved quad-word memory spaces.
In assembly, this is using the load-effective-address instruction:
lea rdx, [x]
Using the System-V calling conventions we can convert the C function into an assembly function:
global PyMult_multiply

PyMult_multiply:
    ;
    ; pymult.multiply (a, b)
    ; Multiplies a and b
    ; Returns value as PyLong(PyObject*)
    extern PyLong_FromLong
    extern PyArg_ParseTuple
    section .data
        parseStr db "LL", 0 ; convert arguments to Long, Long
    section .bss
        result resq 1 ; long result
        x resq 1      ; long input
        y resq 1      ; long input
    section .text
        push rbp ; preserve stack pointer
        mov rbp, rsp
        push rbx
        sub rsp, 0x18

        mov rdi, rsi                ; args
        lea rsi, [parseStr]    ; Parse args to LL
        xor ebx, ebx                ; clear the ebx
        lea rdx, [x]           ; set the address of x as the 3rd arg
        lea rcx, [y]           ; set the address of y as the 4th arg

        xor eax, eax                ; clear eax
        call PYARG_PARSETUPLE       ; Parse Args via C-API

        test eax, eax               ; if PyArg_ParseTuple is NULL, exit with error
        je badinput

        mov rax, [x]                ; multiply x and y
        imul qword[y]
        mov [result], rax

        mov edi, [result]           ; convert result to PyLong
        call PYLONG_FROMLONG

        mov rsp, rbp ; reinit stack pointer
        pop rbp
        ret

        badinput:
            mov rax, rbx
            add rsp, 0x18
            pop rbx
            pop rbp
            ret
Next, change the module definition to include the new method definition at m_methods, dq _methoddef.
If you're a mac user, I recommend the Hopper Disassembler as it comes with a nice “pseudo-code” view.
If you open up the newly compiled .so file in Hopper and
look at the function you just wrote, you can verify it looks loosely like you'd expect in C:
![]() Once you recompile and reimport the module, you'll see the function on
Once you recompile and reimport the module, you'll see the function on dir(pymult) and it will take the two arguments.
Set a breakpoint on line 77
(lldb) b pymult.asm:77
Breakpoint 4: where = pymult.cpython-39-darwin.so`PyMult_multiply + 67, address = 0x00000001019dbf42
Now launch a process and run the function after import, lldb should stop at the breakpoint:
(lldb) process launch -- -c "import pymult; pymult.multiply(2, 3)"
Process 39626 launched: '/Library/Frameworks/Python.framework/Versions/3.9/Resources/Python.app/Contents/MacOS/Python' (x86_64)
Process 39626 stopped
* thread #1, queue = 'com.apple.main-thread', stop reason = breakpoint 4.1
    frame #0: 0x00000001007f6f42 pymult.cpython-39-darwin.so`PyMult_multiply at pymult.asm:77
   74           imul qword[y]
   75           mov [result], rax
   76
-> 77           mov edi, [result]           ; convert result to PyLong
   78           call PyLong_FromLong
   79
   80           mov rsp, rbp ; reinit stack pointer
Target 0: (Python) stopped.
(lldb)
You can check the decimal value in the rax register with:
(lldb) p/d $rax
(unsigned long) $6 = 6
Hooray! It works!
For the record… It took about 25-30 recompilations and changes to get this work succesfully.
In hindsight, its not too complicated, but it was very frustrating to get this working.
One of the issues with assembly is that it seems to either work, or it just fails spectacularly! There is no exception, it just crashes the process or corrupts the host process if you make a mistake.
It's very unforgiving.
Extending setuptools/distutils
Next, its not much good pushing a bunch of assembly source files up to PyPi, because if you pip install it wouldn't work out of the box.
The end user would have to know how to compile the libraries.
The setuptools package adds the build_ext command to setup.py, so if you had this in setup.py:
...
setup(
    name='pymult',
    version='0.0.1',
    ...
    ext_modules=[
        Extension(
            splitext(relpath(path, 'src').replace(os.sep, '.'))[0],
            sources=[path],
        )
        for root, _, _ in os.walk('src')
        for path in glob(join(root, '*.c'))
    ],
)
Then ran:
$ python setup.py build_ext --force -v
It run the GCC compiler against the source code, link it to the Python library of the Python executable you're using to run setup.py and put a compiled module in the build directory.
We want to use GCC to link the object, but NASM to compile the assembly source.
There are some other things we need which are specific to NASM:
Use -DNOPIE when the platform doesn't require PIE
Use -f macho64 on macOS, or -f elf64 on linux
Use -g to add debug symbols if setup.py was run with the debug flag
Add the _ prefix on macOS
I've added all this to a custom setuptools build command, called NasmBuildCommand.
You can update the setup() method to include this class and then specify the .asm source files:
    cmdclass={'build_ext': NasmBuildCommand},
    ext_modules=[
        Extension(
            splitext(relpath(path, 'src').replace(os.sep, '.'))[0],
            sources=[path],
            extra_compile_args=[],
            extra_link_args=[],
            include_dirs=[dirname(path)]
        )
        for root, _, _ in os.walk('src')
        for path in glob(join(root, '*.asm'))
    ],
)
Now if you run setup.py build with verbose (-v) and debug (--debug) it will compile the library for you:
$ python setup.py build --force -v --debug
running build
running build_ext
building 'pymult' extension
nasm -g -Isrc -I/Users/anthonyshaw/CLionProjects/mucking-around/venv/include -I/Library/Frameworks/Python.framework/Versions/3.8/include/python3.8 -f macho64 -DNOPIE --prefix=_ src/pymult.asm -o build/temp.macosx-10.9-x86_64-3.8/src/pymult.obj
cc -shared -g build/temp.macosx-10.9-x86_64-3.8/src/pymult.obj -L/Library/Frameworks/Python.framework/Versions/3.8/lib -lpython3.8 -o build/lib.macosx-10.9-x86_64-3.8/pymult.cpython-38-darwin.so
Once this is all done, the wheel with the compiled binaries can be created along with the source distribution:
$ python setup.py bdist_wheel sdist
And then the wheel can be uploaded to PyPi:
$ twine upload dist/*
If someone downloads this on a platform that the wheel includes (only macOS in this example), it will install the compiled library.
If someone is on another platform, the pip install command will try and compile from source using the custom build command.
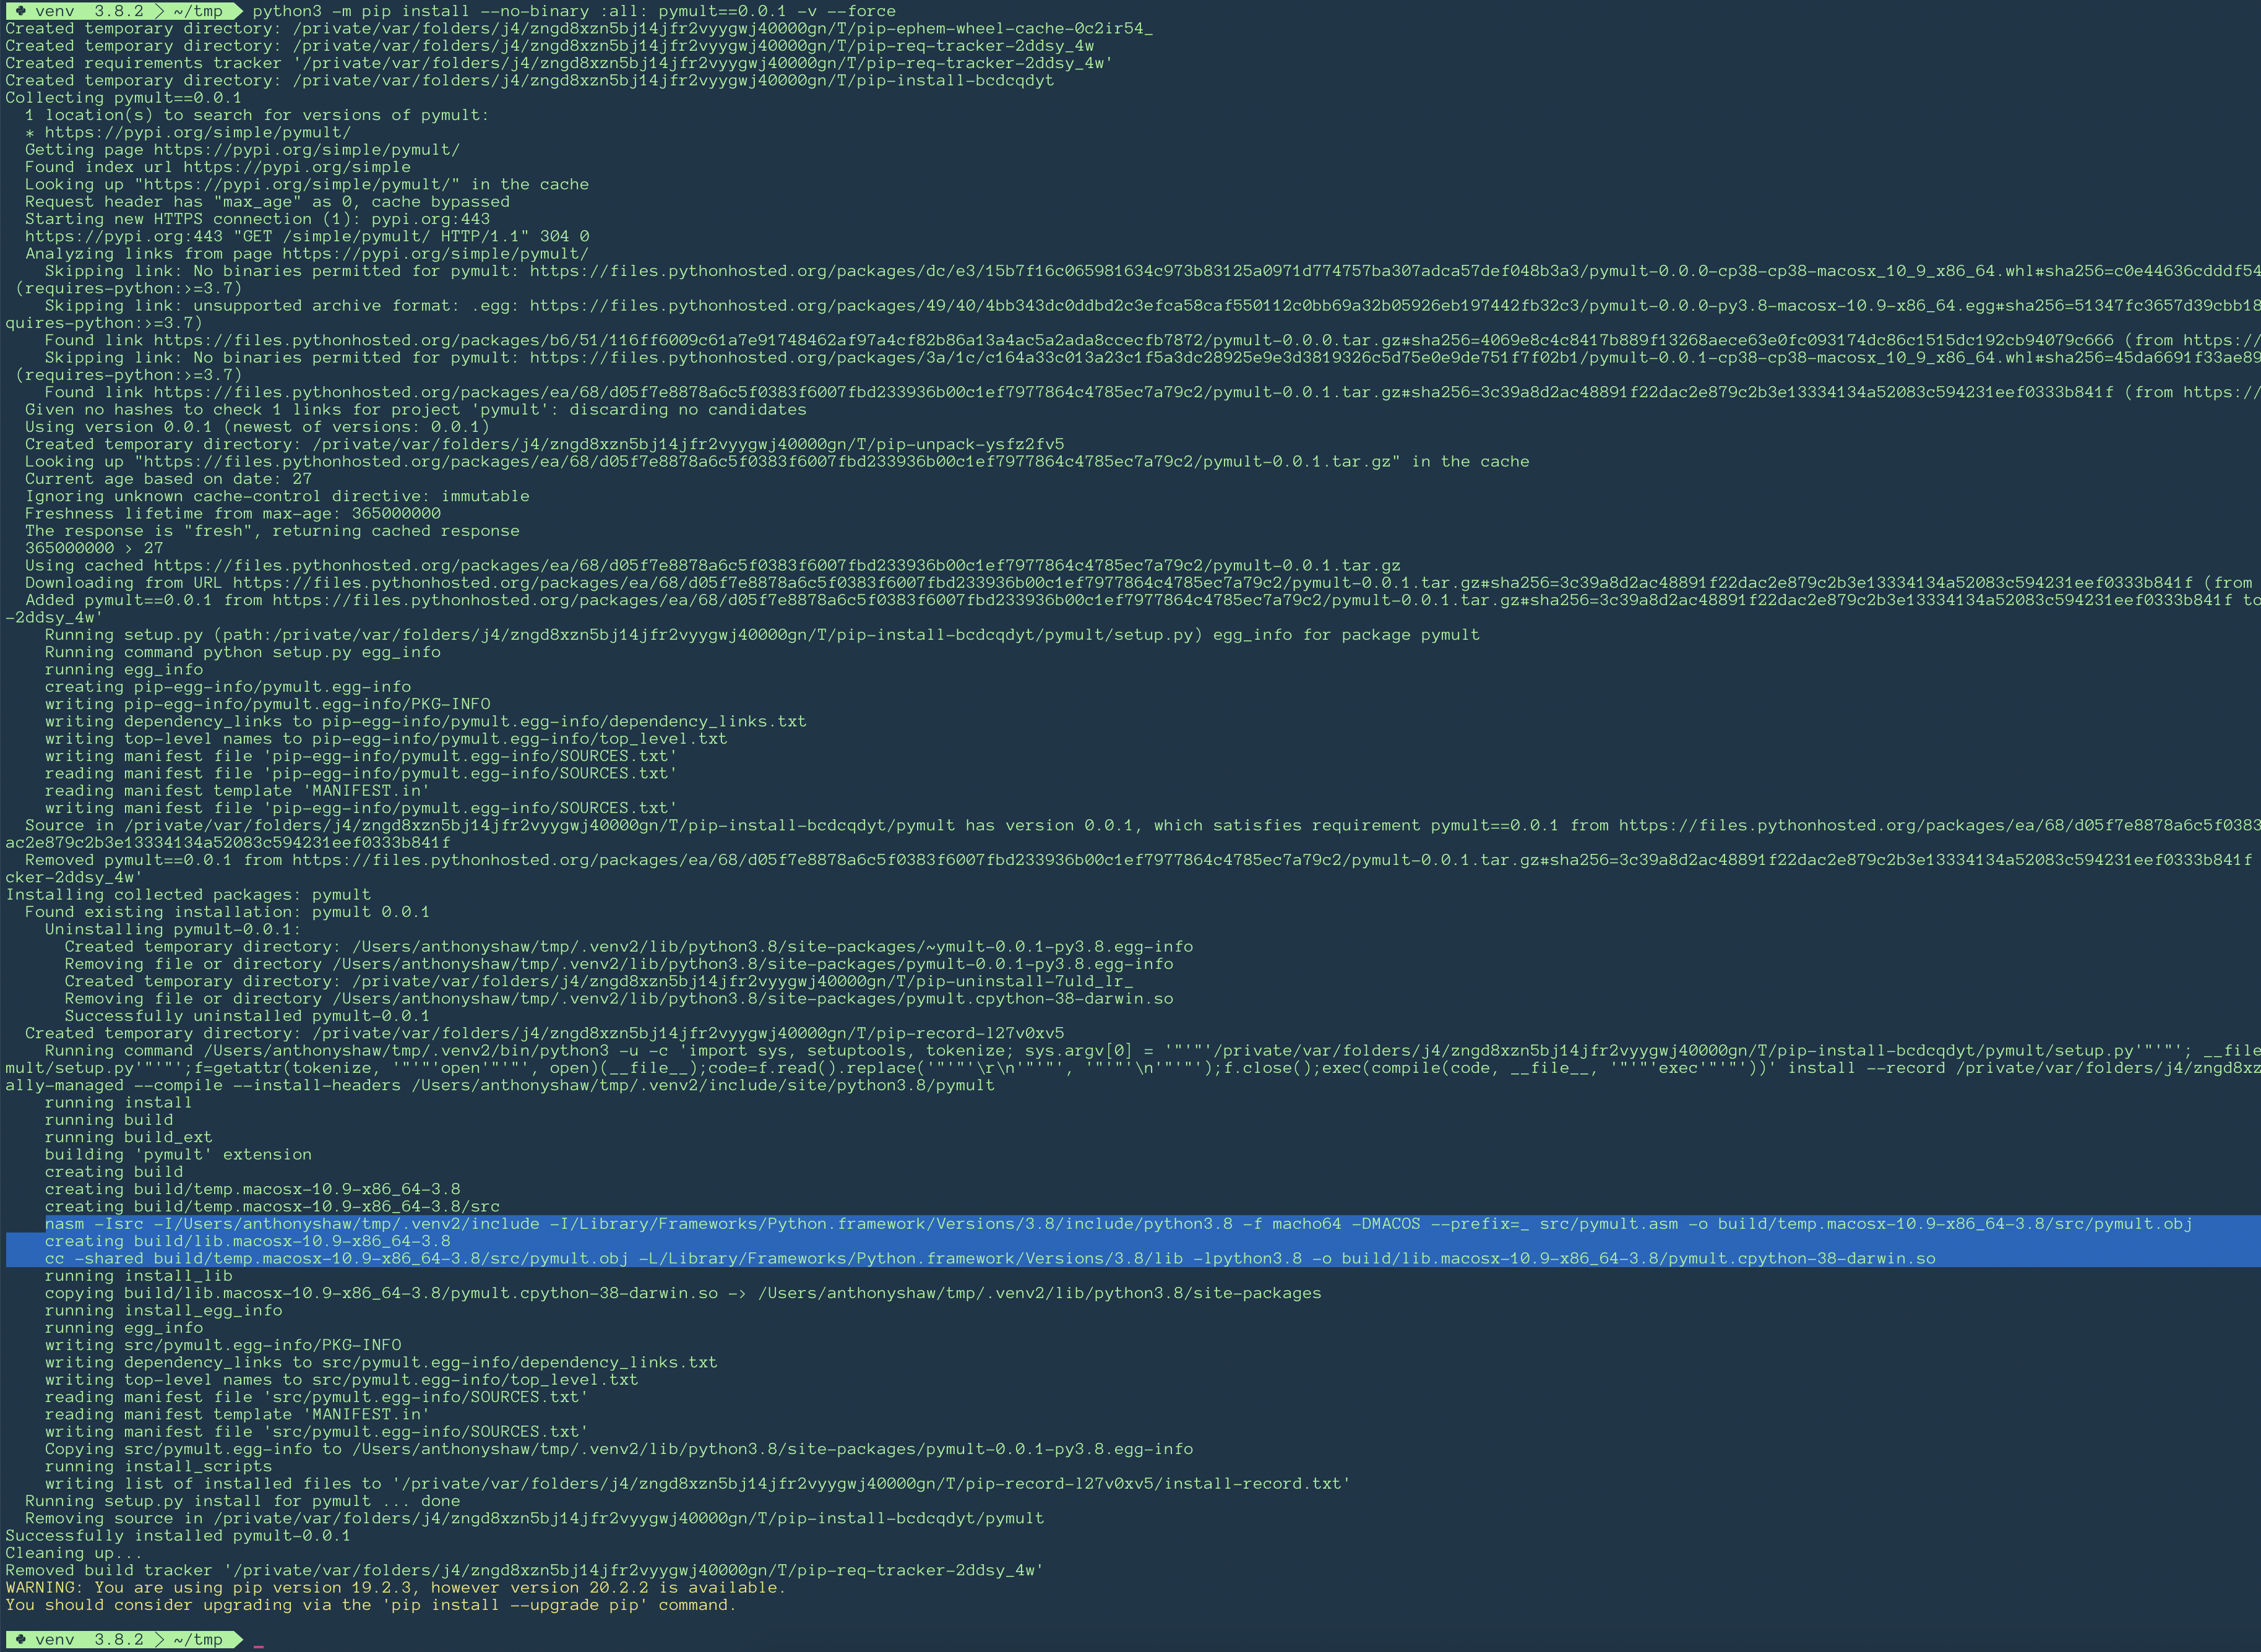
You can force this behaviour by running pip install --no-binary :all: <package> -v --force to see the whole download and compile process in verbose mode:
![]()
GitHub CI/CD workflows
Lastly, I wanted to add some unit tests and continuous testing to the GitHub repository, which meant compiling on GitHub actions.
This wasn't too hard now that setuptools had been extended to build in a single command.
There is only 1 unit test, which cautiously avoid negative numbers (!):
from pymult import multiply

def test_basic_multiplication():
    assert multiply(2, 4) == 8
For testing on Linux, I just installed NASM from apt, then run python setup.py install on the source directory (which runs python setup.py build_ext implicitly):
jobs:
  build-linux:
    runs-on: ubuntu-latest
    strategy:
      matrix:
        python-version: [3.8]
    steps:
    - name: Install NASM
      run: |
        sudo apt-get install -y nasm
    - uses: actions/checkout@v2
    - name: Set up Python ${{ matrix.python-version }}
      uses: actions/setup-python@v2
      with:
        python-version: ${{ matrix.python-version }}
    - name: Install dependencies
      run: |
        python -m pip install --upgrade pip pytest
        python setup.py install
    - name: Test with pytest
      run: |
        python -X dev -m pytest test.py
The extra -X dev flag gives more verbose output when CPython crashes (not if).
For macOS, the build steps are the same, except NASM comes from brew:
    - name: Install NASM
      run: |
        brew install nasm
And then, to live dangerously, give it a go on Windows using the Chocolatey NASM package:
  build-windows:
    runs-on: windows-latest
    strategy:
      matrix:
        python-version: [3.8]
    steps:
      - name: Install NASM
        run: |
          choco install nasm
      - name: Add NASM to path
        run: echo '::add-path::c:\\Program Files\\NASM'
      - name: Add VC to path
        run: echo '::add-path::C:\\Program Files (x86)\\Microsoft Visual Studio 14.0\\VC\\bin'
      - uses: actions/checkout@v2
      - name: Set up Python ${{ matrix.python-version }}
        uses: actions/setup-python@v2
        with:
          python-version: ${{ matrix.python-version }}
      - name: Install dependencies
        run: |
          python -m pip install --upgrade pip pytest
          python setup.py install
      - name: Test with pytest
        run: |
          python -X dev -m pytest test.py
Windows Support
I did end up extending setuptools to support NASM + the Microsoft Linker as a customer compiler implemenetation, WinAsmCompiler.
The biggest changes were:
Use -f win64 (64-bit PE) as the object format
Use -DNOPIE
However, the existing code wouldn't work because it assumed the System-V calling conventions.
You could write a second assembly function, or abstract the calling conventions to allow both standards and swap them out via macros.
At this point, I decided to call it a day!
(it does compile though, but crashes on import).
Conclusion
The full source code for this project is up on Github.
Some things I learned:
How to explore registers in lldb, (which is really useful)
How to use hopper properly
How to set breakpoints in assembled libraries to see why they might be crashing from segmentation faults
How setuptools/distutils compiles C extensions, and how it really needs to be updated with the current compiler toolchain
How to compile from assembly in GitHub Actions
How the object formats work and the differences between mach-o and ELF
Places I'm thinking of applying this knowledge are firstly in the security space.
I'm still reading the Shellcoders' Handbook after finishing Black Hat Python (which, was great btw).
Some ways I could think to apply this knowledge:
Reverse engineering compiled libraries to look for security exploits
Completing more challenges on Hack The Box
Adapting security exploits to mimic complex C data structures
Creating shellcode exploits to demonstrate stackoverflow errors and other things that shouldn't be happening
In particular, I think I could find security exploits in compiled Python C extensions.
Not in the standard library, because hopefully they've been tested, but in 3rd party libraries.
 The working machine on the outside obscures a network of patterns, patches, and workarounds in its internals.
Programmers are used to working on the guts of a system and manipulating the ugly-inner workings to get it to follow some simple instructions.
This experiment was no different.
I wanted to see if I could write a CPython Extension in 100% assembly.
Why? Well, because after finishing the CPython Internals book, the assembly code was still something of a mystery.
I started learning x86-64 assembly from Jo Van Hooey's book and understood some of the basic concepts but struggled to relate
them to the high-level languages that I'm familiar with.
There are some questions I wanted answers to, like:
Why do extensions in CPython need to be written in Python or C?
If Python C extensions compile to shared libraries, whats the magic inside them that makes them loadable by Python?
What ABI does CPython have between C that could make it more extensible by other languages
The working machine on the outside obscures a network of patterns, patches, and workarounds in its internals.
Programmers are used to working on the guts of a system and manipulating the ugly-inner workings to get it to follow some simple instructions.
This experiment was no different.
I wanted to see if I could write a CPython Extension in 100% assembly.
Why? Well, because after finishing the CPython Internals book, the assembly code was still something of a mystery.
I started learning x86-64 assembly from Jo Van Hooey's book and understood some of the basic concepts but struggled to relate
them to the high-level languages that I'm familiar with.
There are some questions I wanted answers to, like:
Why do extensions in CPython need to be written in Python or C?
If Python C extensions compile to shared libraries, whats the magic inside them that makes them loadable by Python?
What ABI does CPython have between C that could make it more extensible by other languages
 On the right, you can see some attributes like:
The CPU architecture this binary was assembled for.
In the future, when Apple release an ARM MacBook, this executable won't work as it will inspect this header and see a mismatch in the CPU architecture (before trying to load the instructions)
The length, positions and offsets of the data, text and bss sections
Any runtime flags, such as Position-Independent-Executable (PIE) (covered later)
Another feature of the ELF, mach-O and PE formats is the ability to build shared libraries (.so files in Linux, .dylib or .so in macOS, and .dll files in Windows).
A shared library can be imported dynamically (like a plugin) or linked during the build stage as a dependency to your application.
When building CPython C extensions, you need to link the extension with the Python shared library.
Your C extension is also in itself a shared library, and is dynamically loaded by CPython (when you
On the right, you can see some attributes like:
The CPU architecture this binary was assembled for.
In the future, when Apple release an ARM MacBook, this executable won't work as it will inspect this header and see a mismatch in the CPU architecture (before trying to load the instructions)
The length, positions and offsets of the data, text and bss sections
Any runtime flags, such as Position-Independent-Executable (PIE) (covered later)
Another feature of the ELF, mach-O and PE formats is the ability to build shared libraries (.so files in Linux, .dylib or .so in macOS, and .dll files in Windows).
A shared library can be imported dynamically (like a plugin) or linked during the build stage as a dependency to your application.
When building CPython C extensions, you need to link the extension with the Python shared library.
Your C extension is also in itself a shared library, and is dynamically loaded by CPython (when you  Once you recompile and reimport the module, you'll see the function on